Leaderboard


Popular Content
Showing content with the highest reputation on 08/03/2010 in all areas
-
1 pointAfter a recent break-in, I'm having to rethink/rebuild my subwoofer box and amp rack, as well as replace the equipment. Fortunately my front stage was untouched, so the only change coming is in the rear. Vehicle: 2004 Toyota Matrix Equipment (new stuff in red): Source: Rockford/Denon RFX-8250 Mids: Usher 8945P 7" Tweets: Peerless 810921 HDS 1" dome Sub: JBL W12GTi MkII Enclosure: 1.7 ft.^3 sealed (after sub displacement) Front amp: Kenwood eXcelon XR-4S Sub amp: Kenwood eXcelon XR-1S Processor: Rockford 3sixty.2 My goals for this build are to decrease subwoofer footprint by utilizing the spare tire well for extra airspace in an effort to increase cargo capacity. Hopefully, a smaller box will also reduce the incentive for someone to steal my stuff again, although the extreme mounting depth of the W12GTi means that I can't make the box flush with the floor of my car. Still, my previous box was 3 ft.^3 with a Soundsplinter RL-p15, so this should open up some space that will hopefully end up being usable. Special thanks to Impious for helping with the equipment selection and giving some DSP tips. Here is the old build. Amps were under the floorboard. Here are some progress pics on the new design. Amps/processor will again be under the floor, on the righthand side.
-
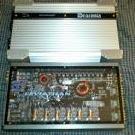
1 pointUPS dropped off a little somethin' somethin': First impressions. I didn't have much time to play around with it (gotta go to work soon), so I was pretty careful with the settings. Still, this thing is amazing. Gets loud and LOW. Hopefully I'll get some more work done this weekend (moving bass knob and replacing the crappy cable) and get it tuned a little better, but so far I'm extremely happy with my purchase. SSA's got a customer for life.
-
1 pointI've used B-Quiet on my past two installs. If it's installed correctly there will be no issue of melting. Mine's been in my truck for 3 years. No sagging or melting. Not even on the roof of my truck cap.
-
1 pointLayout the kerf on a panel that intersects. Like pictured above, the kerf would be layed out on the rear piece. That way you can tell exactly where to start and stop the kerf. The layout will also help you when it comes time to assemble because you can maintain the smooth radius by following you're guide lines.
-
1 point4.337 ohms Play through the frequencies taking voltage and current measurements for each, then use ohms law to calculate impedance R=V/I. R= Resistence/impedance V = voltage I = Current.
-
1 pointSomething like those could work as low tech solutions. But I wouldn't get the value of bass blocker cap that you linked to, as that's a 200 hz crossover. You'll be missing out on all of your midbass with that, even with it only being a shallow -6db slope. The Fmods only work if you have an amplifier hooked up to the speakers, as they go inline with the RCAs. Do you have an amplifier on the front speakers? If not, those won't work. If so, why don't you use the highpass filter on the amp for the speakers? As for the crossover on the sub amp, turn it up to 80 hz. If it is set at 50 hz, you're losing output at 50 hz because the crossover point is actually the point that is already -3db, not the point at which the crossover begins to slope off. So raise it to 80 hz for the test. Or hell, just turn it off. Since you're just going to be running a 50 hz tone to set up the gain, you don't even need the crossover on while you do that.
-
1 pointI have been tied up lately but managed to get back on this today. I had to plan out the hydraulic set up and racks first to determine where the rest of the audio gear would fit. The batteries for the sounds will share the rack with the hydraulic set up. I'm going to use 3 Kinetik 1800s. Now I can get busy making the amp rack for these.
-
1 pointUPDATES! After an hour drive from work today I couldn't wait to get home and work on the box! I started by demolding the port tube, after about 15 seconds of prying I realized this mold wasn't going to survive for very long. Oh well, sacrifices must be made! I broke the Sonotube free from the base, and cut it from the inside all the way down. The cardboard came right off leaving me with a perfect form! And now, through the magic of time lapse *insert saw buzzing here* Tada!! It came out tits, MUCH better than I expected! For only two plies of glass, the flared end is SUPER strong, it doesn't flex at all. However, I still need to construct a mini-mold for the flare on the other side. Now, to get it into the box! Circle jig Just had to drop it in there.... sweeeet! All that's left is to flare the other end of the port, mount it, top off the box, bracing, and I'll be ready to rock and roll. Stay tuned
-
1 pointto SSA !!!
-
1 pointyes, once power line leaves the starting battery and starts heading to back battery, put fuse within 18" of starting battery and within 18" of the back battery and within 18" of the amp. If your back battery rests higher or lower than your starting battery... your alternator will be in a constant cycle of charge all the time. It won't be at full output but it's not ideal if they rest differently. In my opinion, if this were the case, i would get a solenoid. I would charge each battery up separately to full charge, then install the solenoid. This will prevent the alternator from running in a low but constant charge cycle. I'll give u an example- let's say starting battery was at 12.7v and back battery was at 12.9v. When you connect them together, the back battery(because it has higher voltage) will dump partial load into the front battery to "equalize" the load. Typically, it would lower it to about 12.6v, lower than the lowest battery in the link, or 12.7v but definitely lower than 12.9v, the highest reading in this example. Now, this is what's goin on- Your front battery is being "charged" by your back battery but ur back battery was charged before you connected it to the front battery.... so now u start the car and the alt comes on.... The alt needs to charge the back battery because it keeps dumping a load into the front battery every time u turn the car off! Once u turn the car on, the alt is the king of the electrical system so there is no charging confusion when vehicle is on... but because u have an extra battery, every time the car is shut off, the battery drains out a little to keep front battery leveled because they rest differently... so now the alt has a load again next time u start it back up. this is an example that i've seen and could actually happen to me if i didnt use solenoids. My front battery rests at 12.8v and my back rests at 13.1v. When they combine, they all rest at 12.7v.. that's a 0.4v drop.. that's not good.
-
1 pointWelcome to SSA Forum!!!!
-
1 point1 more
-
1 pointWelcome ....
-
1 pointVids for those who are interested
-
1 pointhttp://www.youtube.com/watch?v=fgj89hmF4cY
-
1 point"enough" is hard to say. How does it fit in the hole? Of course the proof can be in the pudding a bit as well, if the low end isn't choked it is enough.
-
1 pointLOL yeah you are right about that! Okay... well this is where I made one little mistake that could've very well cost me another day's work. I thought it would be a good idea to start off with the fiberglass chopped mat... BAD IDEA. For the flare I used woven mat no problem, but the chopped mat made a huge mess of things and plus it cured with hairs sticking out everywhere... I underestimated the cure time... so I'm going to have to bodywork quite a few voids. Had about 3/4 can of resin, finished two plies and ran out. Stuff was curing quickly anyways. Will take a look at it tomorrow and see how many more layers (if any) it's going to need. I finished up with a ply of 1800 cloth (coarse thick cloth) around the tube. Got paranoid; went ahead and taped the radius. Glassing the radius Oops! Always double-cup when you are using thin plastic cups! Better on the board then on me! Having a grand old time trying to get this stuff to hold. Will know better next time. Ahhhhh prune hands FTL! Second ply Aaaaaand done for now The only thing I'm waiting on is a buddy to lend me his long bar clamps so I can start putting this box together... can't hardly get ahold of him it's frustrating as hell! More soon.
-
1 pointI know she stays right next door OH you mean the project lol While the clay was setting I made a jig for the speaker cutout And got busy with the jigsaw! Masked off the area around the radius for a smoother layup, I cured the clay a little too quickly which caused some cracking but it will be fine. You can use a little water to rewet it and if the cracks are big enough, you can mix some clay slurry, cure, and repeat as needed. At this point I waxed the entire mold with my super duper high tech mold wax... or not, but this Meguiar's carnauba wax will do the trick for sure!
-
1 pointWhew... finally got the radius finished, I changed it three times before I was satisfied with it! Used the edge of a scraper for radius. Now I'm going to let the clay cure a bit before glassing Checking out the scenery in my parking lot lol!
-
1 pointOkay Okay one more Dora cups FTW lol
-
1 pointThe port area vs. box volume rule is a myth. To determain port area needed you need to know linear excursion, Sd and power input. Box volume has little, if nothing, to do with it. This "Rule of thumb" was made up to keep idiots from using a 1.5" I.D. PVC pipe with 2 18" drivers because they neglected to look at vent velocity with thier modeling program, or the program left that function out.... Additionally, the shape of the vent terminus has little to do with the area needed, unless it is some kind of extreme shape, or in the case of a slot goes beyond about 1:10 ratio of height to width....
-
1 pointFinally, a little progress. Picked up my new box today. Sub should be here Tuesday. I'm going to try and find some time to get the bass knob moved next weekend. My daughter, hamming it up as usual:
-
1 pointCommenced building of the box today. Outside dims 24D x 16H x 39W. Net volume will be around 6~6.5ft³. Only thing I didn't pick up today was the PVC for the port. Going to do that tomorrow. My makeshift workbench All sliced up