Leaderboard


Popular Content
Showing content with the highest reputation on 07/28/2011 in all areas
-
1 pointkenwood 6.5" speakers q power tweeters 0 gauge memphis wire Shuriken battery clarion equalizer soundstorm crossover fi-day x 12's hifonics brz1700 3g tethering with my phone for google maps for navi and streaming fm radio. hifonics brz1700.d, tsunami 4 channel for mids & tweeters fi-day x 12's tuned 33hz New amps 2 crunch p600 for the highs and mids my next project is a 15 Fi btl n2
-
1 pointThis build will not be a rushed one.. I want to take my time, cause I rushed my last build. I have learned alot of stuff from other forums, but from the little time I have been looking at the amazing builds here.. I know I will be busy soon getting this beast running before any audio goes in, but I have also been working on some ideas.. It's not for sure cause if I can get to it I have been in contact with Mike Singer to design me a 4thorder for 12 12's.. I probably will be using some Alpine type R's (older models swr-1242d) for awhile until funds allow me to go further.. Mike said that using the alpines would not be a bad thing cause they do so well in sealed enclosures.. From what I have seen here, you guys are the 4thorder experts..I would like any advice or ideas anyone has.. Any ideas as far as audio is welcome. I have not ruled out using, DC, SUNDOWN, or even SKAR AUDIO... Not sure what amps I will be using either.. any idea? Thanx Guys Jay This is the Big Beast That will be the victim of my torture.. This Is the outer frame I came up with to get the idea of the room i have to work with.. This will be behind the second seat.. I want it to still have the 5 seats.
-
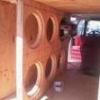
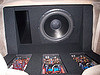
1 pointGot the enclosure covered over the last 2 evenings. Here are some pics... Bottom of the box, seam turned out fairly well. Grasshopper was like, "Who's gonna see that?" I said "Me!" You can see in this pic the feet/extension that I added to accomodate the wiring that will run under the enclosure to the amp. Gotta make it all look pretty. Wiring up the subs to install them. Used some 12ga wire. You should also be able to see that I used some 1/2" spacers under the amp to bring the amp up to the level of the front of the enclosure as well as it should give the amp a little more breathing room for air to flow around it. Thinking about making some filler peices to go at the ends of the amp to cover the wiring. One sub in, time for the second. Both subs in!! Next is just some random shots of the completed enclosure. Will be waiting on Grasshopper to do a little more with the carpet trimming before we set this up in the Tahoe and start the wiring.
-
1 pointWell I know this wont be enough of a update for some.. but this is what I got done today.. Bracing added. Started to glass the corners..
-
1 point
-
1 pointA little more done on the enclosure... 1st baffle installed. 2nd baffle installed.
-
1 pointlookin' good!
-
1 pointFew more updates on the enclosure progress. Amp-rack in place. 45s installed. Rounded port edge. Helloooooo! Baffles ready!!
-
1 pointrounded edges are the sexy.
-
1 pointGettin' my game-face on! HAHA, I know you are. Once the saw dust starts flying some serious shit is bout to happen at the sefugi house!
-
1 pointLittle more progress on the enclosure.
-
1 pointDid not get the bracing part done, but worked on the front on the enclosure instead...I know it looks rough in spots but only cause when i was almost done the bearing smoked up on the router bit.. Jay Resized to 86% (was 1024 x 768) - Click image to enlarge
-
1 pointUpdate Time!!!!! I wonder what this means... I took this pic to check the sub clearance in the seal side..
-
1 pointGot a sheet of mdf cut up today, so I can get started on the sub enclosure. Even got started. More in the next few days...
-
1 pointWell I did get some stuff done today.. Not as much as I wanted but still progress.. everything is just dry fit.. Resized to 86% (was 1024 x 768) - Click image to enlarge Resized to 86% (was 1024 x 768) - Click image to enlarge
-
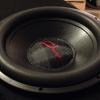
1 pointMy very first setup which was August of 2010 was a 15" Fi BTL in 5.0 cubic ft box tuned to 36 hz. Amp was a Audiobahn 1500 that puts out 2200wrms at 1 ohm. I had it wired 1 ohm
-
1 pointA few pics.. not much alittle of the same.. I have only 3 more added pieces then I can start the sub baffle placement.. Resized to 86% (was 1024 x 768) - Click image to enlarge Resized to 86% (was 1024 x 768) - Click image to enlarge Resized to 86% (was 1024 x 768) - Click image to enlarge Resized to 86% (was 1024 x 768) - Click image to enlarge
-
1 pointVideo page address inserted into media tab:
-
1 pointSome Updated Progress.. Strength Test.
-
1 pointWell I had to get back at it.. I know life will get better, but losing any body either ( person or animal ) sucks.. This will help my mind.. Resized to 86% (was 1024 x 768) - Click image to enlarge
-
1 pointI also vote for Dcons
-
1 pointI did alittle dry fit just to see how shes going to look.. .. This is just the outer shell..she has more layers to come.. View from the back front view.. I know the gap is ugly but that will have more bracing and foamed up.. With the back seats up so I can check clearance..
-
1 pointWell guys while I'm waiting for more funds to continue, I have been remeasuring everything that I think will work better for me and what I need.. I need your guys thoughts and opinions.. Resized to 86% (was 1022 x 500) - Click image to enlarge Resized to 86% (was 1022 x 500) - Click image to enlarge Resized to 86% (was 1022 x 500) - Click image to enlarge
-
1 pointHey guys just alittle small update.. got the final layer up for the headliner.. that means the enclosure will start soon Jay Resized to 86% (was 1024 x 768) - Click image to enlarge Resized to 86% (was 1024 x 768) - Click image to enlarge
-
1 pointAddress of page inserted into the media selection. It's Alive!!!