
Purplehaze
-
Content Count
50 -
Joined
-
Last visited
Posts posted by Purplehaze
-
-
-
As bad as I hate to, I have decided to sell my baby, the Solo X 15. This is a BRAND NEW sub, never used, never mounted or seen any power.
A full build log is available in my cig. I am very firm on the price of this sub, it is worth twice what I am asking.
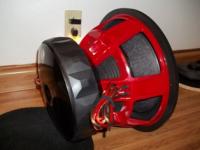
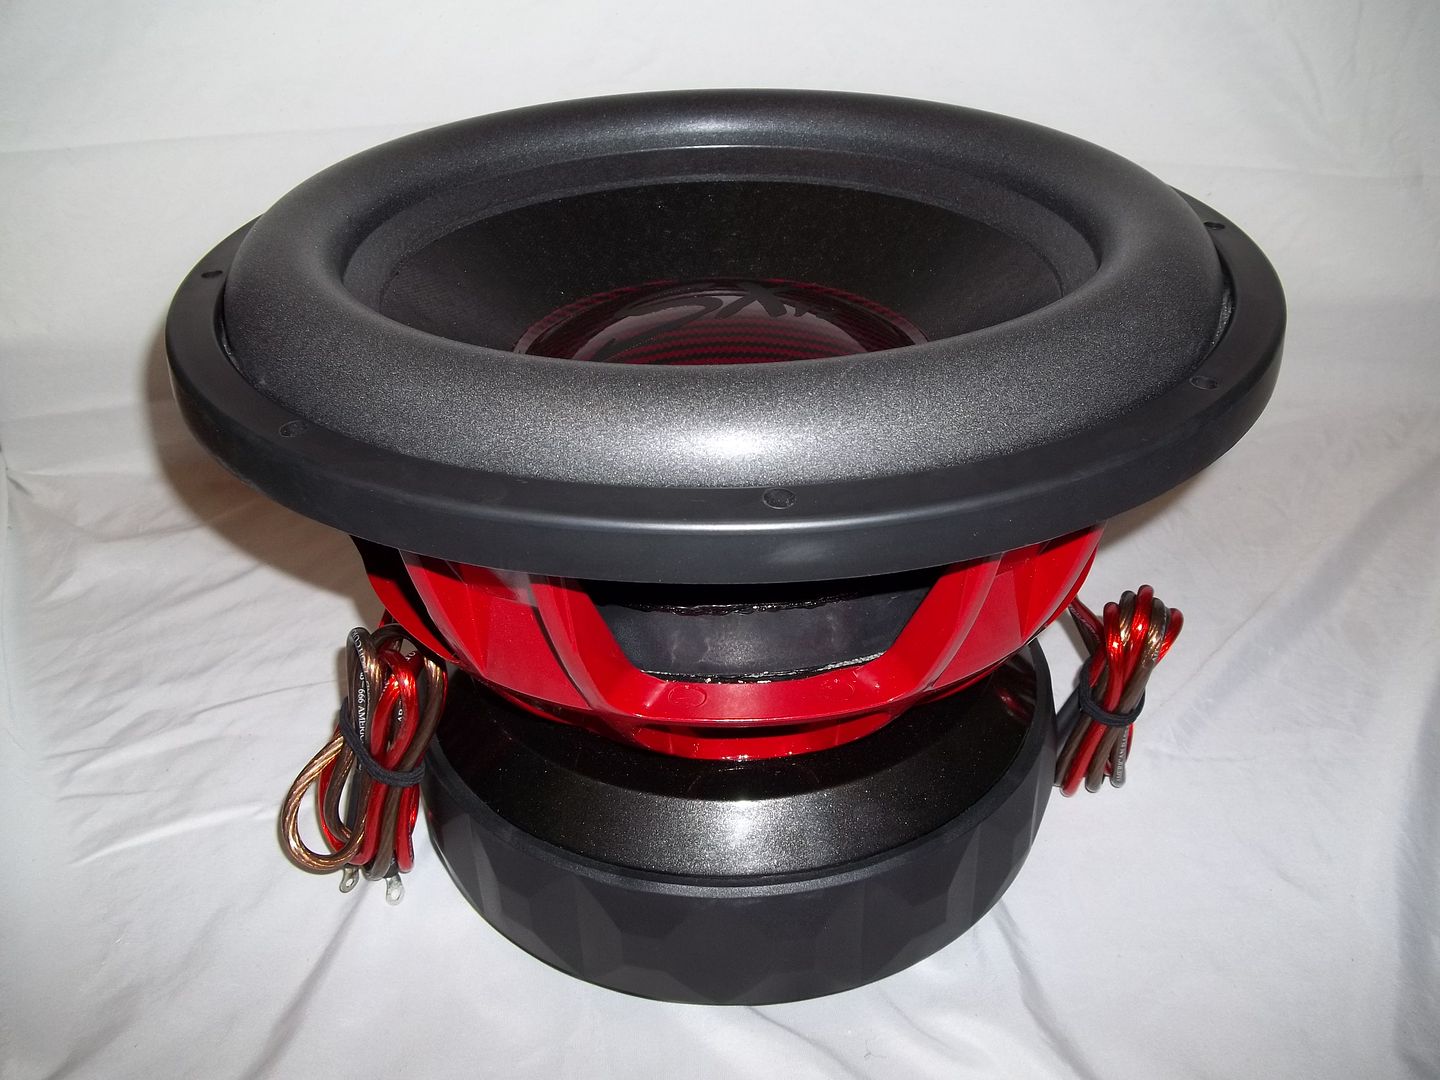
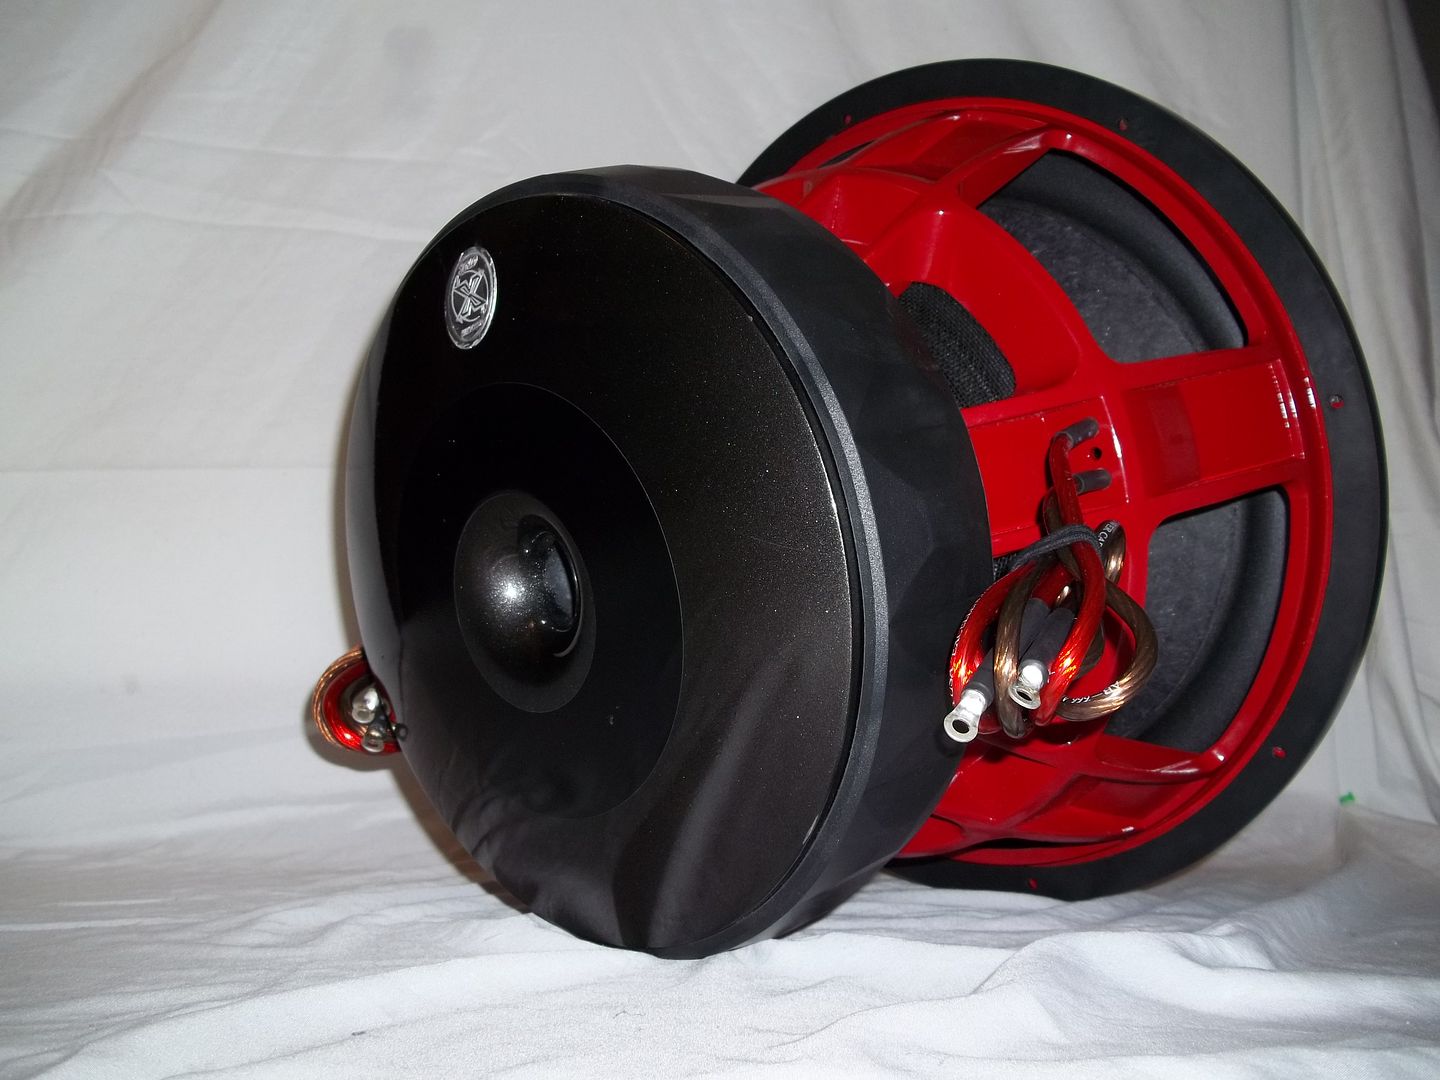
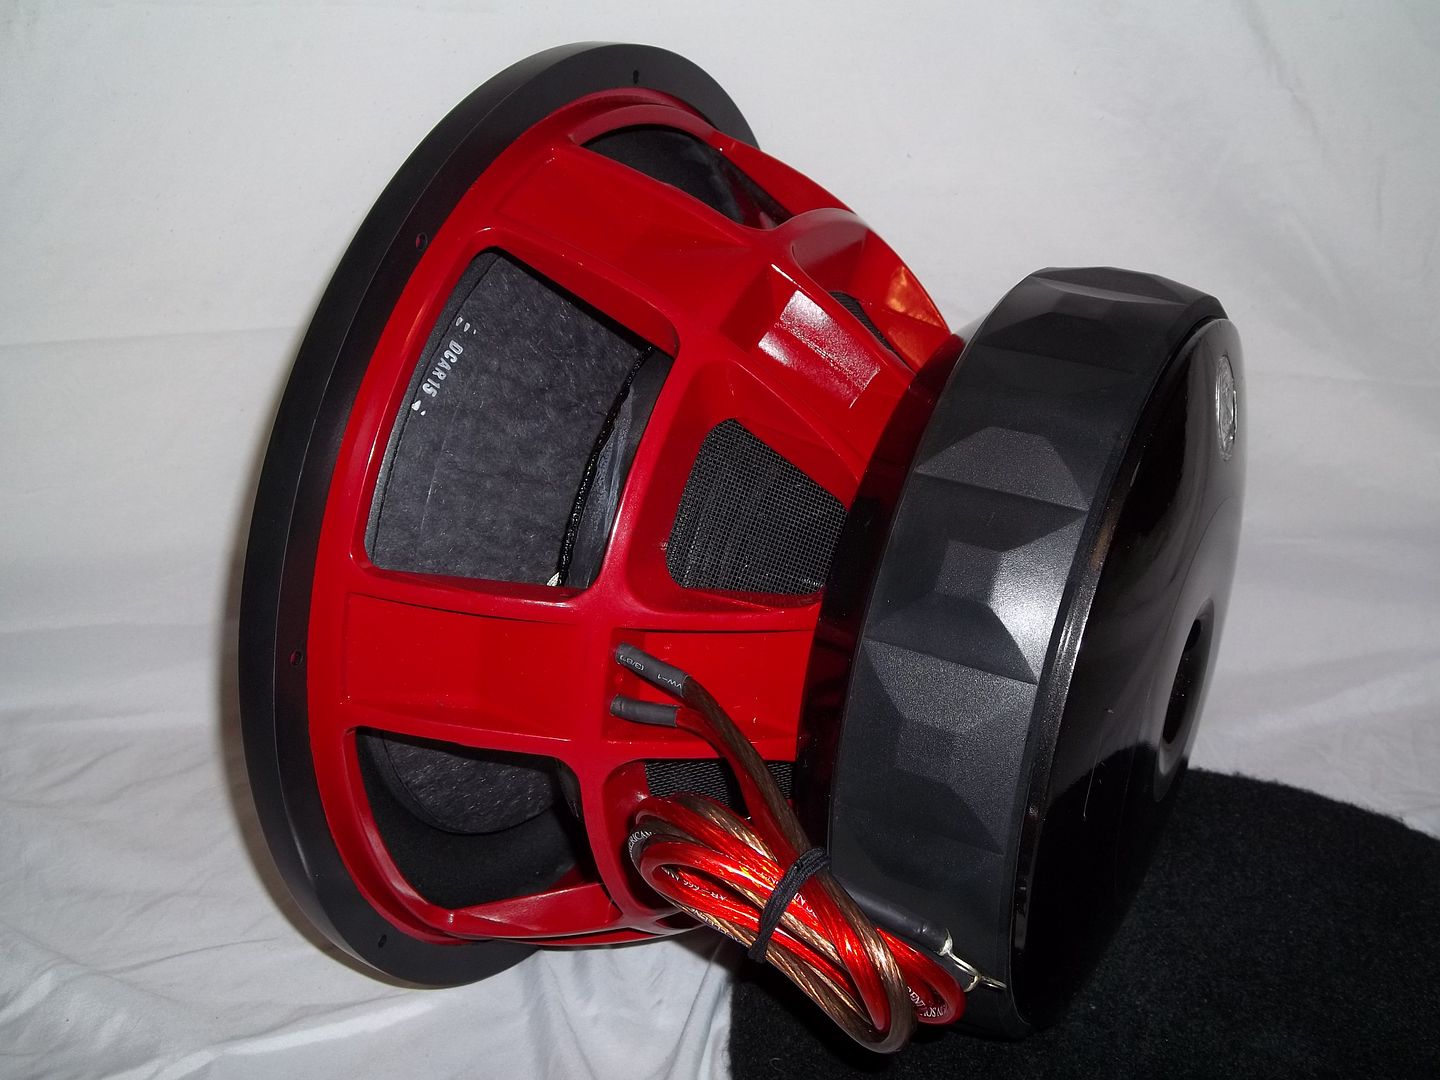
Item: Custom Solo X 15
Description: New, unused. Fresh build.
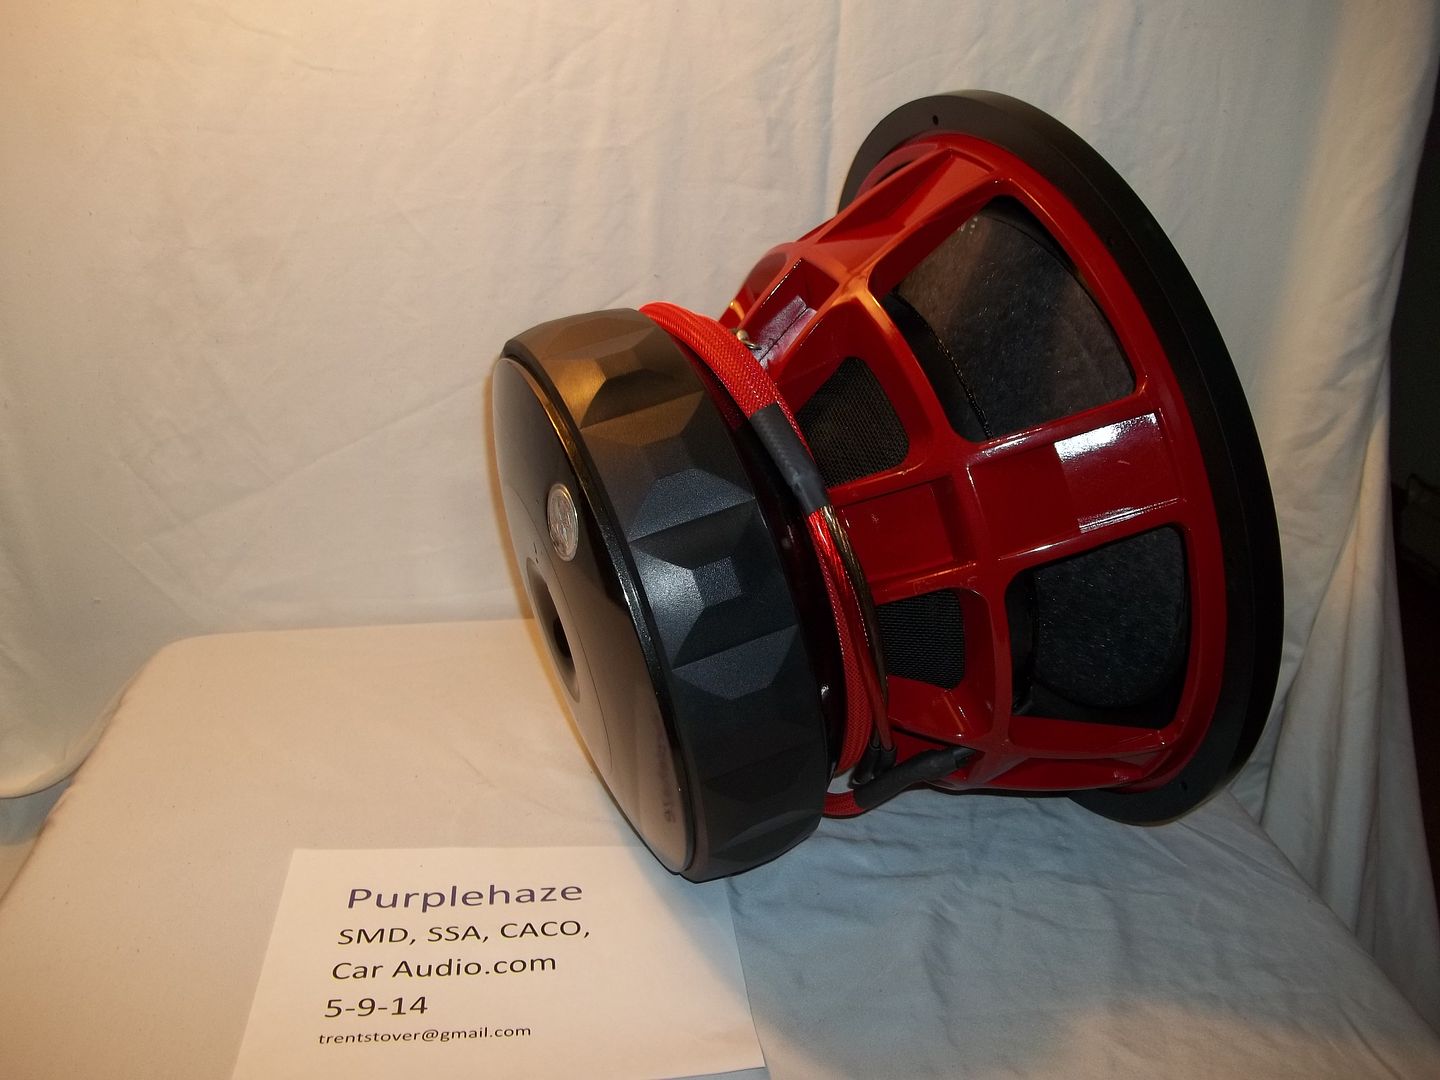
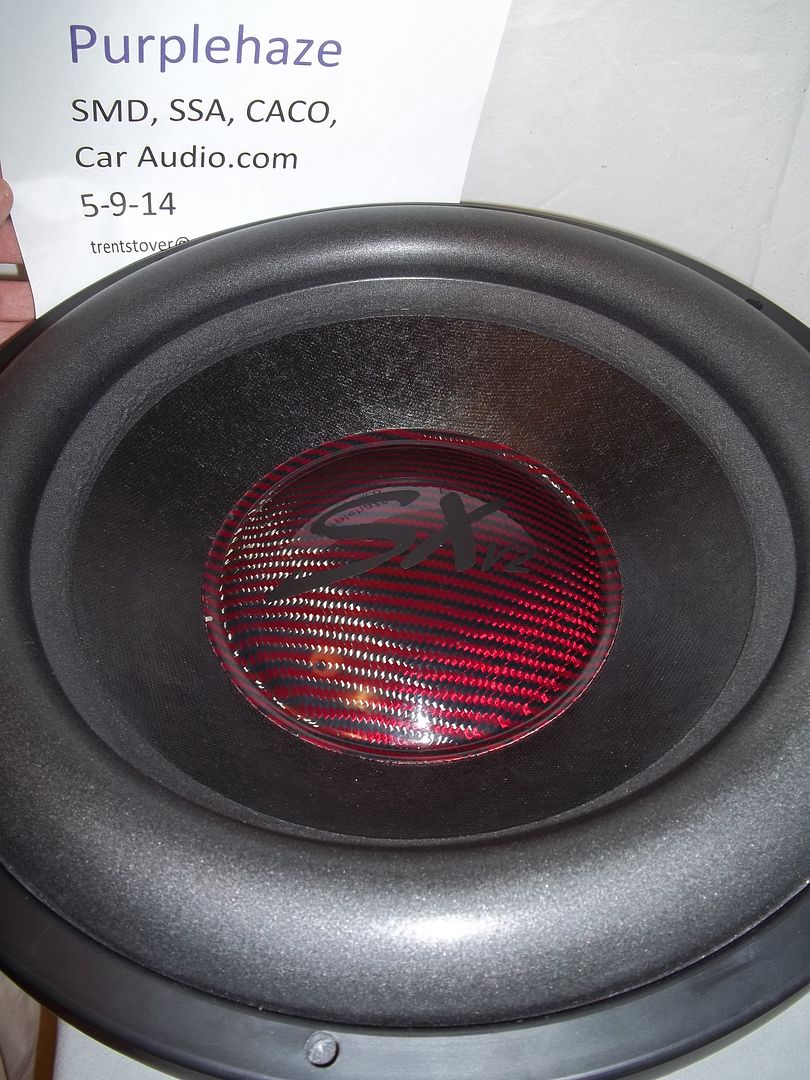
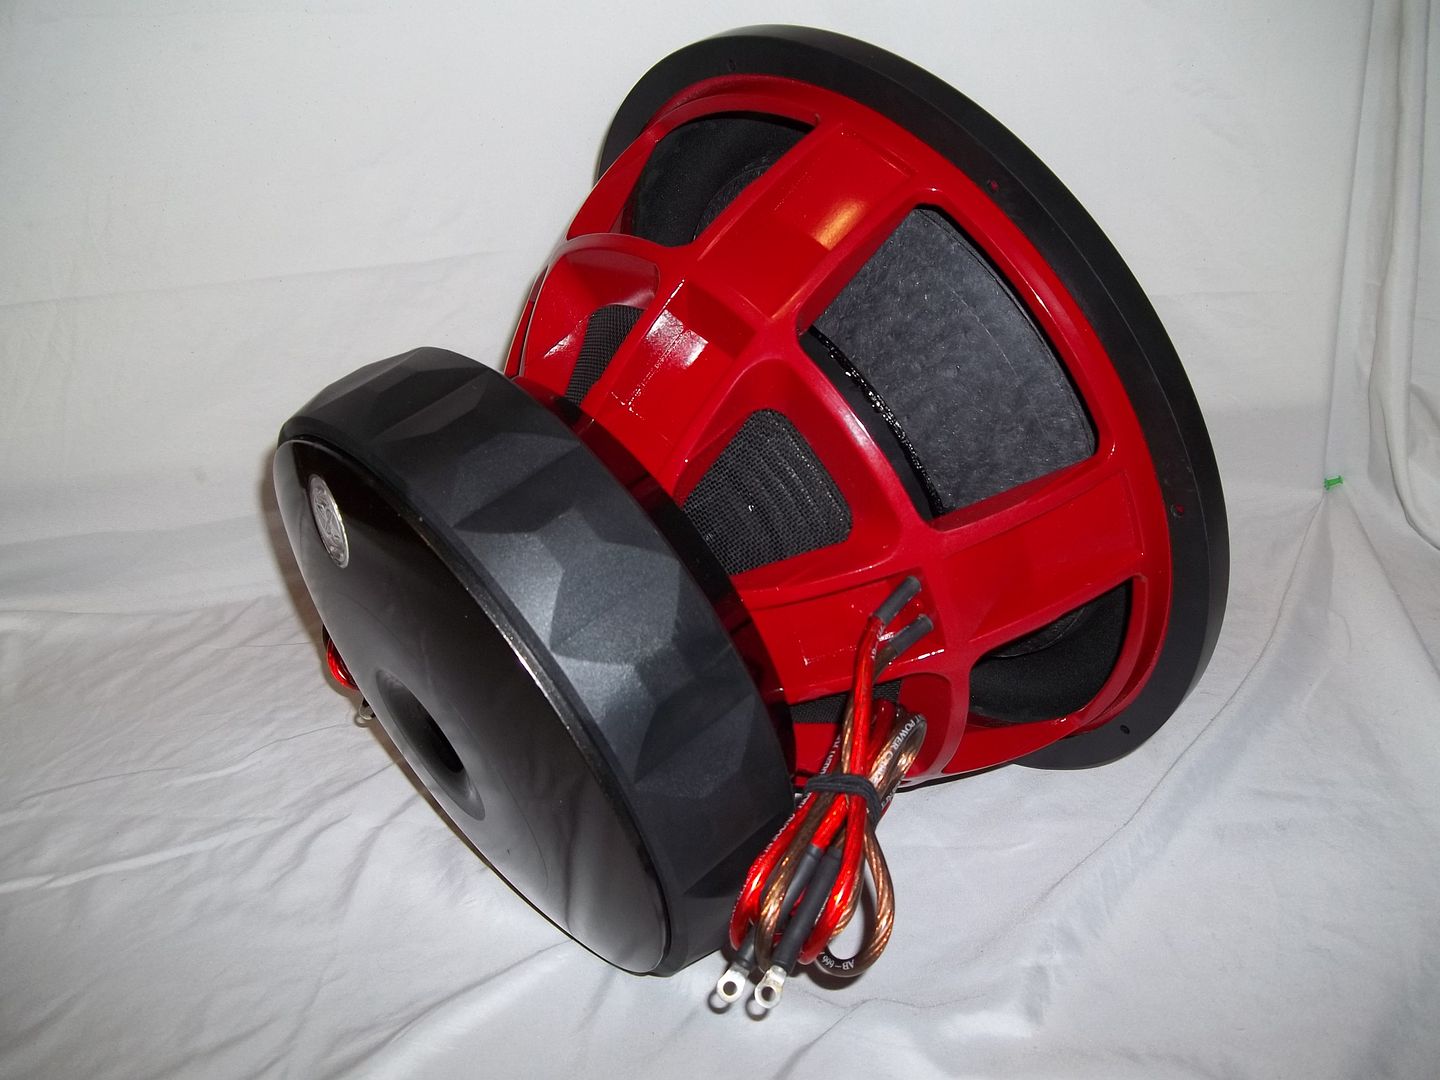
It is a Solo X 18 motor, rebuilt and bored gap, w/ 15" TI frame, Quad spaced TC spiders, and DC Level 5 m2 D1.4ohm fw 8-layer hi-temp coil, AR cone, and true cf matching red dust cap w custom logo.
Specs: I have free air parameters available. It is a custom build...
Price: $700 shipped, cont. US only*
*Pacific time zone pays $20 more for shipping, due to the weight. (sorry)
Pictures: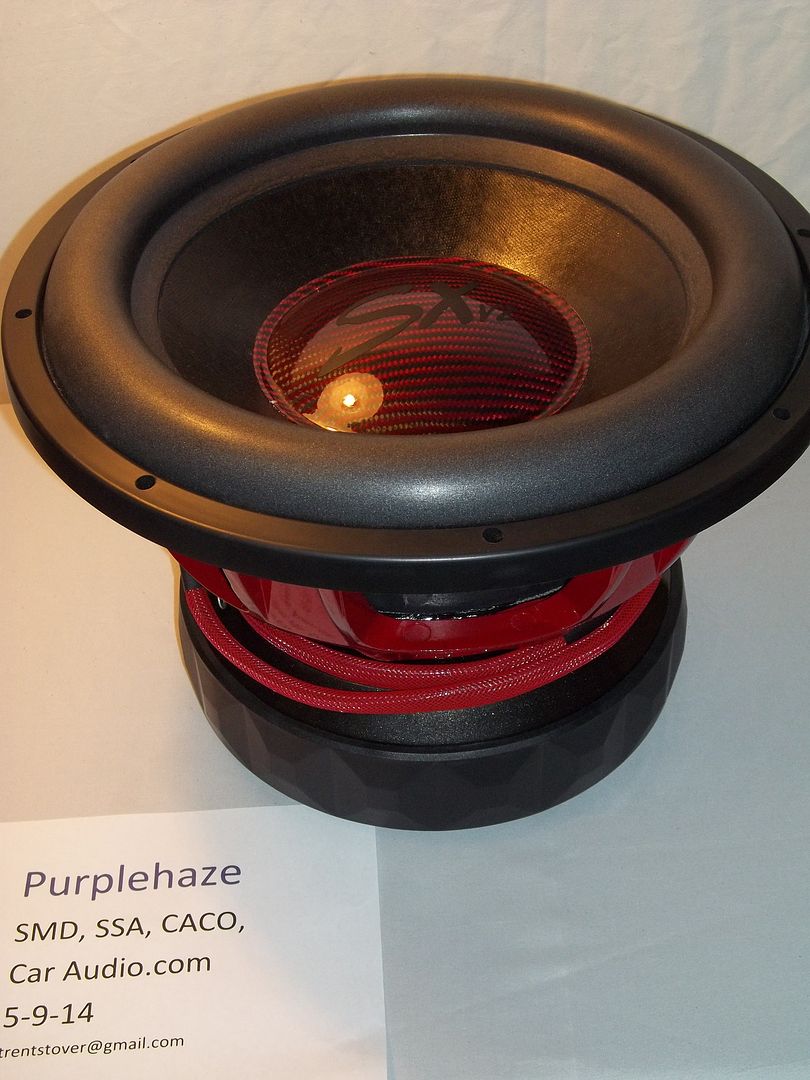

I hate to sell it, I just really need money atm, but I can find 100 reasons to keep it. The main two being that there is no other like it IN THE WORLD, and I built it. But like I said, I need money, and it will be a while before I can properly use this sub. So if anyone out there really wants it, now is your chance! Just please, no trade offers, and I am very firm on the price. If your serious, PM me and we can talk!
- Purplehaze
Build Log: Solo X 15 (V.2) Sub-woofer build log - Subwoofers / Speakers - SSA Car Audio Forum0 -
man, you really do awesome work assembling drivers.

Thanks man, I really appreciate that! Now if only I could find some work... if not I'll just keep making my own work.
Fuck, those are BUFF. Would they be any good for home audio, in say a three way tower?
They would be very good for that, IMO. I actually thought about building a HT setup with them, but just need money more atm.
0 -
-
-
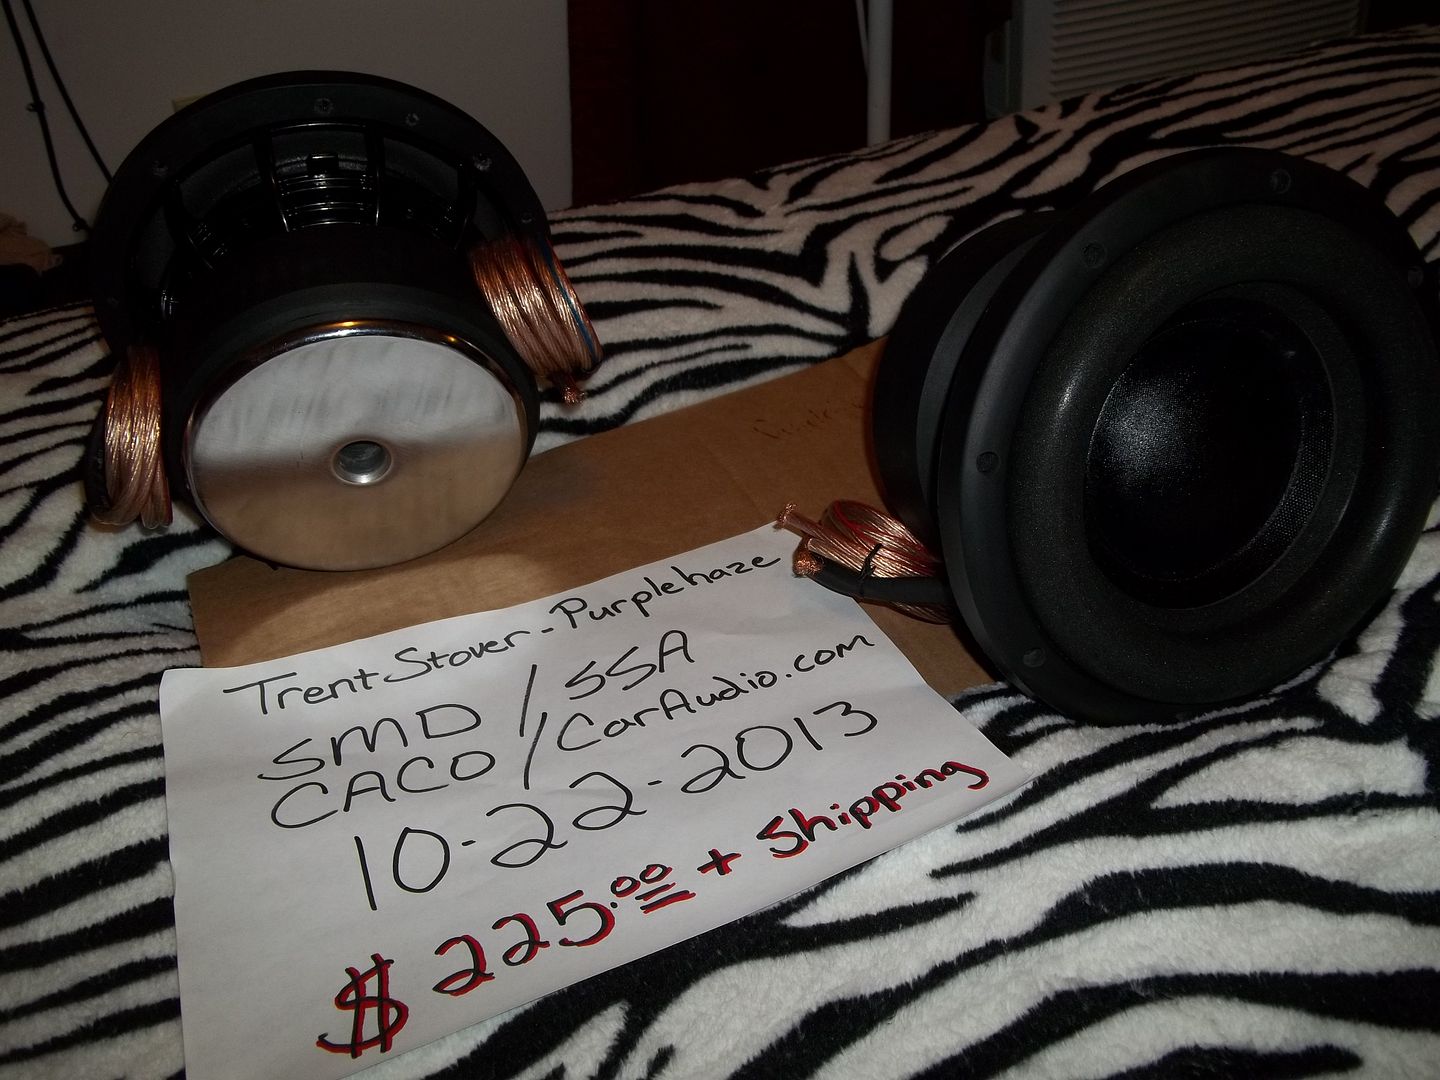
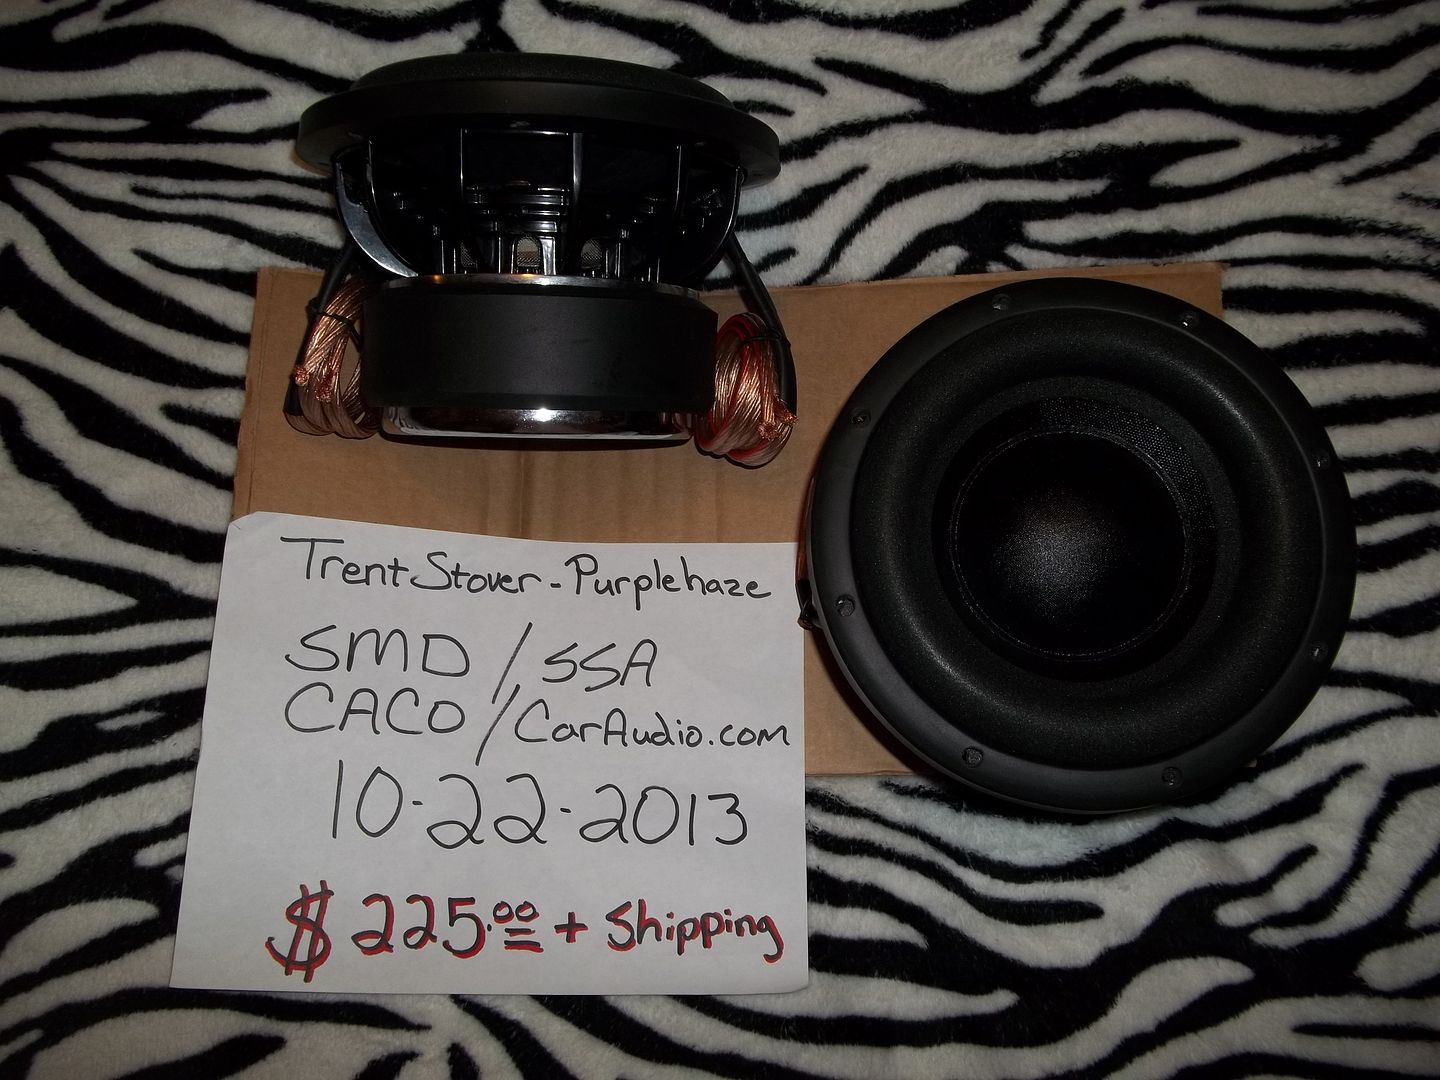
Product: 8" DC Level 2 (m1.5) - Pair
Specs: 600 RMS (Full parameters available)
Description: Freshly built by myself. They have triple nomex spiders, direct 10g ofc sewn leads, and "SPL" coils. Full build log available.
Price: $225 + Shipping for the pair. Will not split up. Trades (or trade-ins) are possible, pm me with what you have in mind.
Pictures: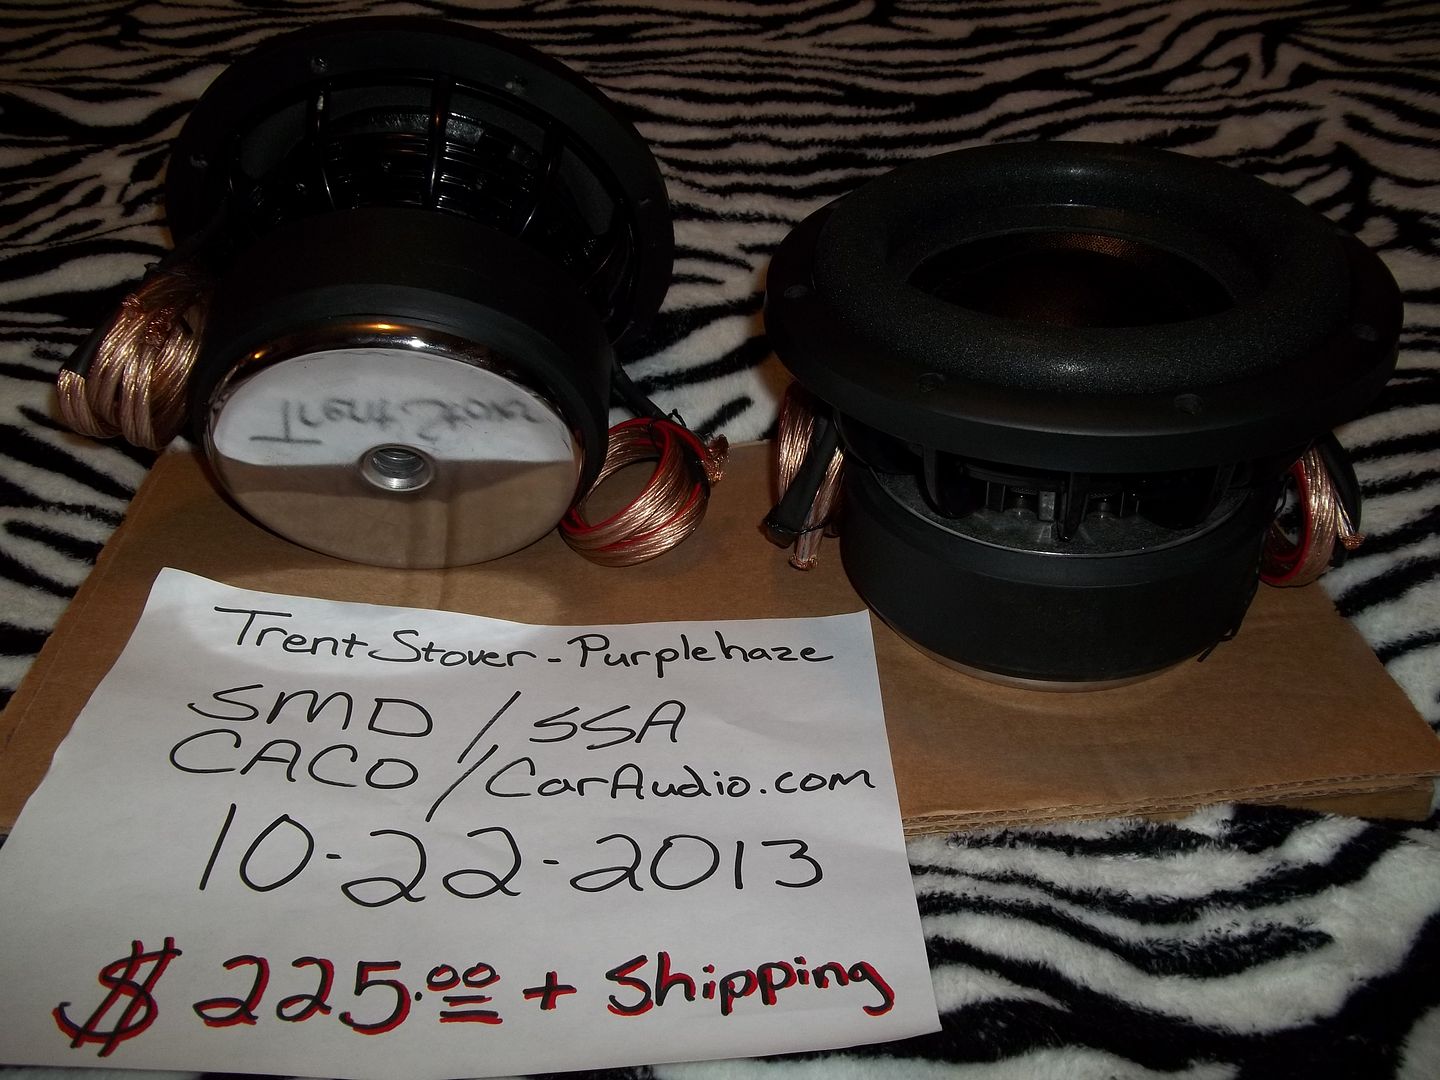
0 -
Hey still looking for the Solo X 18 motor boot.
0 -
Thanks man, yeah he has the whole motor. I really just need the boot.
Bump for boots!
0 -
Very nice work, thanks for sharing the progress.
No problem, glad to! And thank you for the compliment!
I just don't understand why it doesn't get anymore attention than it does... maybe it's the title.
Is there any way for me to edit the thread title?
0 -
Bump for help?
0 -
TTT
Does anyone know of any other boots I could use on the Punch HX2?
Or of any place I can have them made? Or just buy different ones that are already made?
I could really use some direction!
0 -
-
-
Hello friends,
I am looking for motor boots for a couple of different motors. First, I need a boot for a Solo X 18 motor. This is needed badly, the subs will be inverted, and I'm only missing one.
And second, I need a Rockford Fosgate Punch HX2 (3" coil) motor boot. I have money ready, and will gladly pay for these plus shipping.
Let me know if you have either, please!!!
I know someone out there somewhere has one of these much needed motor boots! My fingers are crossed!
Trent - Purplehaze0 -
great job.....and great skills
Looks sexy
Thanks guys, I appreciate it!
0 -
Looks good to me.
Thank you.
That's one really nice looking driver. I really like the cap.
BL is low due to the Mms. If you run the test with a given Mmd say 350 you will see that it will increase a bit. I wouldn't be too concerned I'm sure it'll do well.
Thanks man.
That's what I figure too, so I'm just gonna build a couple of enclosures and see what she does.
I'm thinking far a daily box, 5 cubes, tuned around 35hz.
For a burp box, maybe 3 - 5ft3 and a 8 - 10" external areo port, tuned up around 47 or so.
What do you fellas think? Any opinions on the enclosures?
0 -
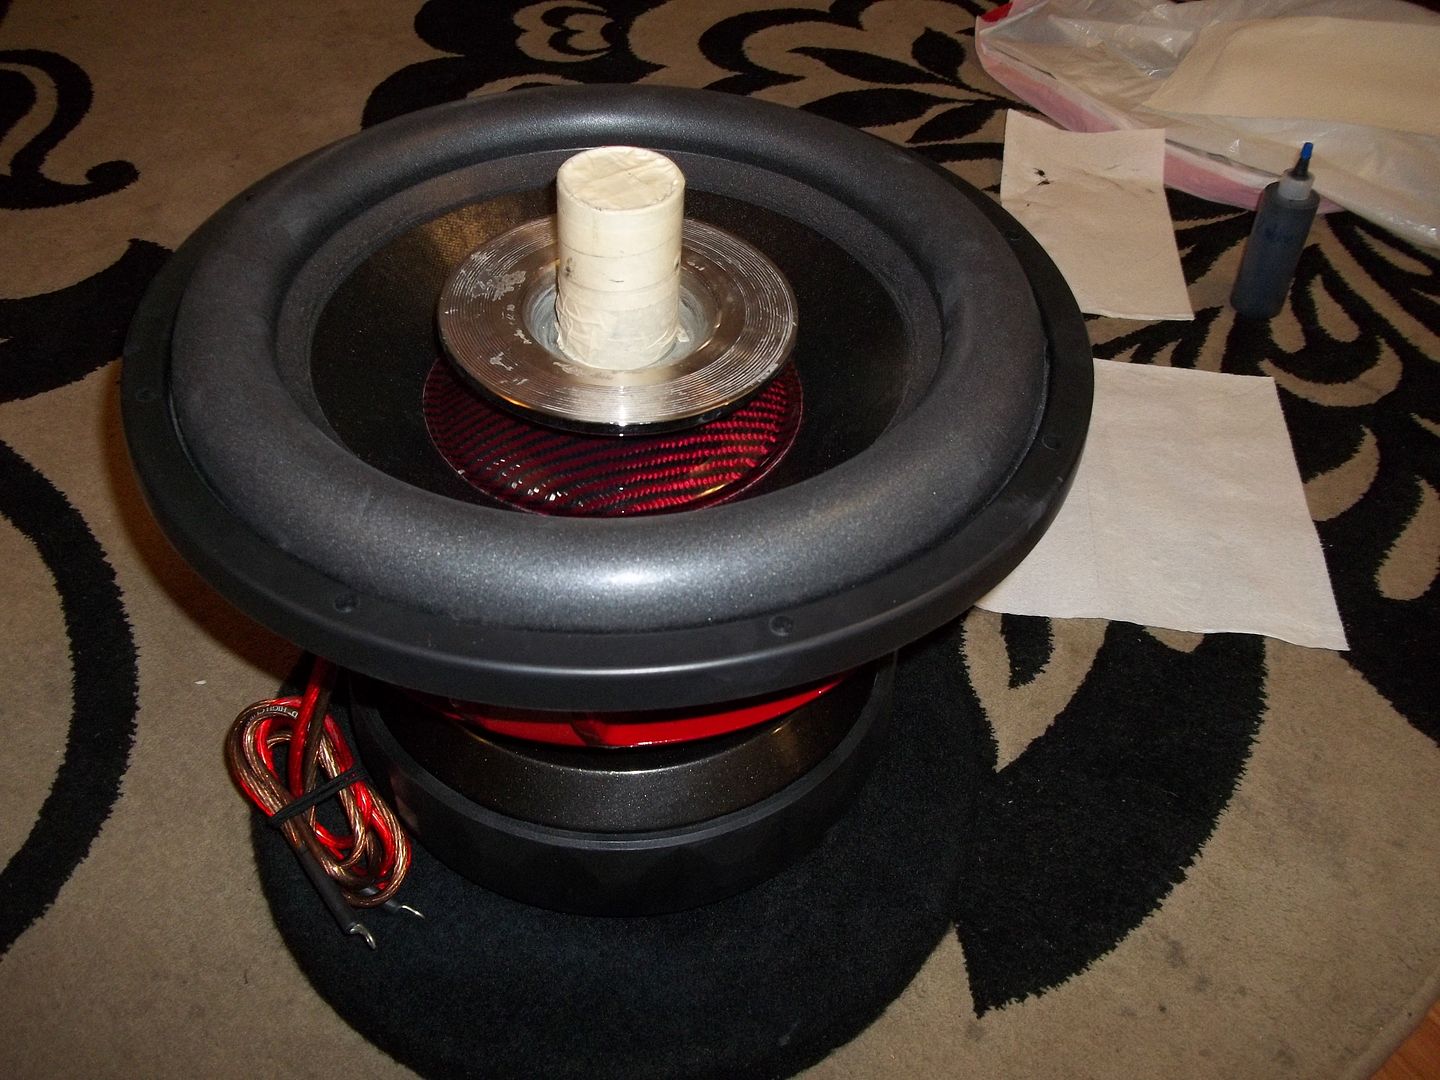
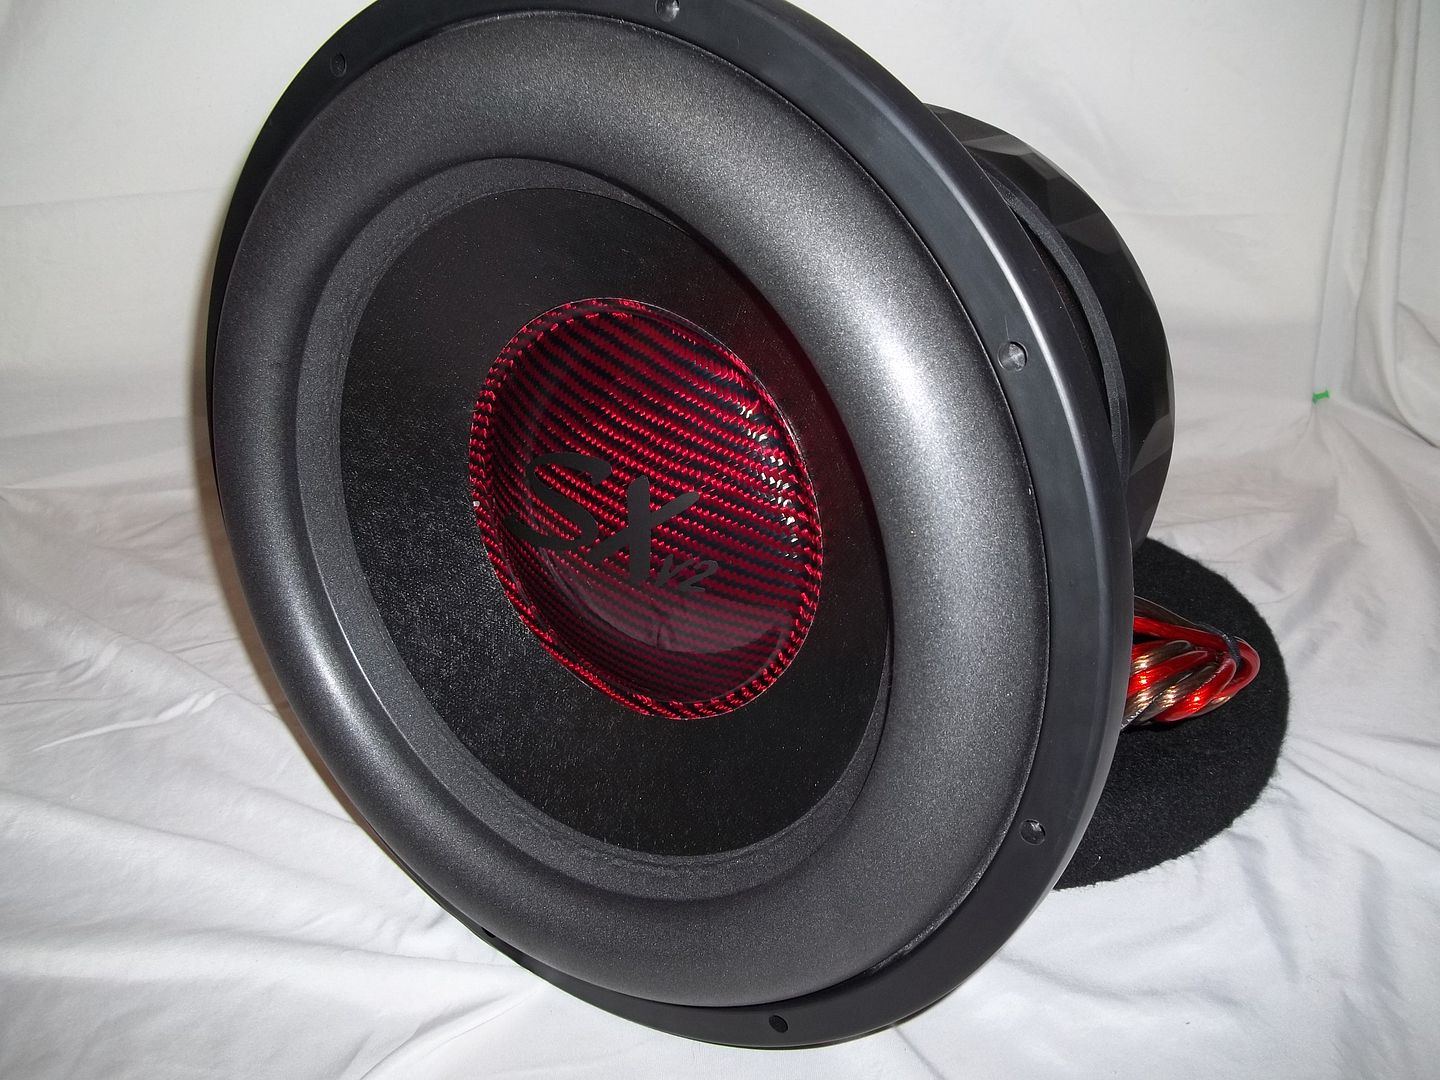
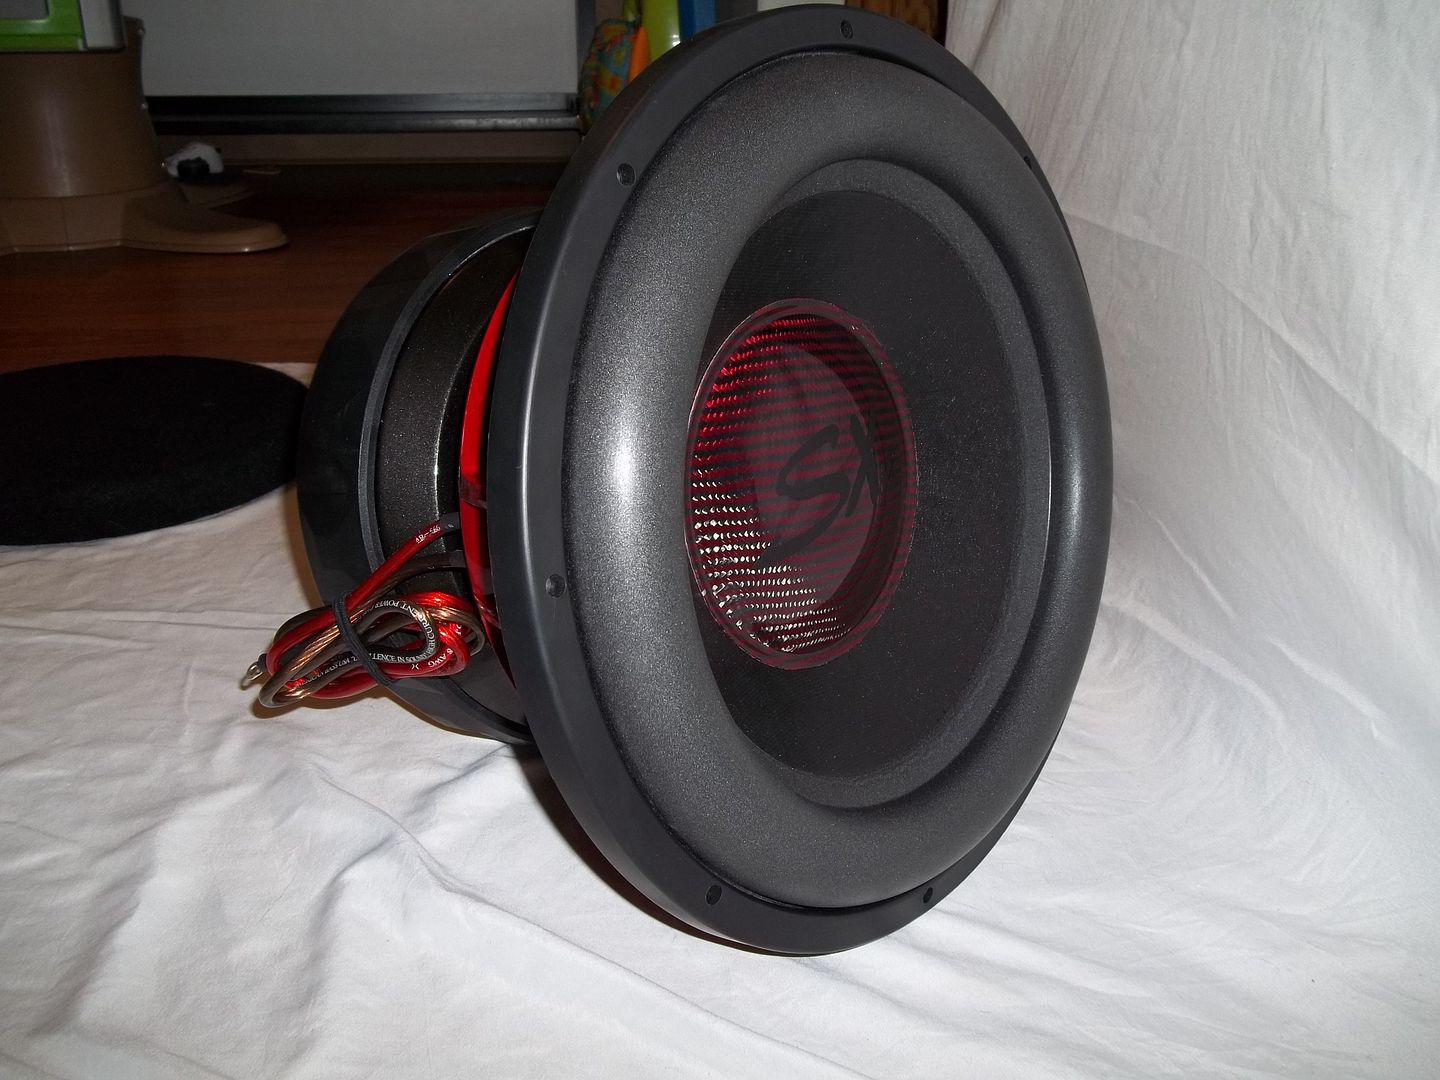
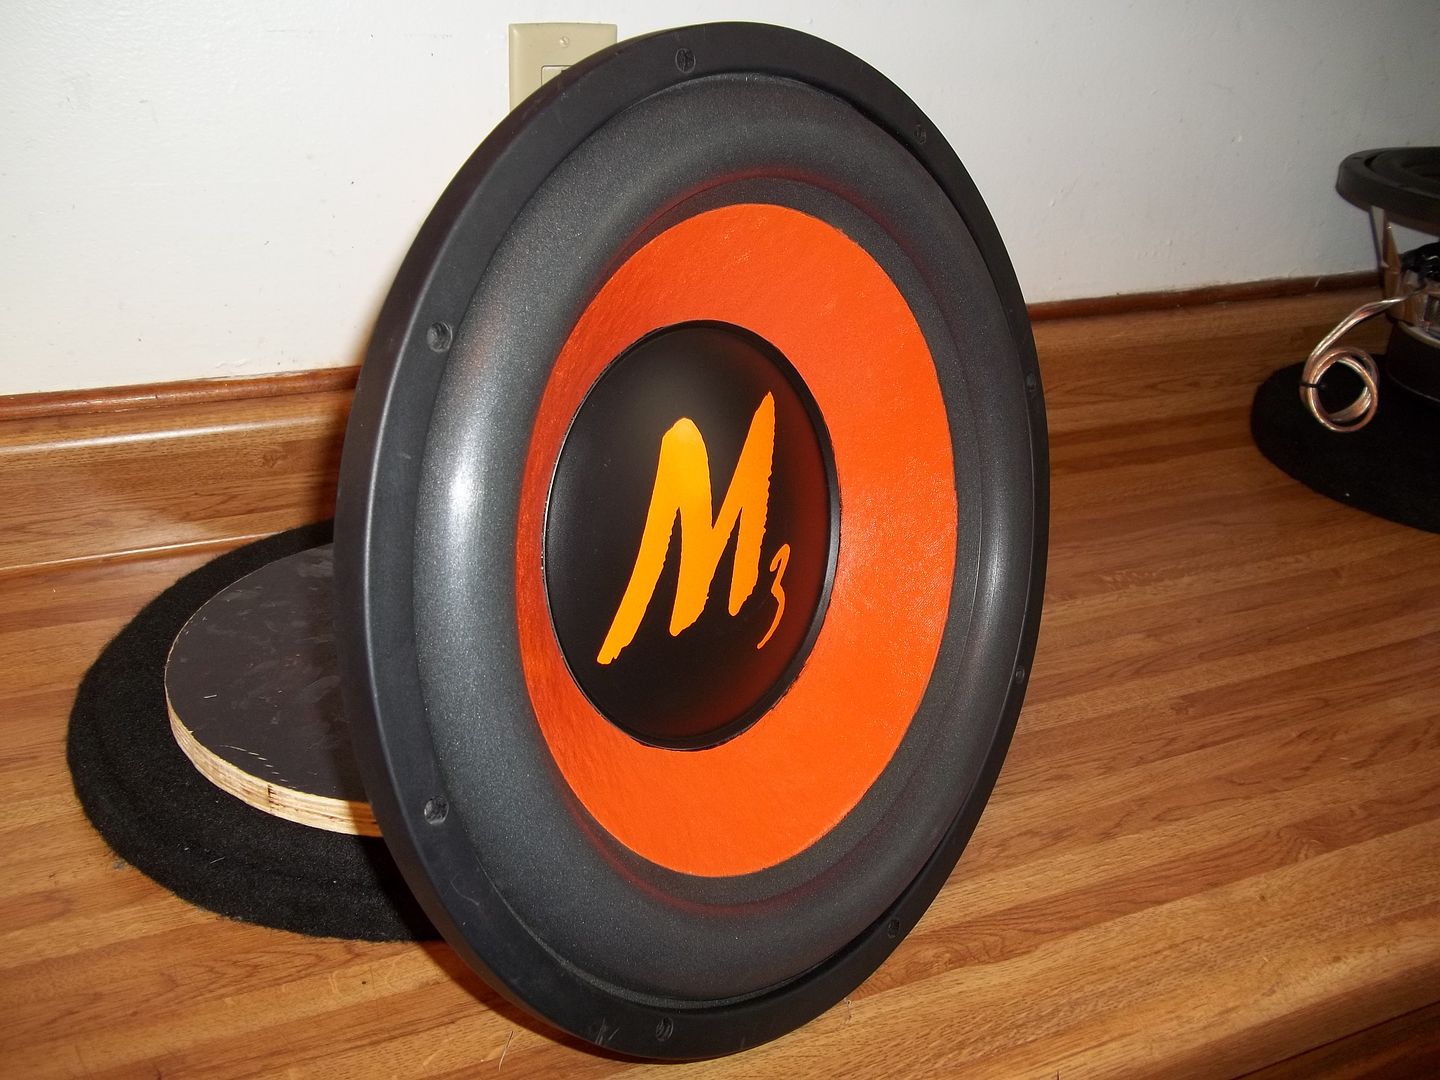
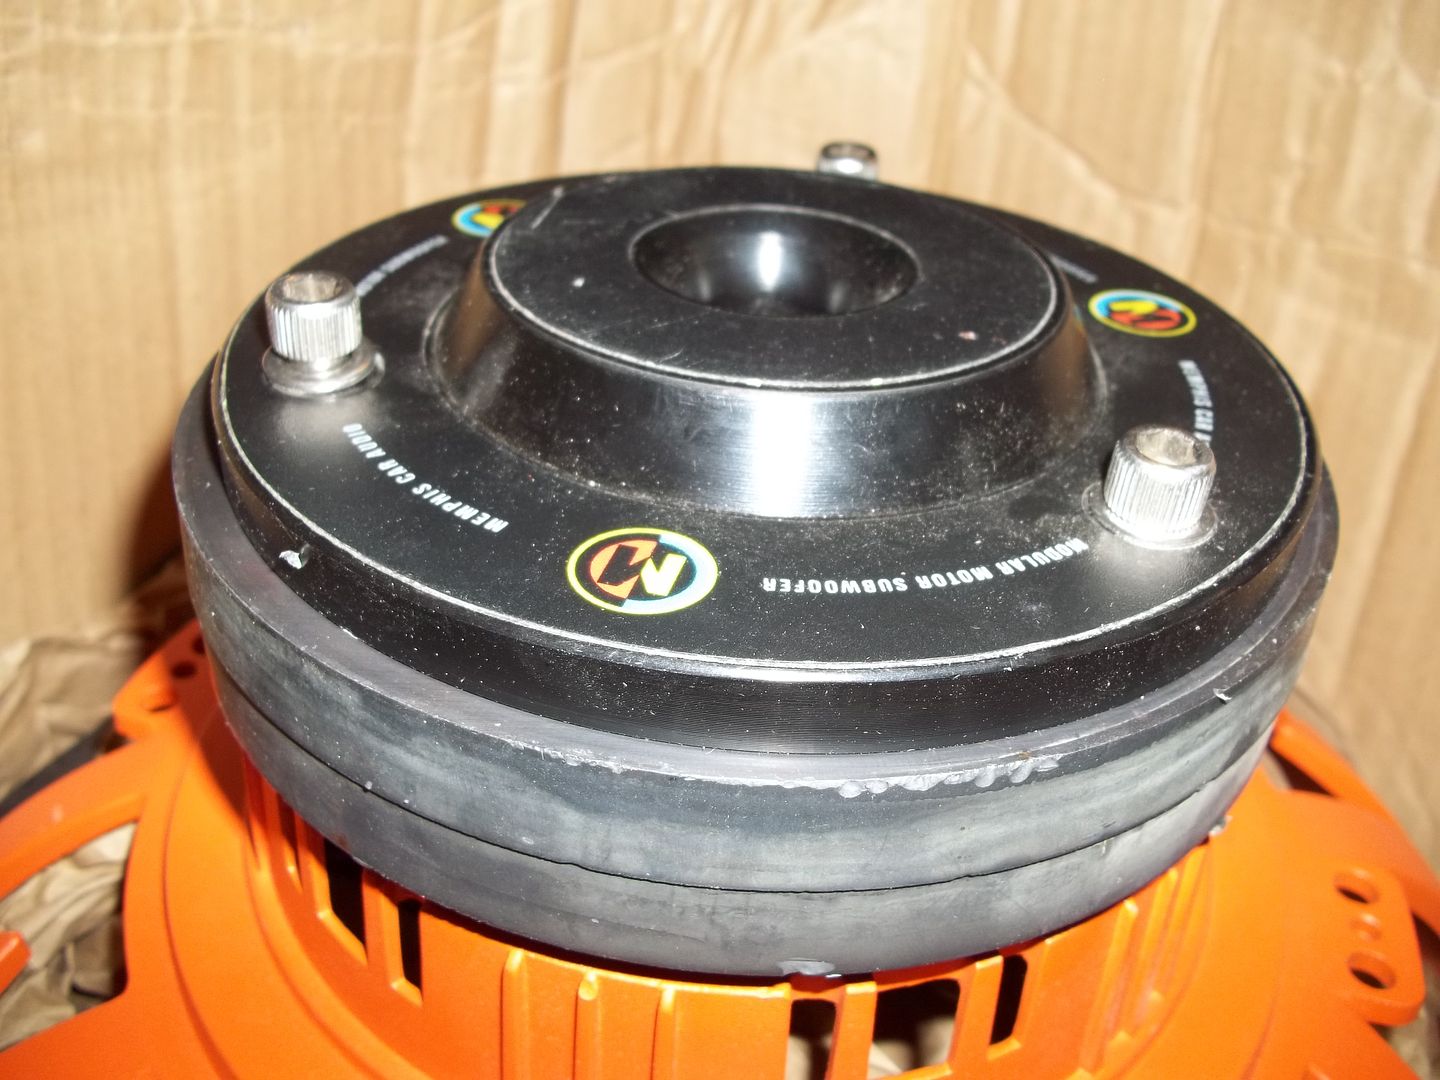
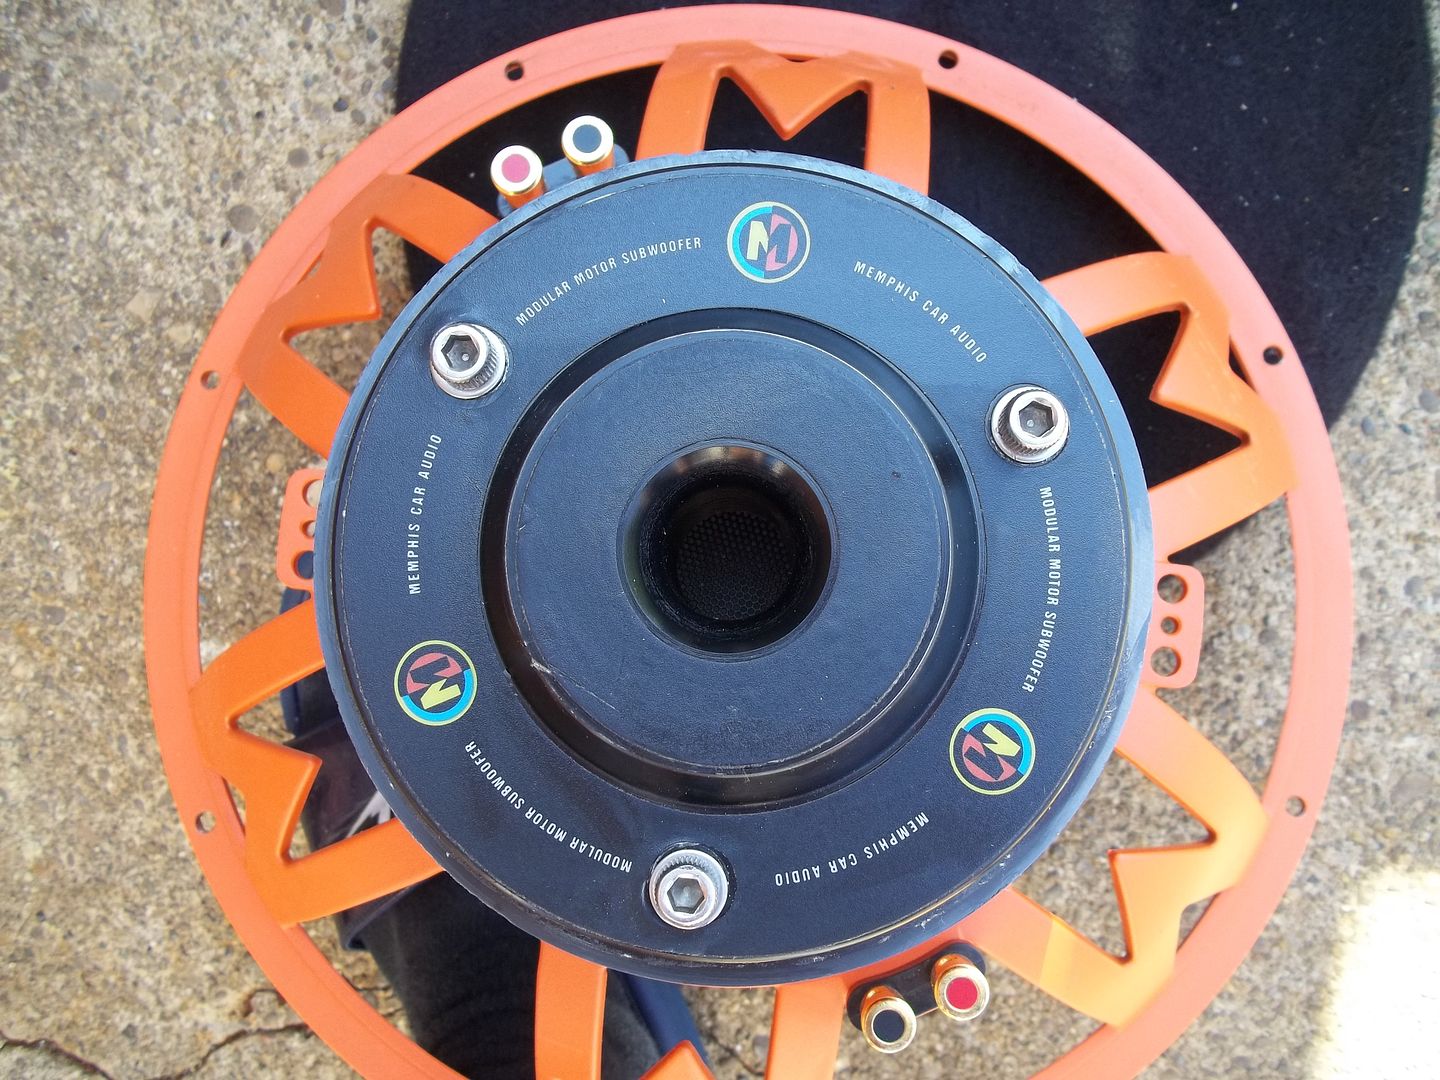
Okay so when I last left off, I was waiting for the dust cap. Well it came in, and I'd already had two logos cut for it, one in black & one in silver, so I could decide which one to use. It still took me almost two days to decide, and I finally went with the black. Btw I know these are simple logo's, but I completely designed them, they use different fonts for each letter, so I know they are "different". I think it's perfect. "SX V2" - I call mine v.2 because PSi already did them, but mine is a different version, hence the "V.2".
So here is the cap and logos, right after getting the cap in the mail. The bottom is my original printout.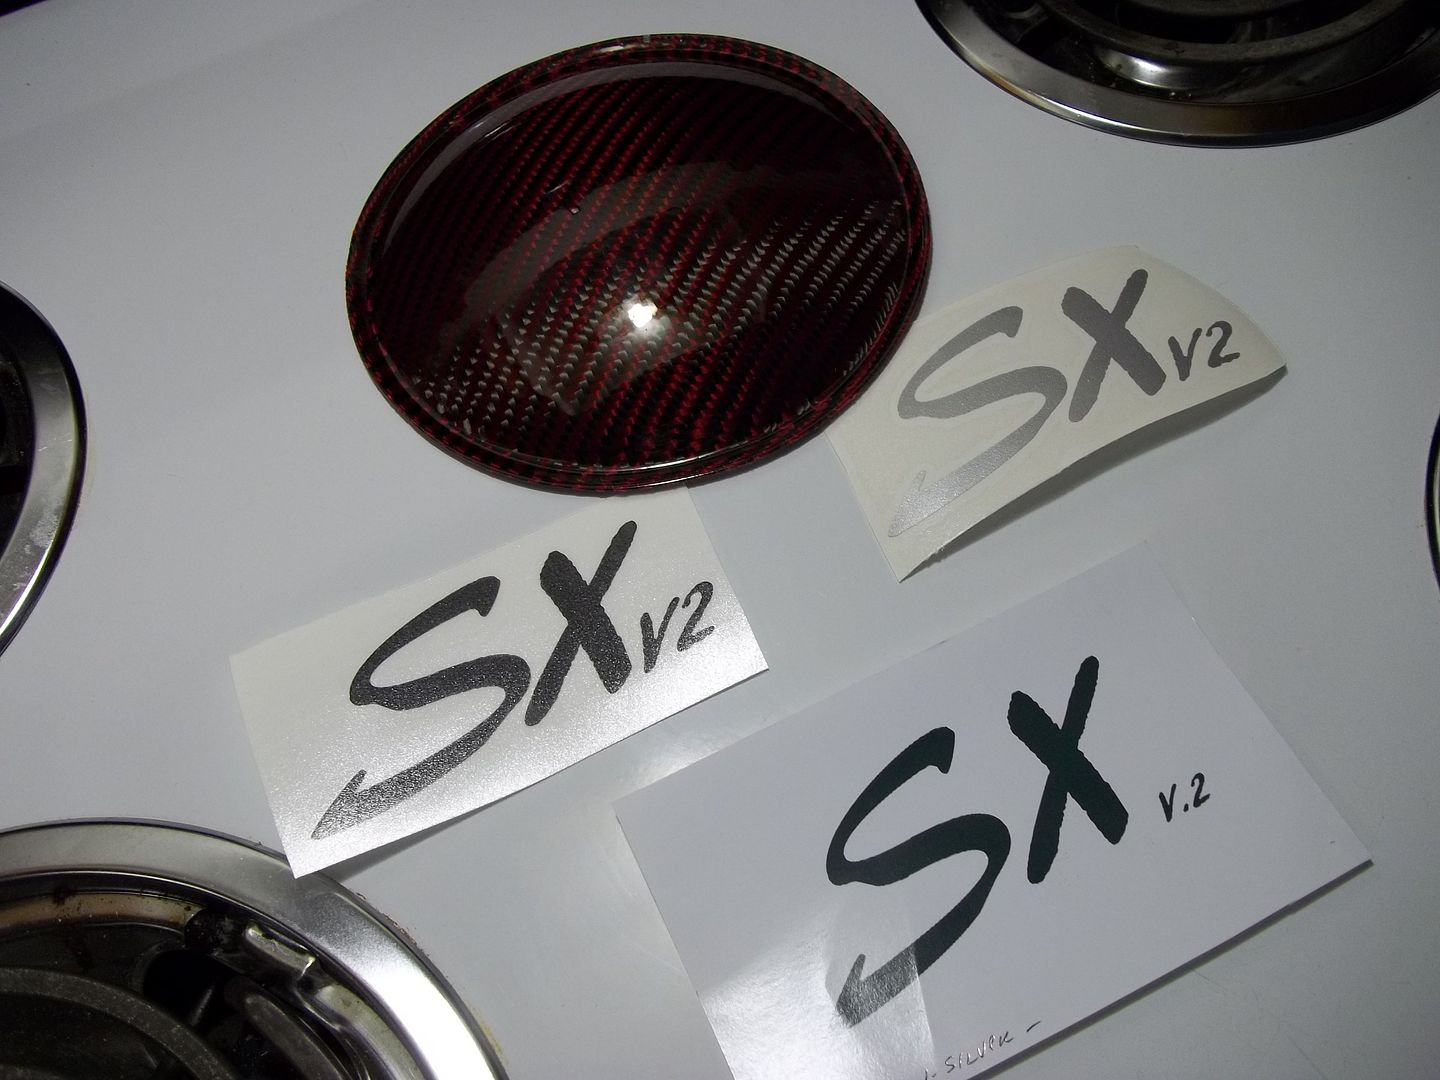
So then I taped up the bottom plate of a 10" Kicker L7, to use for weight to press the cap down while the glue sets up.

Done. And this one, I did a good job, no glue where it's not supposed to be")
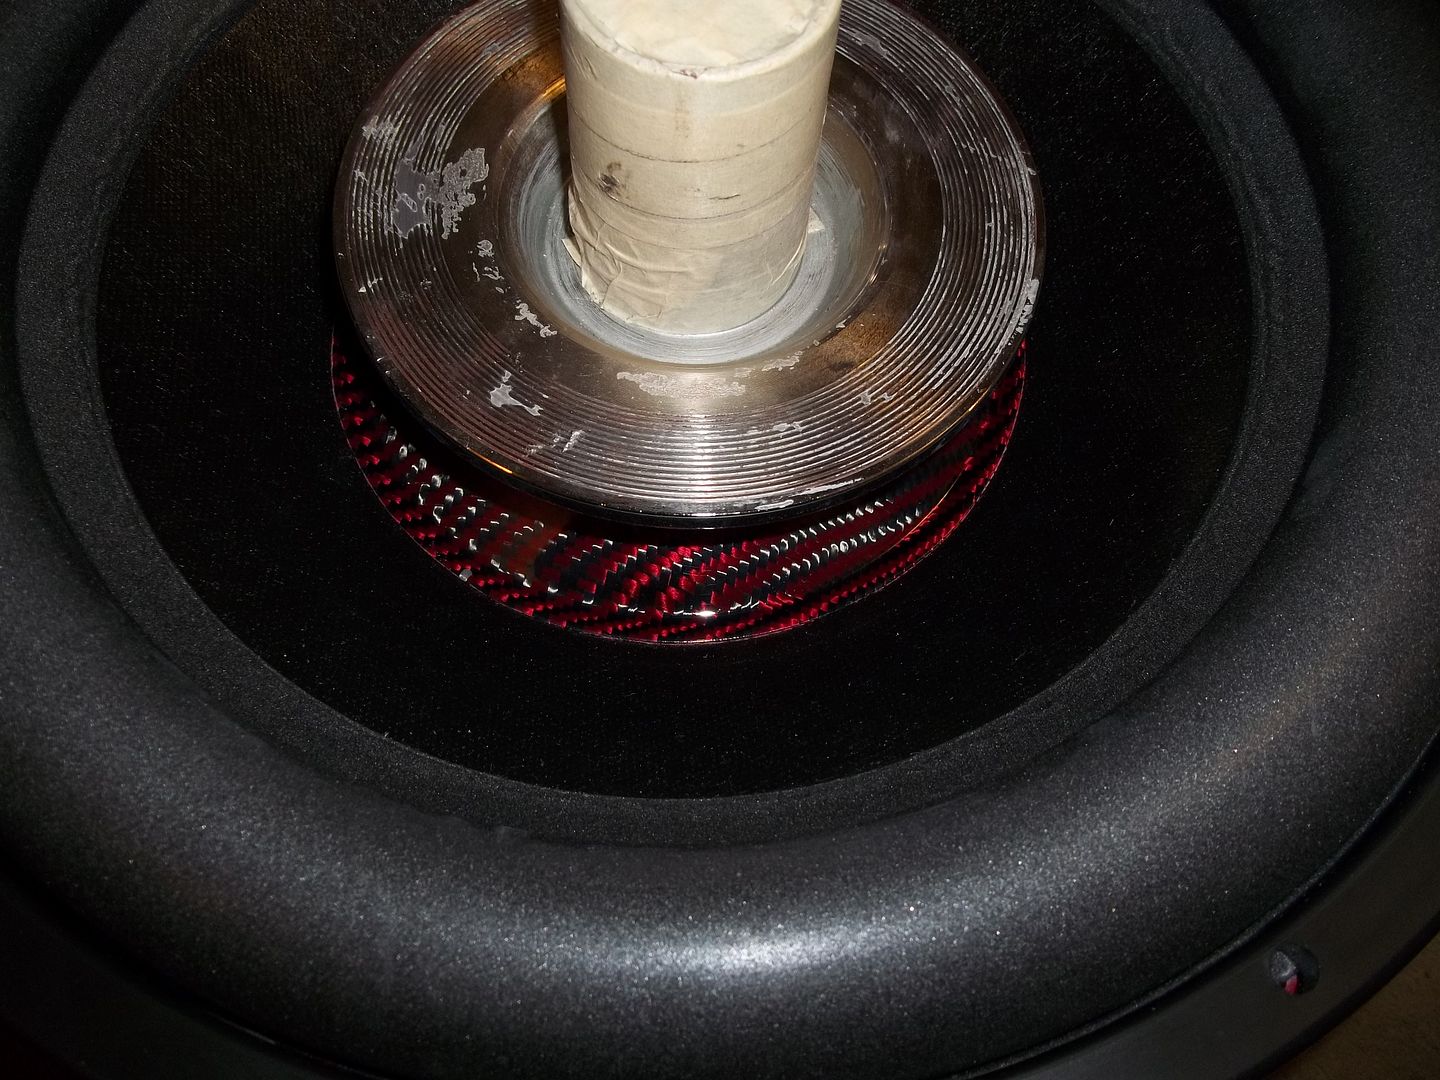
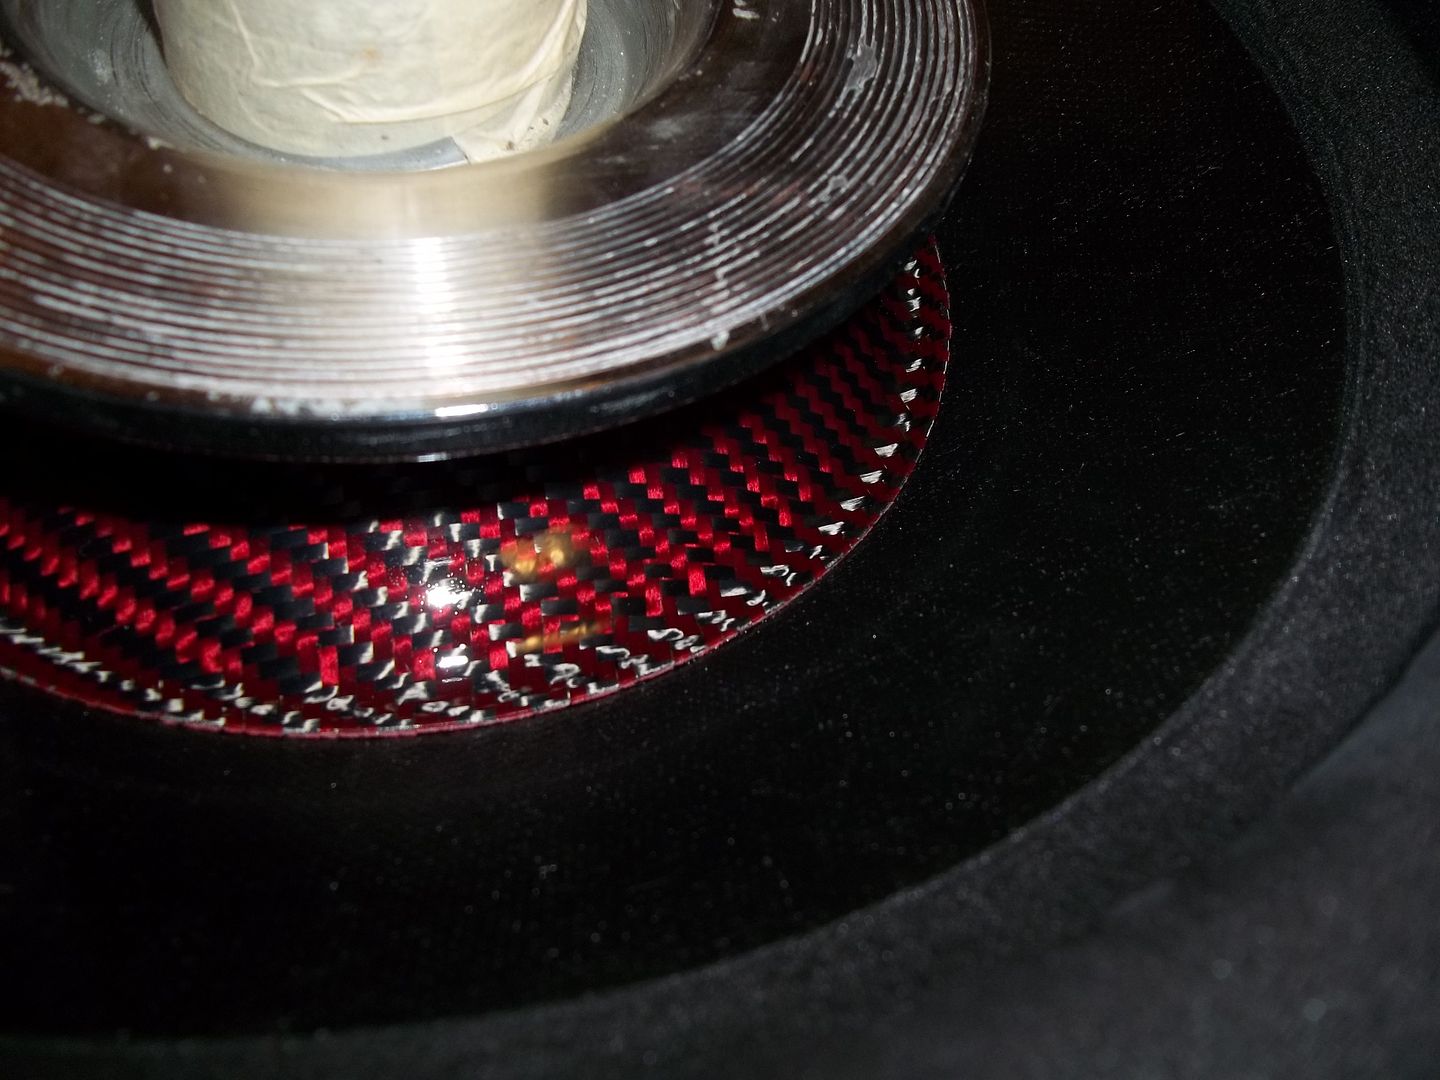
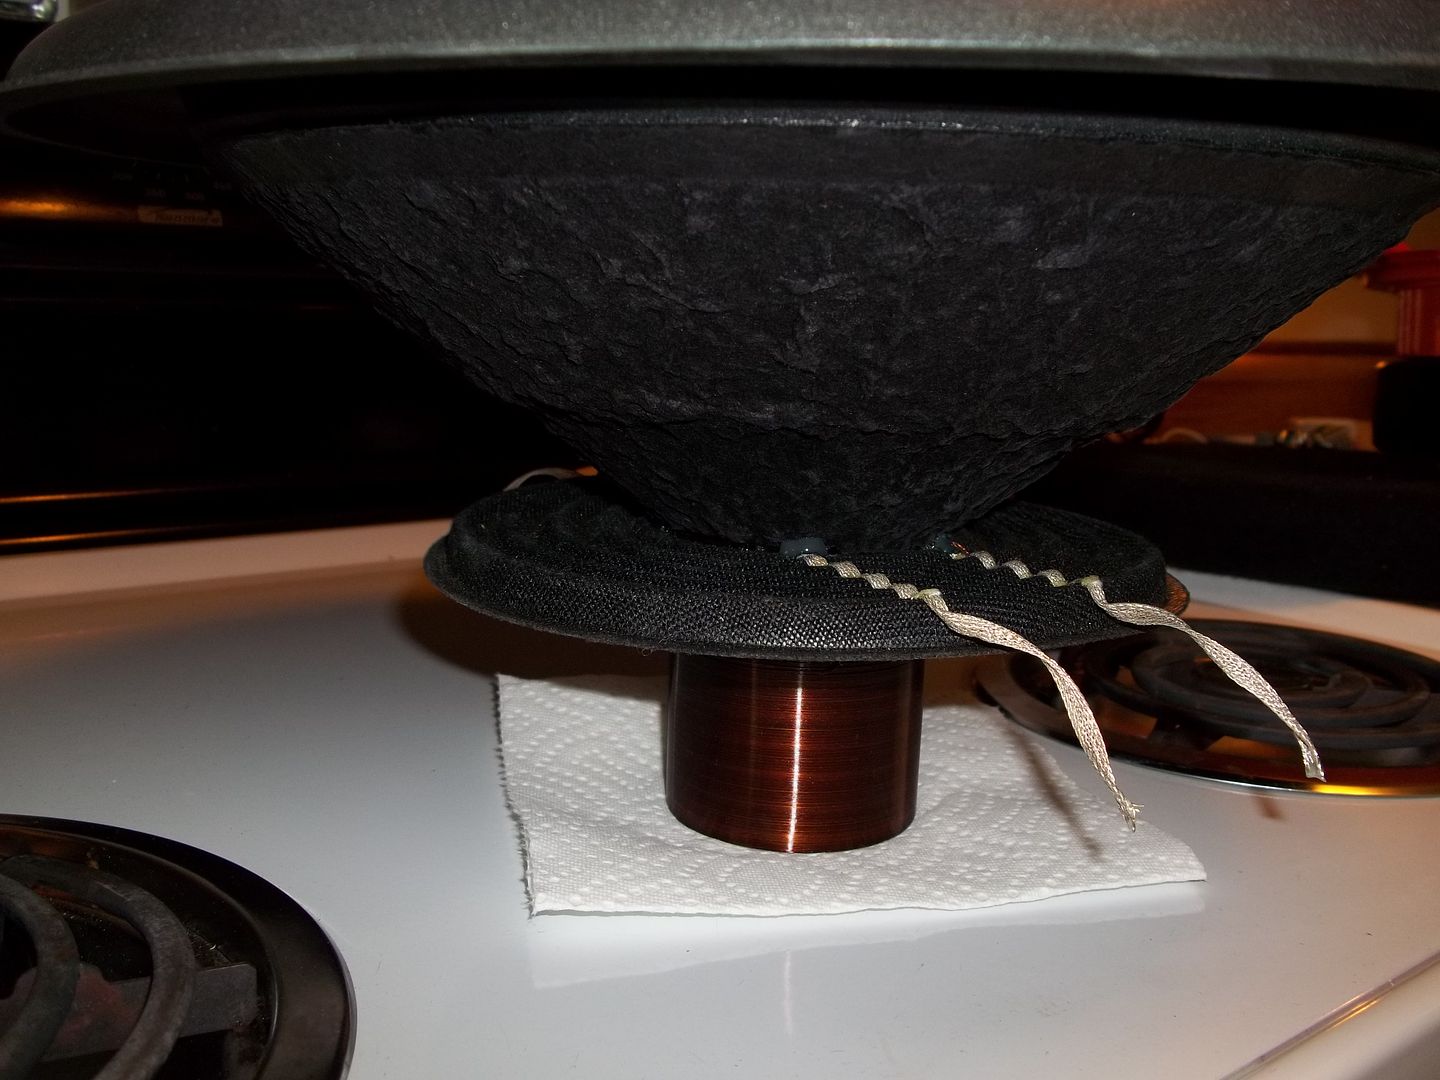
After letting it setup for 24 hours, time to put the logo on, and call the project finished. (Well almost, still want to put some tech-flex on the wires)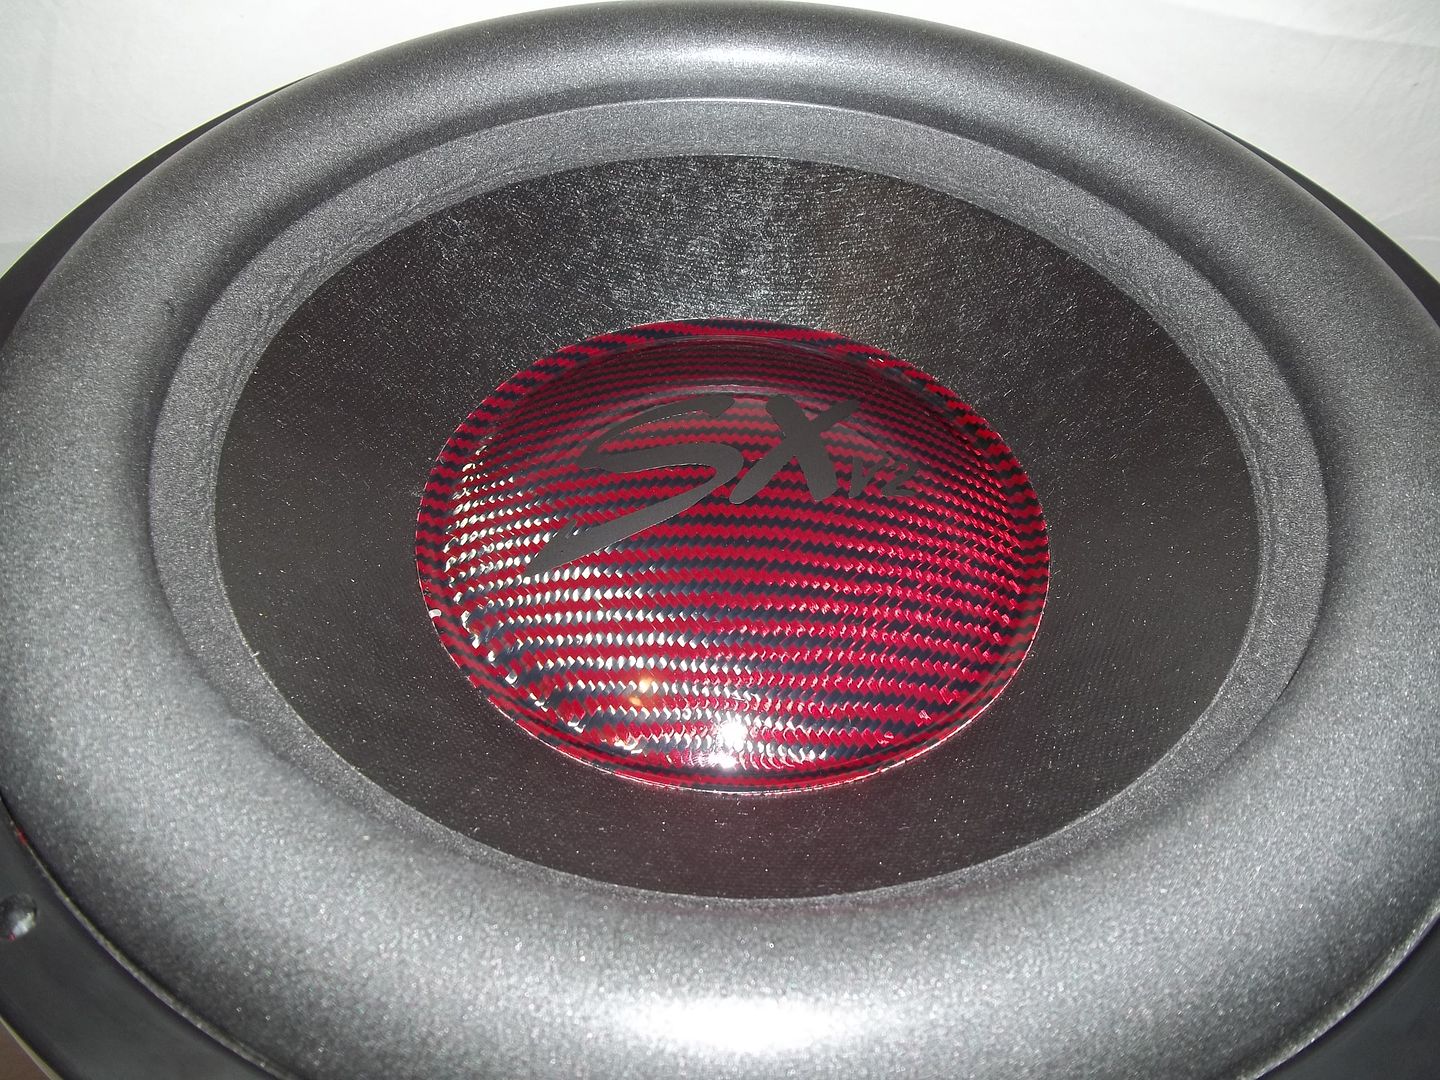

And here are the parameters I came up with. I don't know that they are all accurate, b/c this is a large driver, with a SUPER tight suspension, and the "added mass method" is just not the best way to do the test. But unfortunately, it's the only way I know to do it. So here is what I came up with...
* This data was exported from DATS the Dayton Audio Test System
*
* Manufacturer: Trent Stover - Purplehaze
* Model: Solo X 15 V.2
* Piston Diameter = 330.2 mm
* f(s)= 41.43 Hz
* R(e)= 2.96 Ohms
* Z(max)= 87.24 Ohms
* Q(ms)= 15.693
* Q(es)= 0.551
* Q(ts)= 0.532
* V(as)= 41.900 liters (1.480 cubic feet)
* L(e)= 6.31 mH
* n(0)= 0.73 %
* SPL= 90.71 1W/1m
* M(ms)= 288.80 grams
* C(ms)= 0.04 mm/N
* BL= 31.27
Now the main #'s I'm not sure about are the Qms (seems too high), the Vas (got different #'s every time), the Mms (too low 4 sure) and the Bl (also too low). I'm sure the fs will drop once it gets broke in, and the other stuff could be wrong due to my inability to use a different method. So anyway, what do you all think?1 -
Man....
Shit is for real, no doubt!
And turned out so nice too, I just love it!1 -
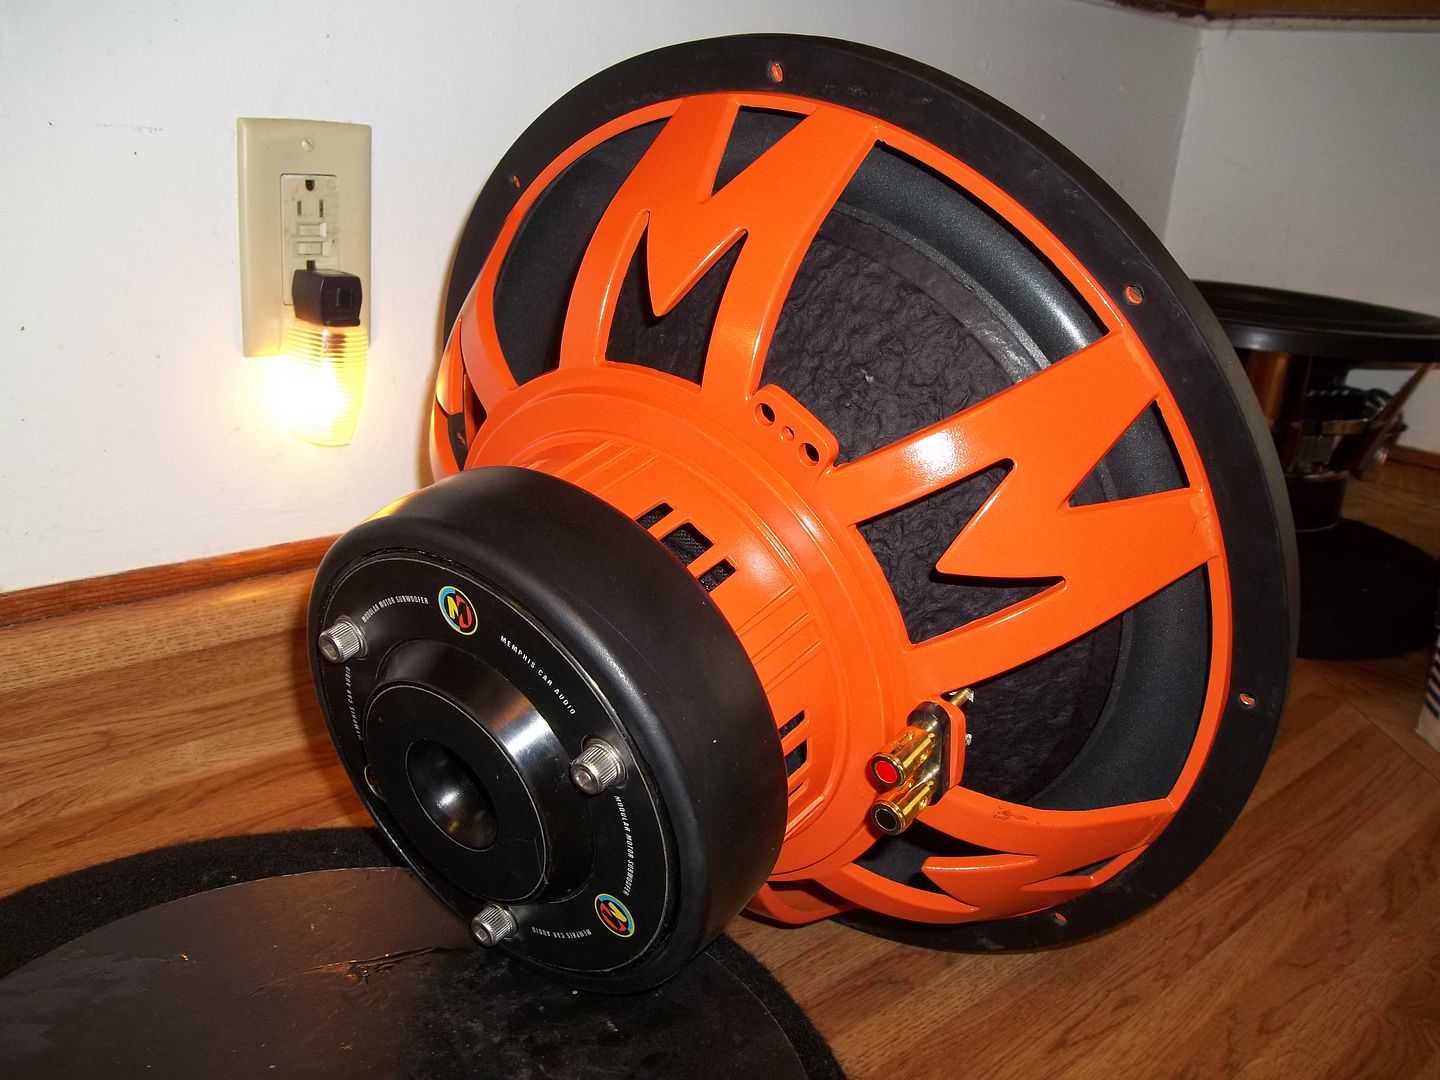
But then, I got to looking, and thinking. The top plate seemed to be next to shift. So, I beat it to the punch, and pulled it, and re-set it, with new glue. (It is much easier to pull, just use long screws)
And after that, she was finally ready for some touch-up paint, and assembly.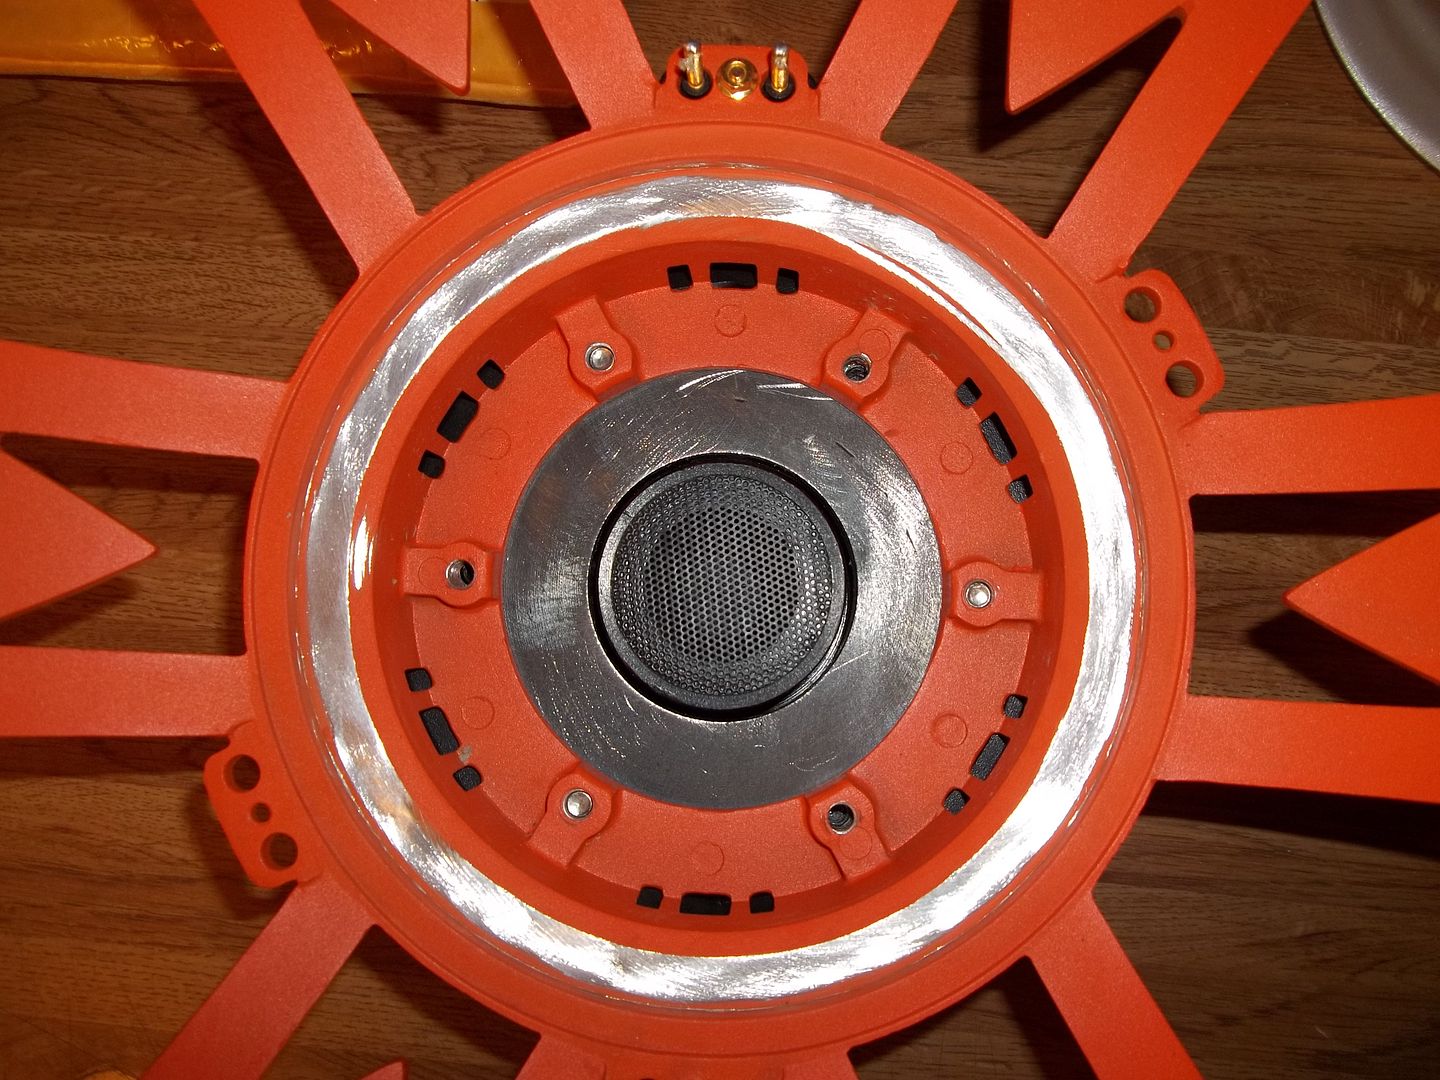
Very tight gap means lots of motor force...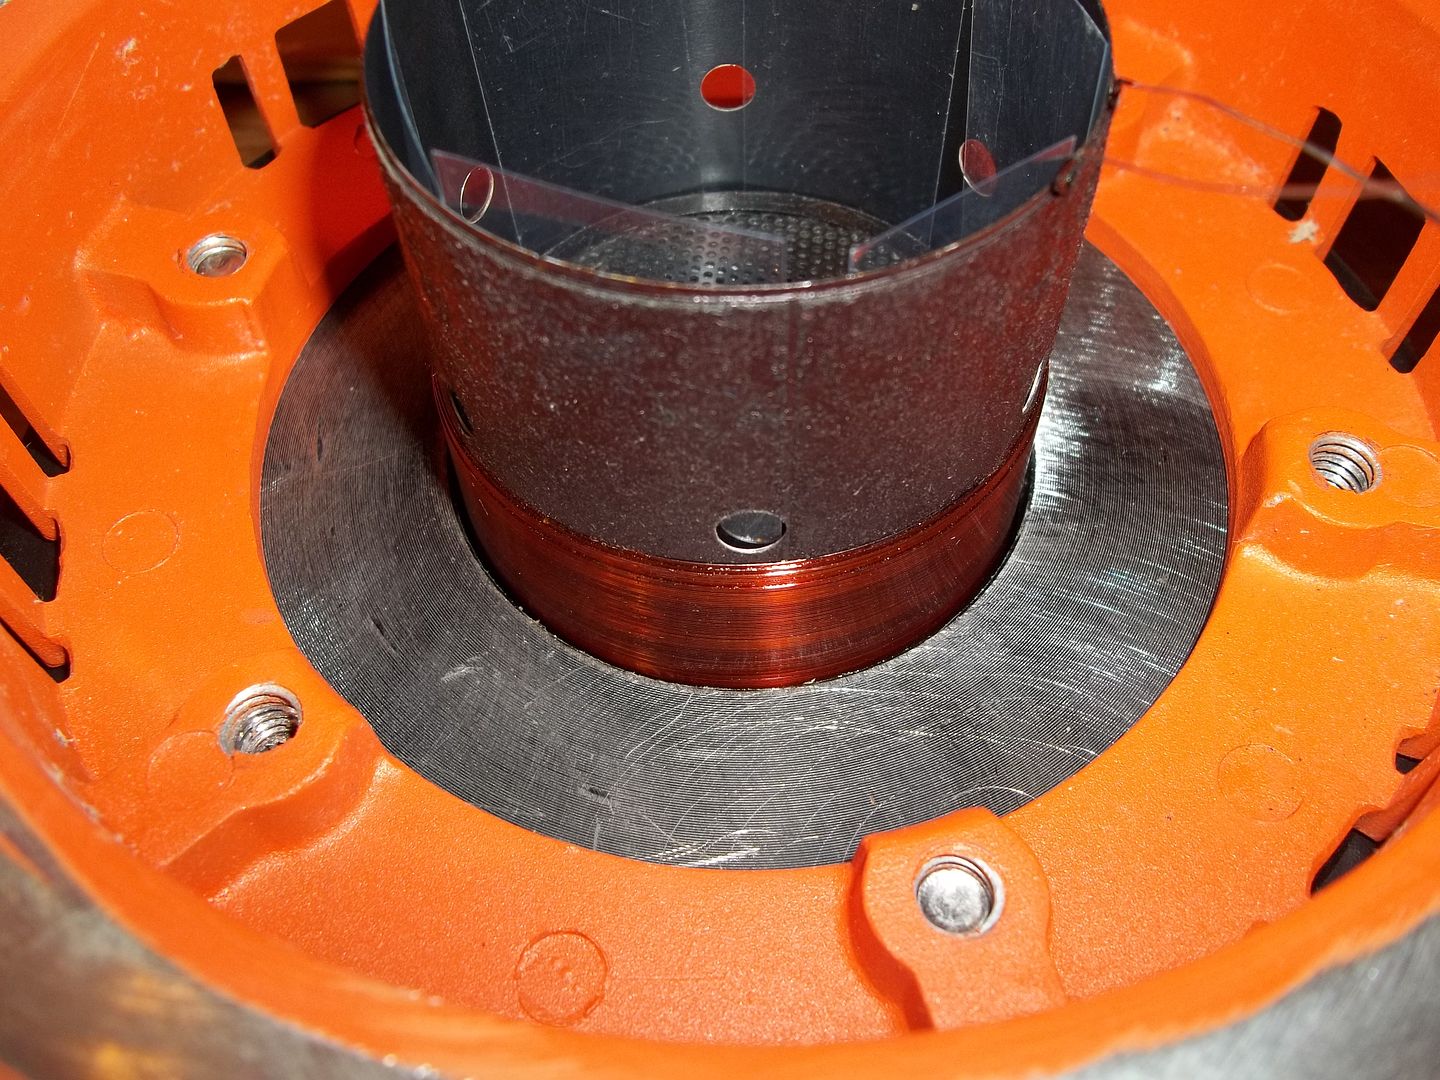
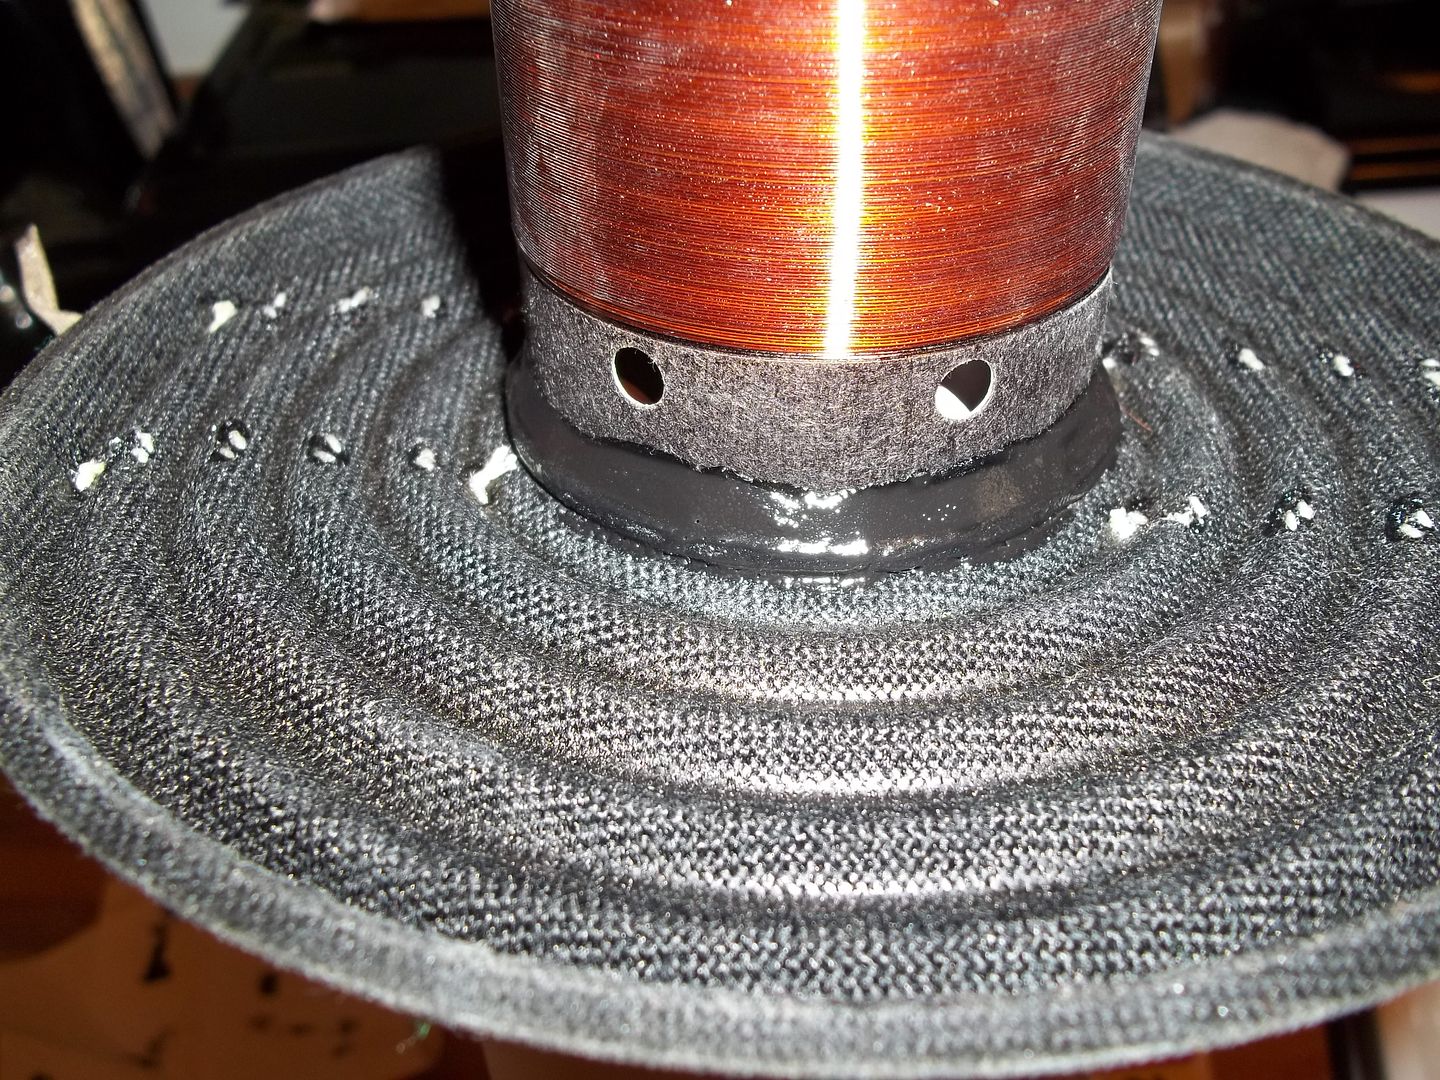
I painted the cone, to make it different than other M3's. Next time, I will use a poly cone if I'm going to add color, this was not easy, and didn't really turn out exactly how I wanted. But it wasn't bad...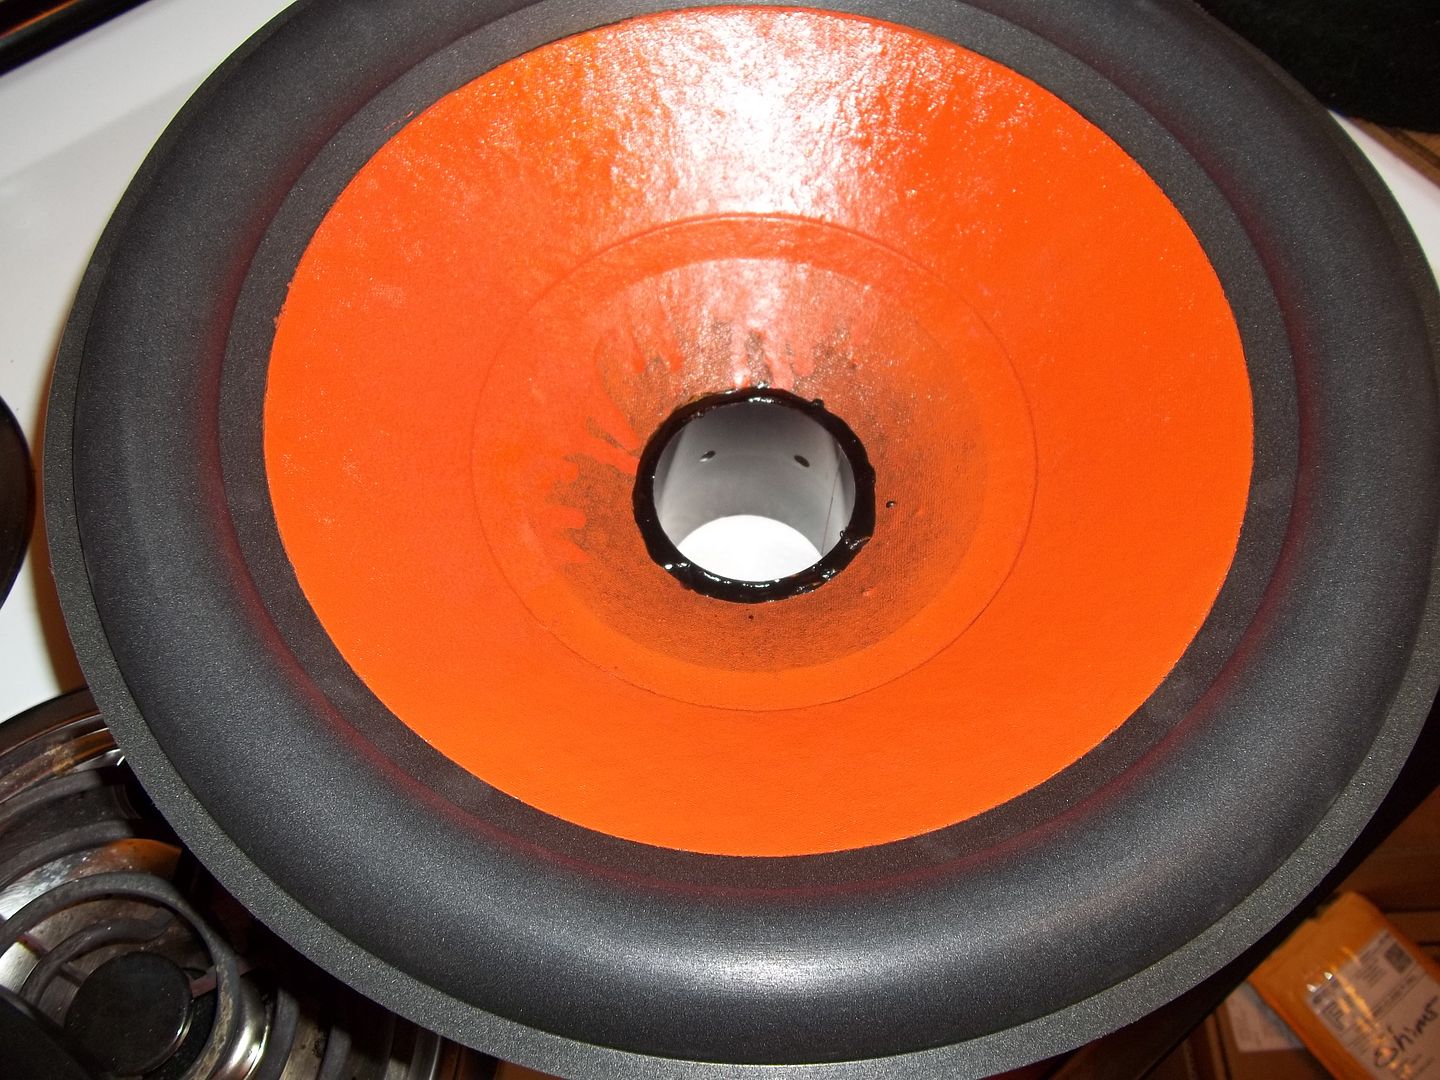
Some glue on all the bolts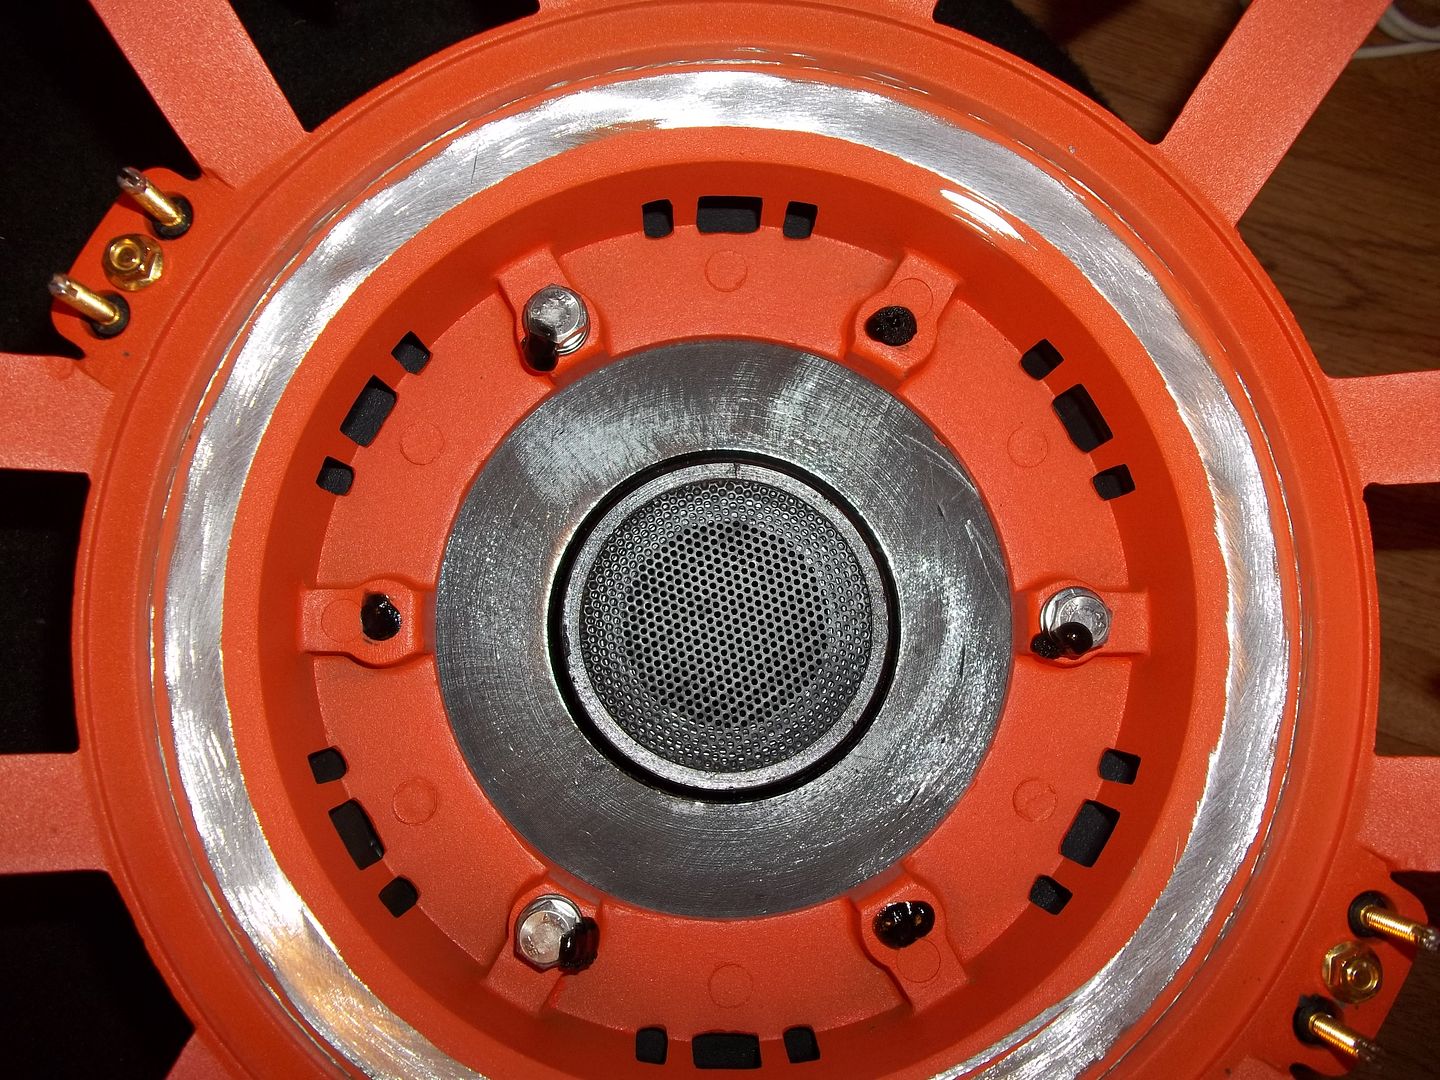
And now final assembly. Spiders get ca glue, surround gets rubberized glue.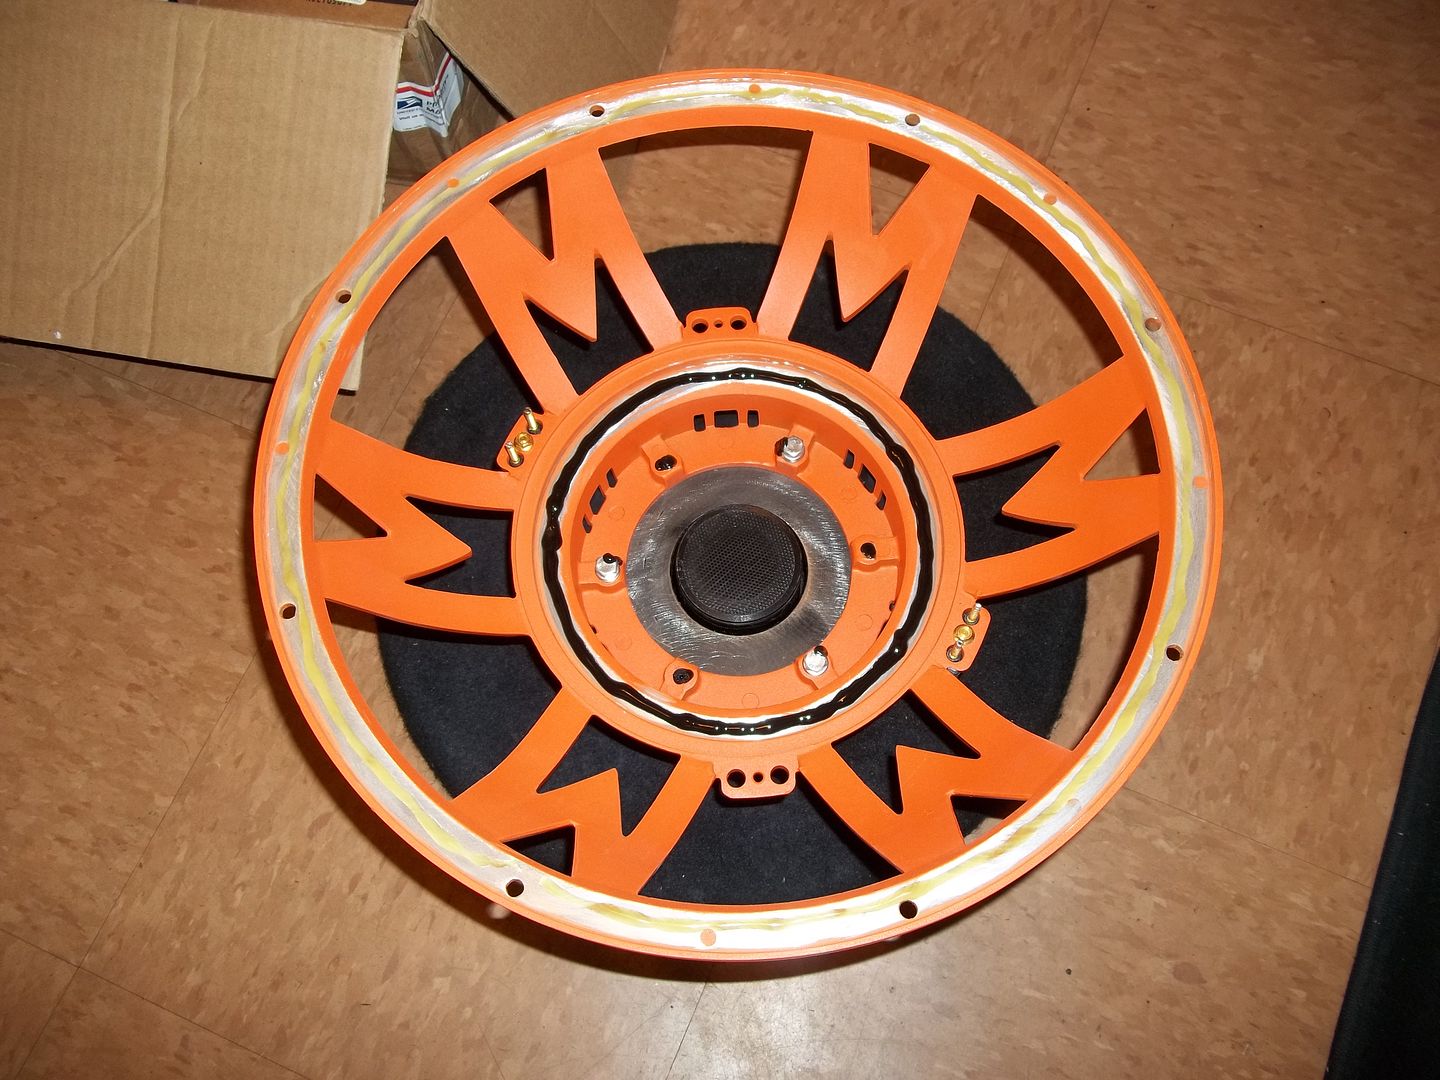
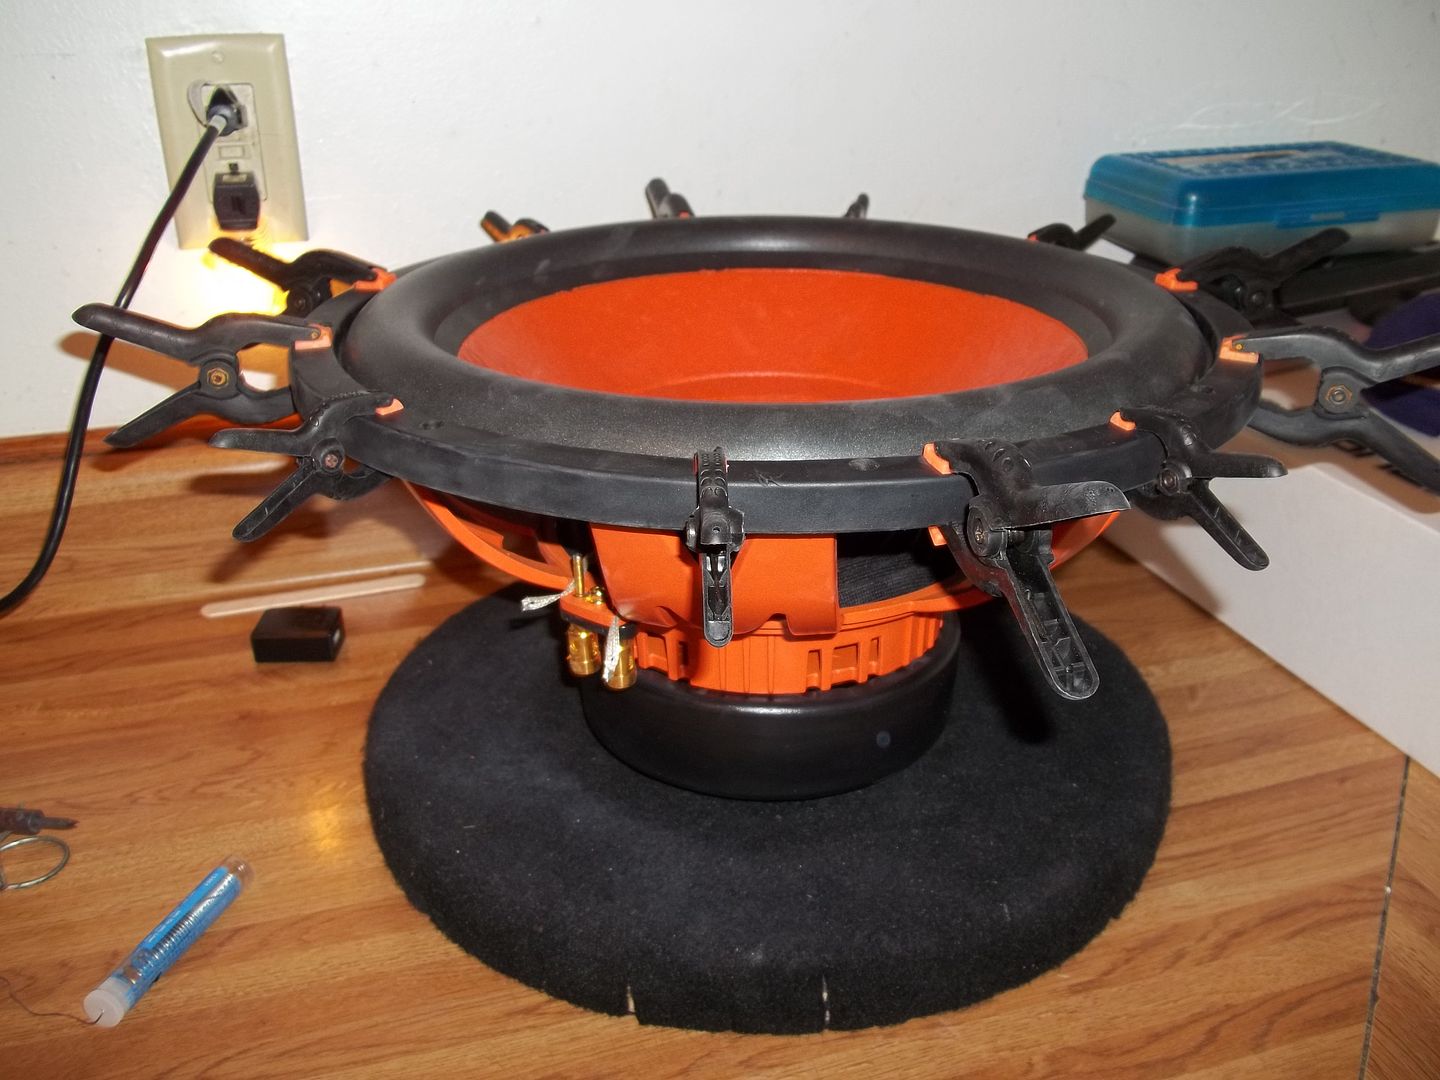
Here it is finished.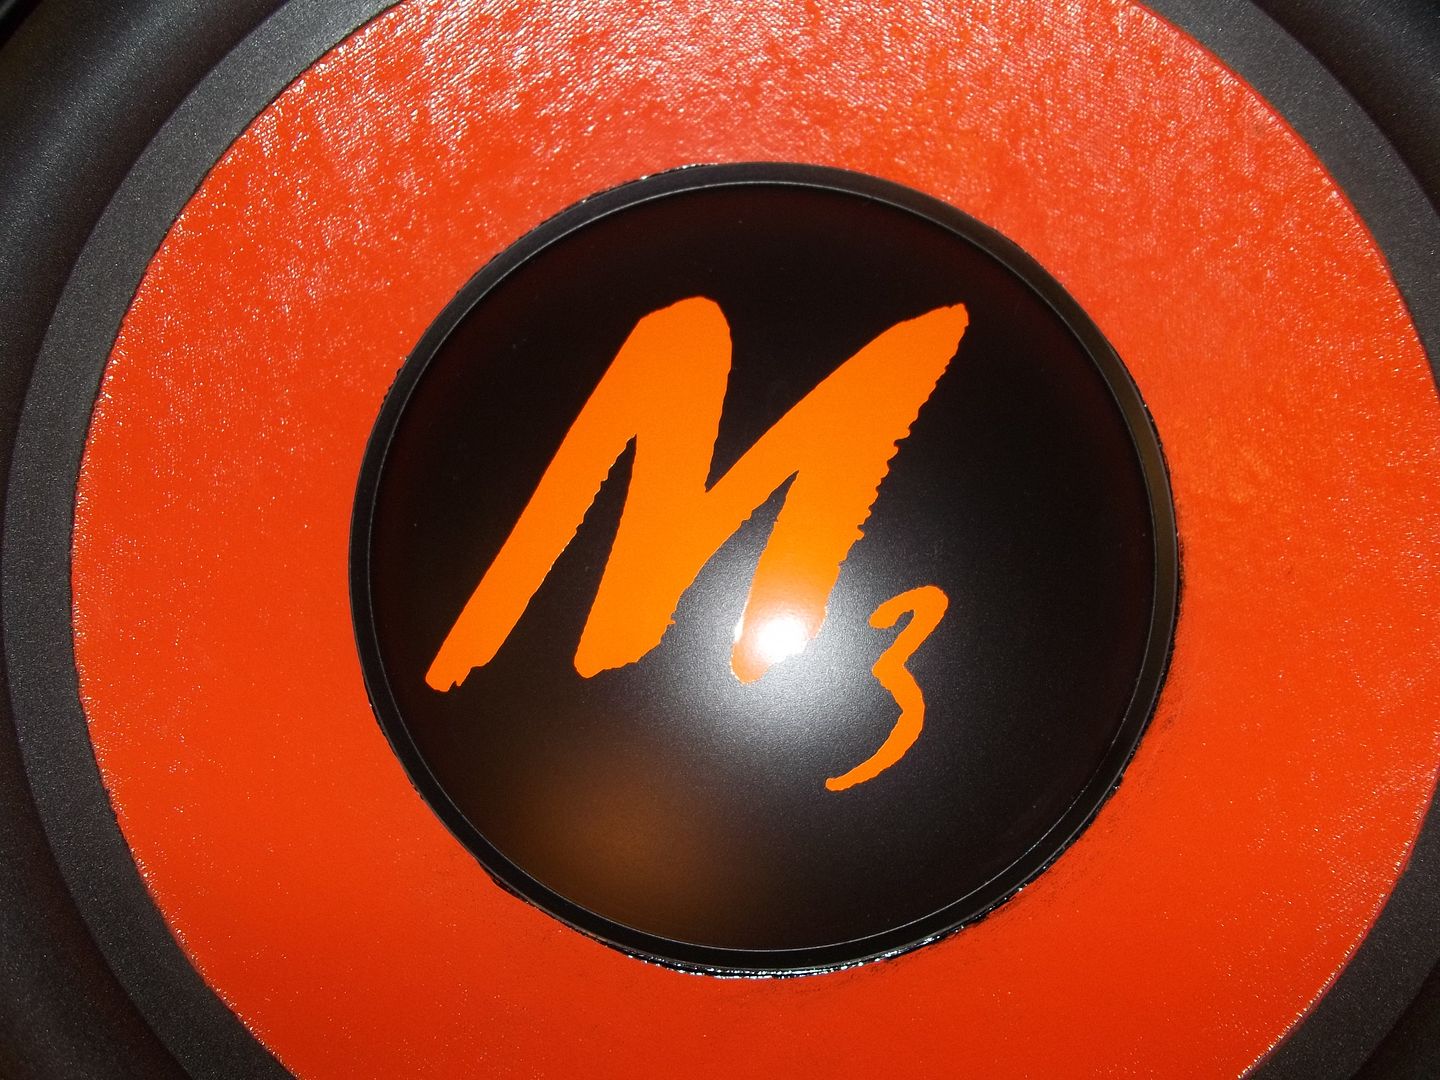
And man, I've got to say, this thing was freakin loud! And sounded good too! But I was really surprised at how loud it was, and only on 600 watts at that. But one of my neighbors was also impressed. So much, that he bought it that day! I didn't even get the chance to pull ts numbers on it...
Oh well, it was a fun build, and I learned a lot. And I've got another one to do, as soon as my next load of parts makes it in.
So what do you guys think about me maybe doing the next one in blue, instead of orange?
Would that be a sin? Or a cool idea? Lets discuss!0 -
I bought 2 - 15" Memphis M3's recently, but at different times from different people. This was the first one I bought, I have yet to start on the second one. This one was sold the day after I finished it...
Anyway, when I got it, the bottom plate was shifted. (almost every motor I get seems to be shifted)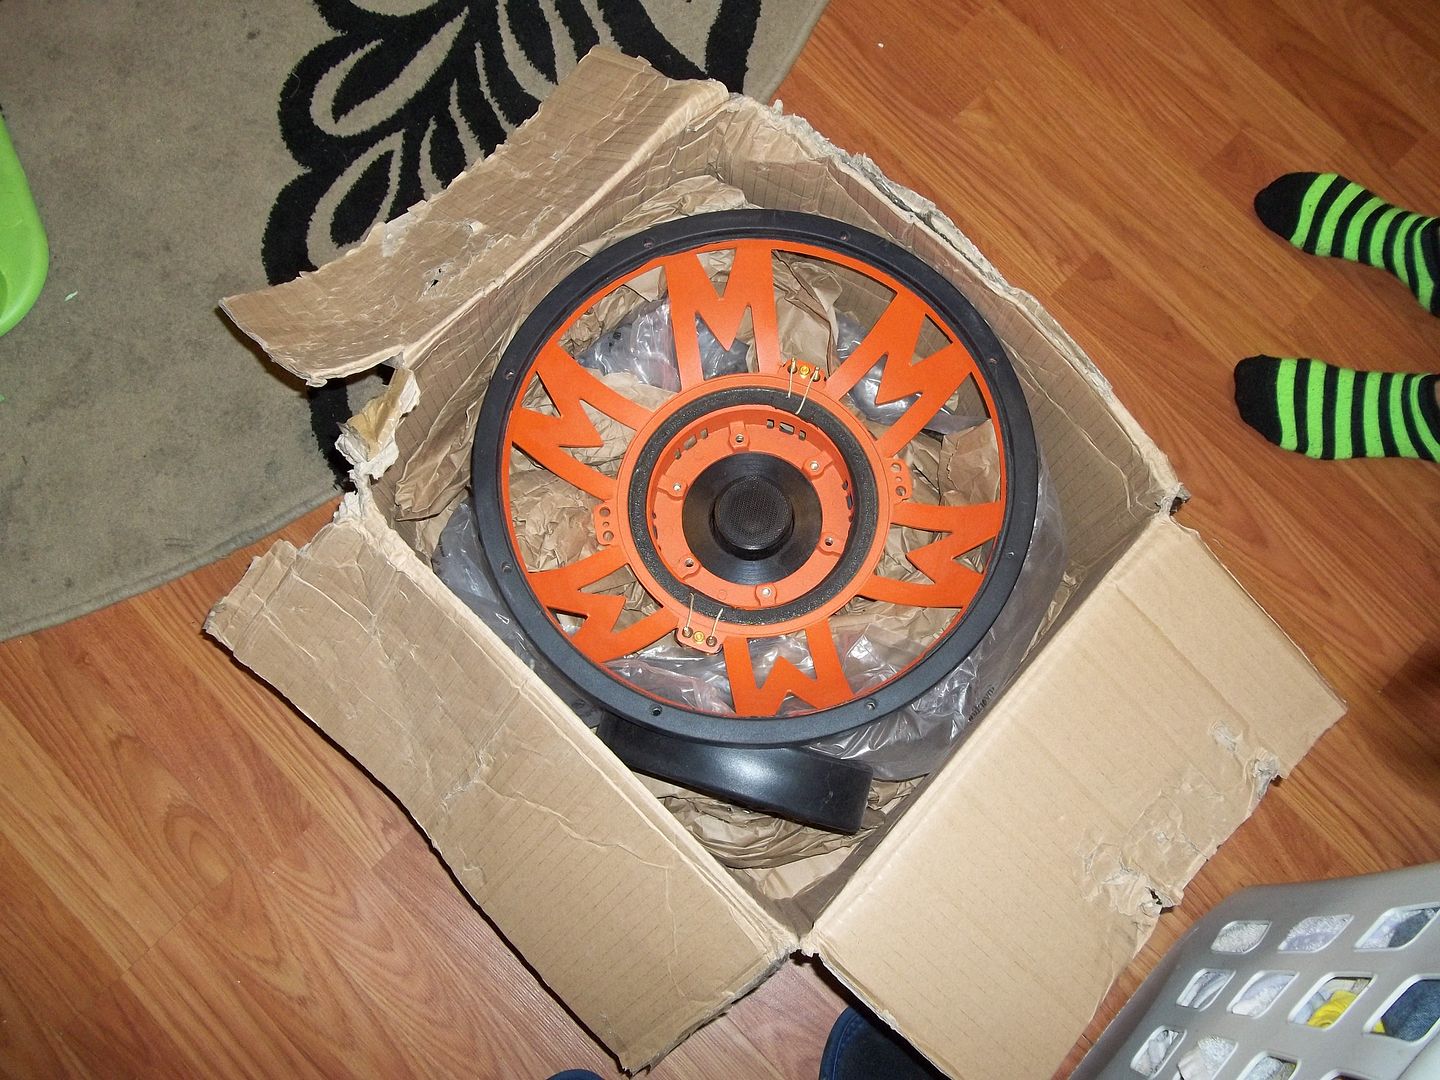
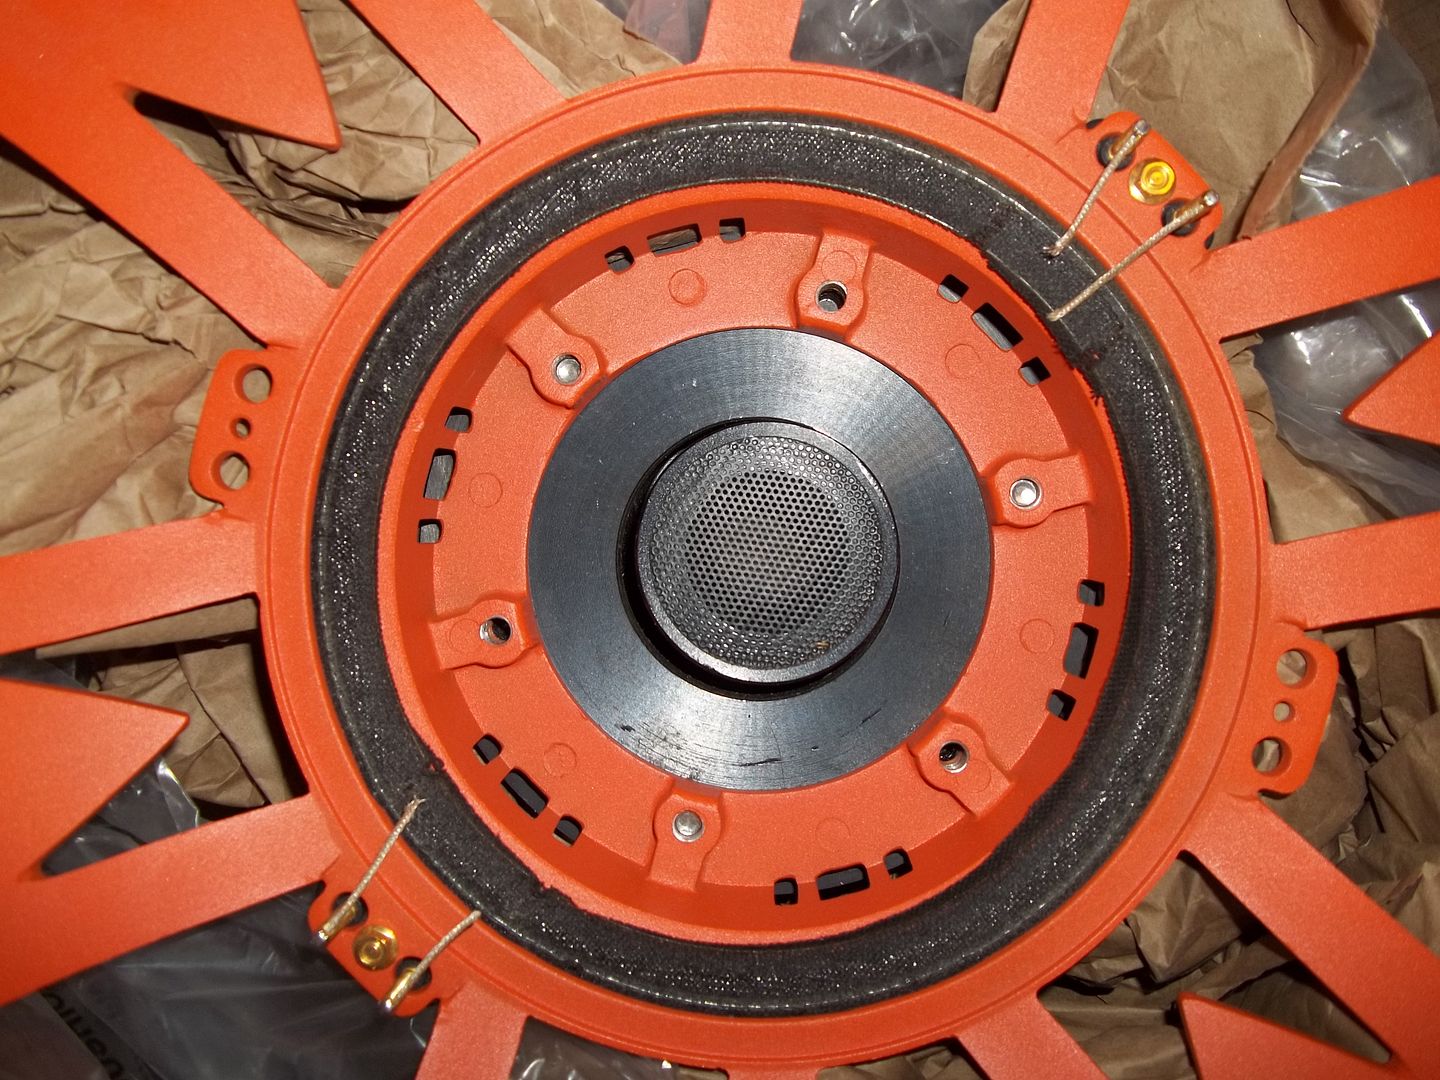
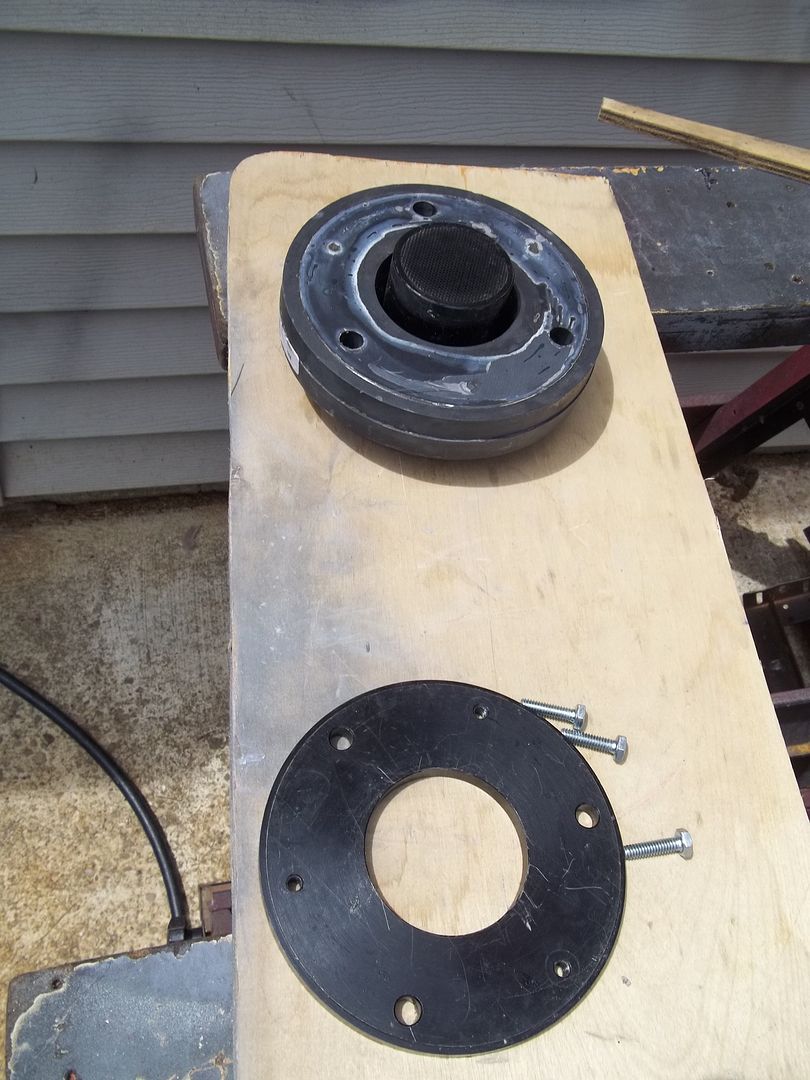
So in order to fix it, first Ihad to pull the bottom plate. Here is the method I came up with to do it, w/o hurting the ferrite.
I start with a putty knife, and 2 butter knifes. First I gently tap the putty knife in between the plate and magnet. Then, I gently place each butter knife on each side.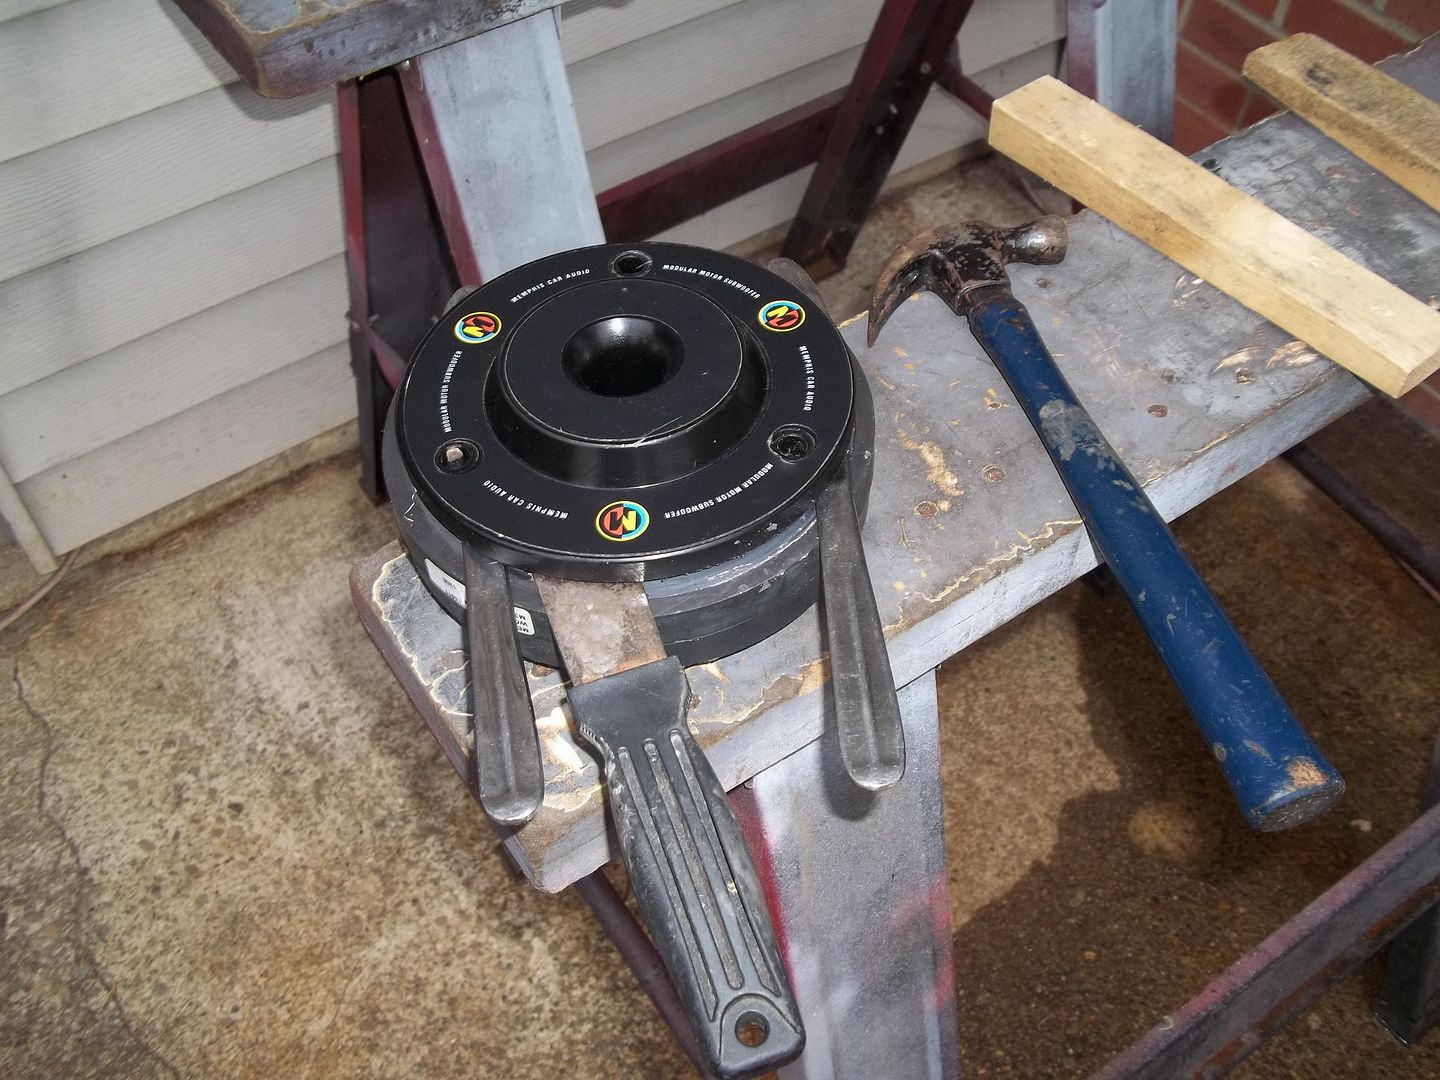
Then I remove the putty knife, but leave the butter knives.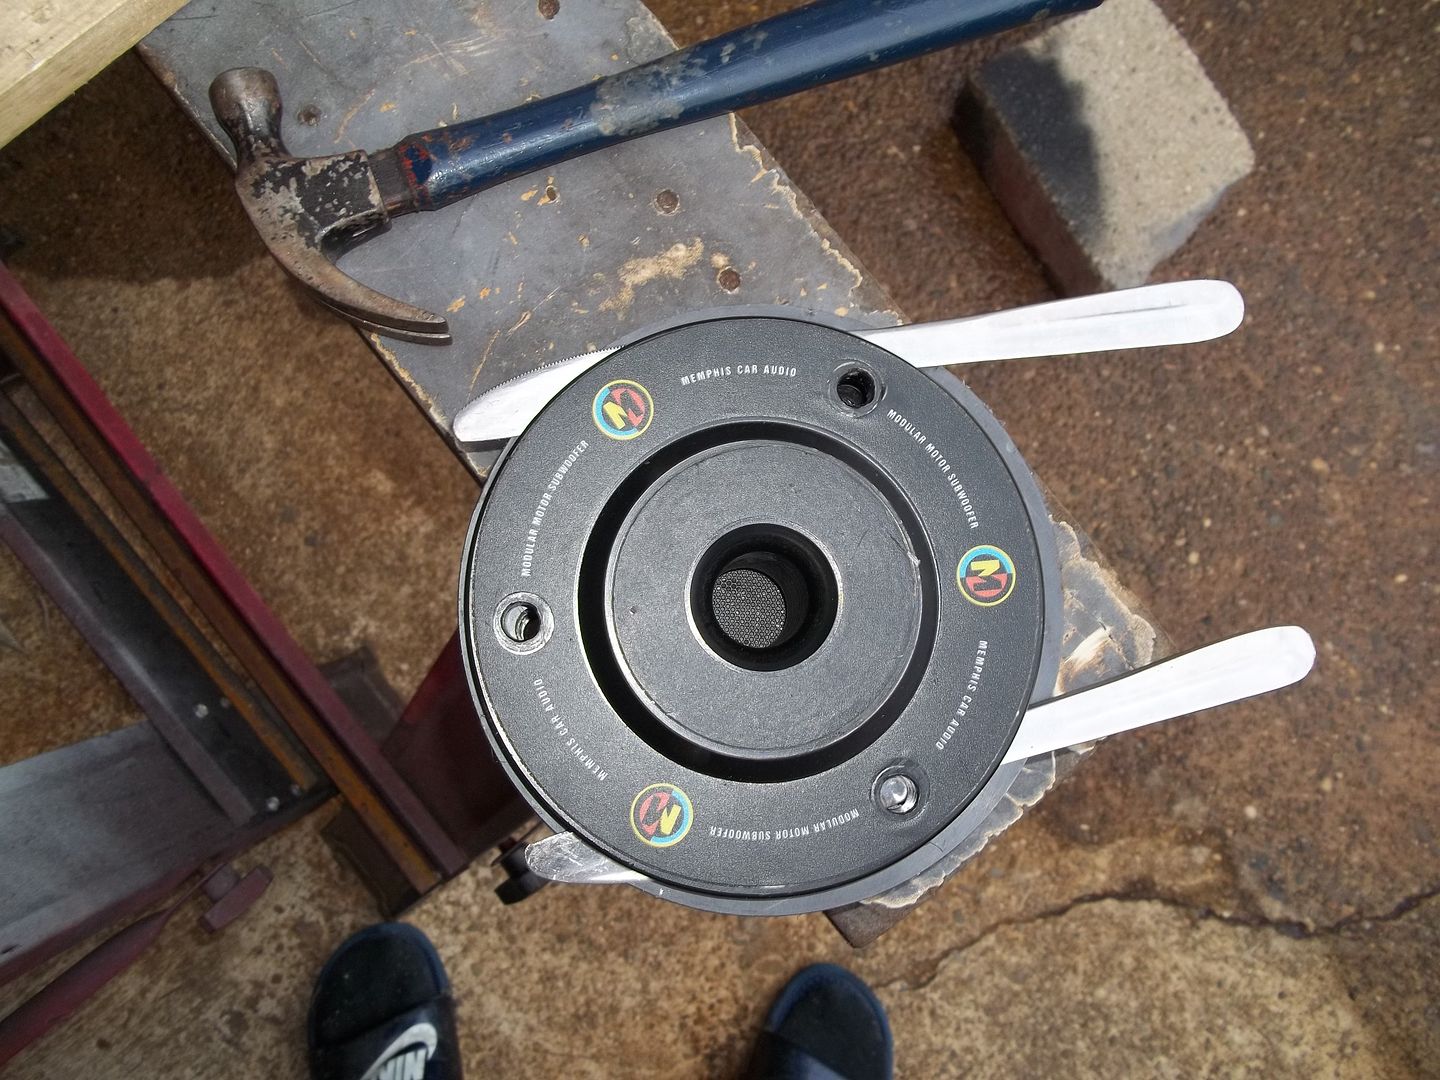
Then, I gently tap a flat head screw driver on each butter knife, between it and the plate, so the knife keeps the magnet safe.
Once they are both in, you just pry up enough to get a piece of wood in one side.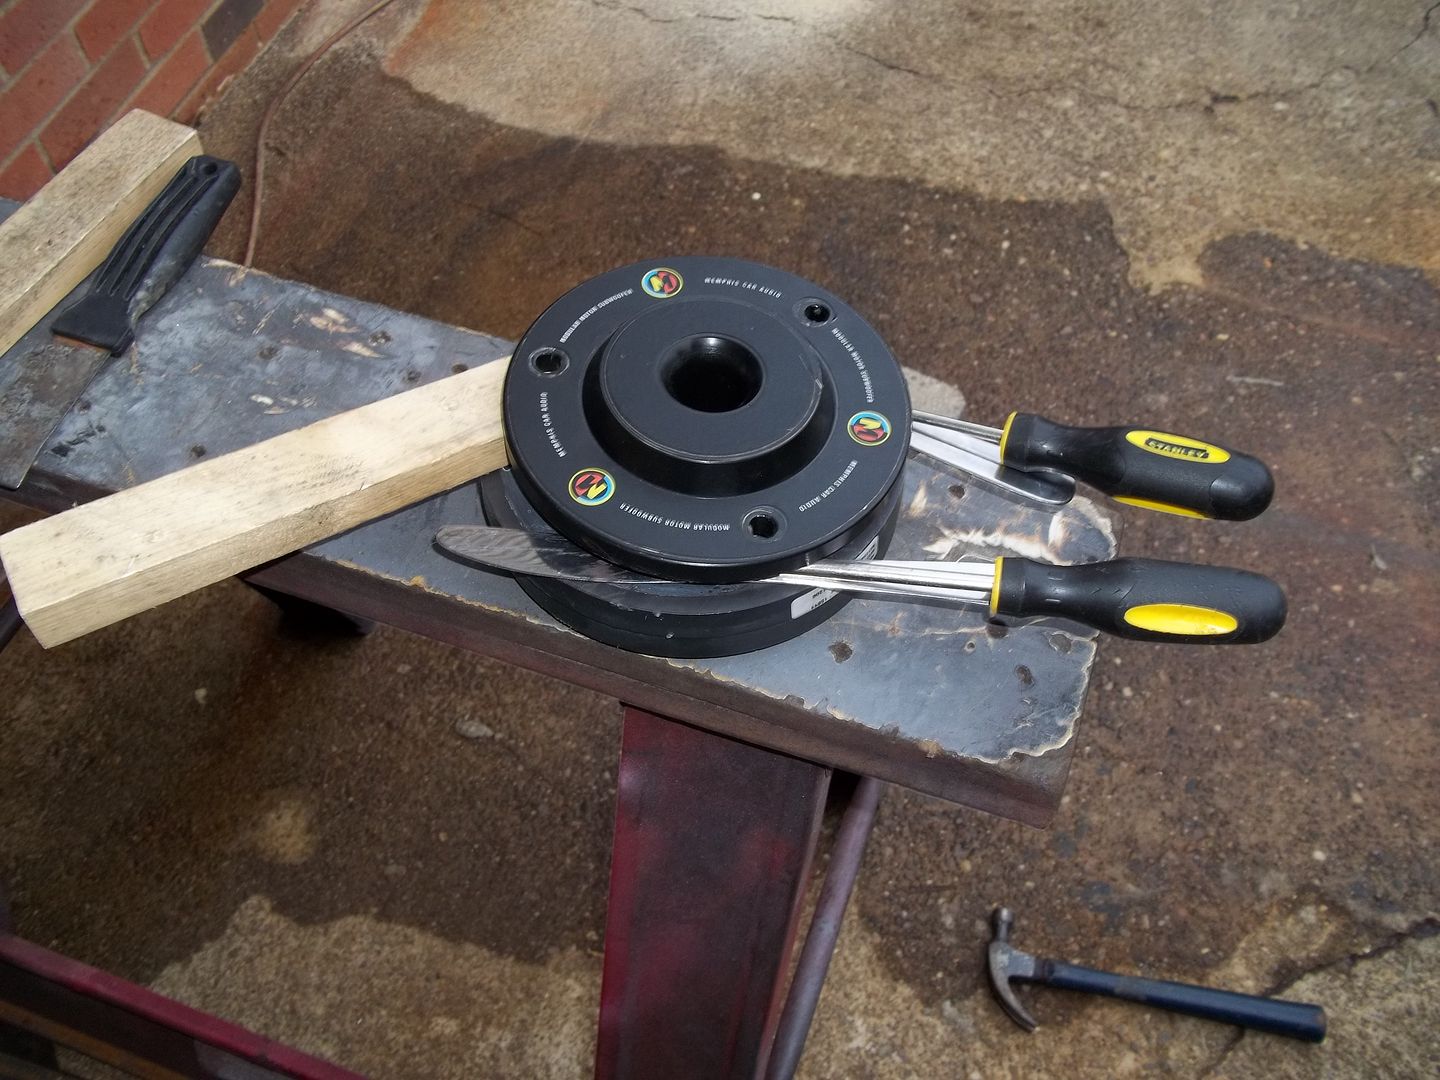
Then you just repeat the process so you have two pieces of wood now in between the magnet and bottom plate.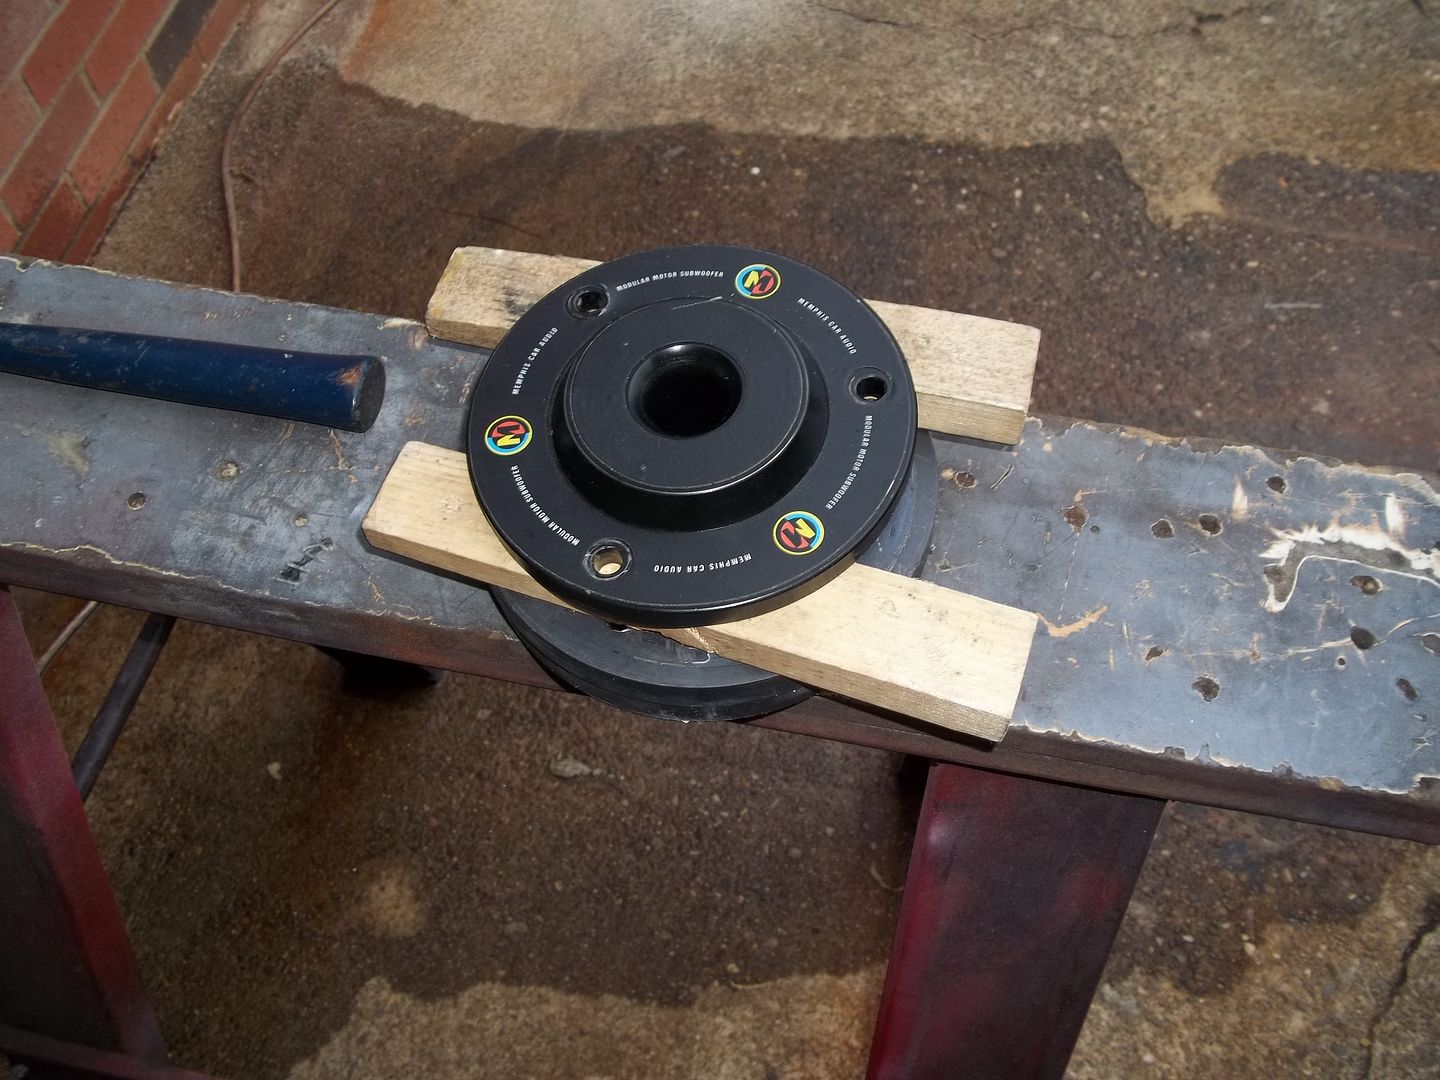
At that point, separating them is easy.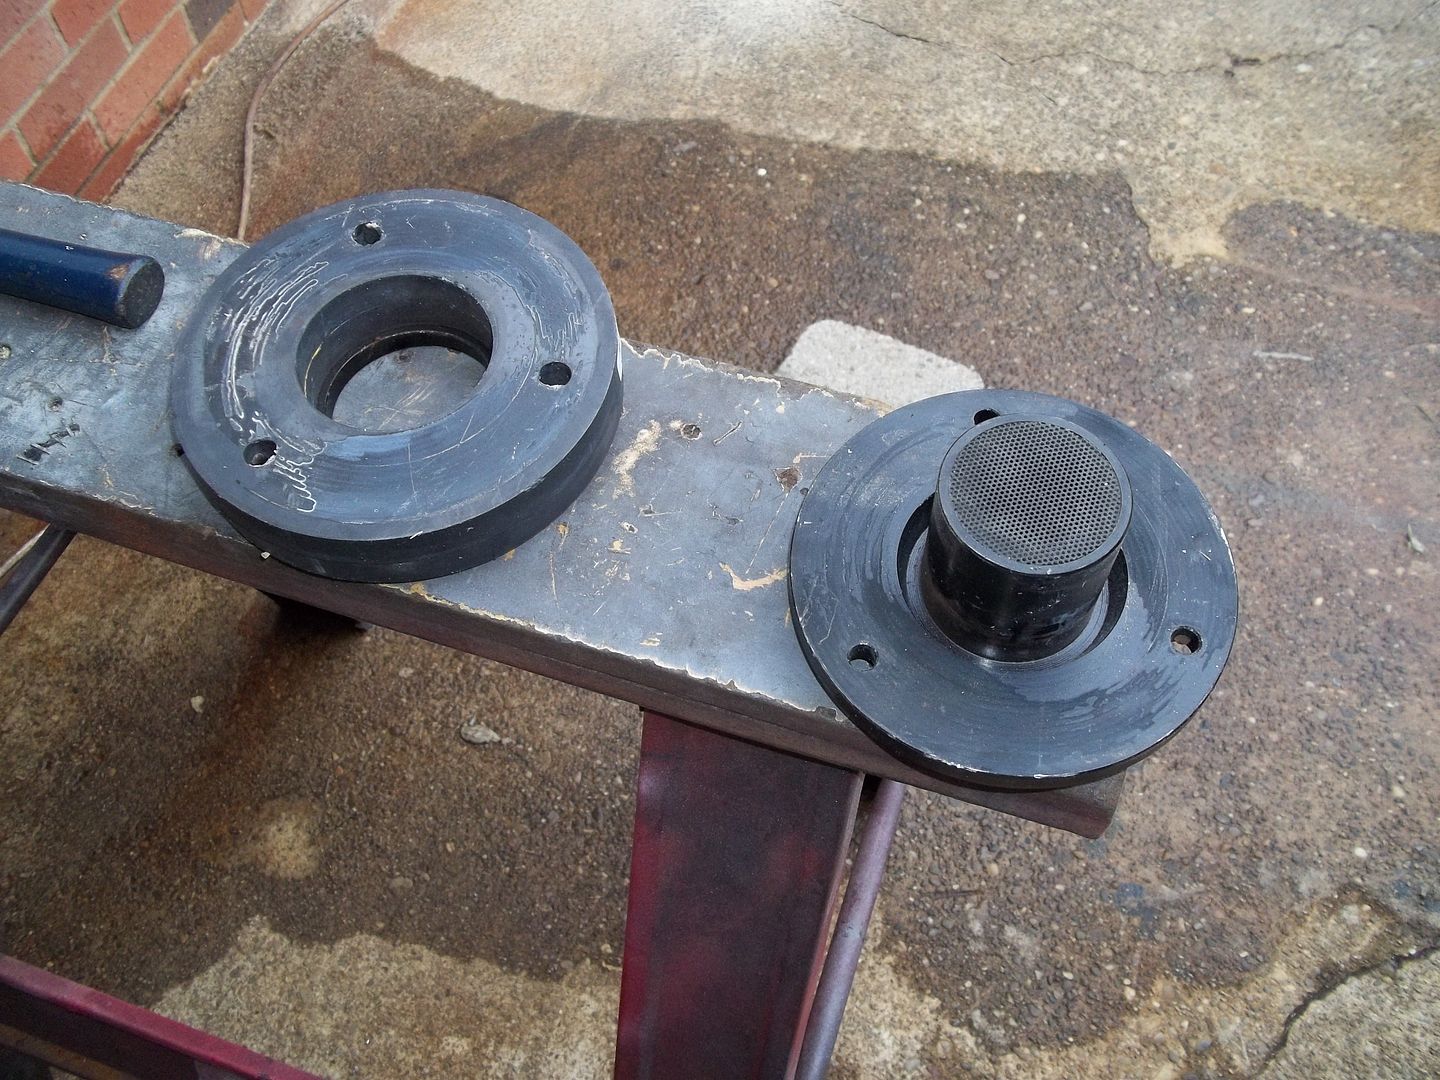
Then, after cleaning the old glue, and making shims, it's time to put them back together.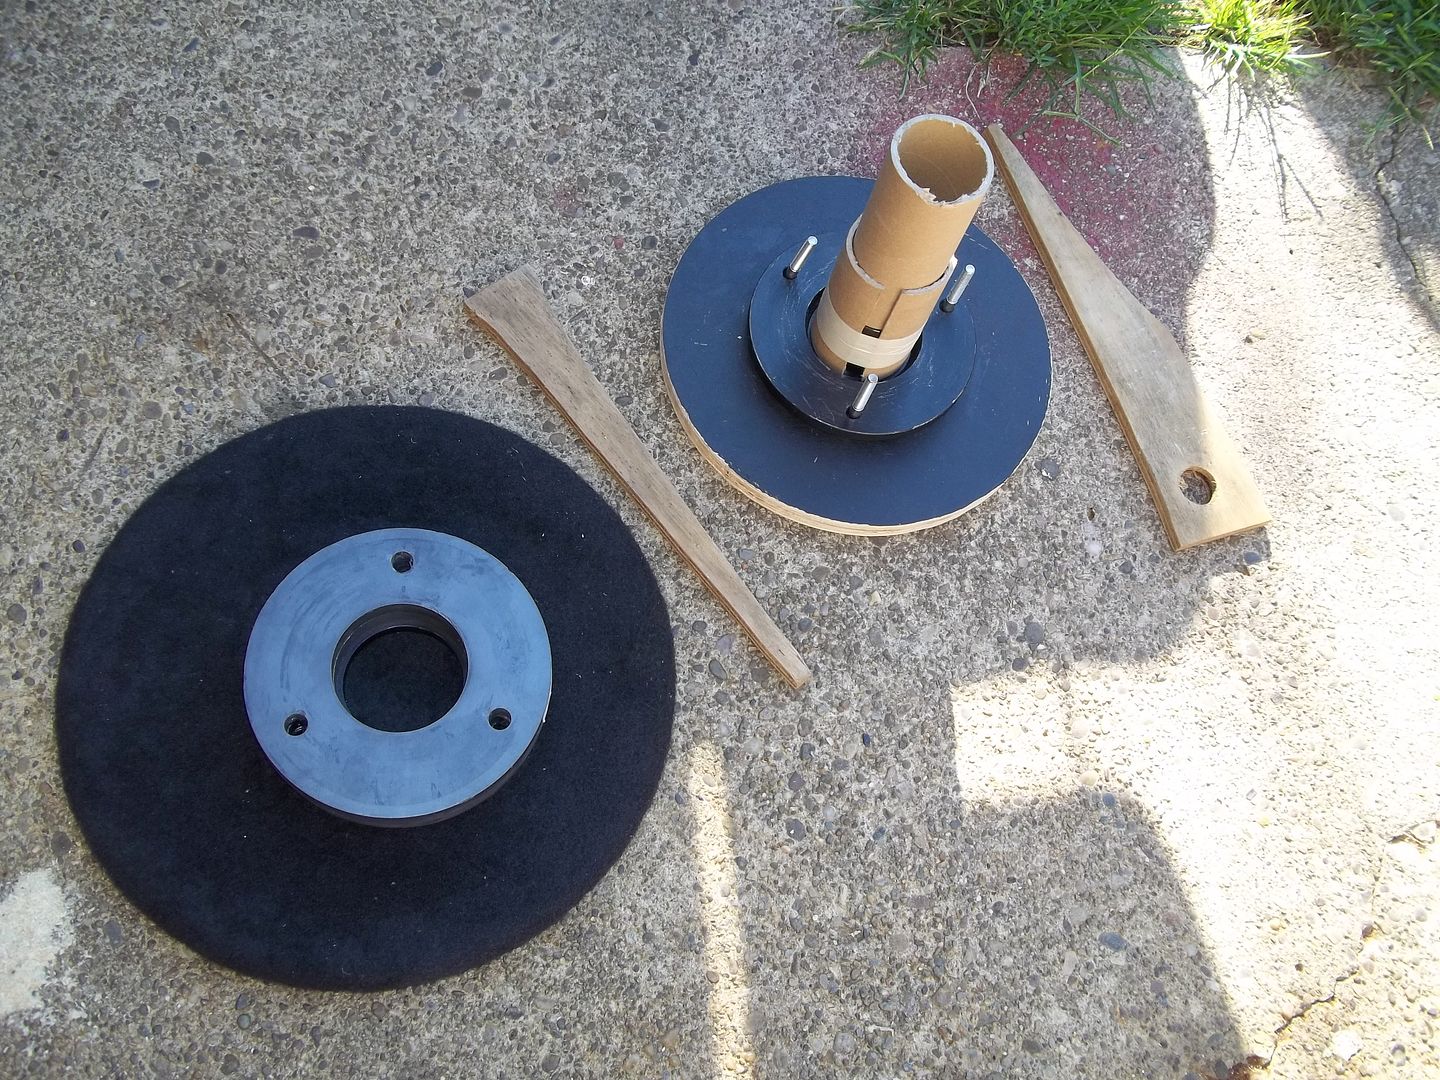
Fixed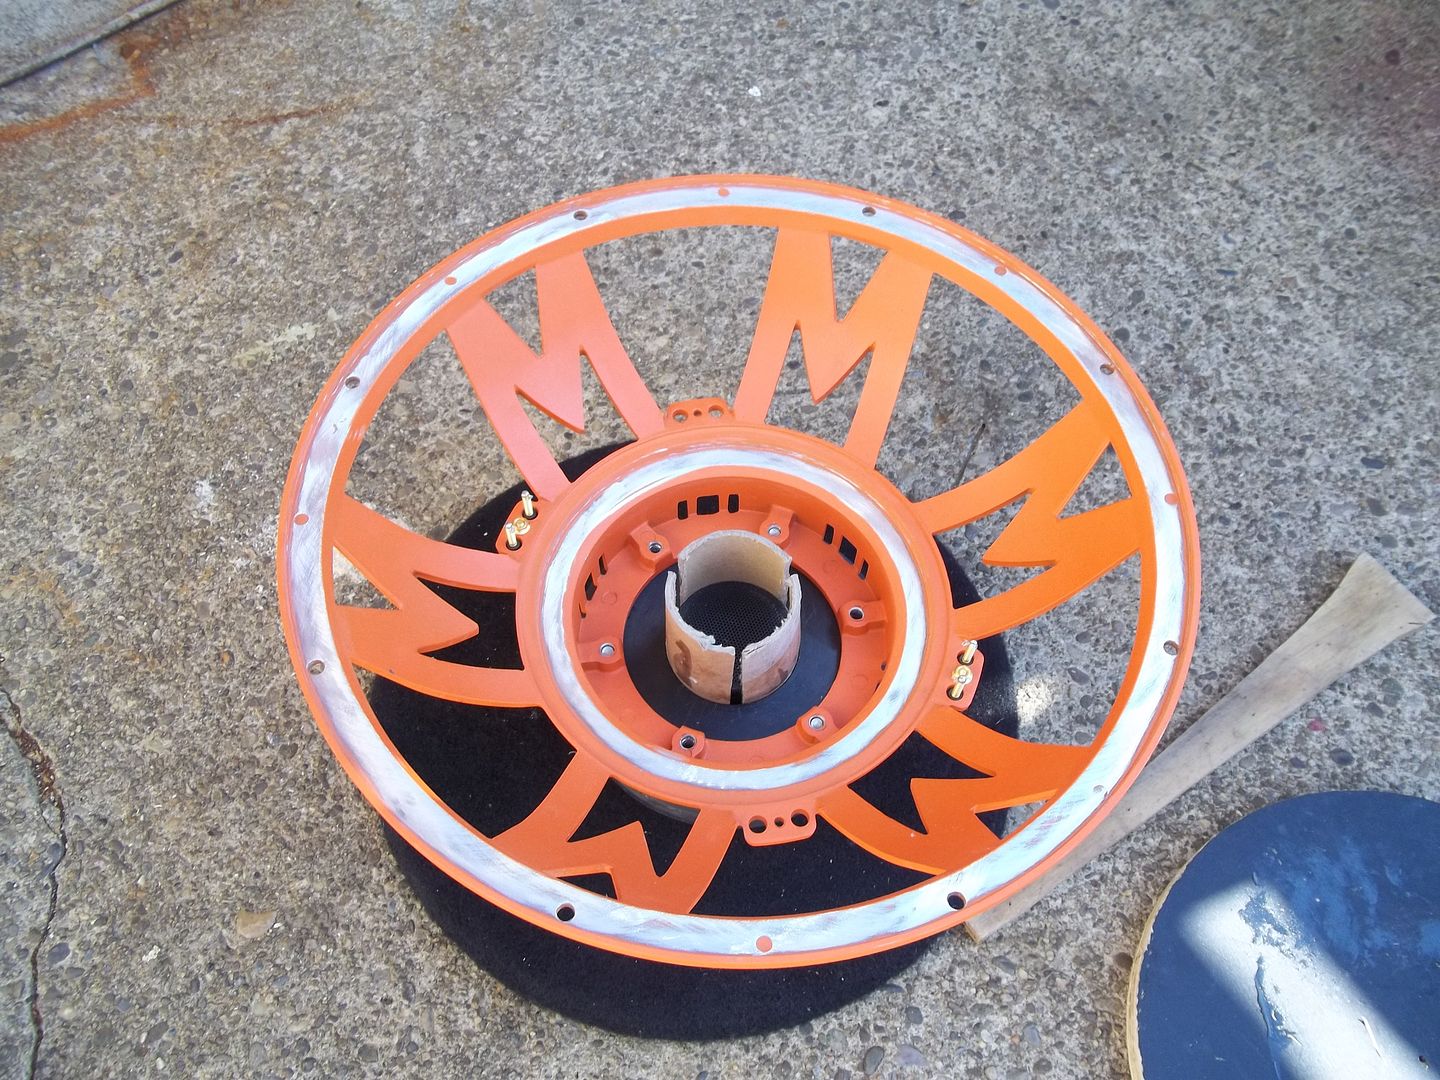
More on the way...0 -
Very nice!!! What type of paint did you use on the top and bottom plate? And did you paint the basket yourself?
And I'm guessing you got those spiders from ultra_audio on ebay (he has spiders with the exact style lead setup as yours, which is what I also used on my build). If so, I have asked him and he confirmed they are rated as medium/hard stiffness. You can hit up Zeuslicious on car audio classifieds or caraudio.com and he can sell you soft 10" spiders to help bring that FS down for the next build.
Cool deal, thank you! I appreciate that. Yeah I get all my parts from Jorge or David @PSi. But hell yeah, I'm always down for finding more quality parts hook-ups! Thanks again!
Oh and yes sir, I did all the painting. The top/ bottom plate I used "Black Night Metallic" from Rustoleum. and the frame is "Cherry Red" American Accents, both with the American Accents semi-gloss clear coat. The frame was color sanded twice, in between coats.
I am very pleased with the finish on all of the parts to this sub. I took my time, and it paid off...
0 -
So does anyone want to take a look at the new numbers, and try and help me figure out what I'm doing wrong?
I'm definitely not doing something right.0 -
can we get a video of this beast in action?
Yes sir, as soon as I build a box for it, and upgrade my Expo's electric, I will have lots of vids in action.
Till then, the best I can do is maybe a free-air/ break-in video sometime this week.
FS should drop after break in.
You are right, it should. I sure hope so.
I'm about to free-air soon, see if that helps.
Plus I need to figure out what I'm doing wrong with this program...
0 -
It's always best to physically weigh the soft parts or "half mass". Which is
Cone with half of the edge cut off
Half of the spider and leads (cut half way between OD and coil OD
Dustcap
All glue assembling the parts (cap to body (cone), body to coil, spider to coil)
Just a guesstimate from experience:
Coil= 150grams
Body and edge (cone & surround)= 100grams
Spiders and leads (4spiders total)= 50grams
Cap=15 grams
Glue=40 grams
So Mmd should be closer to 350-375 grams. With the air load the Mms should be in the 375-400 neighborhood.
I'd remeasure the piston area, retest and see what happens.
Thanks man. I appreciate the help.
I will do exactly that as soon as I get the DATS, should be Saturday. The one I used was borrowed/ returned.
But I ordered one yesterday, so hopefully by Sat. I'll have it. Thanks again!
0
One off Solo X 15 - D1.4ohm 8 layer fw - Absolute BEAST!
in For Sale/Wanted
Posted
SOLD