Jump to content
Sign in to follow this  
Purplehaze

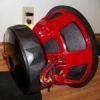
15" Memphis M3 Subwoofer Build Log

Recommended Posts

I bought 2 - 15" Memphis M3's recently, but at different times from different people.  This was the first one I bought, I have yet to start on the second one.  This one was sold the day after I finished it...

Anyway, when I got it, the bottom plate was shifted. (almost every motor I get seems to be shifted)

100_5474.jpg

100_5475.jpg

100_5476.jpg

So in order to fix it, first Ihad to pull the bottom plate.  Here is the method I came up with to do it, w/o hurting the ferrite.
I start with a putty knife, and 2 butter knifes.  First I gently tap the putty knife in between the plate and magnet.  Then, I gently place each butter knife on each side.

100_5638.jpg

Then I remove the putty knife, but leave the butter knives. 

100_5640.jpg

Then, I gently tap a flat head screw driver on each butter knife, between it and the plate, so the knife keeps the magnet safe. 

100_5643.jpg

Once they are both in, you just pry up enough to get a piece of wood in one side.

100_5641.jpg

Then you just repeat the process so you have two pieces of wood now in between the magnet and bottom plate.

100_5644.jpg

At that point, separating them is easy.

100_5646.jpg

Then, after cleaning the old glue, and making shims, it's time to put them back together.

100_5776.jpg

Fixed

100_5779.jpg

100_5781.jpg

More on the way...

Share this post


Link to post
Share on other sites

But then, I got to looking, and thinking.  The top plate seemed to be next to shift.  So, I beat it to the punch, and pulled it, and re-set it, with new glue.  (It is much easier to pull, just use long screws)

100_5840.jpg

And after that, she was finally ready for some touch-up paint, and assembly.

100_5894.jpg

Very tight gap means lots of motor force...

100_5896.jpg


100_5941.jpg

I painted the cone, to make it different than other M3's.  Next time, I will use a poly cone if I'm going to add color, this was not easy, and didn't really turn out exactly how I wanted.  But it wasn't bad...

100_5942.jpg

100_5944.jpg

Some glue on all the bolts

100_5950.jpg

And now final assembly.  Spiders get ca glue, surround gets rubberized glue. 

100_5952.jpg

100_5956.jpg

Here it is finished.

100_5990.jpg

100_5992.jpg

100_5996.jpg

And man, I've got to say, this thing was freakin loud!   And sounded good too!   But I was really surprised at how loud it was, and only on 600 watts at that.  But one of my neighbors was also impressed.   So much, that he bought it that day!   I didn't even get the chance to pull ts numbers on it... 
Oh well, it was a fun build, and I learned a lot.  And I've got another one to do, as soon as my next load of parts makes it in.  

So what do you guys think about me maybe doing the next one in blue, instead of orange? 
Would that be a sin?   Or a cool idea?   Lets discuss!

Share this post


Link to post
Share on other sites

Create an account or sign in to comment

You need to be a member in order to leave a comment

Create an account

Sign up for a new account in our community. It's easy!

Register a new account

Sign in

Already have an account? Sign in here.

Sign In Now
Sign in to follow this  

×