Jump to content
hdrox88

2005 Silverado crew cab

Recommended Posts

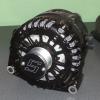
Replaced plugs and wires today. Also got the Singer in place. 

IMG_20160319_171356397%20469747_zpsrdzsc

Share this post


Link to post
Share on other sites

Factory alternator and battery location will continue to run the factory systems for the truck. The Singer alternator is wired up and charging the battery in the secondary under hood location and will charge additional batteries and power the amps.

Cold start

IMG_20160323_133504767%20612344_zpss2jzz

Share this post


Link to post
Share on other sites

Nice!

Share this post


Link to post
Share on other sites

Made some progress today. Rear seats are out. Built a false floor and fitted the batteries.

IMG_20160331_121215790%20659177_zpsvir2m

IMG_20160331_124243388%20658890_zpsue0pj

IMG_20160331_155411819%20658703_zpscdebk

IMG_20160331_172616000%20658515_zpsekarg

Edited by hdrox88

Share this post


Link to post
Share on other sites

I like that false floor with the batteries.  It gives me ideas, as I need to hide mine.:thanx:

No more back seats finally ! :peepwall:


Share this post


Link to post
Share on other sites

Finally got to work on the box. 8ft^3 @ 28.5hz with 130in^2 of port. I went a little lower with tuning as the response of the xcon in the crew cab is playing much higher than it did in the tahoe. I'm hoping to counter that and play down to the mid to low 20s well.

IMG_20160429_144219748%20134634_zpsq49rm

IMG_20160429_155613137%20134629_zpshpq7q

IMG_20160429_191129418%20134621_zpszlldc

Share this post


Link to post
Share on other sites

It's taking shape, I just need to figure out how I'm going to finish it.

IMG_20160430_155512449%20142481_zpstqe2z

I wrapped the false floor today. Not an exact match to the factory carpet, but it looks tons better than the bare wood.

IMG_20160430_161238323%20142476_zpslmupa

IMG_20160430_170713785%20142460_zps5mh0v

I regret this tweeter placement. It looked good in my head, after actually doing it I'm less than pleased.

IMG_20160414_163400992%20121769_zpspg8sh

Share this post


Link to post
Share on other sites

Well, curiosity got the better of me and I loaded up the xcons in the box to see how it sounded before I spend the time finishing the box. My roof is flexing bad, making terrible noises and killing mid to high 20hz notes. 20-21hz is fun, then it dies off til about 28hz and plays well up into the 60s. Anyone have any experience with the roof in these crew cab trucks? No sun roof either.

Share this post


Link to post
Share on other sites

Coming along nicely!  Those PPI's are tiny.

Share this post


Link to post
Share on other sites

Sure the roof is killing them?  It should at lower levels too then which you can counteract with your body.  Like anything that flexes it needs a heat converter and a stiffener if it is real bad.

Share this post


Link to post
Share on other sites

At lower volume it plays fairly flat. As I turn it up, there is a point where the roof starts flexing/resonating making it's own music and that is when the frequencies in the 20s don't get any louder while the rest of the sub bass frequencies will continue to increase as I turn the volume up. My back wall/window gets going as well when this happens. Hell, the panel of the bed next to the back wall of the cab flexes now too. Who buys multiple large subwoofers anyway?!

Share this post


Link to post
Share on other sites

Have you tried just playing single frequencies to see the same effect?  It should help you "localize" the problem.  Quotes are because it won't be so local...

Share this post


Link to post
Share on other sites

No, I haven't tried that. Will have to see what I find. Anything in particular to pay attention to when doing so? Will probably start by placing towels and heavy weight on the roof to reduce it moving and see if that changes anything.

Share this post


Link to post
Share on other sites


Share this post


Link to post
Share on other sites

One of the requirements, or must-haves, with a loud ground pounder is body bracing. Personally,  I'd sand the paint off the exterior roof then weld 1/2" angle iron across the inside of the roof. It wont be easy, you'll need to heat the angle iron with a torch and form it to the contour of the roof. Then you will have to repaint the roof. You came this far...

Share this post


Link to post
Share on other sites

I kinda figured welding in some bracing was in order. I just need to decide how far I want to go with this one. My Tahoe sounded excellent without much effort. This one is proving a little more difficult to get the response where I want it. Definitely loudest I've had so far though. Making me giggle every once in a while again.


If I pull the headliner and brace the roof, I might as well just wall it. Oh dear, what am I getting myself into?!

Edited by hdrox88

Share this post


Link to post
Share on other sites

I think 2 more xcons and a wall is in order :)

Share this post


Link to post
Share on other sites
On 5/8/2016 at 9:44 PM, hdrox88 said:

I kinda figured welding in some bracing was in order. I just need to decide how far I want to go with this one. My Tahoe sounded excellent without much effort. This one is proving a little more difficult to get the response where I want it. Definitely loudest I've had so far though. Making me giggle every once in a while again.


If I pull the headliner and brace the roof, I might as well just wall it. Oh dear, what am I getting myself into?!

Too bad you dont live near me, I'd love to help. That would satisfy my desire to do it to my own vehicle!

Share this post


Link to post
Share on other sites

I need that bc3500 crescendo amp you have. I can't seem to find one any where. What's up with that?

Share this post


Link to post
Share on other sites
On 5/12/2016 at 1:14 PM, frogcase2002 said:

I think 2 more xcons and a wall is in order :)

Don't temp me.


I decided on a finish for the box, failed miserably on the execution. It was supposed to be a dark grey hammered metal texture. I think it was too hot and it dried before it could separate to create the effect it was supposed to achieve. It came out a lighter grey and more of a gloss with a little orange peel to it. Oh well, at least it's not bare wood anymore.

IMG_20160515_154649257%20218286_zpsx1cof

Share this post


Link to post
Share on other sites

Looks pretty good to me but I'm not there in person. If it looks good from 10 foot away I call it good. My new car and build has a couple of flaws but from 10 feet away it looks perfect. It's hard to keep a daily driver perfect. I met my woman at a store one day in my work car and she was driving our show car and sure enough a guy in a huge full size suv backs right into the show car setting 3 feet from the hooptie work car and just drives off. I was so pissed I was like he could have totaled the work car and I wouldn't have cared but he nails the one that cost piles of money then speeds away. We watched the stores cameras but he had a plastic cover over his plate so you couldn't read it. Bastard he was.

Share this post


Link to post
Share on other sites

Looks like I forgot to upload these pics when I finished the box.

IMG_20160518_191323299%2044592_zpssqobkk

IMG_20160518_191425470%2042983_zpsc2ytye

Share this post


Link to post
Share on other sites

Yea if you are not using the back seats anyway you mite as well wall it :)

Share this post


Link to post
Share on other sites

If only I had the funds for it... Looks like it's time to start saving!

Share this post


Link to post
Share on other sites

Create an account or sign in to comment

You need to be a member in order to leave a comment

Create an account

Sign up for a new account in our community. It's easy!

Register a new account

Sign in

Already have an account? Sign in here.

Sign In Now

×