

Handcrafted Car Audio
-
Content Count
126 -
Joined
-
Last visited
-
Days Won
1
Posts posted by Handcrafted Car Audio
-
-
This system was built by a shop in California before the owner of the vehicle moved out here to Arizona. The goal of the build was all SQ and, while some of the fabrication was okay looking, alot of it simply did not match with the quality of the sound. Also, it was pretty difficult to get to all of the amplifiers or the bit one if you needed to.
So, the new goals for the new build were to dress up the trunk a little bit more so that it's style would be complimentary to the vehicle and to the sound systems. The door pods needed to be redone to accept a new size speaker. The tweeter pods in the a pillar needed to be completely rebuilt to allow for a much larger overall tweeter whose angle could be adjusted after the fact. The dash panel needed to be reworked because it was simply textured and painted black and everything was held together with hot glue! Needless to say, it was not something that could be removed many times before the MDF structure was ruined. Well, enough babble, here's the breakdown.
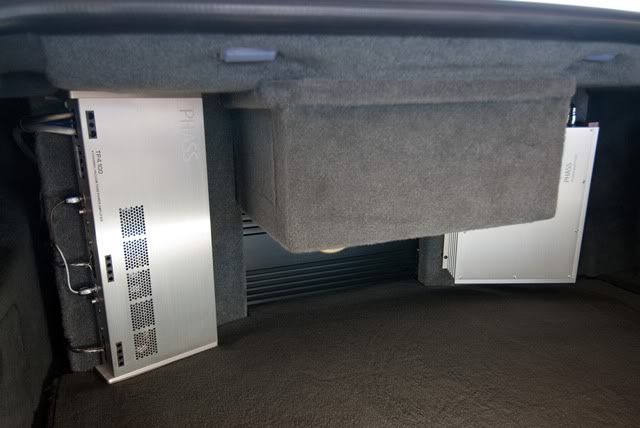
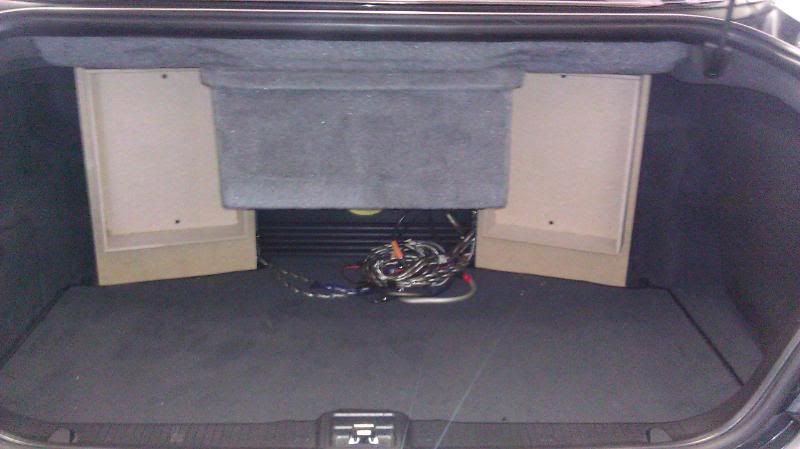
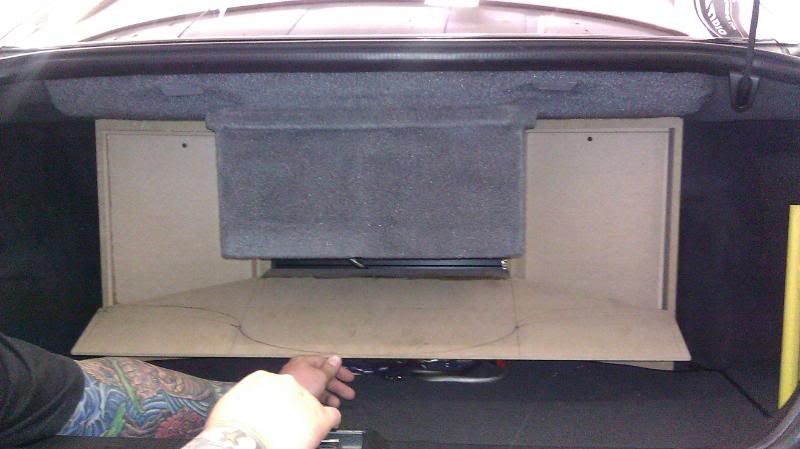
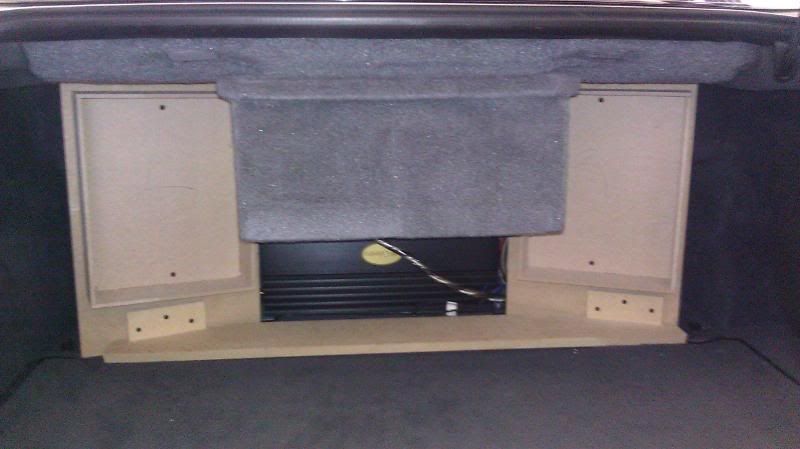
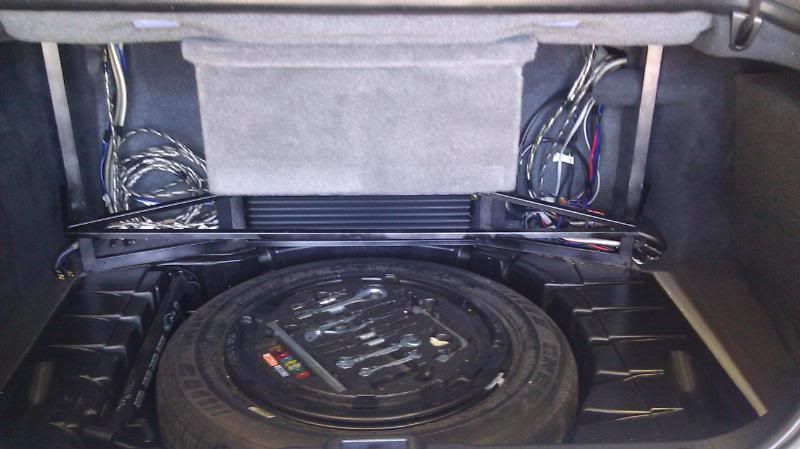
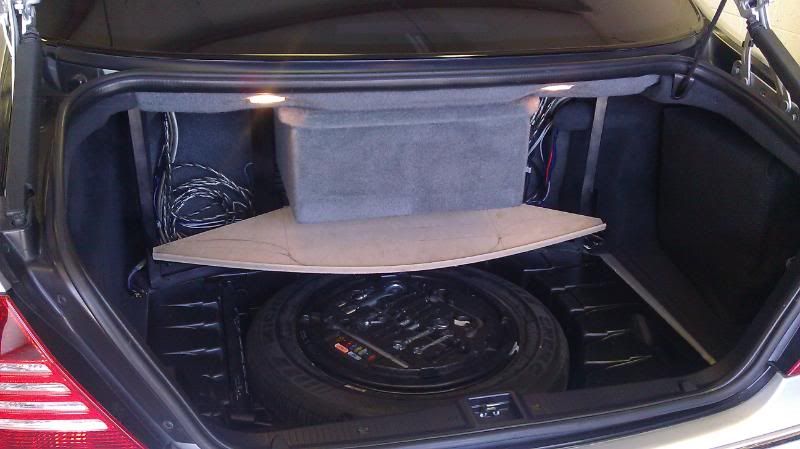
This is what it looked like before hand. It had a carpeted piece that covered it all up when he didn't want it to be shown. The sub enclosure hangs down in the middle. Behind the amps on the sides are the other amps and the Bit One. like I said, pain in the ass to get to.
Here, I started to mock up the new amp rack which would be welded out of steel. The MDF is placed up against the same mounting points that the existing system used.
This piece is the mock-up of where the Bit One will sit in the end.
I used this piece to ensure the location of each "amp" when I reassembled it outside the car.
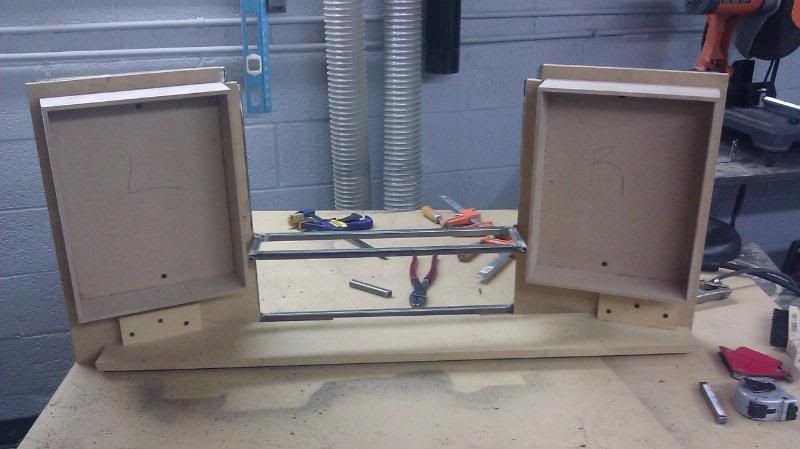
Kinda like that.
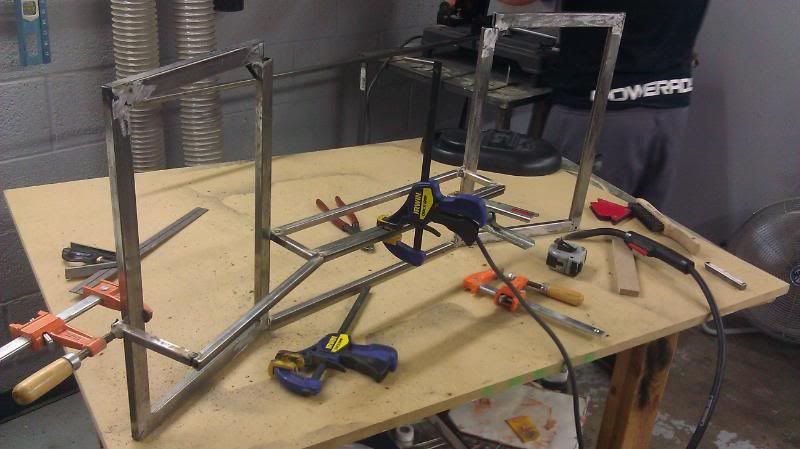
Here, I am adding the piece that will trim out the amp.
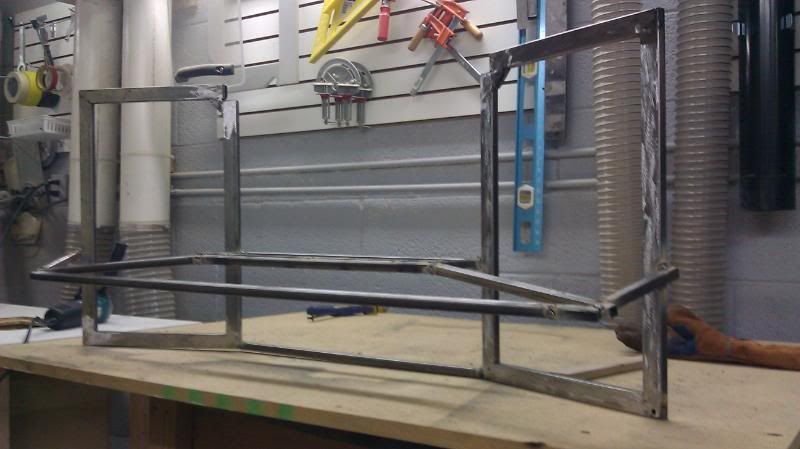
As you can see, I got the whole front trim piece done and then welded it to the frame. This piece is at an angle so that the Bit one can be seen easier once everything is assembled and to add some style.
Kind of a rough idea of what it will end up looking like.
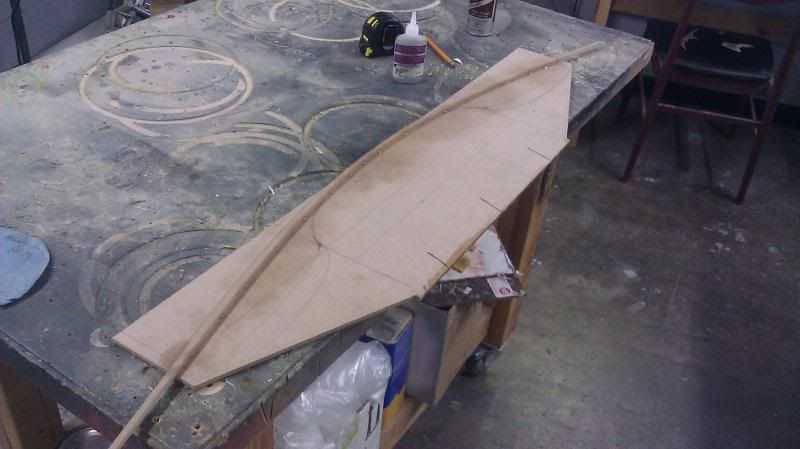
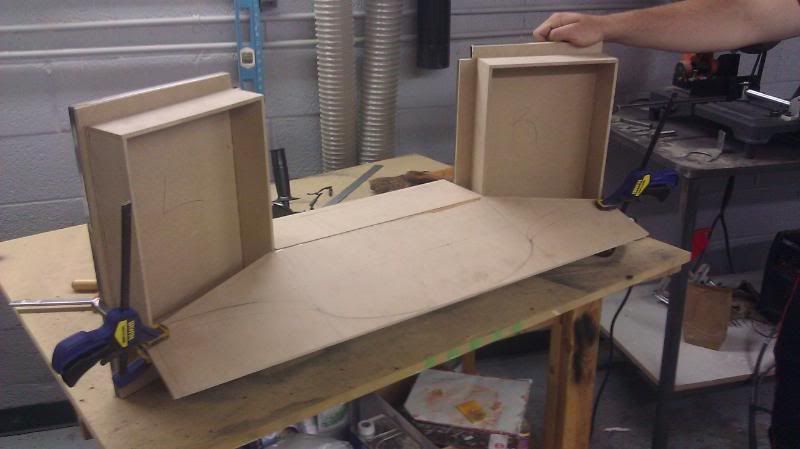
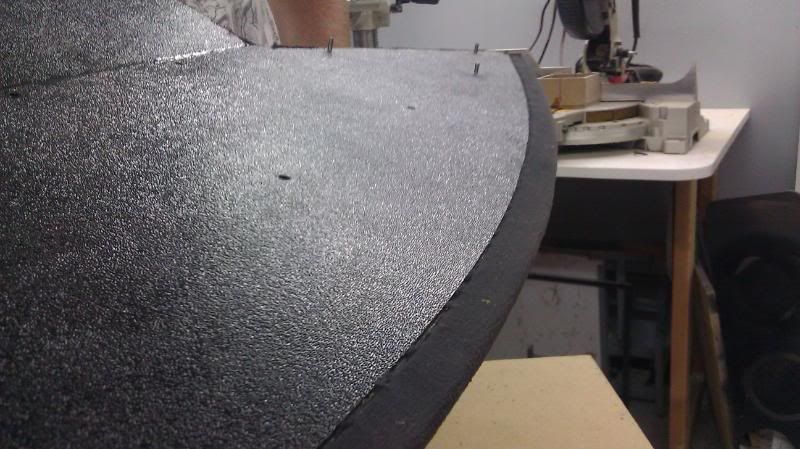
I wanted to mimic the shape of the trunk with this piece, so I used a piece of 1/4x1/4 mdf and glued it in place. This then became my piece to flush trim with and later, as a template.
Here's the rack being test fitted.
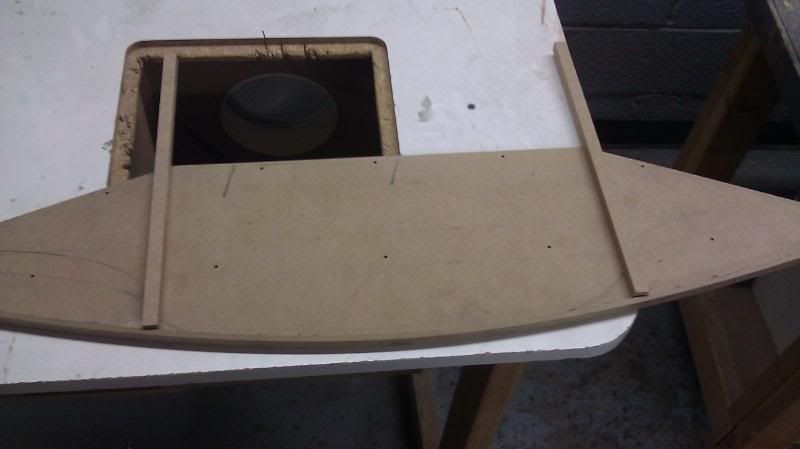
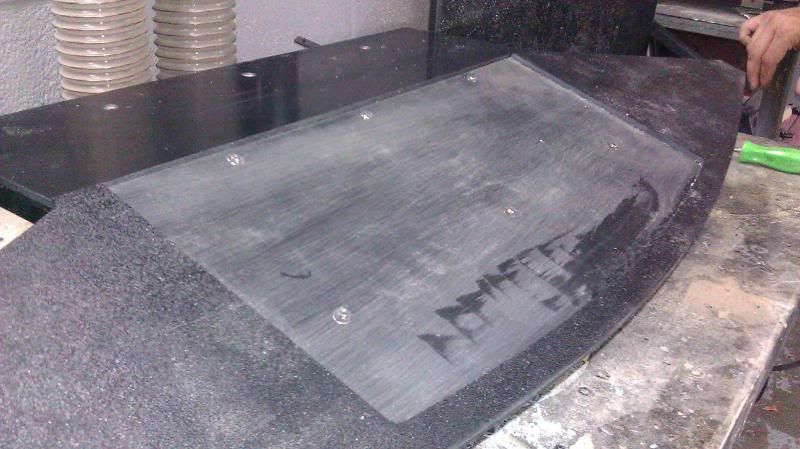
This is where I used that piece as a template to turn the shape into a two part piece. Now, I can wrap the majority of it in one material and have a press in insert from another material. You can also see where I tapped the steel for mounting points.
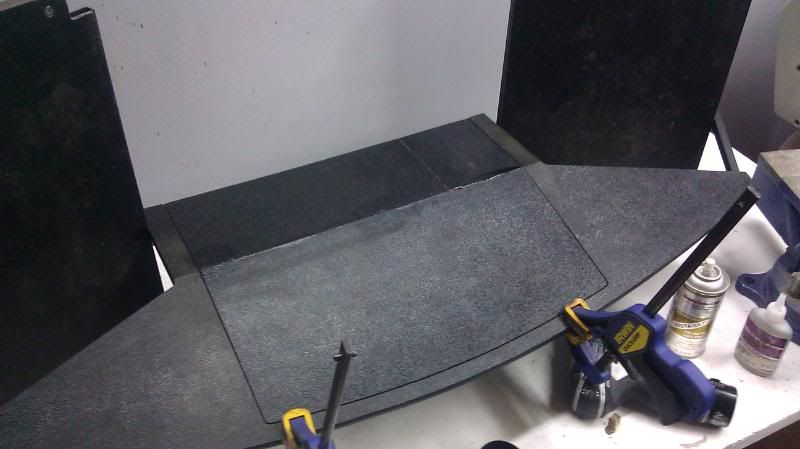
Here's the insert piece.
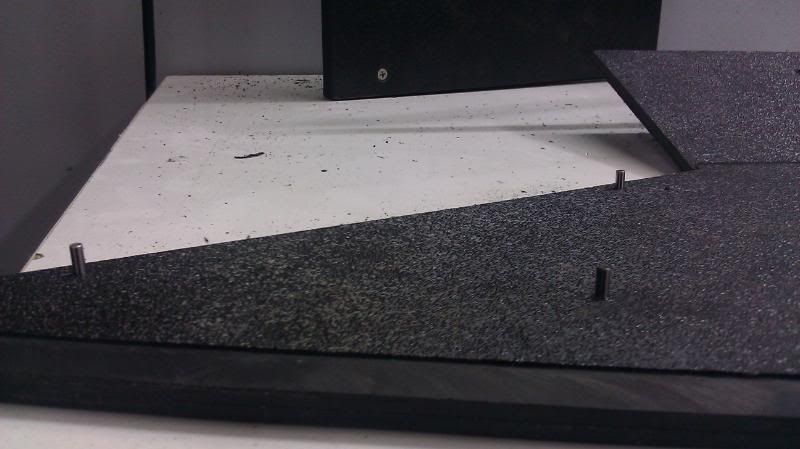
In the areas where we could not use screws, I used these 1/2" by 1/8" metal dowel rods which were glued into the bottom of the plastic panel and then fit into the 18" holes in the steel.
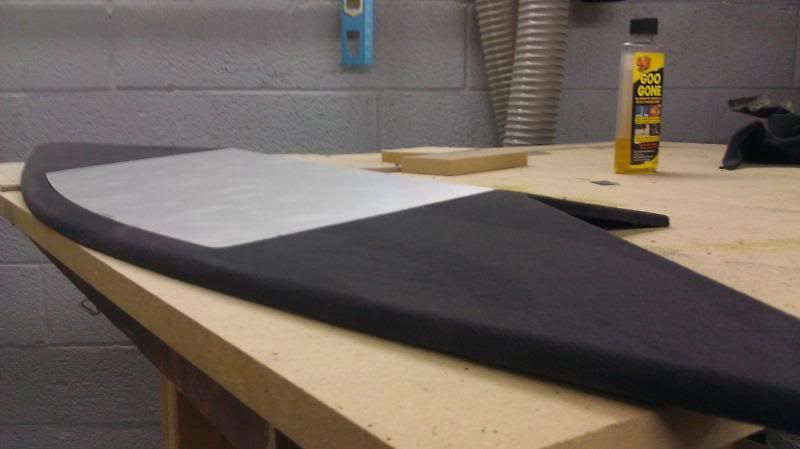
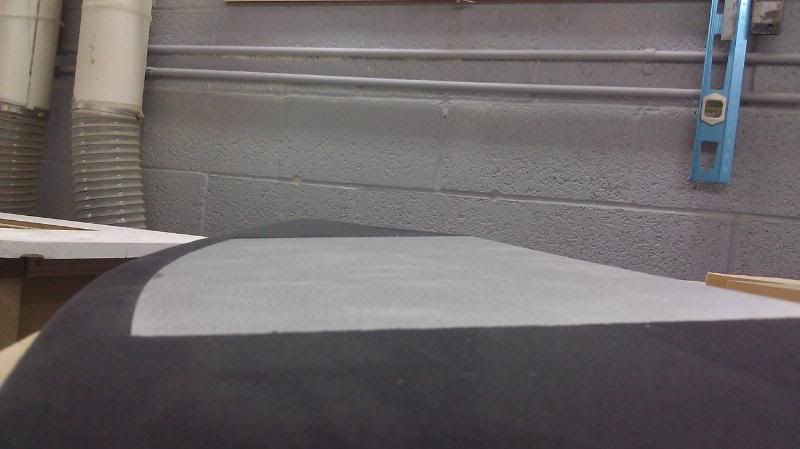
Here is the top piece all wrapped up. We used a headliner like material which will be used in other parts of the trunk. The aluminum is simply laminate.
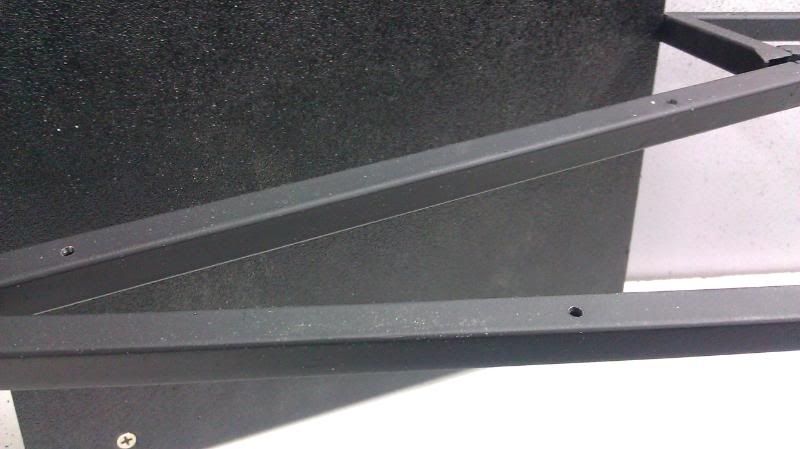
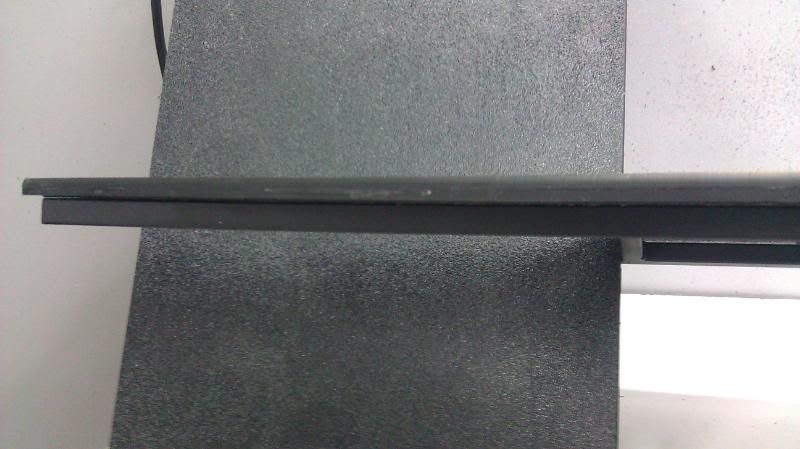
here you can see the nice edge left on the bottom because of the 1/16 x 1/2" rabbet I used.
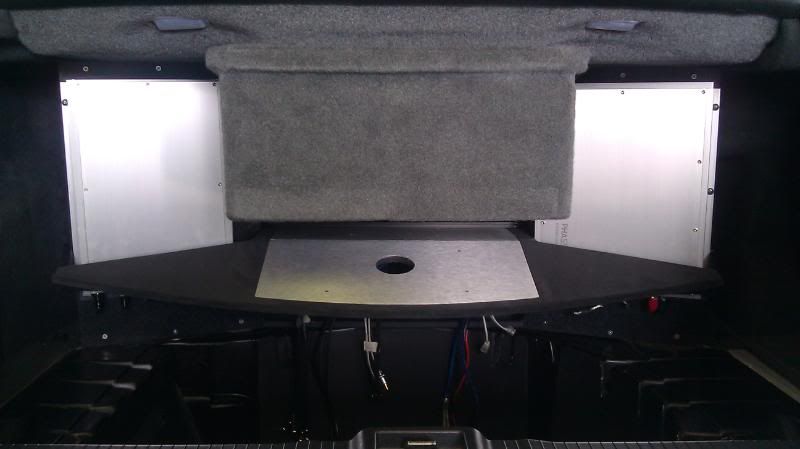

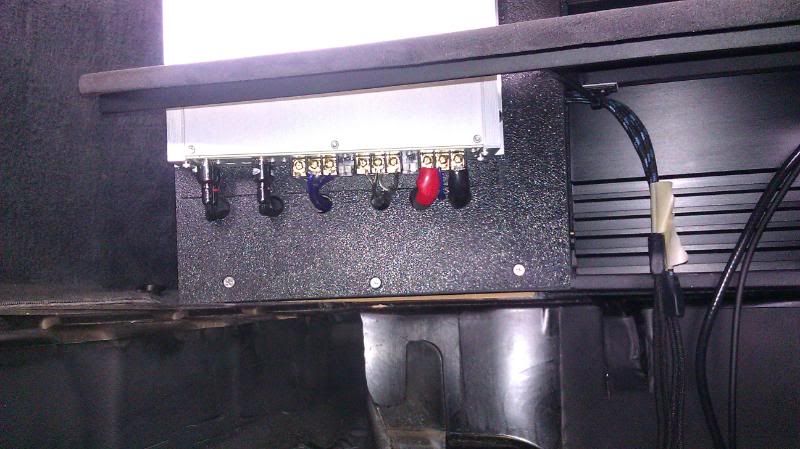
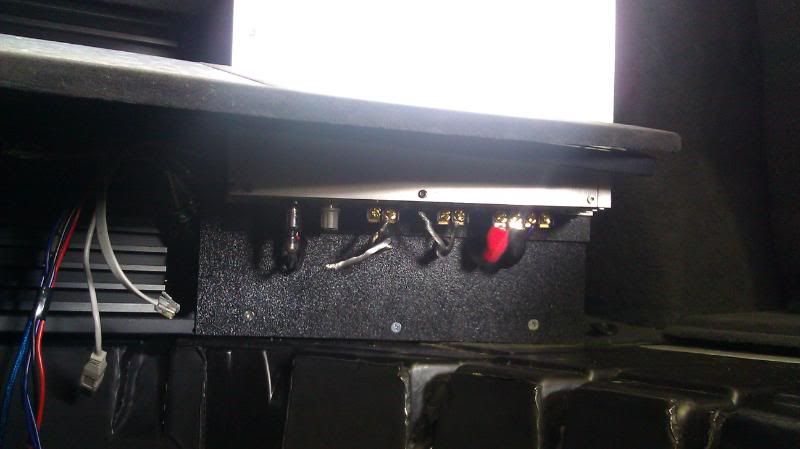

Here's some almost finished shots. Note how the wiring is hidden underneath the panel and everything seems to be kinda floating.
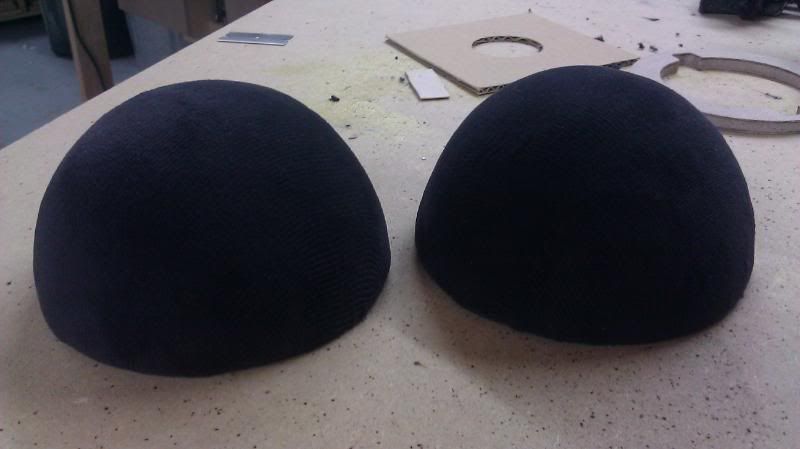
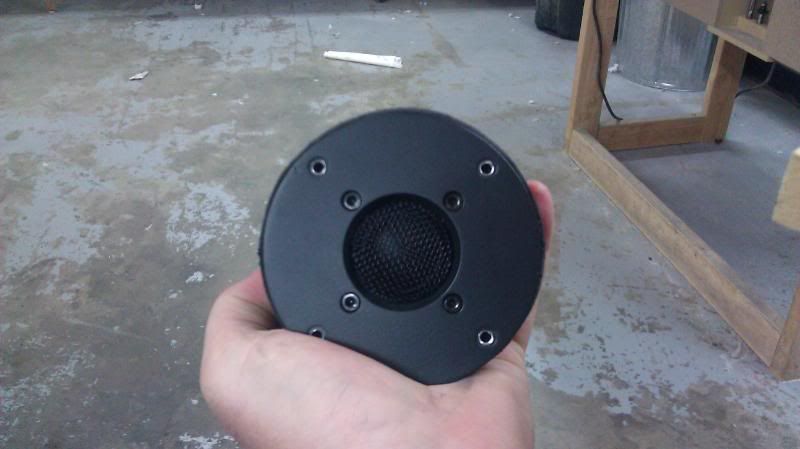
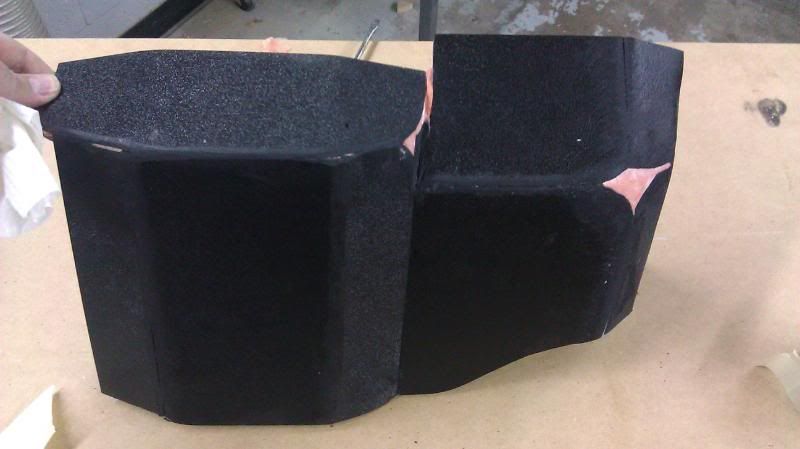
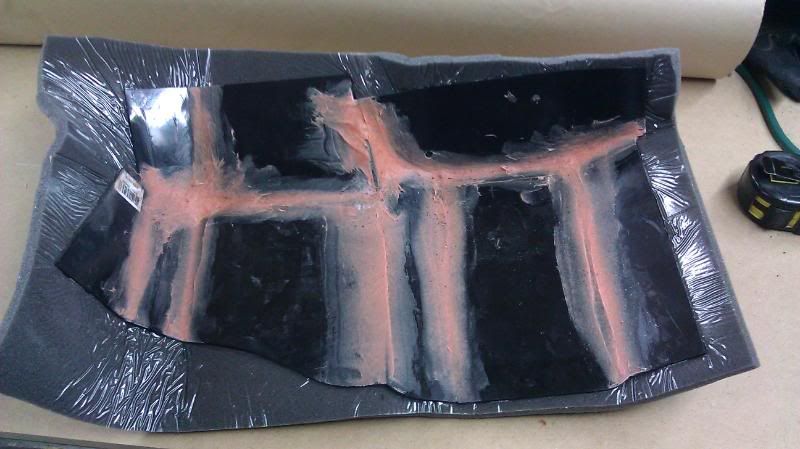
So, these new tweeters are freakin huge so i had to think outside the box a bit when it came to incorporating them into the a-pillar. Plus, I have always thought it would be cool to mount a tweeter on a ball & cup kind of mount so that it could be adjustable after the fact. So, here's what i did.
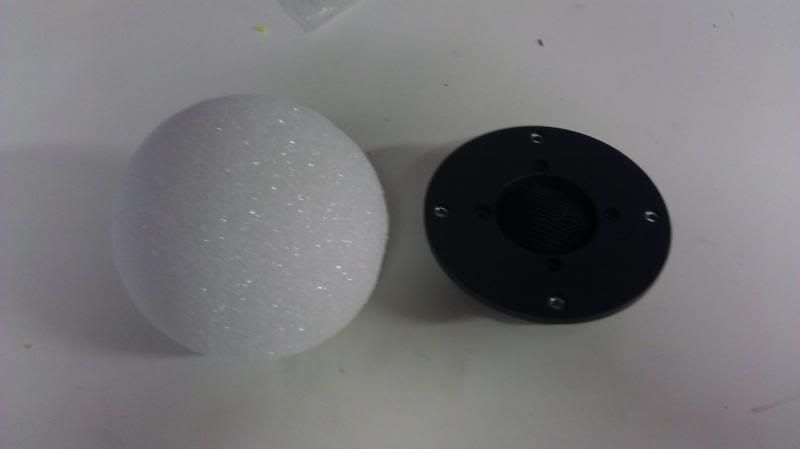
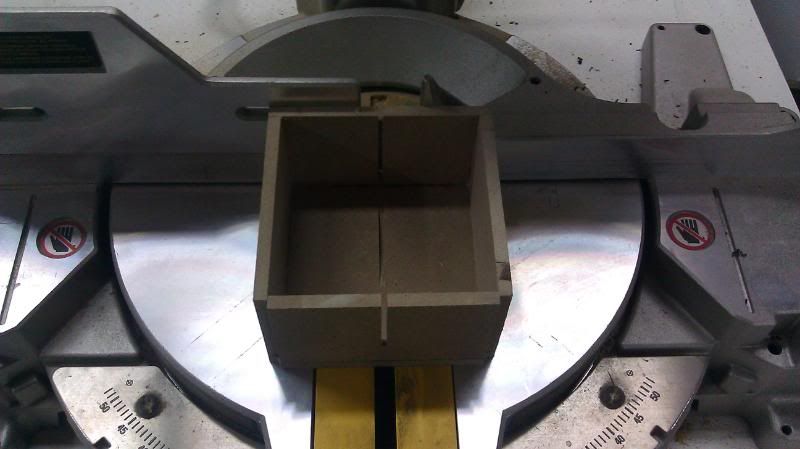
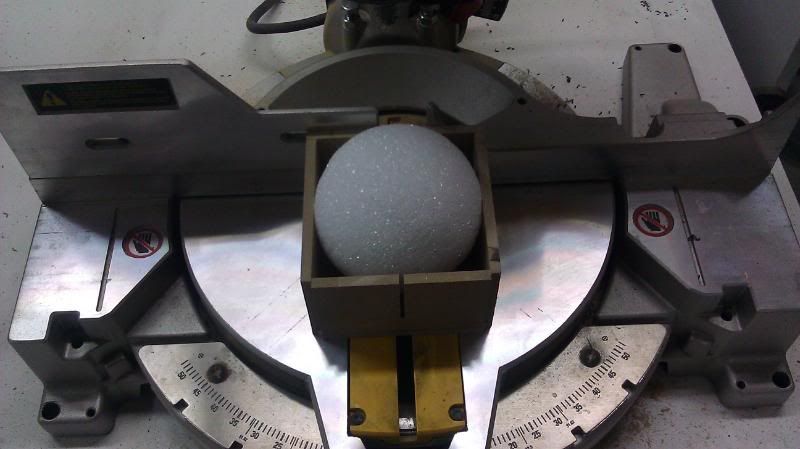
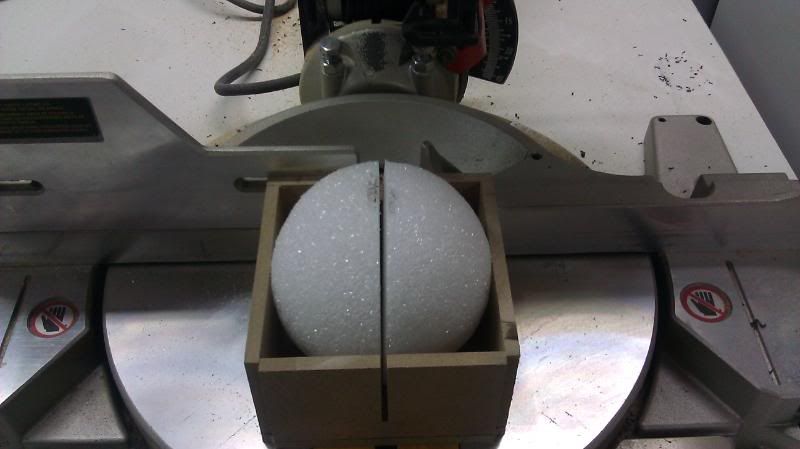
Yes, that was completely necessary!

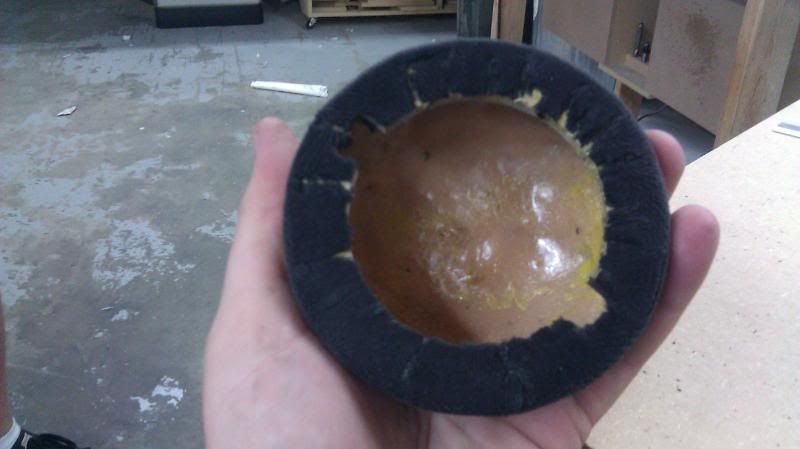
Before I taped these down, I glued an MDF trim ring to the foam so that the fiberglass would bond to that.


Ha ha
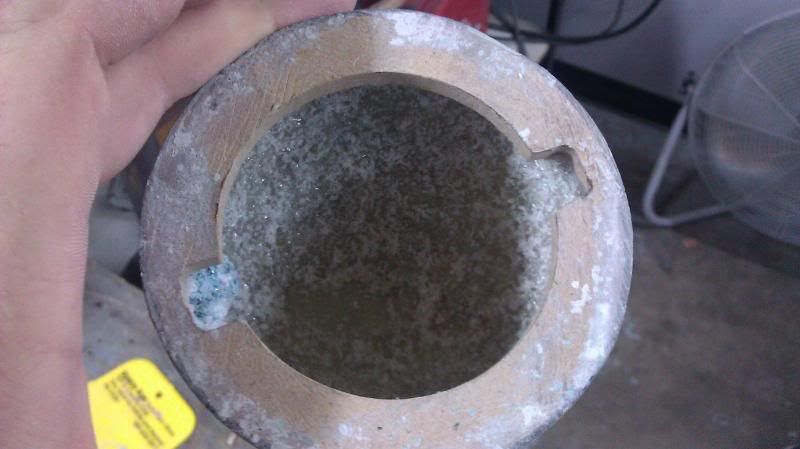
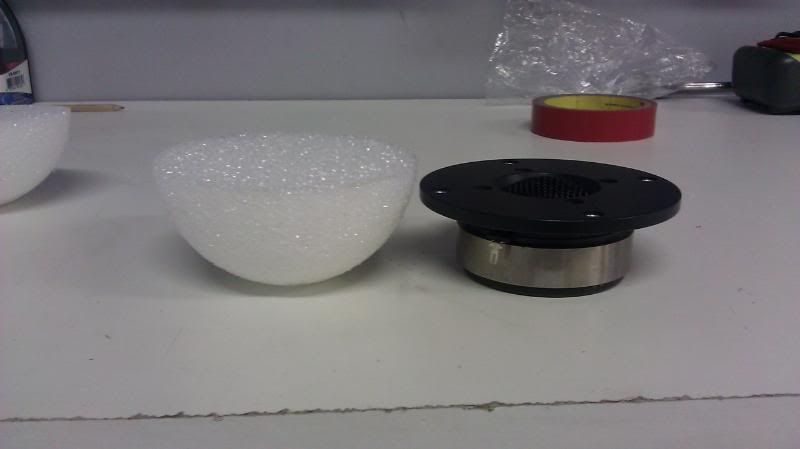
We were able to get most of the foam out of there.
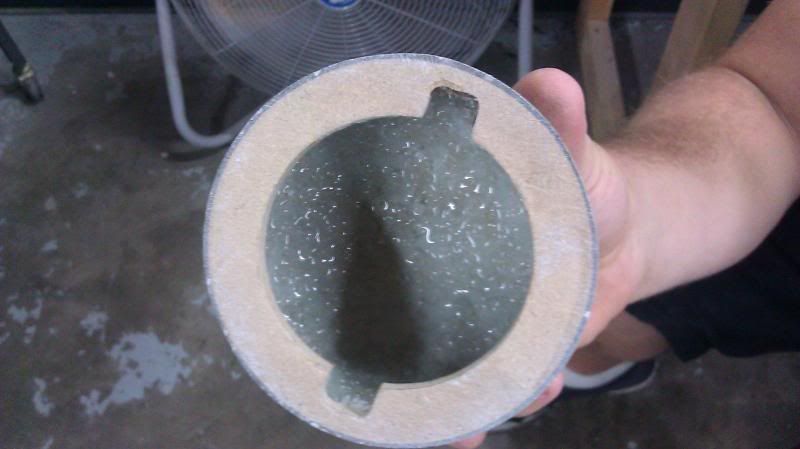
Then we just ran some acetone on the inside to get rid of the rest.
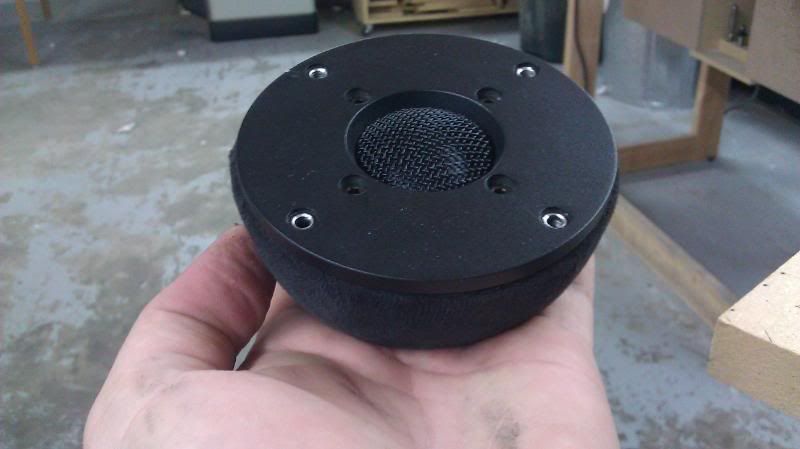
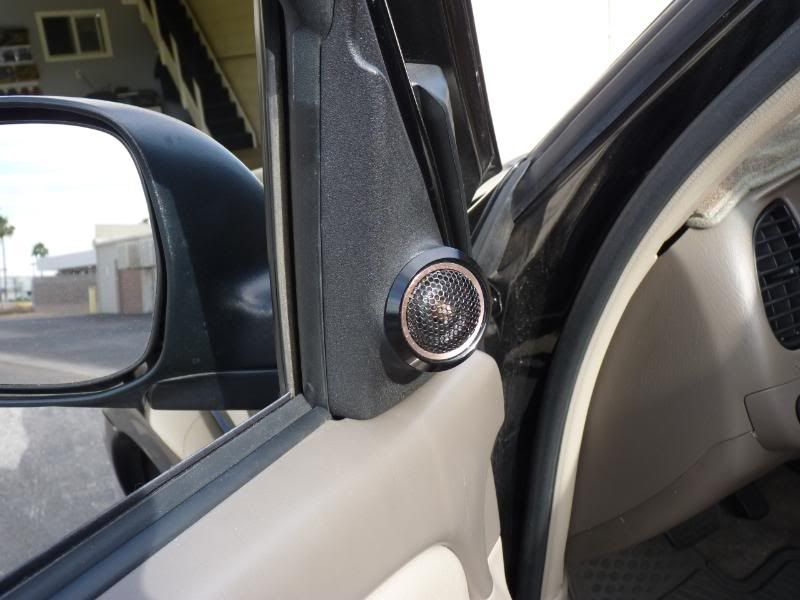
We wrapped em in that same headliner material without a seam! Then the speaker mounts and you get an idea of what it's gonna be like. I wasn't too happy with the way it looked at this point because the difference in diameter between the speaker and the ball. It was only like 3/16" but still it was weird. So I made these.
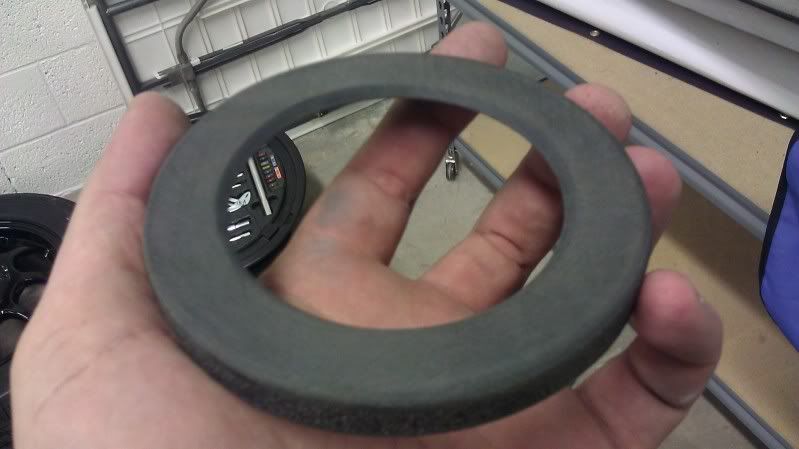
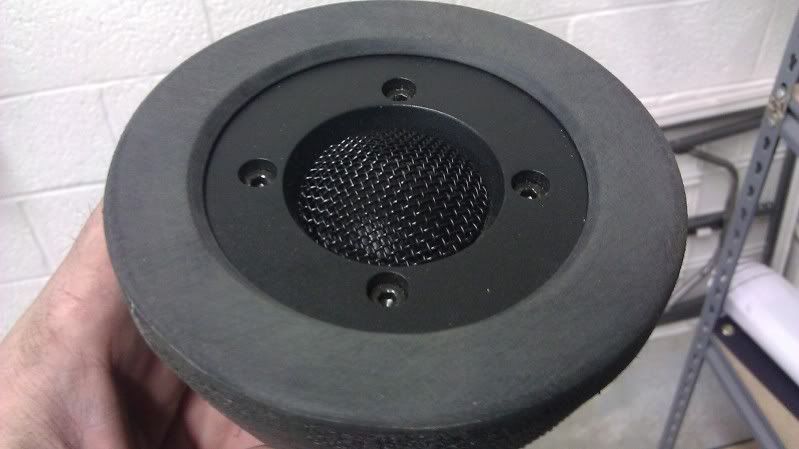
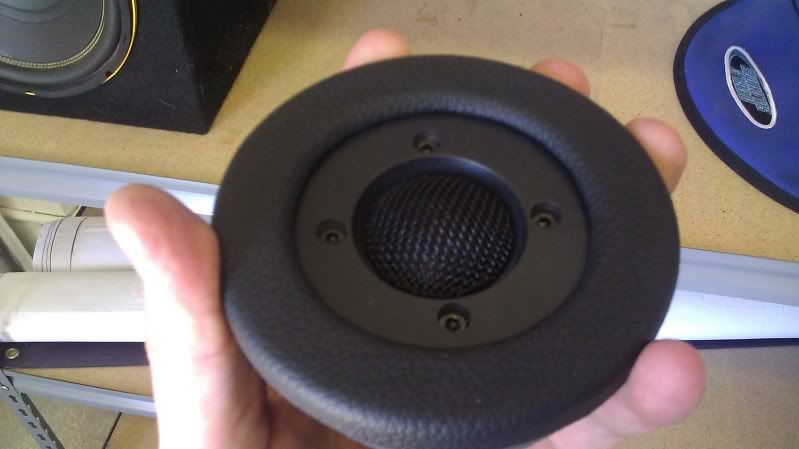
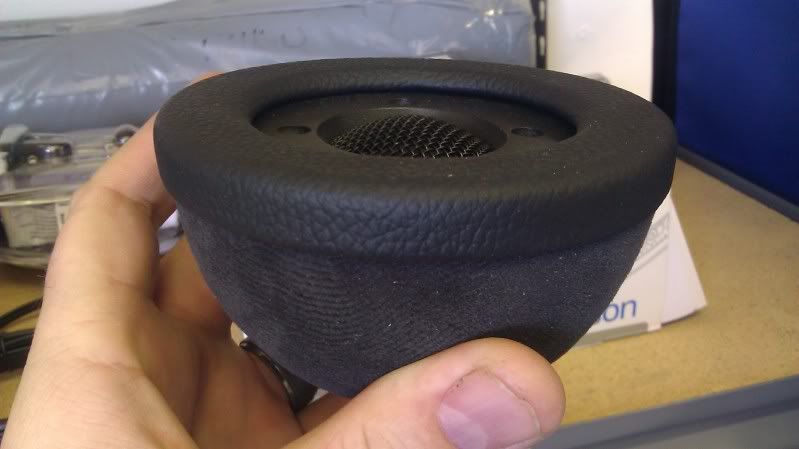
Kinda looks like an acorn right?
The existing dash kit was a two part piece. It had one piece that went into the dash opening and was secured with screws. Then it had a trim piece that covered up the mounting screws and trimmed everything out. I pretty much just refinished what was already there.
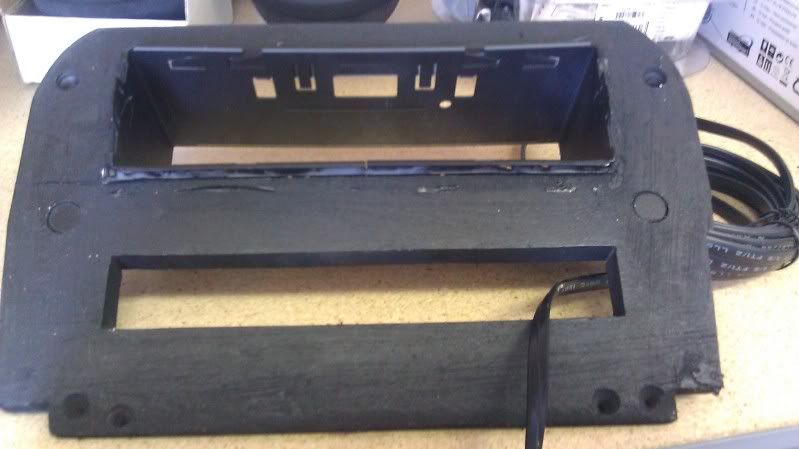
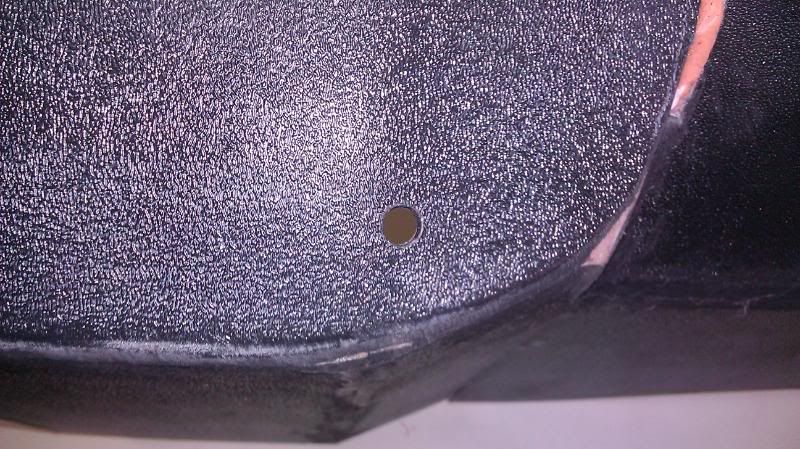
As you can see, I painted it black, just cuz. Also, you can see the two magnets that are sunk into the piece.
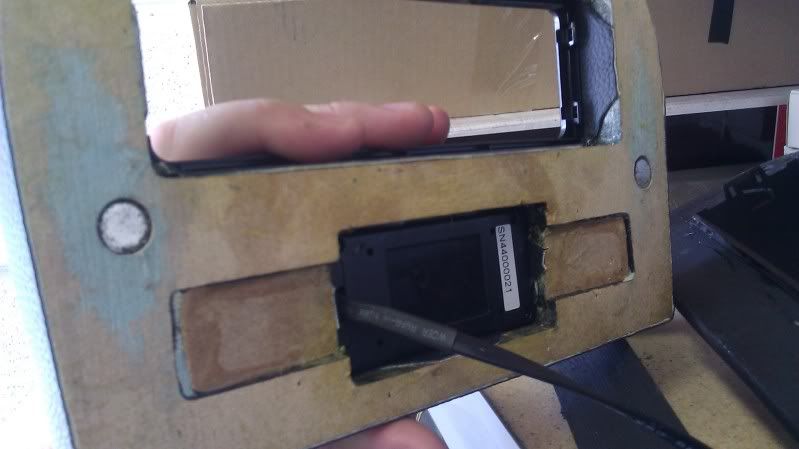
And you can see these two magnets
Here's the dash kit, all wrapped in matching vinyl and magnetized in place. Now, he can remove the dash panel easily if need be without having to pry against the hot glue.
the car is due back any minute to do some more work on it, I'll post more pics when i have them.
0 -
One last addition before the GTG this Saturday. We will have Mobile Solutions on hand with their demo booth set up so you guys can check out all the cool tools that make what we do so much easier. Bryan Schmitt has also told me that is going to be providing something for the giveaway as well.
So, we have a full Arc Audio sound system, a set of Hybrid Audio speakers and a set of Phass tweeters to be auctioned off via a silent auction. And we have Compustar alarms, Mobile Solutions gear and a Pioneer deck to giveaway just for coming and donating!
It's gonna be fun, see you guys there
0 -
-
Okay, here's the gameplan...well, most of it anyway.
Where: Handcrafted Car Audio
When: June 4th, 6:00 pm
Who: Anybody who is into cars, good sound or helping out a good cause.
What: SQ get together/car show/fund raiser
All proceeds of the get together will go to support our Safe N' Sound campaign which is designed to promote child safety around water by collecting life jackets to be distributed to those who need them.
Some of the highlights of this get together are as follows:
A silent auction for a set of Phass tweeters and a complete Arc Audio system and possibly more!
A short tuning seminar will be held to show the benefit of proper tuning technique using the right tools.
A chance to hear some great sound systems and get recommendations for how to improve yours.
Enjoy some good food and meet some new people or hang out with friends.
Support a good cause!
The cost of admission will be simple. Either bring a new or lightly used lifejacket, or $10.
Thank you all for your participation.
0 -
I'm sorry man, I'd really like to but I have a big custom job I have to finish. Good luck with it though!
0 -
Thank you guys, I am going to start compiling a list of attendees over the next day or so if I can keep my welding helmet off long enough. But, you guys get to see what I've been welding when you come!
0 -
Thank you!
0 -
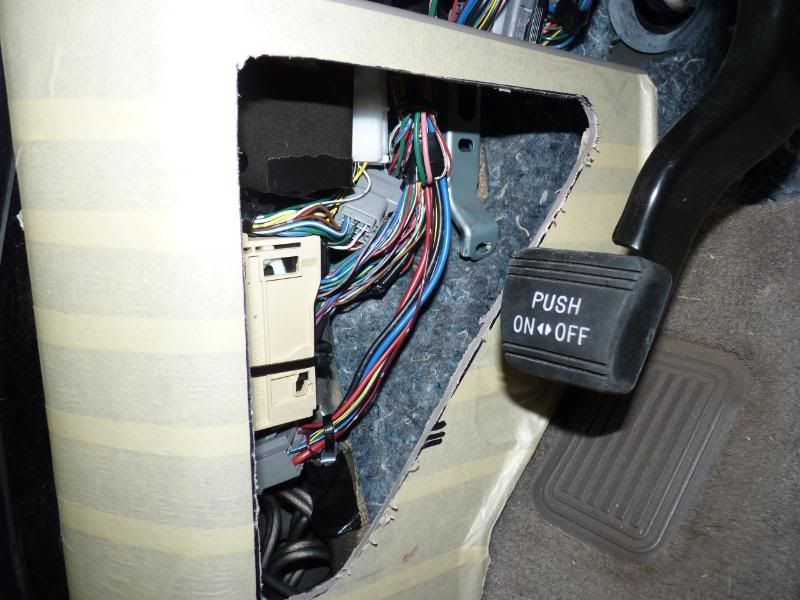
This truck came back in today for a little addition. The customer wanted to add some acoustic padding to the underside of the drivers and passengers side dash to kill any harsh reflections from the kickpods. Simply sticking foam to everything would not be cool, so this is what I did.
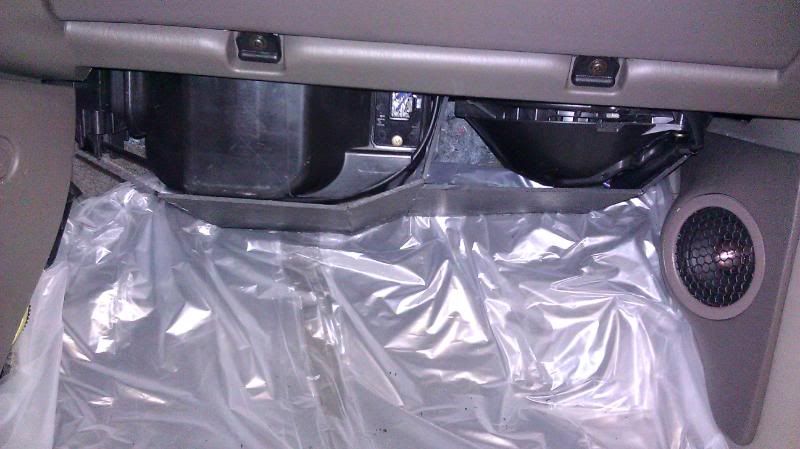
I started off by cutting pieces of 1/8" abs to shape so that the cover conforms to the shape of the components down there pretty well.
Then, i added some pieces to cover up the front of the components, again trying to make the cover as small and form fitting as reasonably possible.
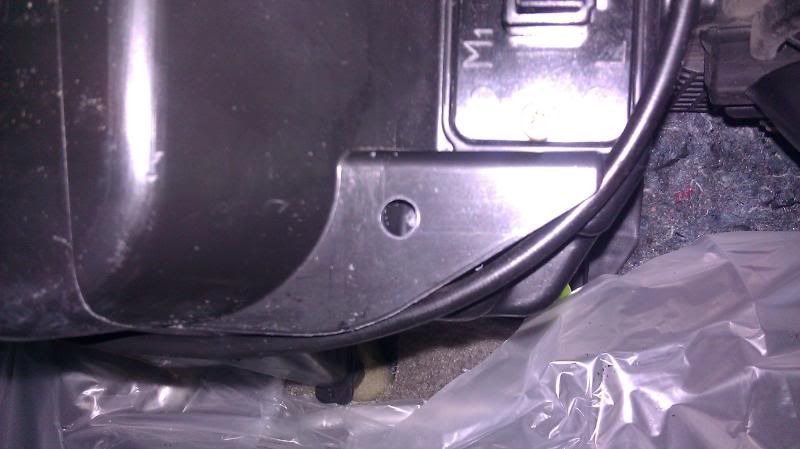
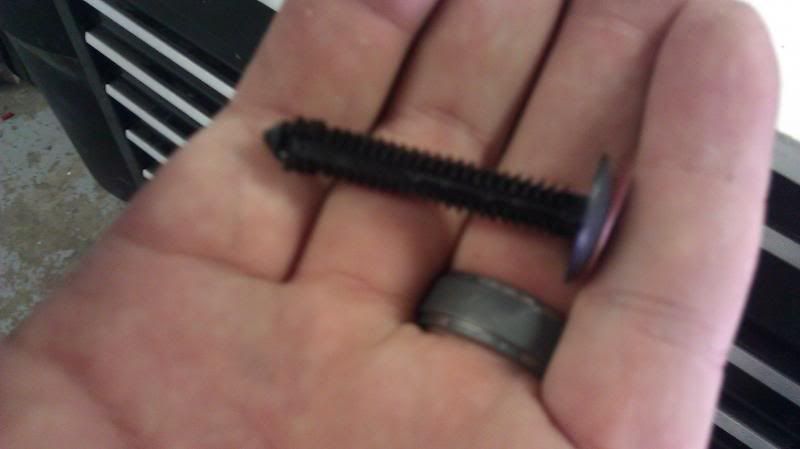
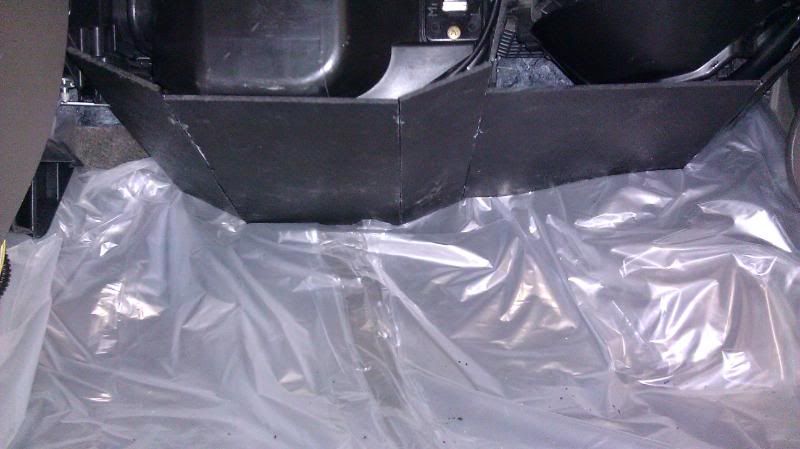
This fastener will mount the piece.
Here you can see how I strengthened the bond of the plastic pieces. I used a 24 grit roloc disc to chew into the plastic a bit before applying the duraglas. Once it was cured, I used it as backfill to grind away the sharp corners of the piece. Especially near the kick pod.
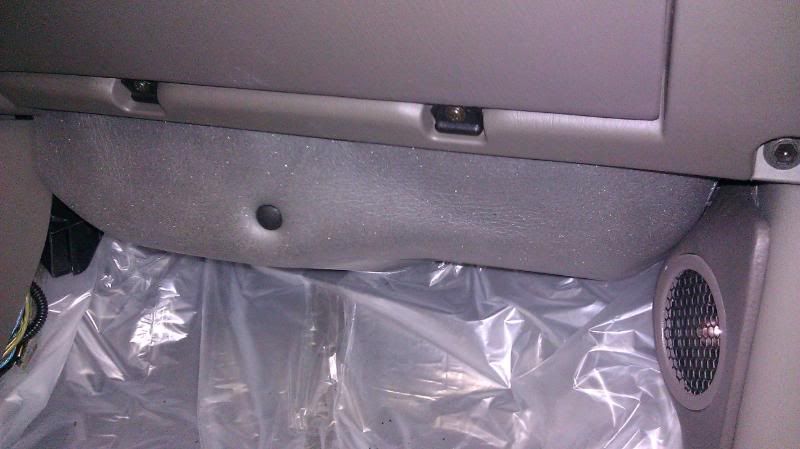
Here it is mostly finished and installed. We weren't quite sure what to cover the whole thing in and also weren't sure if we were going to try a different type of foam so we just left it as is for now. He'll be back next week for me to do the drivers side, wrap them both and to tune the truck with a scope and an RTA.
0 -
Thank you man, and good luck next year! There are certain requirements, like you have to be professional and a certain number of years experience. Then you need to be nominated by your sales reps and be one of the top 100 with the most nominations.
0 -
You sure can, til the 31st!
0 -
Thank you you guys! That is awesome and it looks like your votes did some work!
0 -
Awesome man, thank you I will!
0 -
GTG Date: Saturday 6/4/11 6 pm or so.
As some of you know, my daughter required some extra attention after she was born and we ended up staying in the hospital for 3 weeks with her. While we were there, we were treated so well and regularly given little gifts to make the circumstances a little brighter. I have wanted to do something to give back in some way for all that was done for my little girl ever since, so here is what I came up with.
I want to use my business to try to help raise awareness and collect items to help support child safety around water. Although it is not directly related to what my daughter went through, it is most certainly needed and it may help keep some other guys baby out of a hospital bed. I have spoken with the Drowning Coalition, AZ Fish & Game and Mesa FD and I have a few ideas on how to execute this. The main drive will be through my shop where I will offer a discount on services/products for anybody who brings in a lifejacket. I would also like to do an event at a lake where I could bring a boat with a nice audio system to help promote marine audio and offer to take other boaters extra jackets (cuz I know they have em) off their hands in exchange for some kind of discount. The last part is where you guys come in.
Some of you may recall that we had a little GTG at my shop in January to talk SQ and basically hang out. We talked about doing it more often, but Jan, Feb and March were ridiculously busy for my business and I simply did not have the time. Well, I have been talking to Don Gibson about it for the past few weeks and we would like to do another get together, ideally on 6/4 AFTER SUNDOWN, or atleast close to it. This will be a place where you guys can come hang out, talk gear, sound, setups and all that. Plus, we will be raffling off a set of Phass tweeters, donated by Don and a compete sound system donated by Handcrafted Car Audio and Arc Audio. The proceeds would go to support the safety around water campaign. We are talking about having a tuning seminar, where myself and maybe a guest would go over tuning techniques, gain structure and all that. There would be food, maybe drinks, and manufacturer demos. The best part, is that you can attend and have your fill of all of this for the cost of a life jacket!
Going forward, I plan to do more of these shows as the summer months stretch on. Once swimming season is over, I plan to do a big show/gtg to promote the Eller Congenital Heart Defect center as that would allow me to give back directly to those that helped my family. So, what do you guys think? Will you all rally up and support me on this?
2 -
Hey guys, the polls are officially open and they're working properly! So, do your civic duty and cast your votes!
0 -
Thanks guys.
0 -
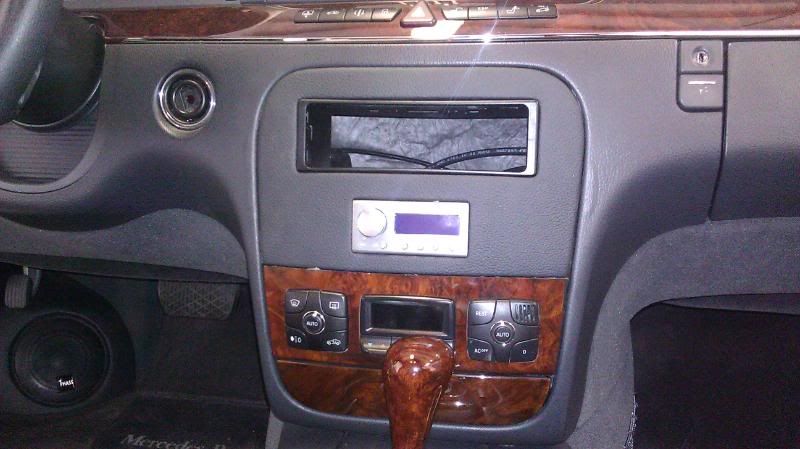
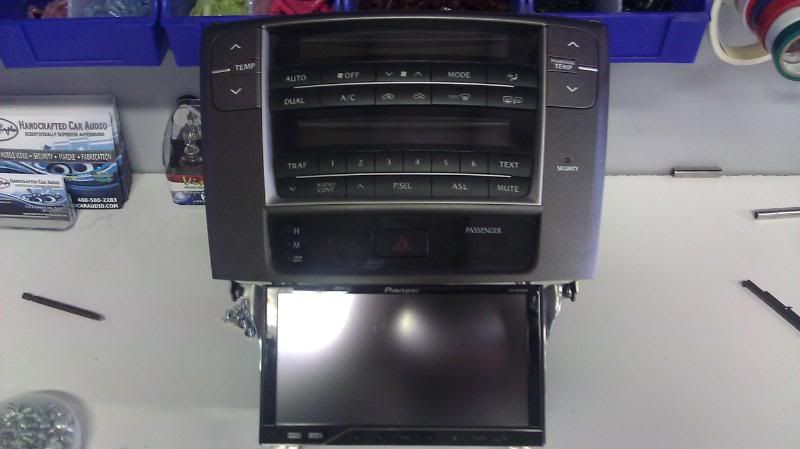
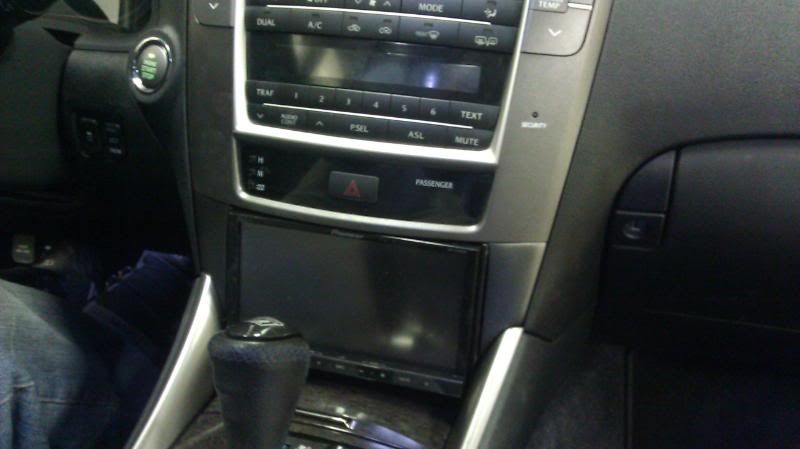
Did this one last week. It was actually quite a bit easier than I thought it was going to be, hardest part being prep for paint but the radio bolted right in and removing the circuit board from the factory deck allowed the climate control to work like normal without stashing the whole radio someplace. Here's the pics.
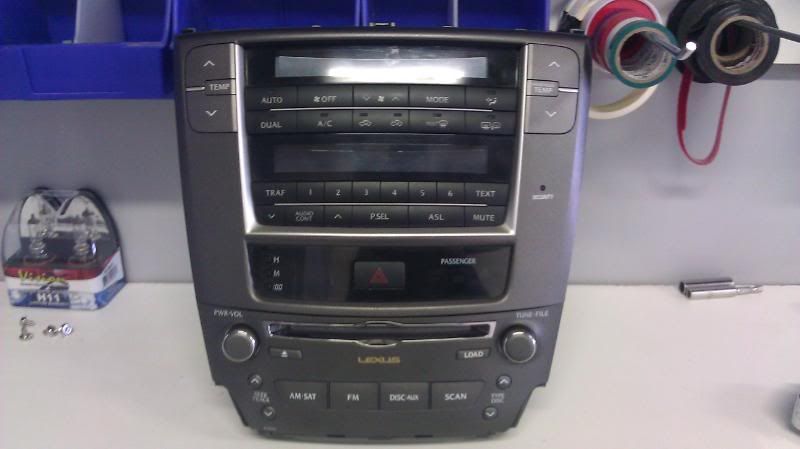
The victim
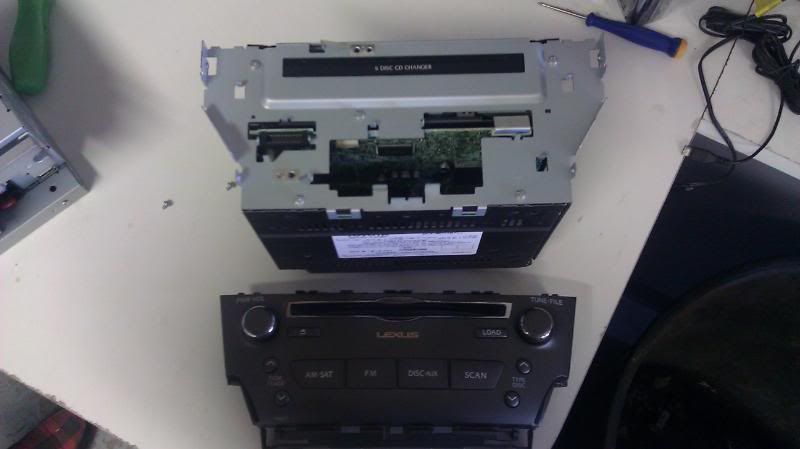
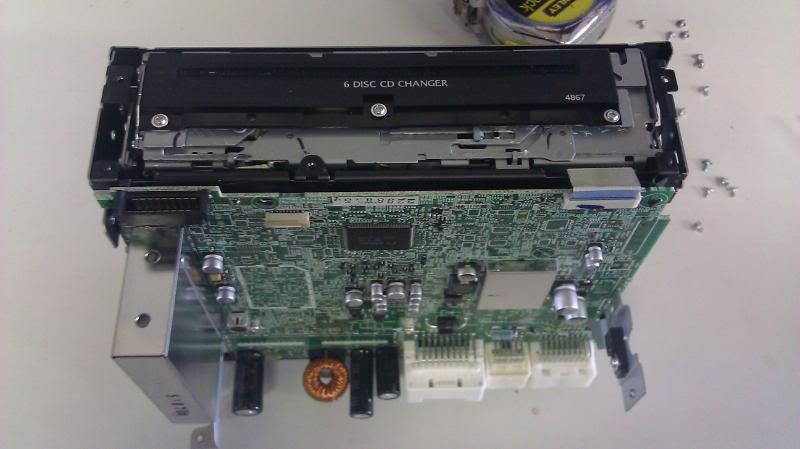
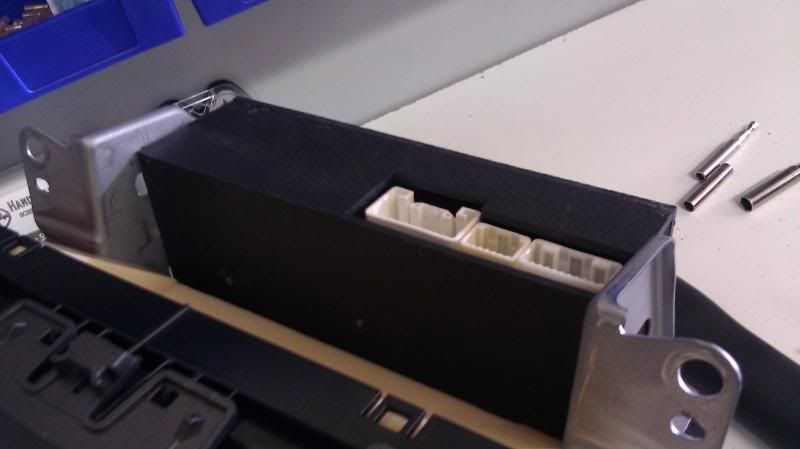
Here's the circuit board that needs to be removed. Just unplug the ribbon cable at the front, remove two screws and it lifts right off.
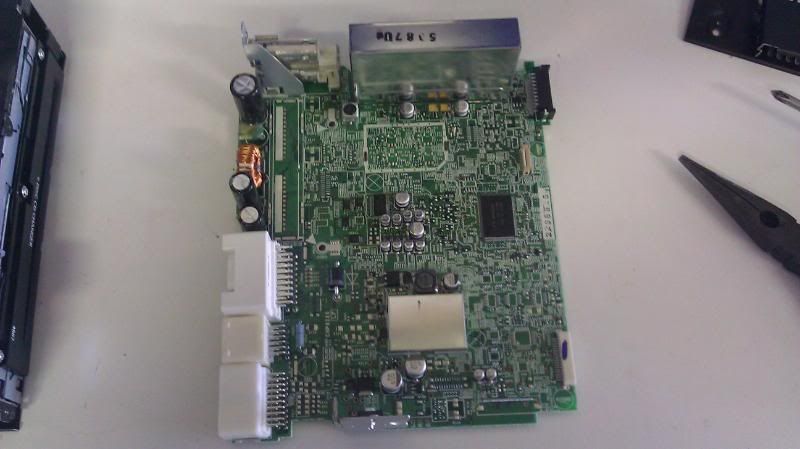
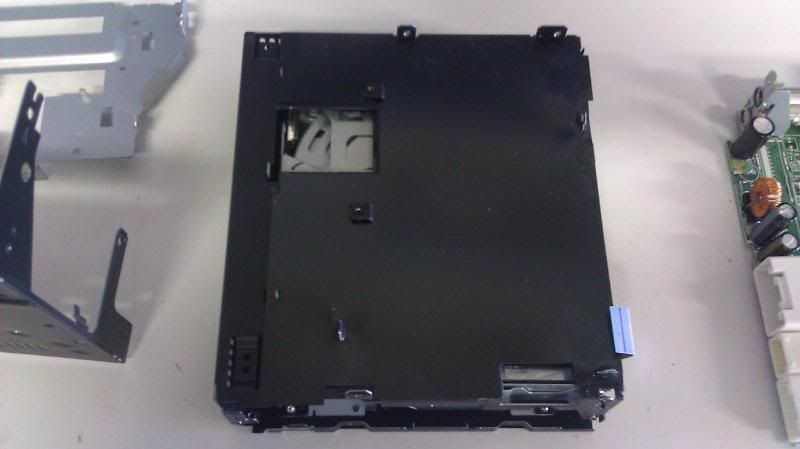
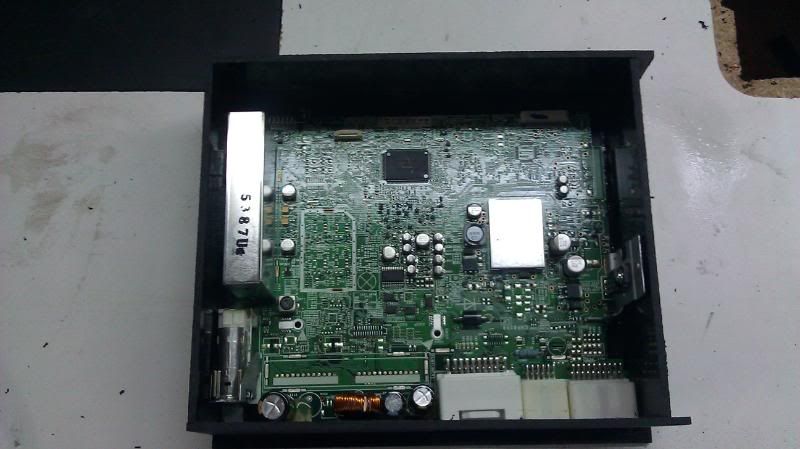
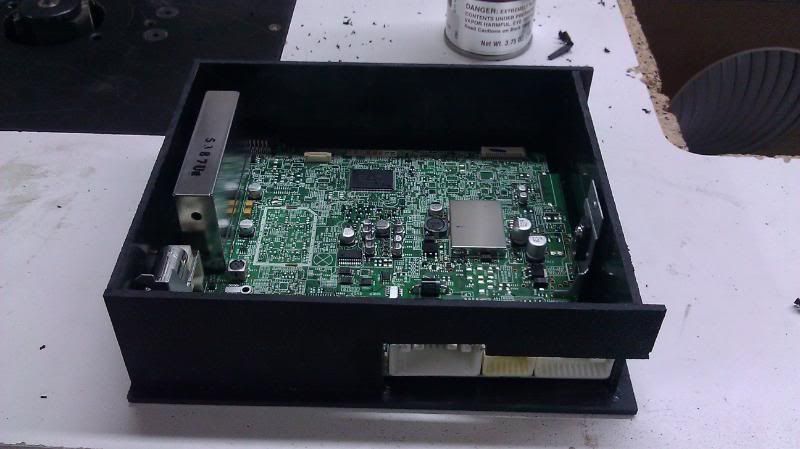
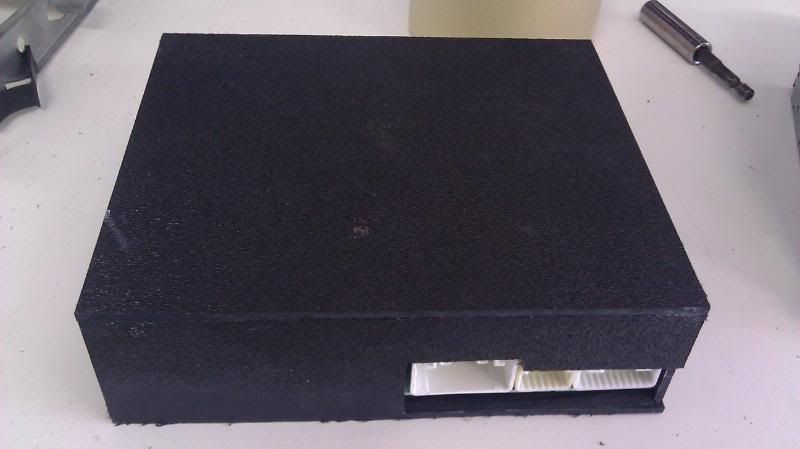
I made a little ABS box to house the circuit board and cut out a hole for the Molex plugs to peek out, making the installation much easier.
Here's the radio all bolted in place.
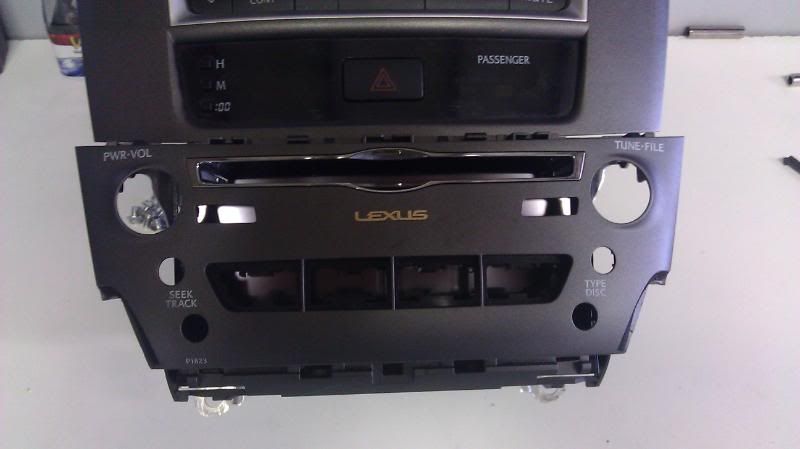
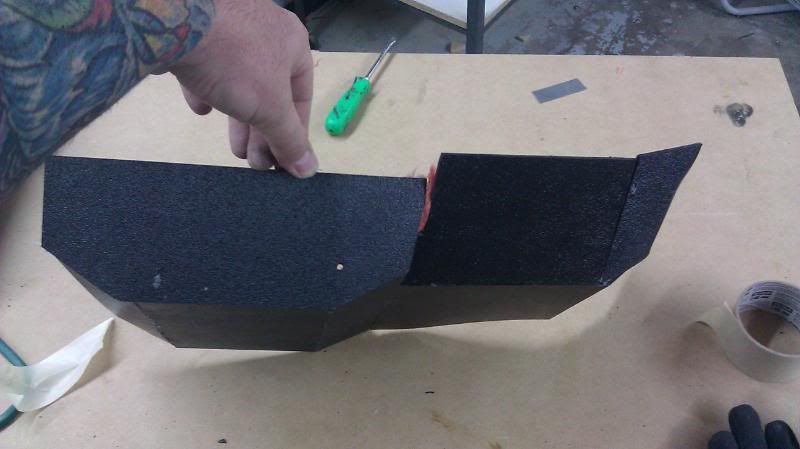
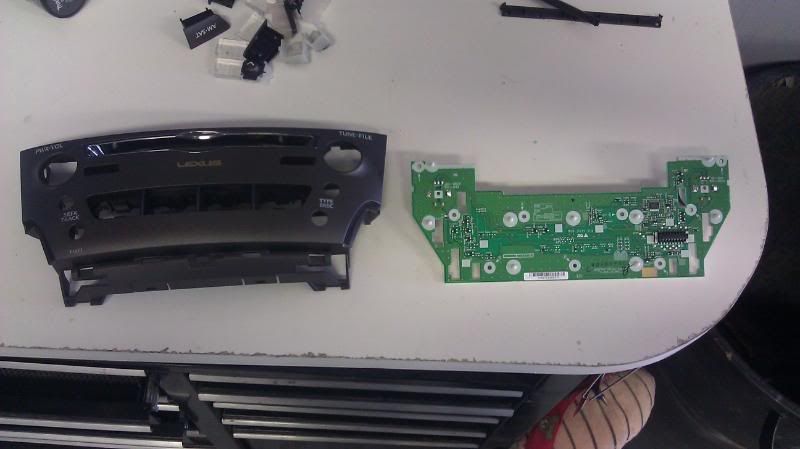
Just getting an idea of where I need to cut.
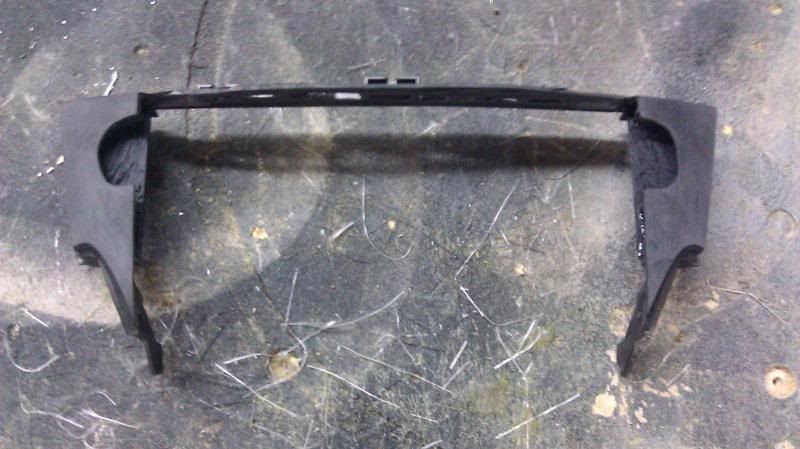
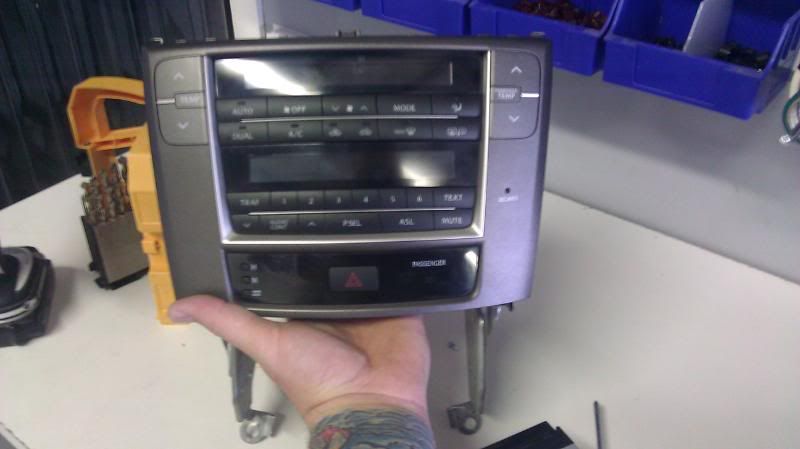
After all the cutting and grinding. I chose to leave the top part on so that it could still clip into the factory panel like normal. I tried to leave the bottom on, but due to the angle of the deck, the bottom part made the sides bow out a bit.
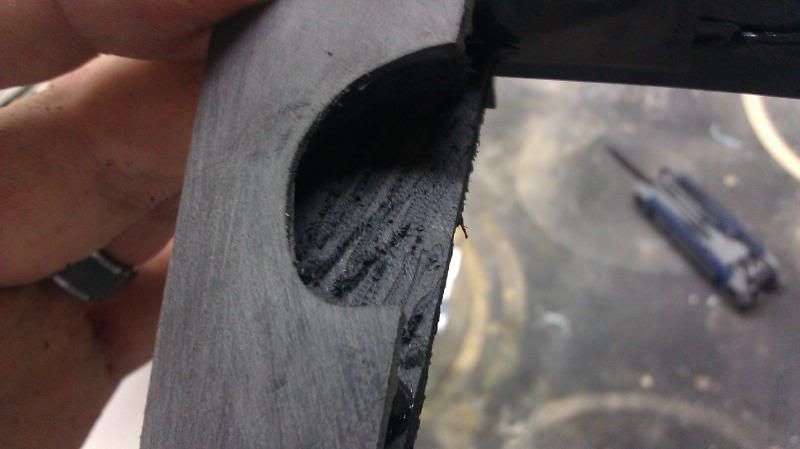
A close-up of how I chose to fill in the little circles. After grinding the surface flat, the factory plastic was a little thin for me to trust a plastic adhesive. So, I made a piece of ABS to go a little bit further behind, secured that with CA glue, put some nice deep gouges all around and then packed the hole with UPOL filler. Sorry, I didn't take any pictures of this part, but I'm sure you get the idea.
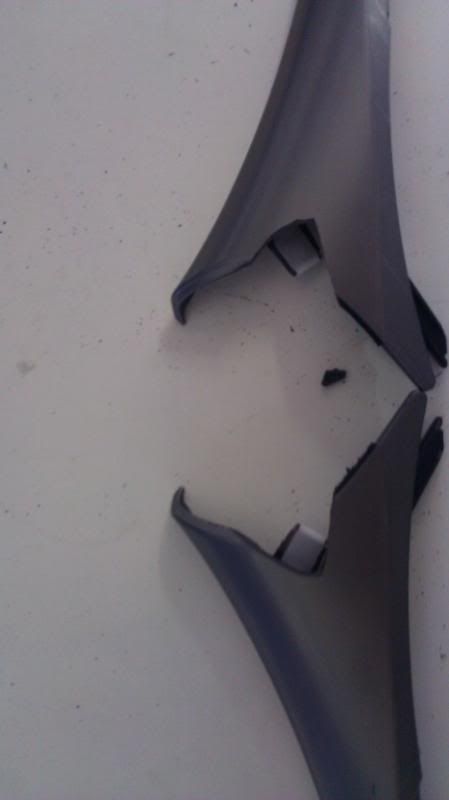
I also had to modify these little silver pieces on the sides of the dash so that the new radio did not push them to the side, causing gaps.
I mounted the a/c box to the radios mounting brackets. It fit perfectly.
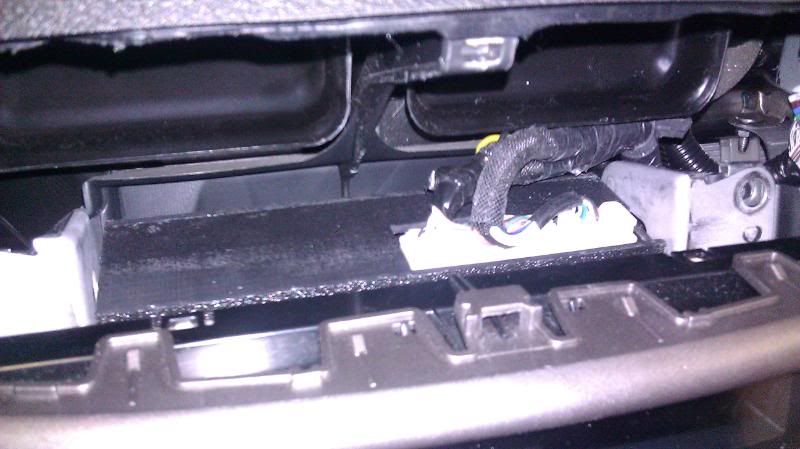
The harnesses came up over the top and plugged in.
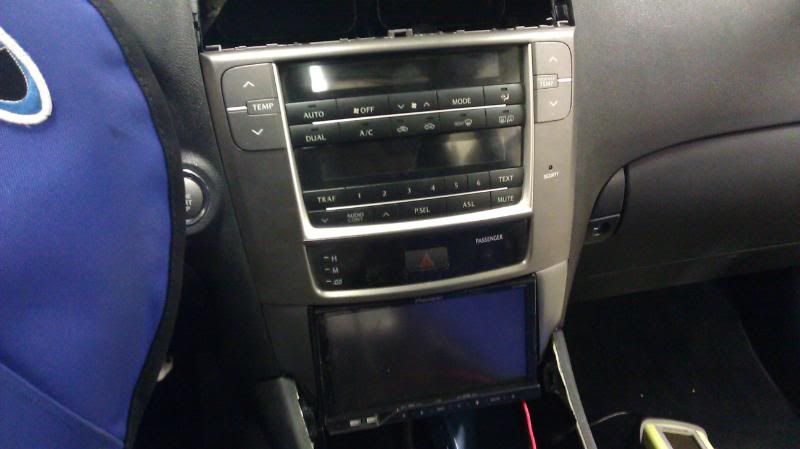
Here is the piece all painted and installed.

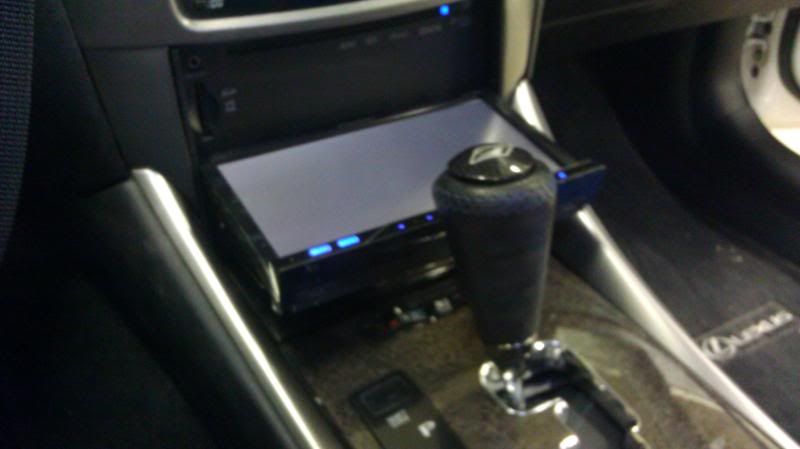
Factory change drawer opens and closes no problem and the screen opens easily.

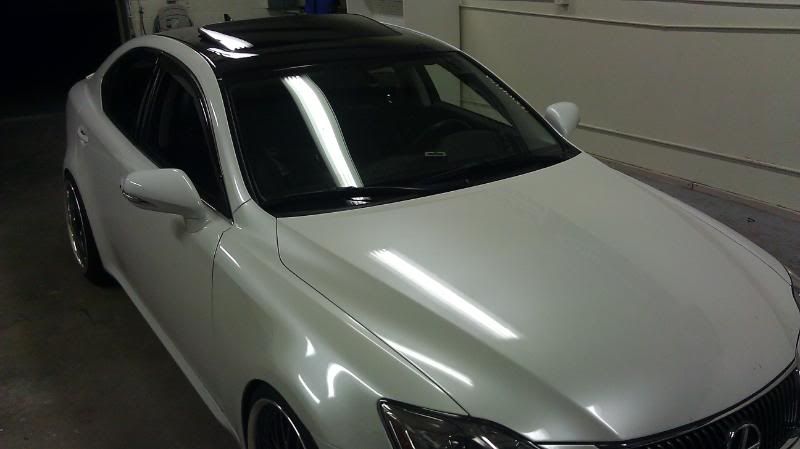
And a couple of shots of the car just because I think it is particularly bad ass.
0 -
bump test it with a 9v battery.... if it moves out, then polarity of the terminals is correct, if it moves in... well one got missed as Nick said.
No chit man, good info
Not really. Think about what is being stated here and how a speaker works. When you connect positive to one side of the coil and negative to the other, you complete the circuit and current flows through the coil creating a magnetic field which reacts to the stationary magnet. When the signal swings positive the cone moves outward, it swings negative and the cone moves inward. If each voice coil were wired in opposite of eachother and connected to a mono amp, the end result would be no movement. Or atleast very little. They would be fighting eachother.
0 -
Your old RF amp had an input sensitivity range of this:
Variable from 150mV to 4V
(RCA Input) http://www.rockfordfosgate.com/scripts/rightnow.cfg/php.exe/enduser/fattach_get.php?p_sid=9wNlhGsk&p_tbl=9&p_id=830&p_created=1171906789 (page 14)
Your sundown amp has an input range of this:
200mV to 6V (+/- 5%)
http://www.sundownaudio.com/index.php/products/item/saz-2500d.html
3/4 gain means nothing. Truth be told, 3/4 anything means nothing. When you adjust the gain on your amp, you are simply matching it to the output of the headunit so that the amp knows that at a particular voltage on it's inputs, you'd be very grateful if it would produce a particular output. Your old amp had a relatively small input signal range, meaning that each little adjustment was a bigger step than it is on your new amp, which has a much larger input sensitivity range.
My suggestion to you is to get a scope, I'm guessing you have access to one, and reset the levels throughout your entire system starting with your headunit and move downstream. Get your output on each device as high as you can without clipping. Do this, maybe with a little gain overlap, and I'll bet you're more than happy.
0 -
How do you do that??!! You're a machine.. I'm so envious it's not funny haha Awesome skills. I'll drive down to AZ to get some work from you

Sounds like a plan!
Glad to see you posting on here again.
Your work is always so damn clean. Lets me know I have a long way to go with my stuff.
Nice job Bro.

Thank you. For some reason, I am not getting much fab work lately. Don't know what the deal is.
Do you pull the vinyl all the way to the back of the panel, or do you cut it right at the edge-wouldn't that be prone to peeling? You should make a youtube video of you wrapping a pod with vinyl sometime.

I pull it over about 1/4". I could make a video next time I wrap something. I'm certainly no upholstery wizard, these were just super easy.
0 -
Finally I got to do some real custom work again, seems like it's been forever. This customer is a great guy who loves to try out new speakers and gear all the time. He comes back regularly just to change things up a bit. This time, he wanted to take the kickpod plunge with his brand new Hybrid L3SE's and rework the door speaker position a bit. Since he does change drivers often, we had to make the door pods very user friendly so that he could. Here we go.
Stackin templates to relocate the speaker location.
Now, one shape.
All the rings stacked up. You can see the countersinking set that is screwed into the base is removable to allow for the trim panel design.
We cut the factory grill to use it for it's shape.
We applied some UPOL over the whole surface and over the edge to get rid of the area where the factory plastic and grill roll into eachother.
All done, ready for vinyl.
On to the kicks
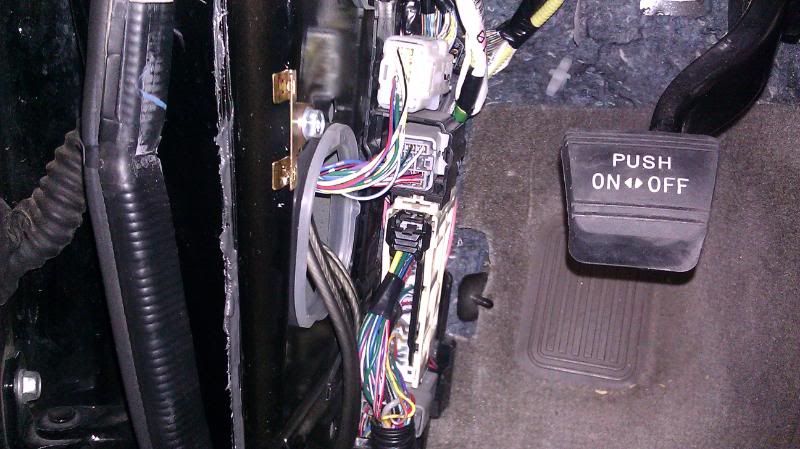
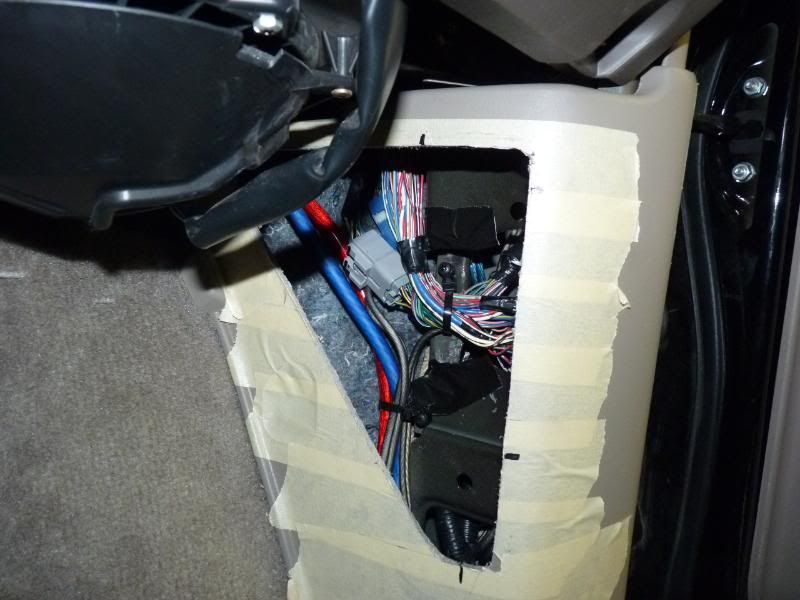
These connectors take up a lot of space in the kicks.
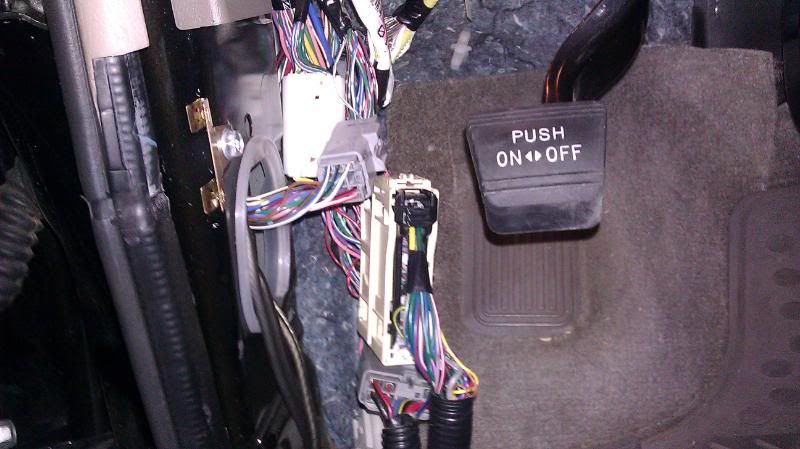
Which just will not do
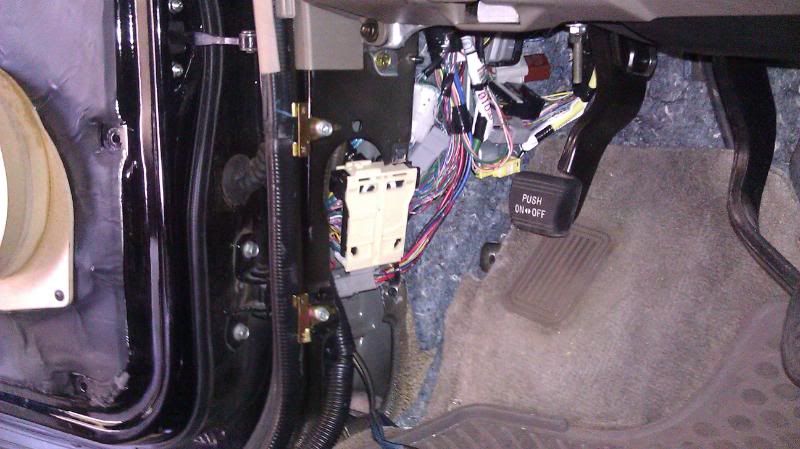
So, we removed them from their plastic container, cut away a small section of the a-frame and tucked the connectors inside. This gave us atleast another 1 1/2" behind the factory plastic kickpanel.
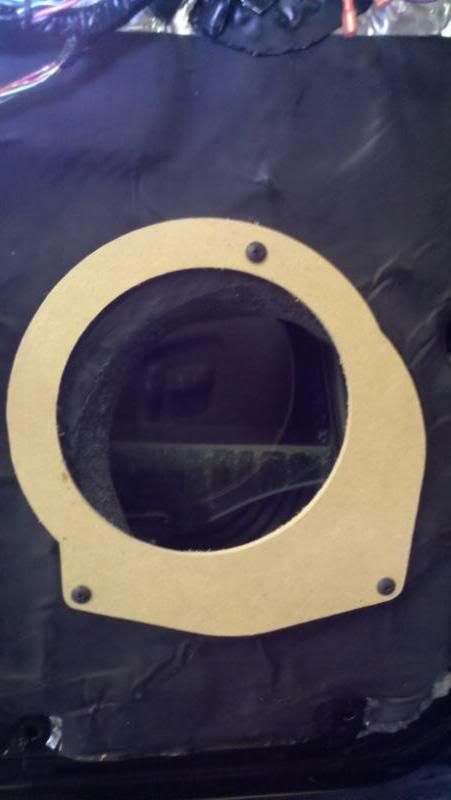
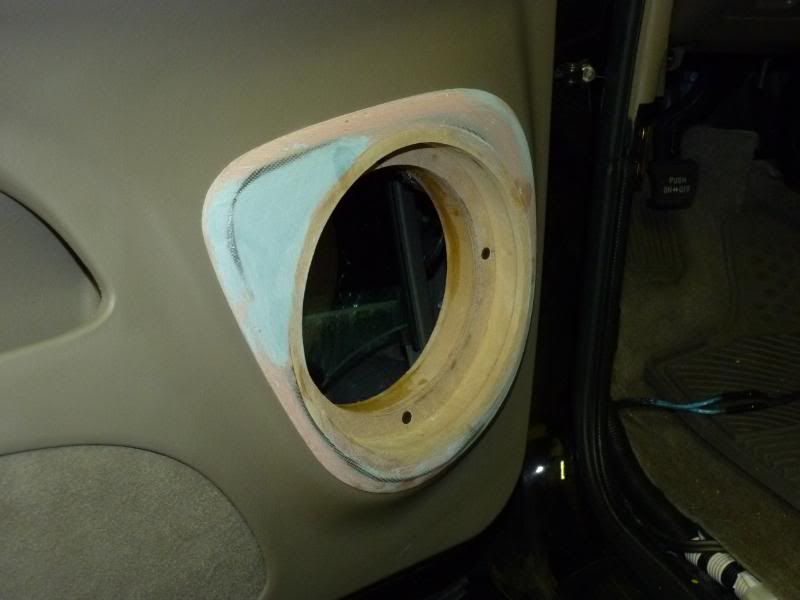
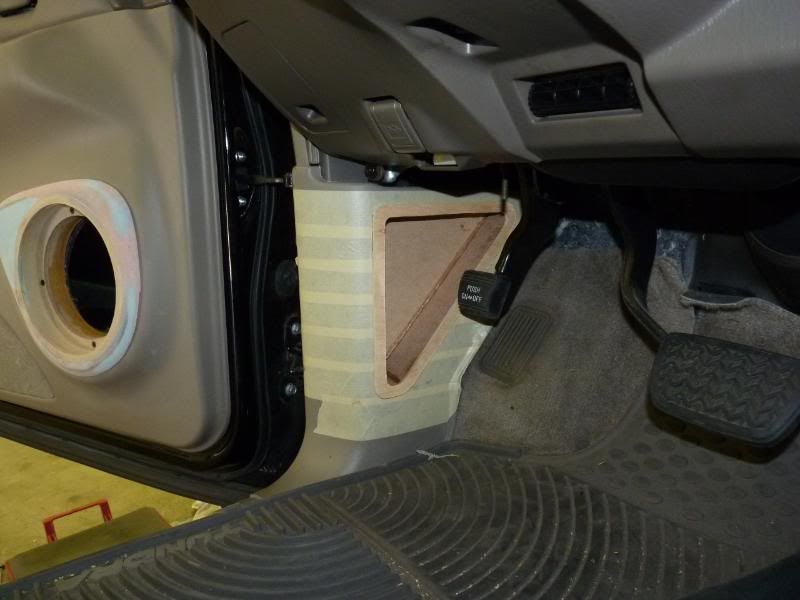
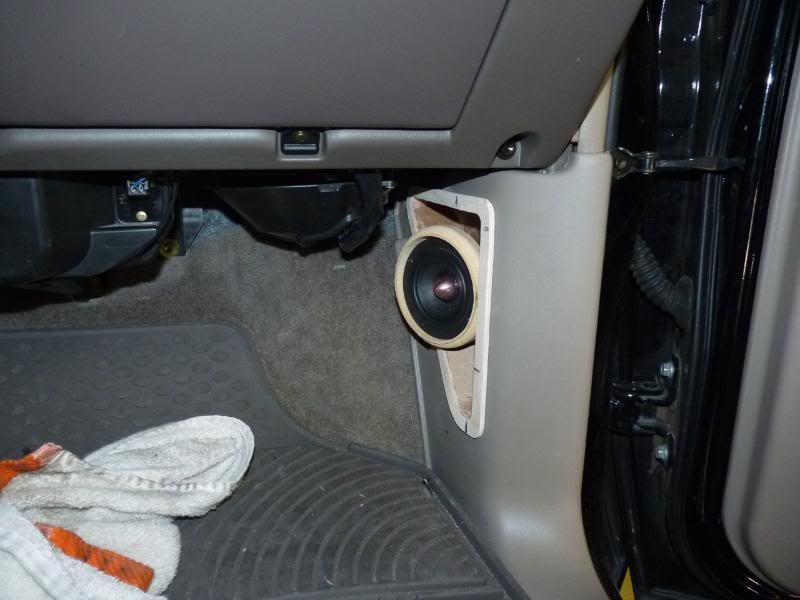
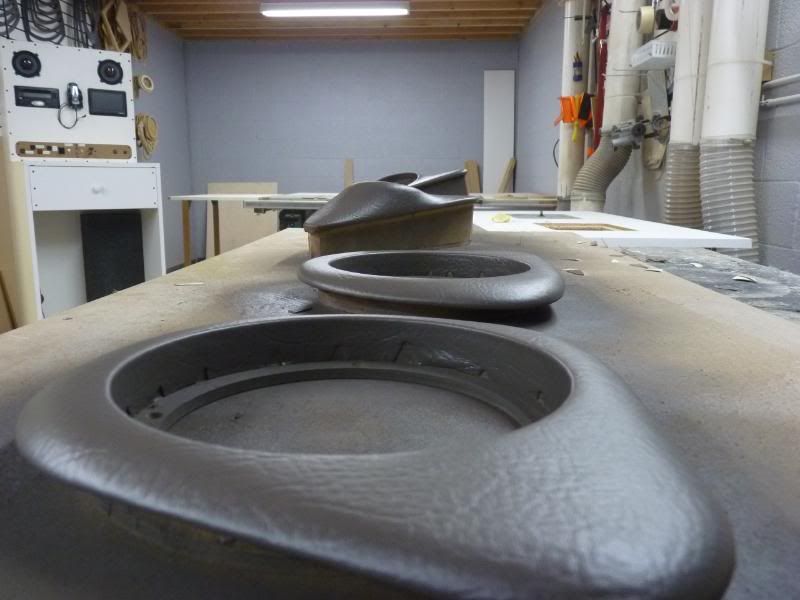
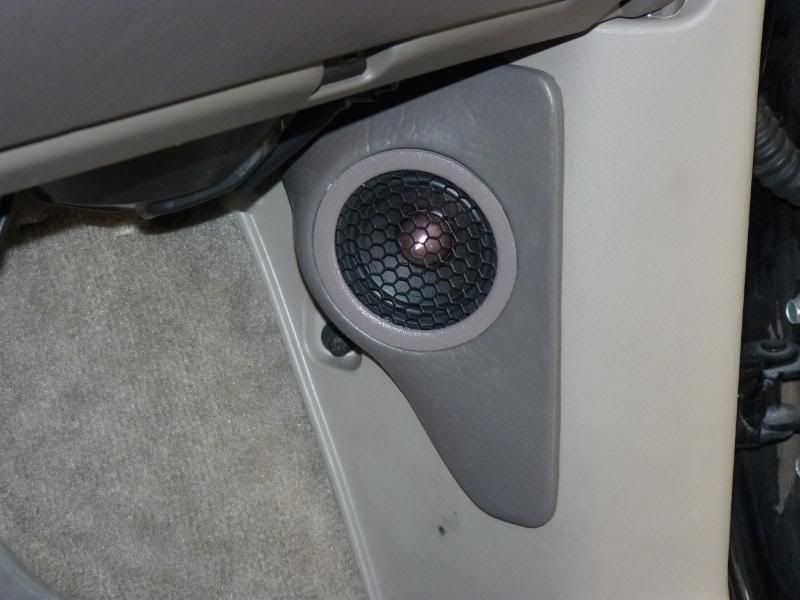
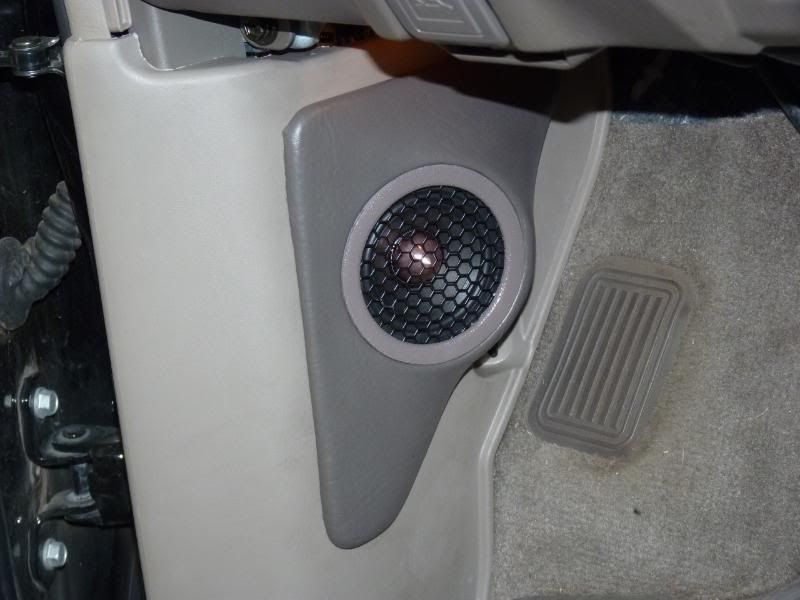
Here, you can see the shape of the future kickpod cut out of the plastic. I really prefer to do pods as and add-on, instead of building onto the factory plastic.
Same thing for the passenger side, except much more room over there.
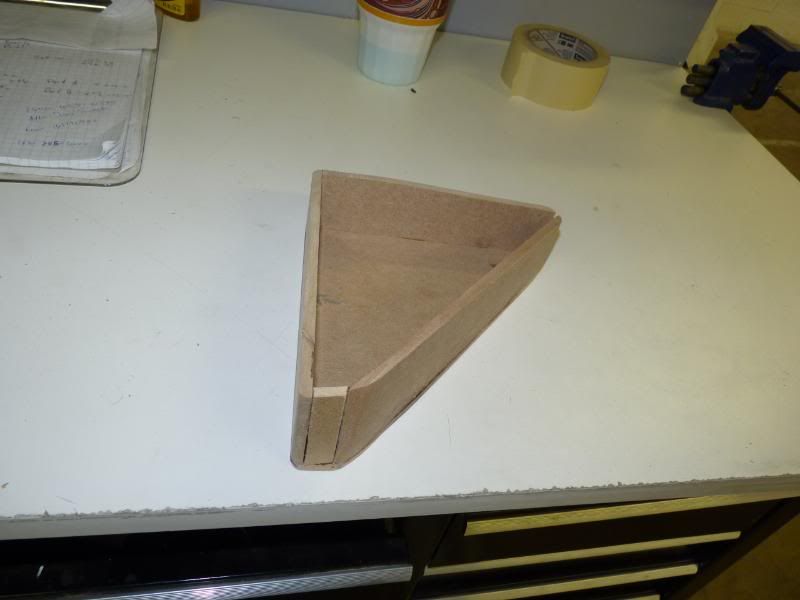
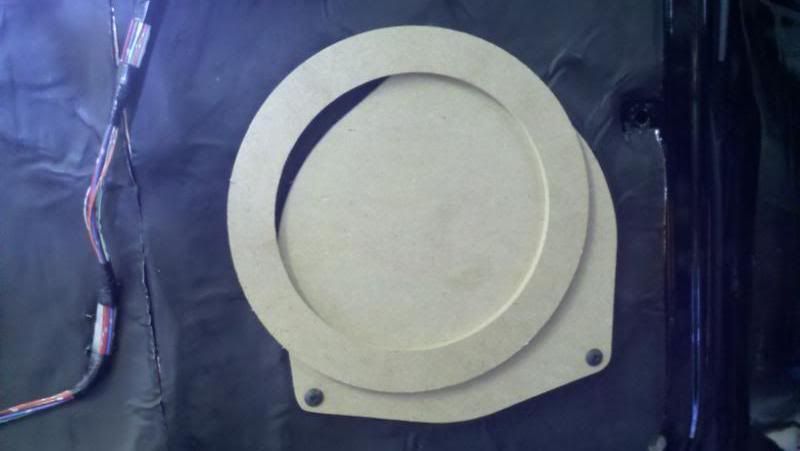
Cutting the same shape out of each side allows us to use templates! So, we were able to build almost the entire kickpod out of MDF, outside the vehicle.
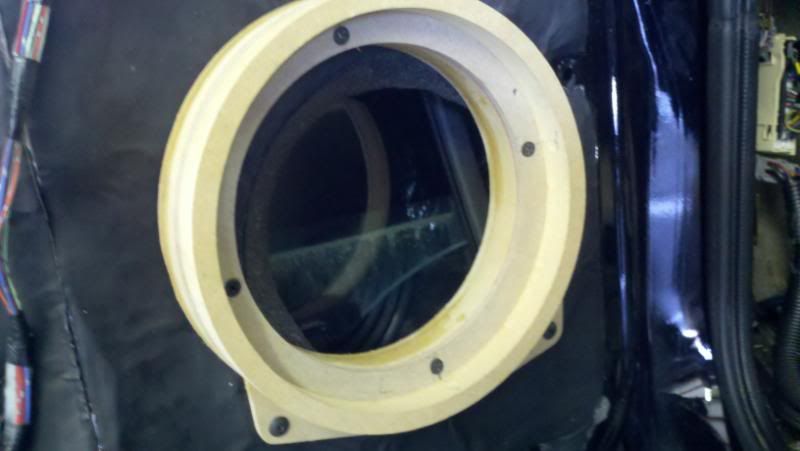
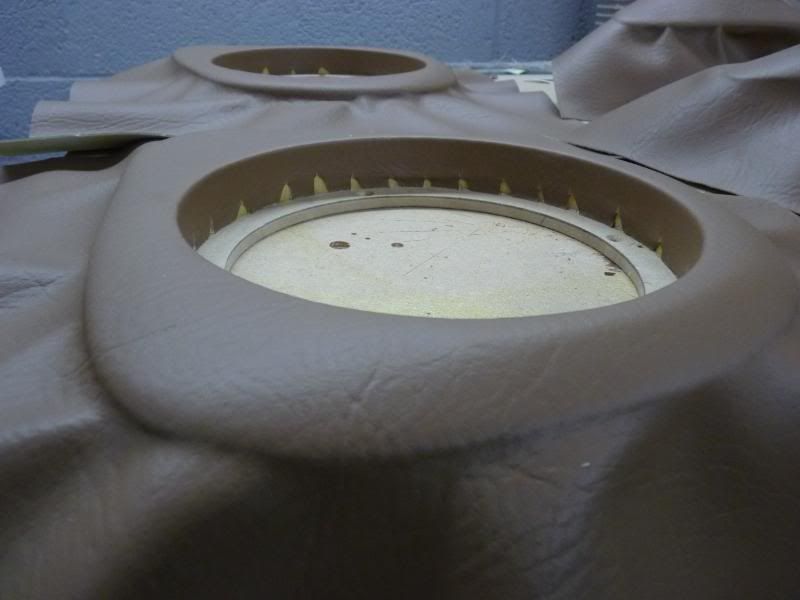
Next, we added a 1/2" trim ring to the shape, which gave us a 1/4" overlap all the way around to cover up the cut.
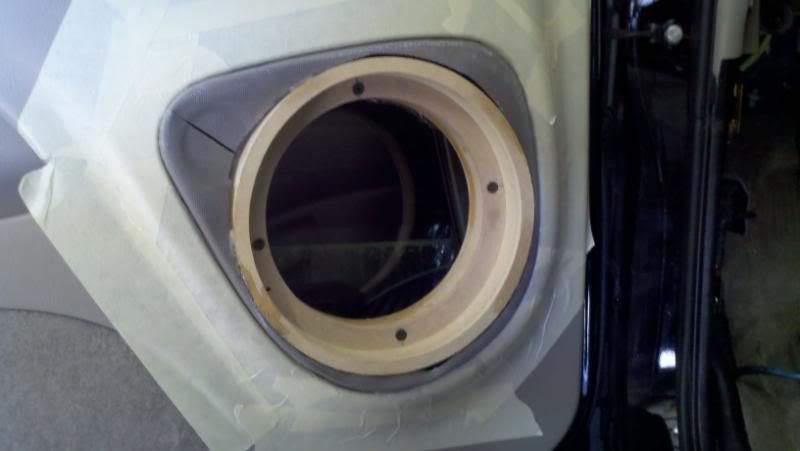
And the speaker ring goes in place, checking for fitment.
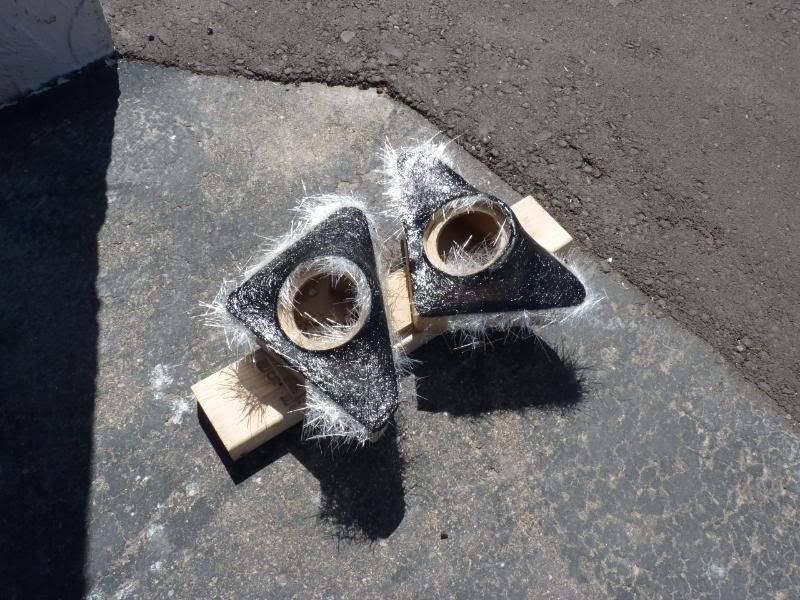
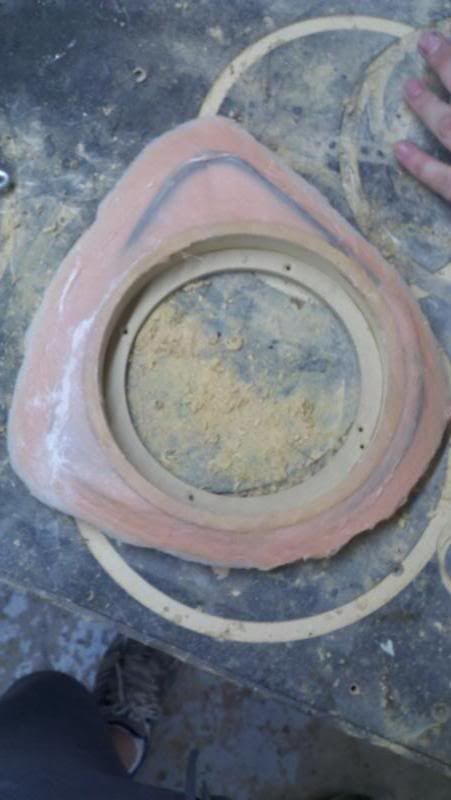
A little fiberglass getting some sun.
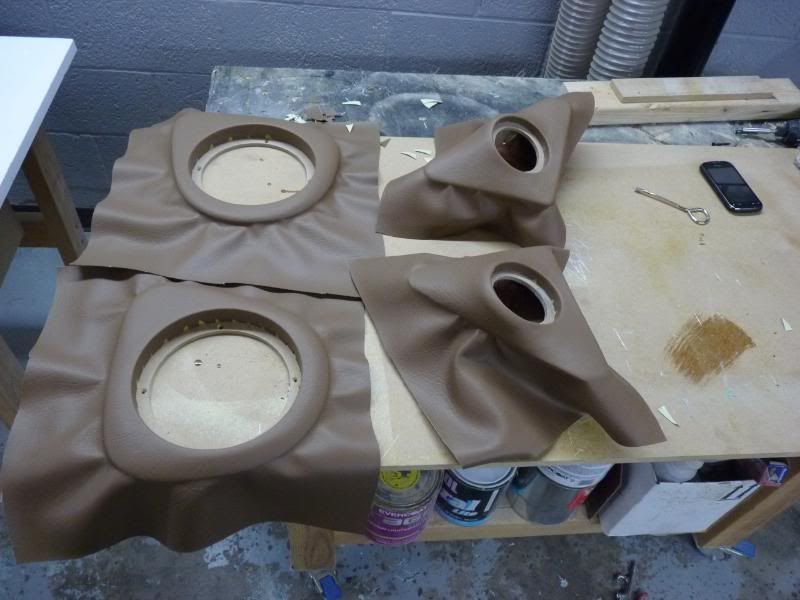
All the pods almost completely wrapped up. We couldn't find a match for color and grain, so we matched grain and we'll dye it for color.
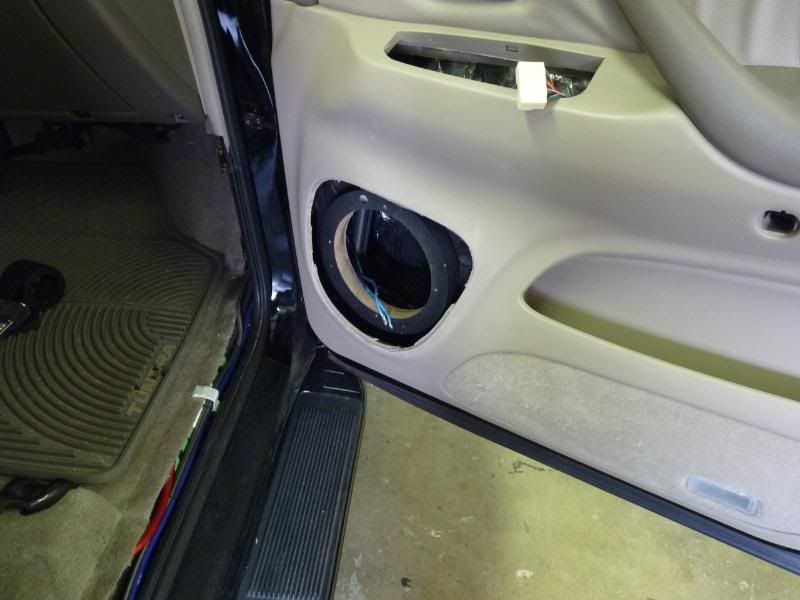
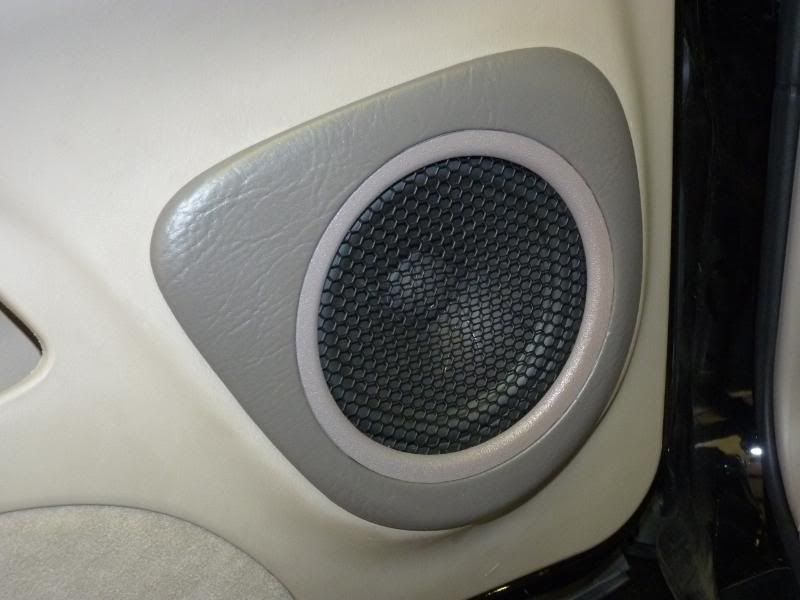
Here is the speaker baffle and the door panel installed.
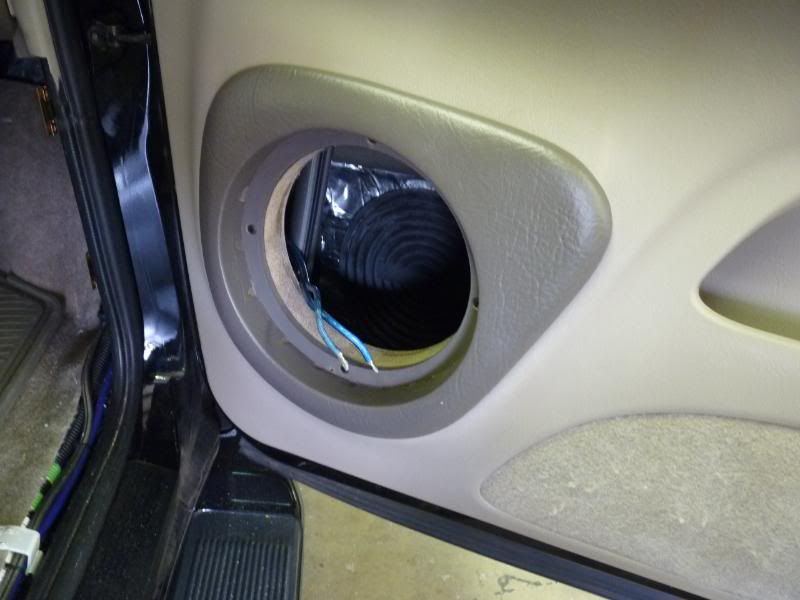
Now the trim panel goes on.
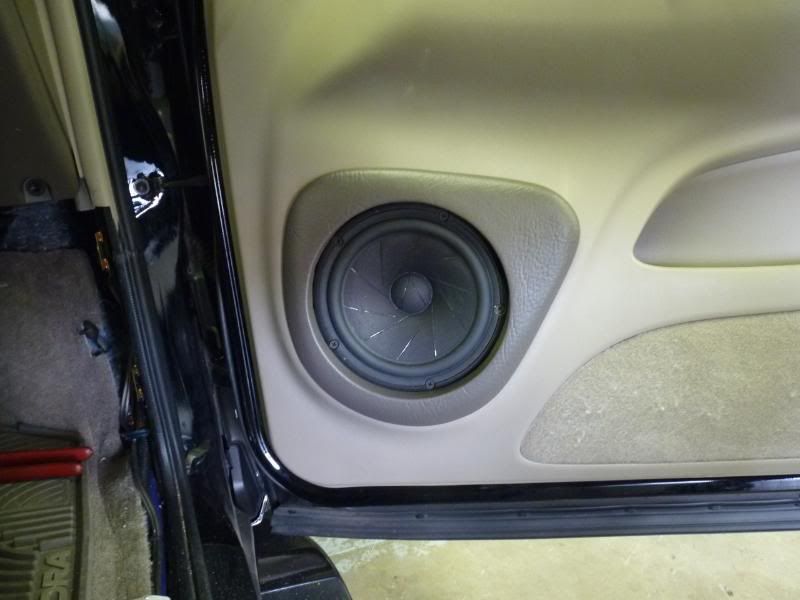
And of course the speakers.
And here are some finished pics.
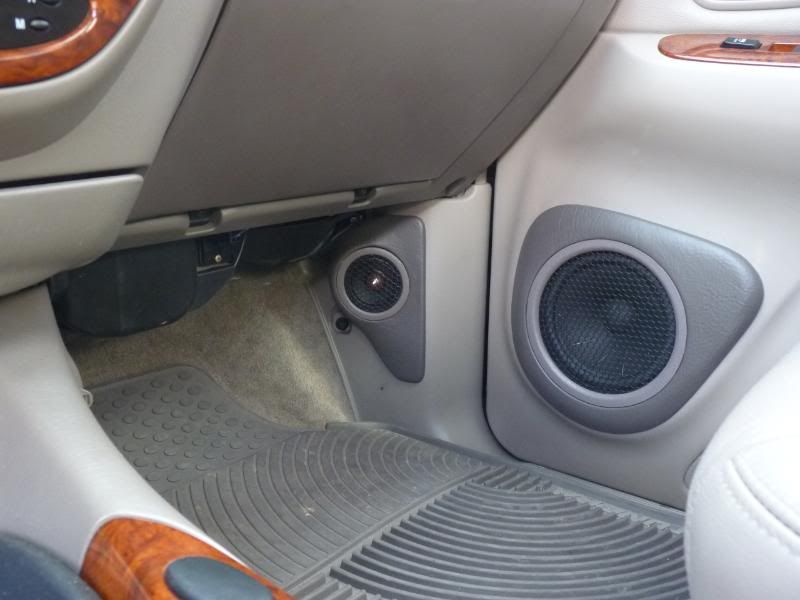
These are some custom sail panels we made for his Hybrid L1R2's previously.
What do you guys think?
1
2003 Mercedes S500 System overhaul
in Build Logs
Posted
Just wait, the end result of the tweeter pods is gonna be awesome!