

Bigpete123
-
Content Count
163 -
Joined
-
Last visited
Posts posted by Bigpete123
-
-
Very clean. Are you planning on putting any panels on the sides of your "false wall" so that they go all the way to the sides of the trunk? Or will that remain open? Either way it will look great.
0 -
those look sweet!!and if you don't finish the trunk in a similar manner, we will hunt you down and takes all your sound quality!!
I know, I know... I think I'll get things up and running, and maybe a few months later I'll start putting together something fancy for the trunk. So I'll set up the relays for the fans and everything so that I can add those later. I'll probably just make some kind of covering around the sub and amps/eq. Cover it in the same vinyl, add some highly glossed walnut burlwood veneer accents (to match the interior), and slap a mercedes logo on it or something. I'm just running out of steam right now and my other projects are backing up...
Gonna redo those fake floors in our condo (shown in the pics) with real hardwoods and carpet, put our baseboard and crown moldings in, work on a restoring/refinishing/updating an armiore that's a family airloom on my wife's side of the family, etc etc, the list goes on. I'm more of a woodworker than a car audio guy. But I will use my woodworking skills to come up with something for the trunk eventually. Probably not right away though... I need something new to work on
 0
0 -
Thanks guys. I'm really starting to feel like I'm getting close to being done with this year-long project!
0 -
Vinyl work came out great. There are a few very minor wrinkles here and there, but it's a million times better than anything I was coming up with on my own! I'm so excited to put my door panels back on this weekend!

 0
0 -
Why not put some 8" midbass/sub drivers in his doors IB and forget the subs. I think that would do more than he needs and really sound the best anyway. That way you could have them play up to 300-400hz to blend with the front stage while still providing enough low end grunt for someone who is just into SQ. I'd try the Peerless XLS 8's in the doorsDefinitely true... some designated midbass drivers might be better than sticking small subs in the front. Maybe I'm just lazy, but making another set of door pods is more work than I'm willing to put in on his car! Plus I'd have to do some research on crossovers and his current setup to make sure the frequencies are all correct.
Do you think it might sound funny to have a midbass driver from a different manufacturer than the other speakers? Would that be noticeable?
Even if I did the midbass drivers, I bet he'd still be into getting a moderately-powered subwoofer. Not something that would kick him in the kidneys, but something that would allow him to detect the upright bass in his jazz music. To me, when I think of jazz or classical music and consider a sub accordingly, I keep thinking that we should go with an infinite baffle setup. It's just so much work!
Man, it sucks to learn what good sound quality is like! It is so damn expensive!!
:)I keed I keed. I love this stuff
0 -
i'm sooo excited... I'm picking my upholstered door pods up in an hour and a half. I hope they turned out well! Pics later tonight!
0 -
Hi all,
Some of you may be following my build log. Well my dad is seeing my progress and he's getting jealous. He drives a 1986 Mercedes 300SDL. He's the person who got me into audio in the first place.
He as an incredible-sounding system in his car, with the exception of bass. He only has 4" MB Quart speakers installed, running on a PPI amp and a super high-end Nakamichi head unit... the one that's all metal. The detail I hear in his system is just incredible.
He hates loud bass, but he most definitely could use some improvements in the low frequency range. Some of you may know these cars-they have a gas tank right behind the rear seats, and the trunk is relatively sealed from the cabin. Luckily his car is less-sealed than mine, so we will probably get away with 2 8" subs flush-mounted to the rear deck (i.e. "hanging" on the rear deck).
The question is this. For SQ (please ignore SPL, but if an SPL subwoofer also has the best SQ, I'm all ears), which sub and enclosure type would you recommend? I would prefer not to go the infinite baffle route since it's just a ton of work to seal things off properly, but if you guys truly think that's the best SQ setup, I will investigate it. But I don't want to have to build enclosures for his rear speakers to seal those off.
So I'm thinking 2 8's in sealed boxes, hanging from the rear deck.
I also started looking at JL Audio's 6W3v3 drivers, which won't be available until June this year. I probably won't get to this project by then anyway. But the reason I'm looking at these is because it might be cool to install the 8's in the rear, but also bring some smaller subs up into the front of the car in some false floors or something. That will maybe bring some mid-bass to the front to help balance out those 4" speakers in the dash. These little subs only require .18 cubic feet in sealed enclosures. That's mind-boggling to me!! We're talking a 3 3/16" cubic box!
Anyway, please give me your wise guidance.
0 -
~
in Build Logs
lol isn't there a Christian band named Audio Adrenaline? Have you heard from their lawyers yet?
jk
Great stuff btw.
0 -
saw some pics of Denim's install on MBworld.org. We drive the same car, he did the same install I wanted to do (and am getting close to completing). He's not too active over at MBworld and I had questions for him, so I stalked him! lol SSA was in his sig and it said he was a mod.
Little does he realize, I know where he lives. lol jk
0 -
very cool
0 -
don't skimp on the trunk though. it'll cheapen the rest of the work. and as you put it up, you've followed through on the rest of the install without cutting corners, don't cut that one. with the quality of work you've presented so far, you'll only be letting yourself down if you don't finish the trunk as nice as the rest of the install.I know you're right... I considered trying to apply my woodworking skills to do something classy in the trunk. And maybe that is something I will do later. The wood in my interior is a walnut burl, so I'm considering making some covers for my amps/EQ and putting some matching walnut burl veneer on it... and slapping a mercedes emblem on there. We'll see. I don't want to think of that right now because I'm so sick of this project. lol
0 -
nice, looking good.
0 -
Wow, thanks guys. This is gonna sound cheesy, but I've really learned a lot about seeing things through from this project. My "main" hobby is woodworking, which is why I have a good supply of tools. But I tend to feel more comfortable with woodworking because I can sit down, draw up a plan with clean dimensions, and know exactly what I need to do to build a quality piece of furniture.
But with car audio, it's very different. There's a ton of guess and check work involved. You don't really know what you need to do until you try it, mess up, redo it, and redo it again. I feel like cutting corners all the time because it's frustrating work. Whenever I'm working on something and I get the urge to cut a corner due to frustration, I put it down and I work on another part of the installation. That's why I many of the sub-projects within this installation are only half-finished.
Anyway, it's nice to get a positive response out of you guys cuz I know you guys are honest based on how you've also responded negatively to some other installs on the board. Nobody I know is into car audio (or audio at all, really), so when I show people my project they just think I'm nuts!! Although my interior has been taken apart for close to a year now

Anyway, the upholstery on the doors should be done before this weekend, so I'll post pics for you guys when it's done. Hopefully I'll have the door speakers installed this weekend and finish up the FG on the tweets. Then all I will need to do is hook everything up, finalize the mounting positions for my crossovers, and finish up the trunk setup. The trunk is gonna be pretty ugly-looking, but I don't really care about the trunk... it's a trunk, afterall.
Until then...
0 -
lol I hardly even have time to work on my own, let alone fly out to MD to work on yours!!! ha ha
0 -
And there you have it. If you're reading this and you're confused where to start, go to post #74 in this thread and start there. Thanks for looking! Comments welcome (positive or negative) as always
0 -
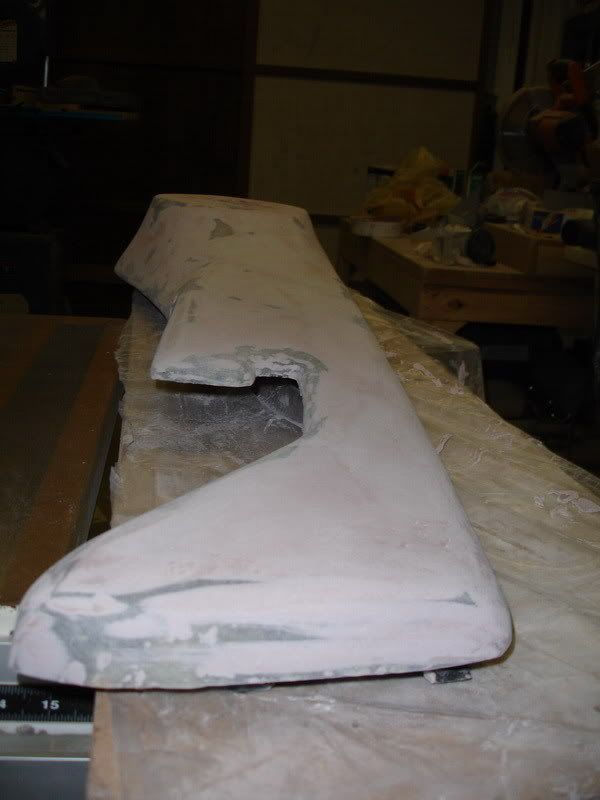
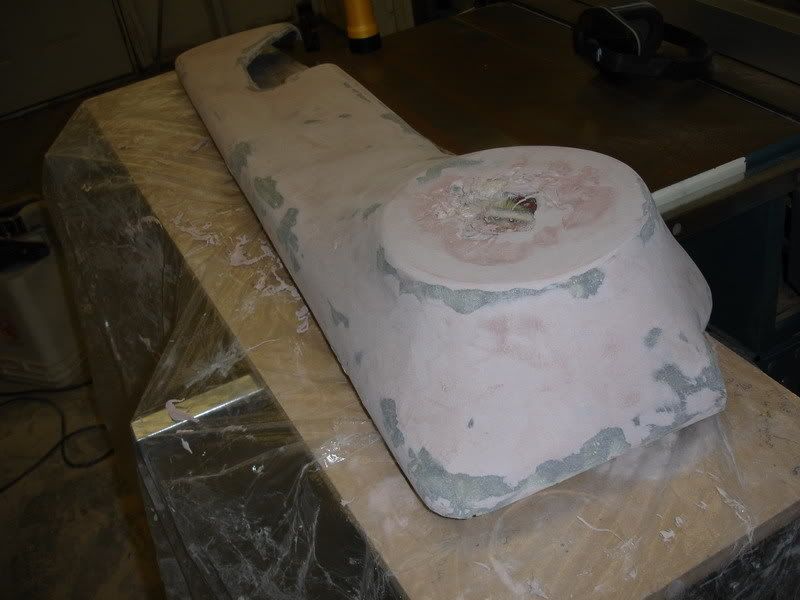
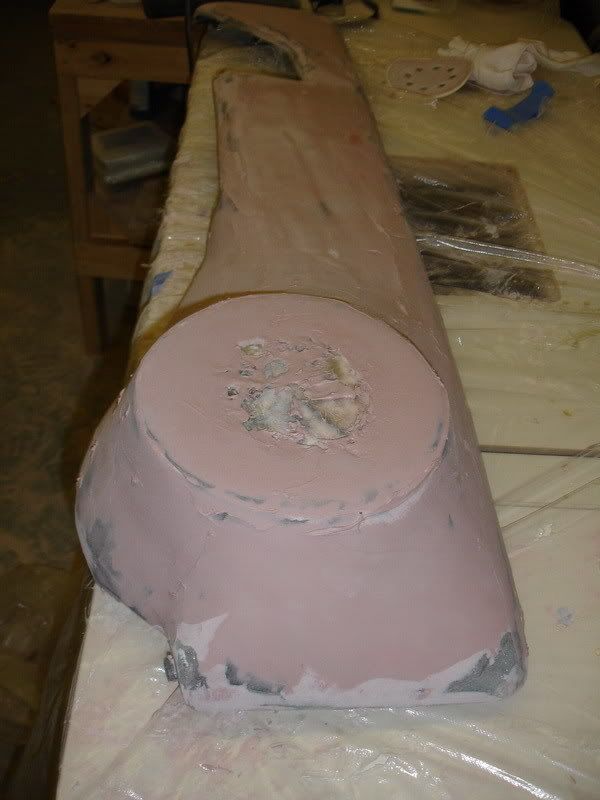
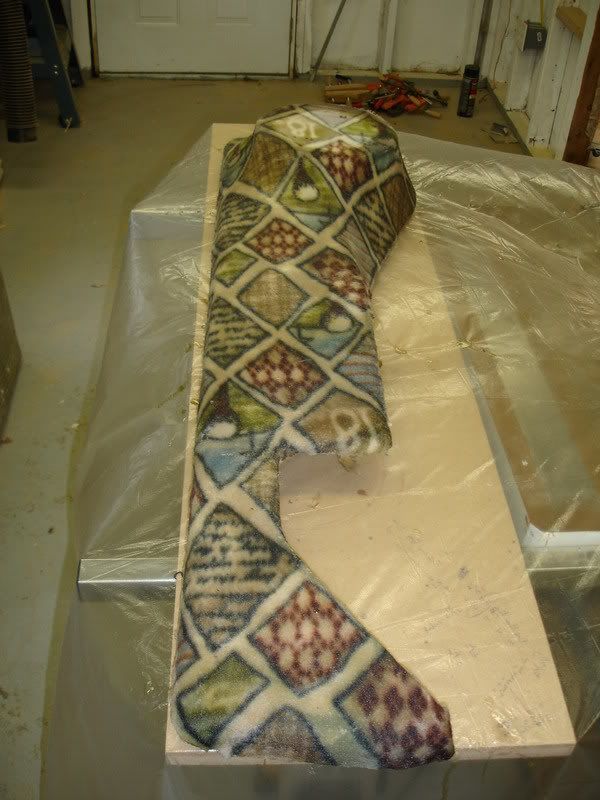
This is my first true FG job (I don't count the rear speakers, those were easy). It came out hella bumpy, so I sanded the FG itself with some agressive sand paper and my belt sander. I was itching for days, but it came out pretty well.
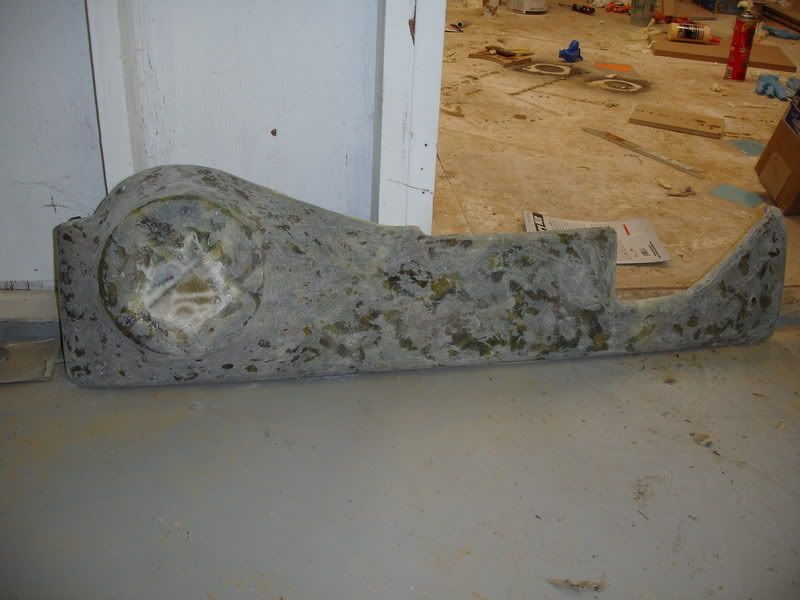
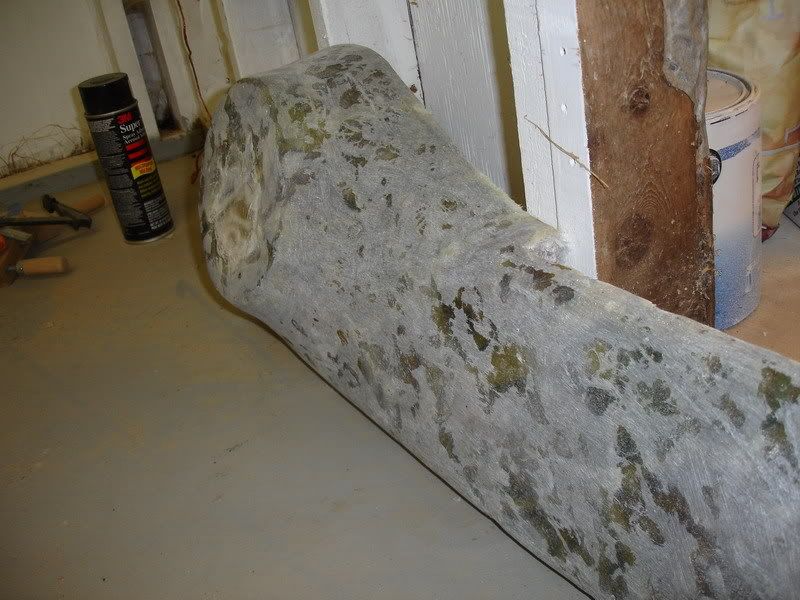

And bondo and sanding. I think we're about caught-up to realtime now:
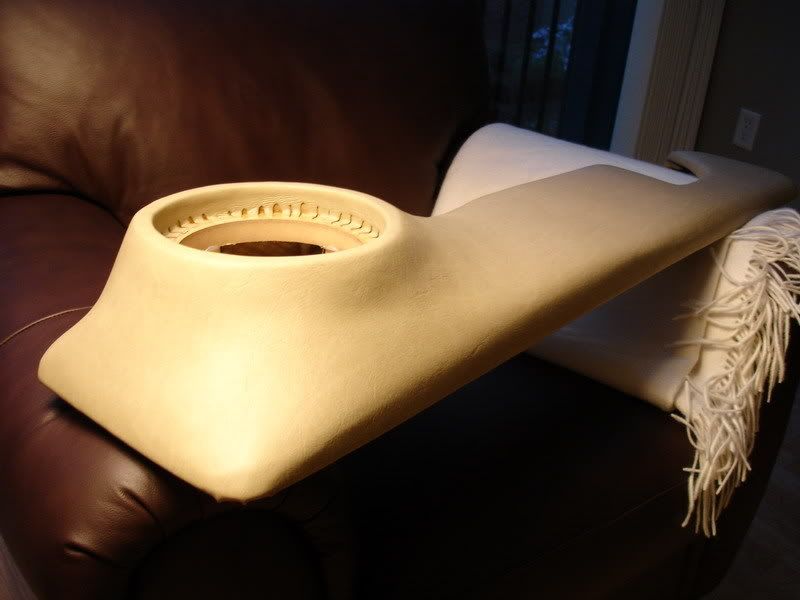
My goal of how they should look (pic courtesy of a british dude on a Mercedes forum- I copied his design and I'm not ashamed!)
 0
0 -
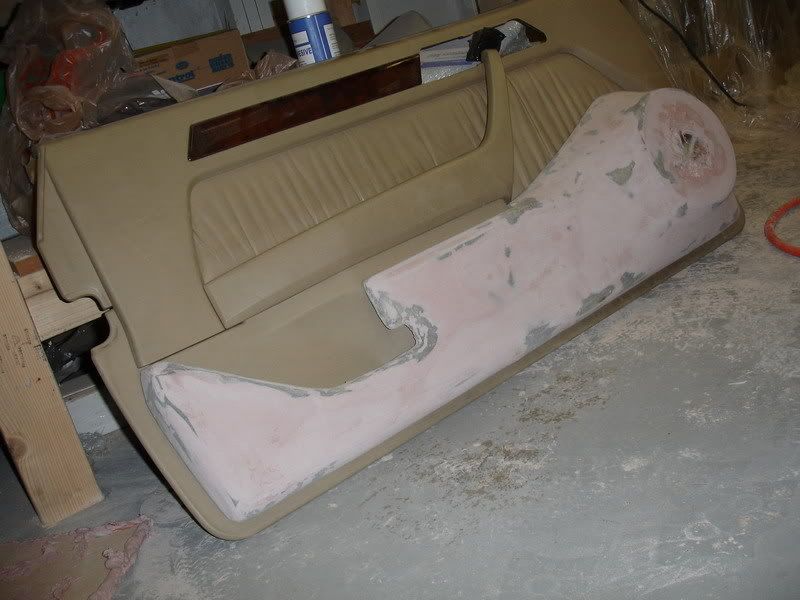
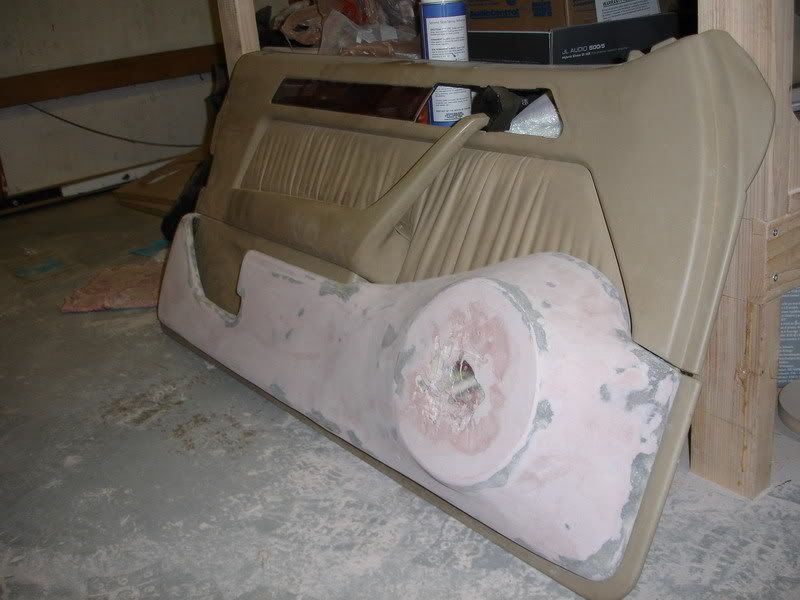
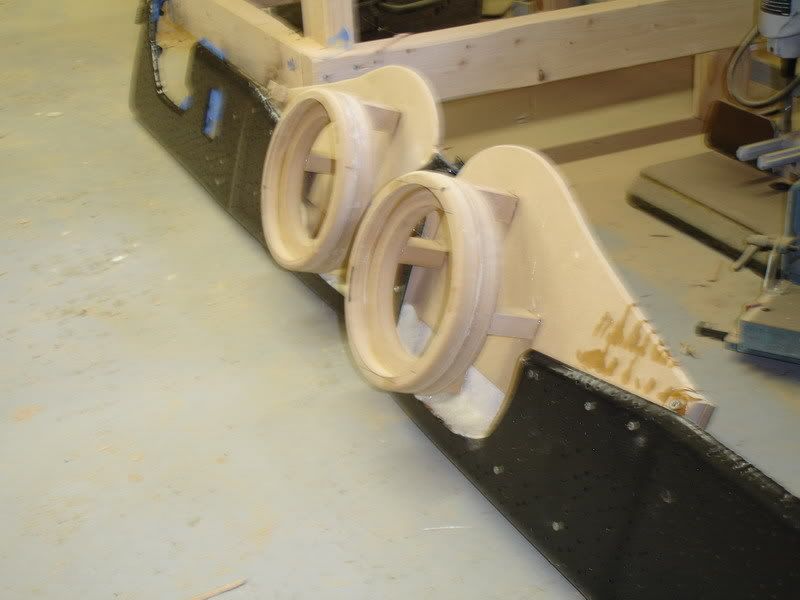
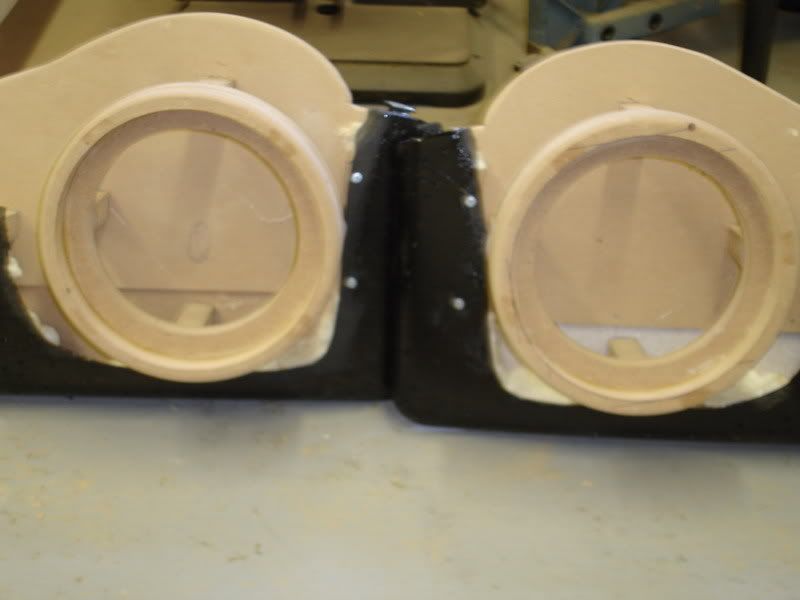
And now we're closing the loop back to my earlier pics of my FG door pods.
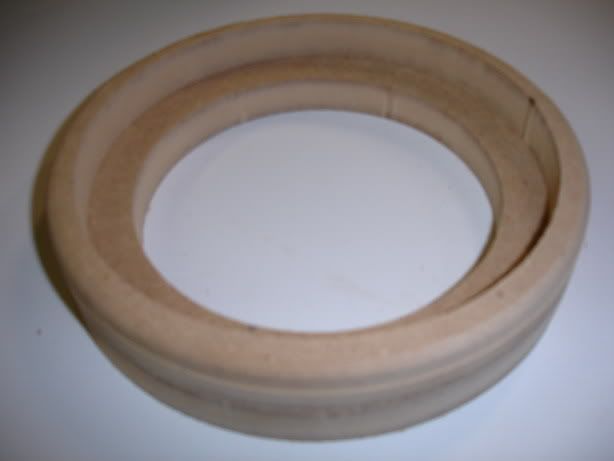
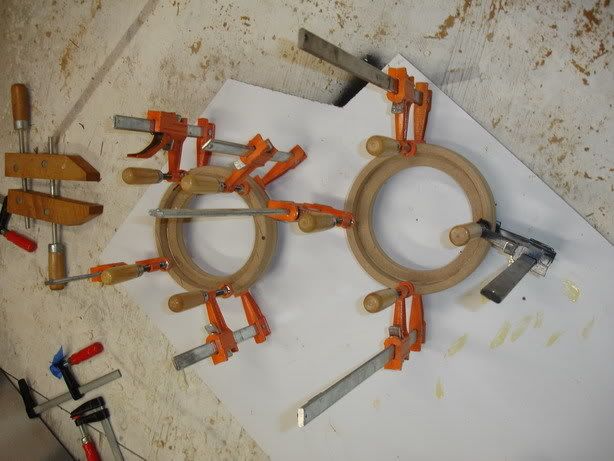
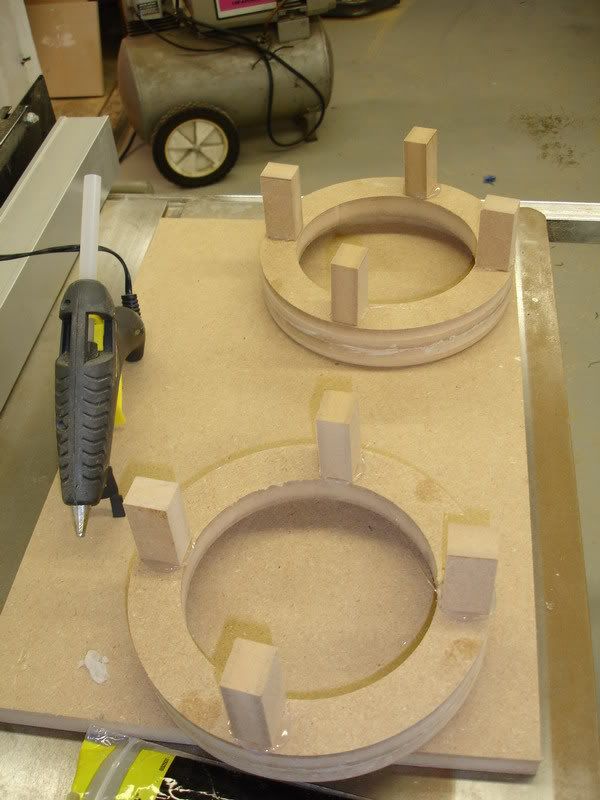
Speaker rings (recessed):
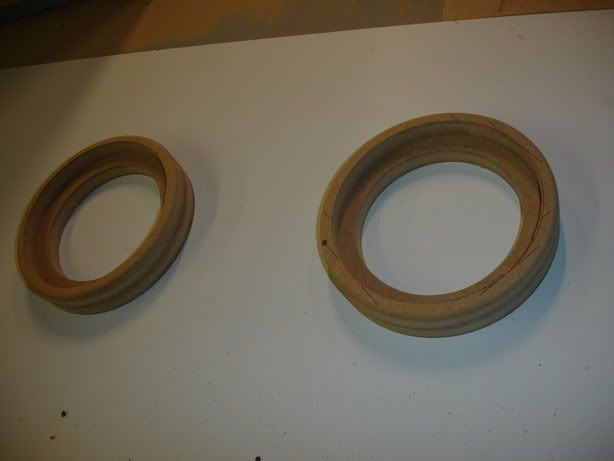
The map pocket where the speakers will go. I cut a horse-shoe shaped hole where the ring will go. and I made a curved 1/4" MDF backing.
drilled a bajillion little holes to ensure a strong hold on the plastic:
dowels/pegs:
rings attached:
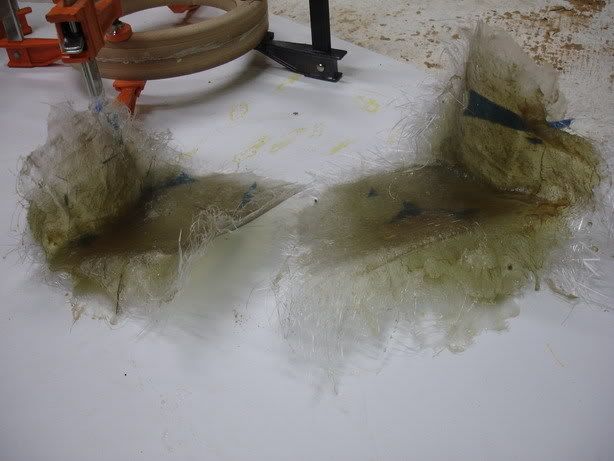
Fleeced (lesson learned- use a thinner material than fleece. this was a total waste of resin to get that thing soaked)
Coat of resin:
 0
0 -
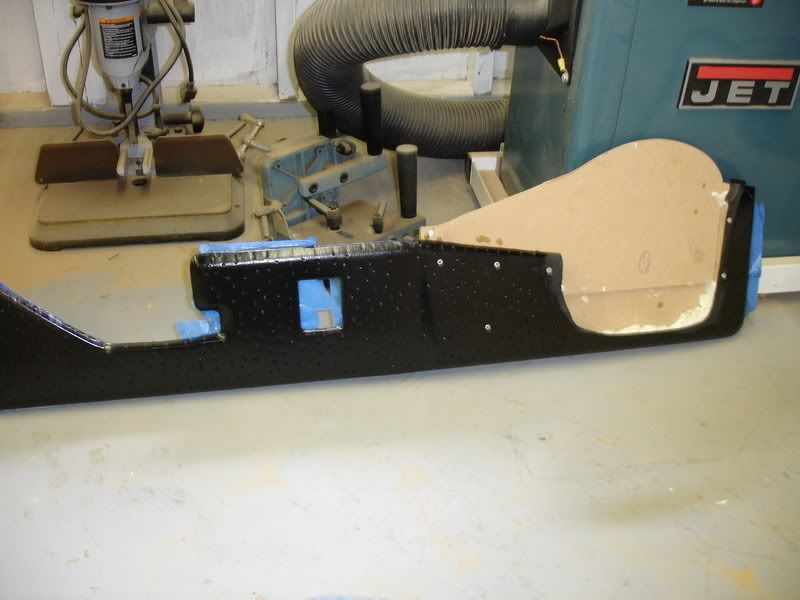
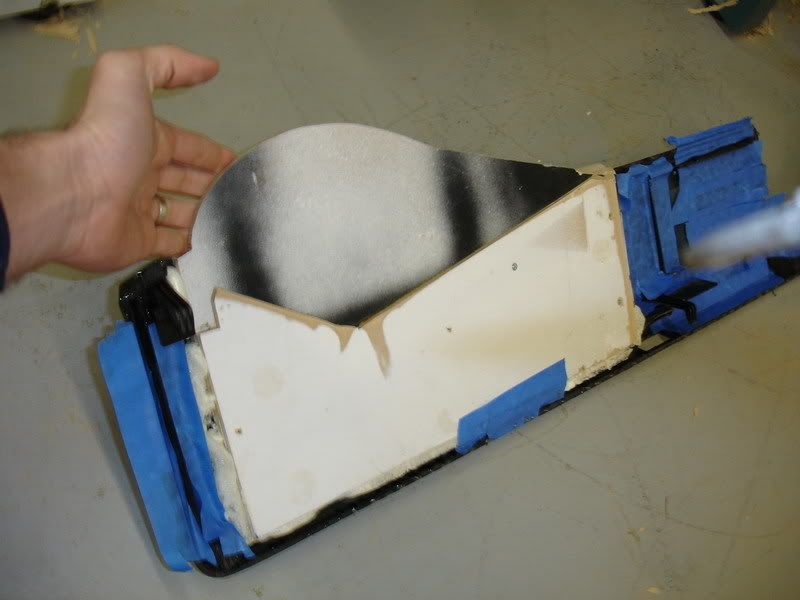
started work on the tweeter pods:
 0
0 -
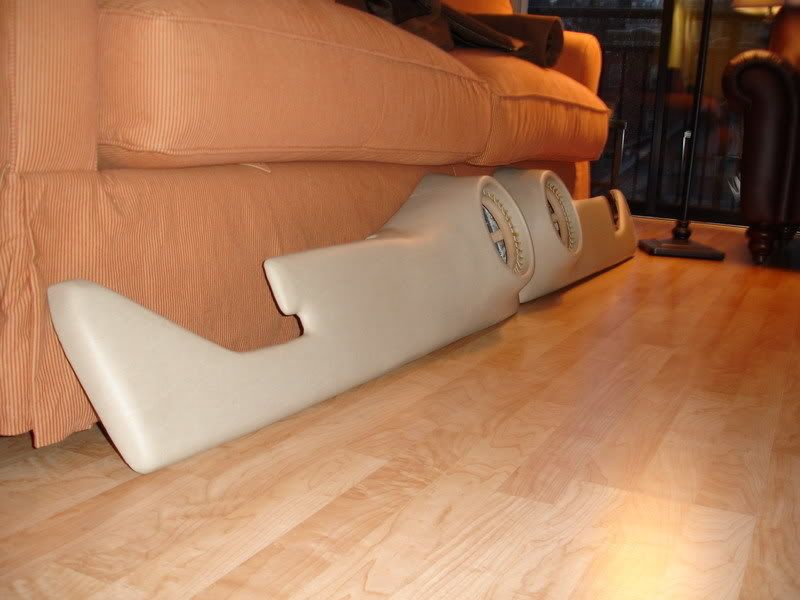
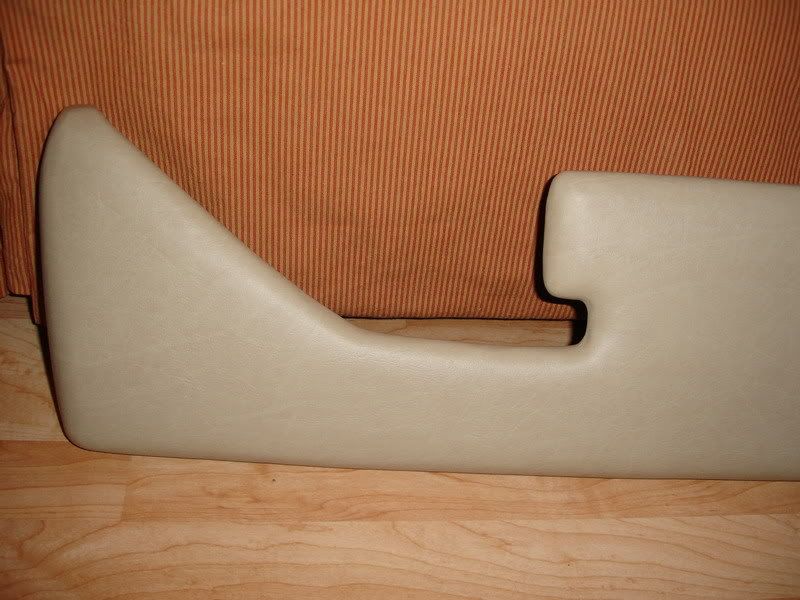
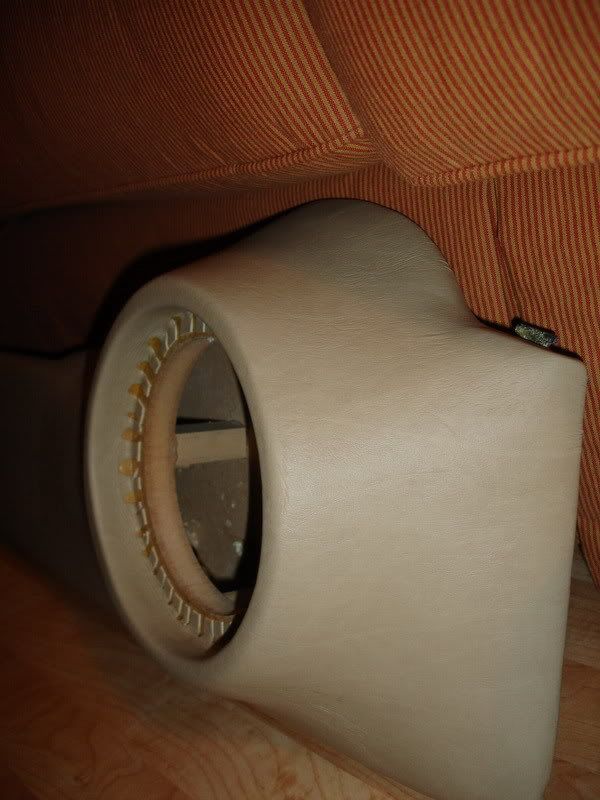
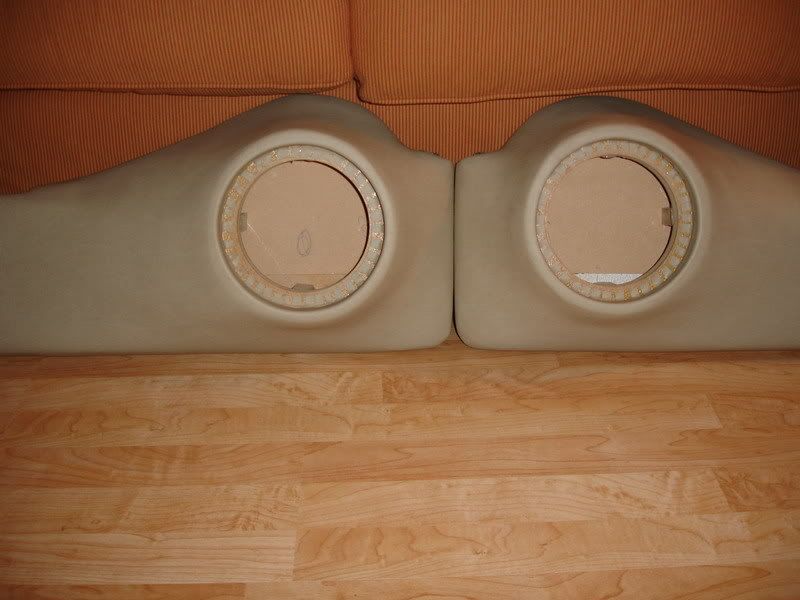
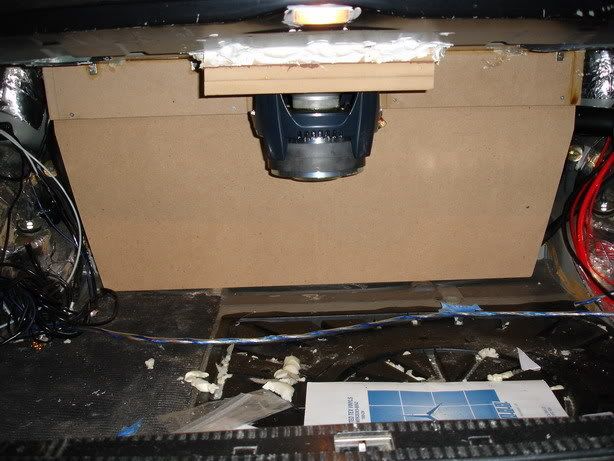
okay, I lied. I do have a few trunk pics, but these are really old. Those boxes hanging from the rear deck were my un-elegant solution to the headrest problem.
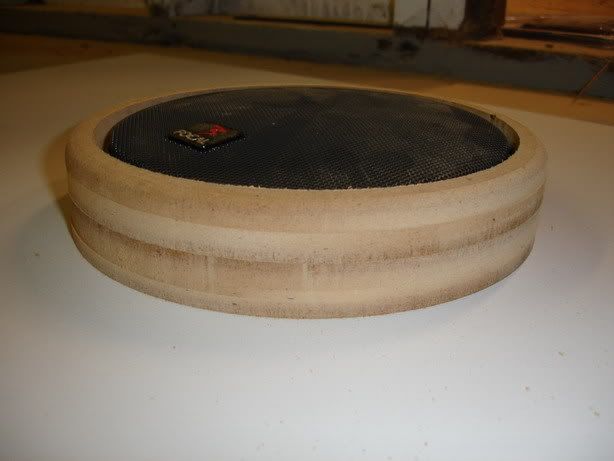
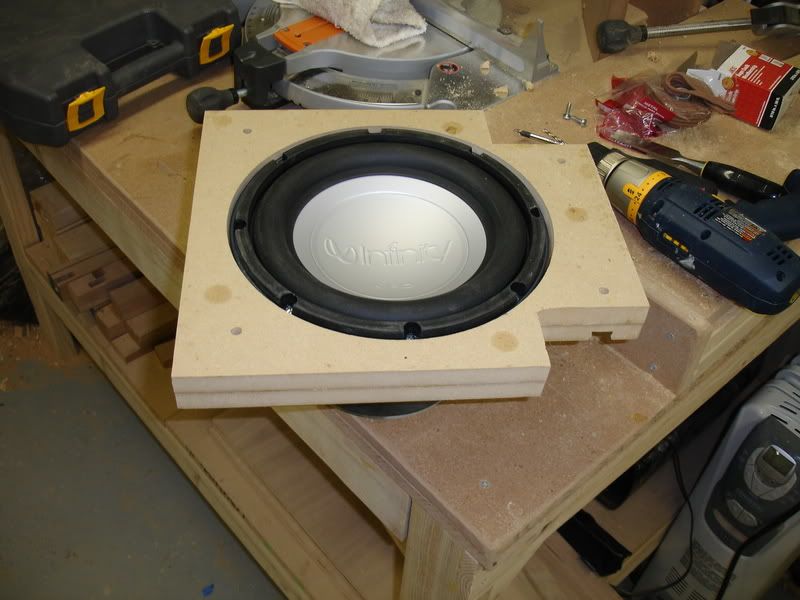
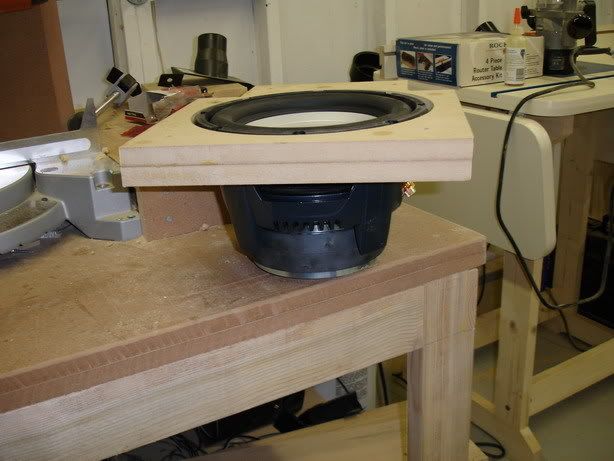
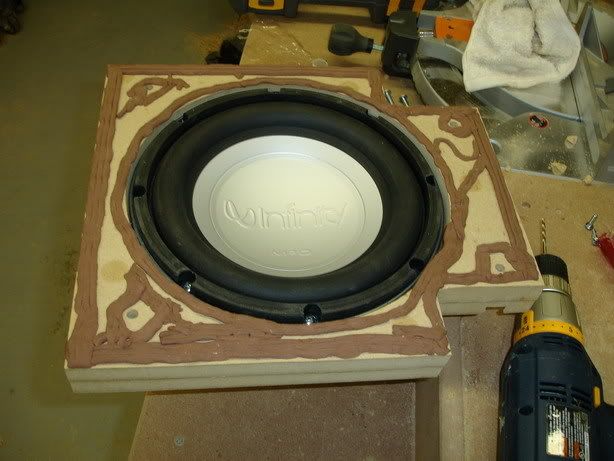
Subwoofer baffle (keep in mind, I'm only running ~200w rms to this sucker, I'm an SQ guy)
rope caulk:
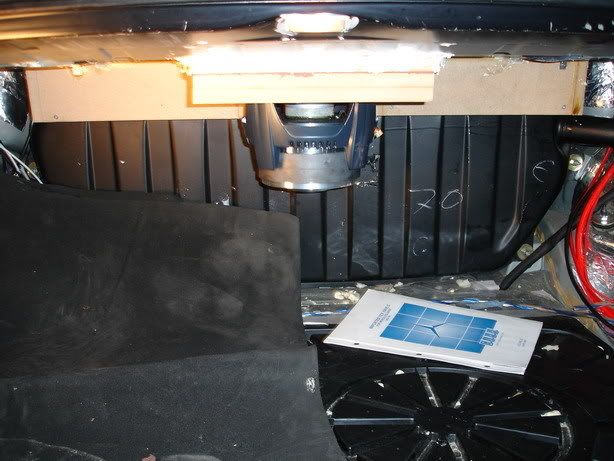
the beginnings of my amp rack (that's a gas tank behind it, btw)
 0
0 -
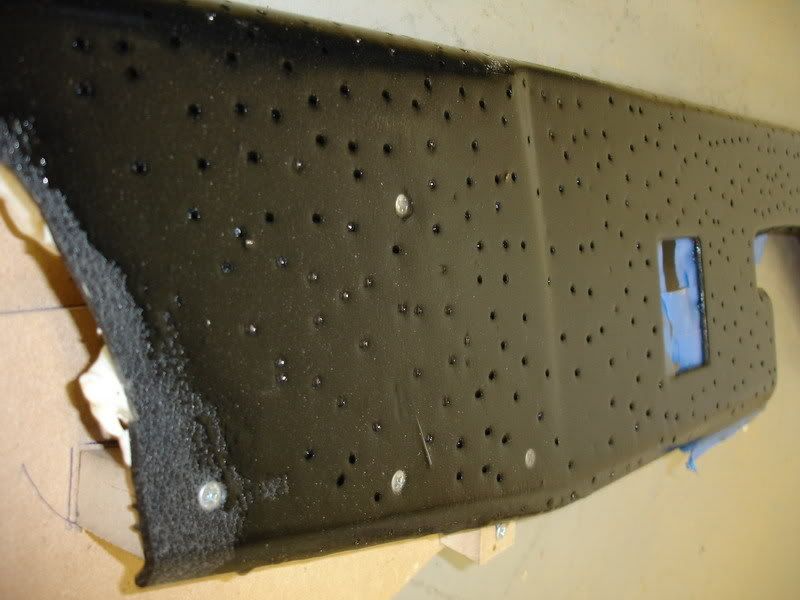
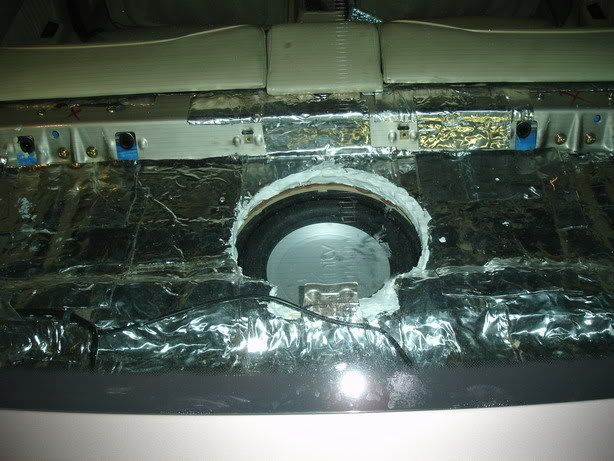
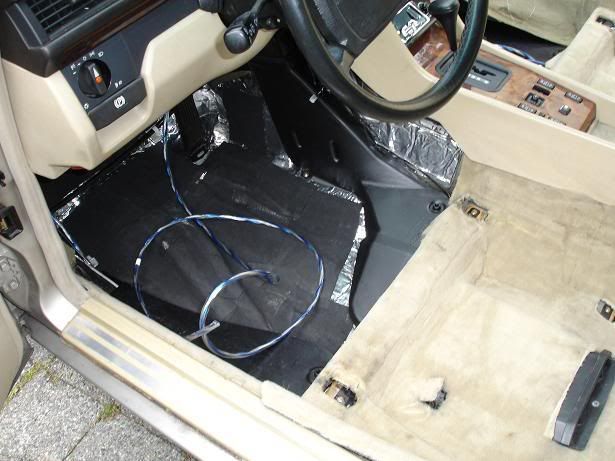
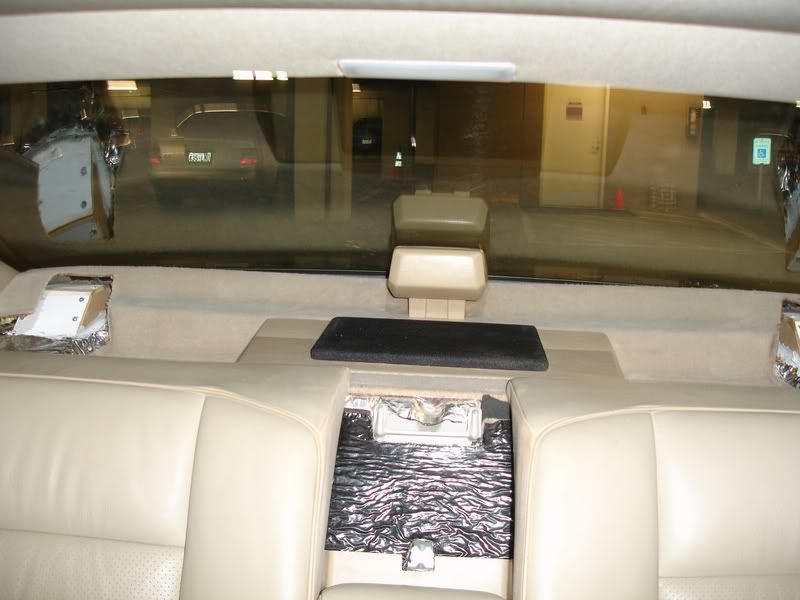
Oh I forgot to show these at the beginning. I sound-deadened the interior with Damplifier Pro (~2 layers) and some foam matting.
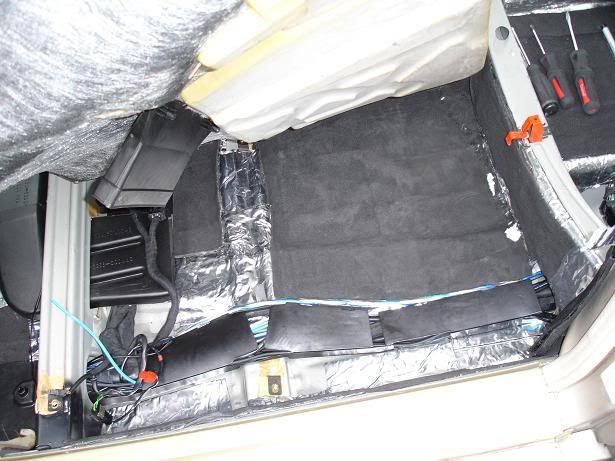

this pic shows the trunk hinges that I had to cover and seal:
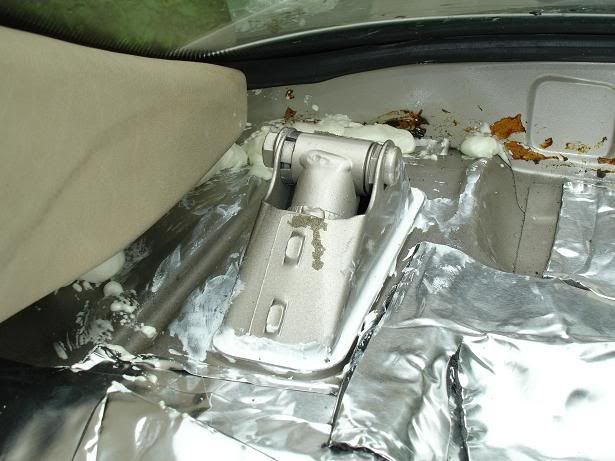
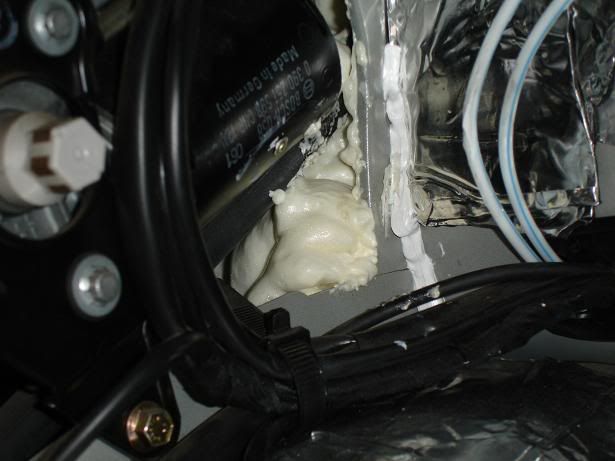
expanding foam in select places:
 0
0 -
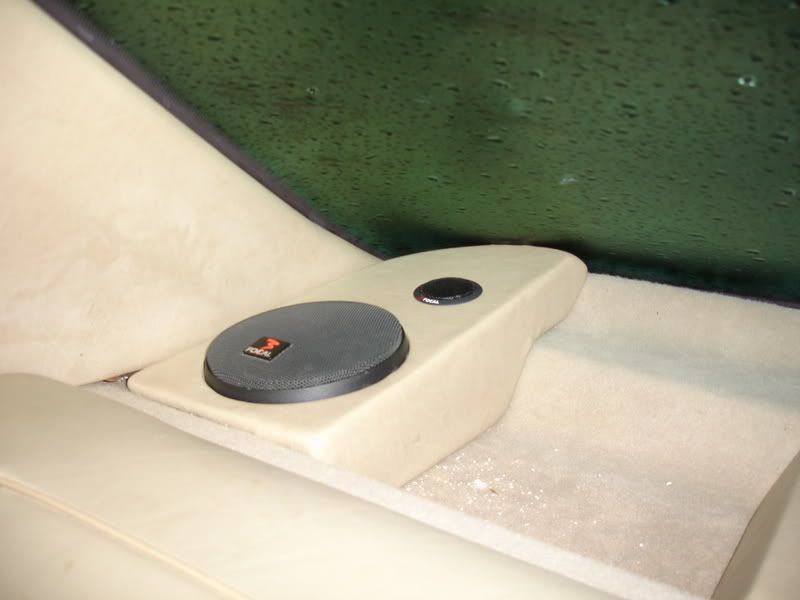
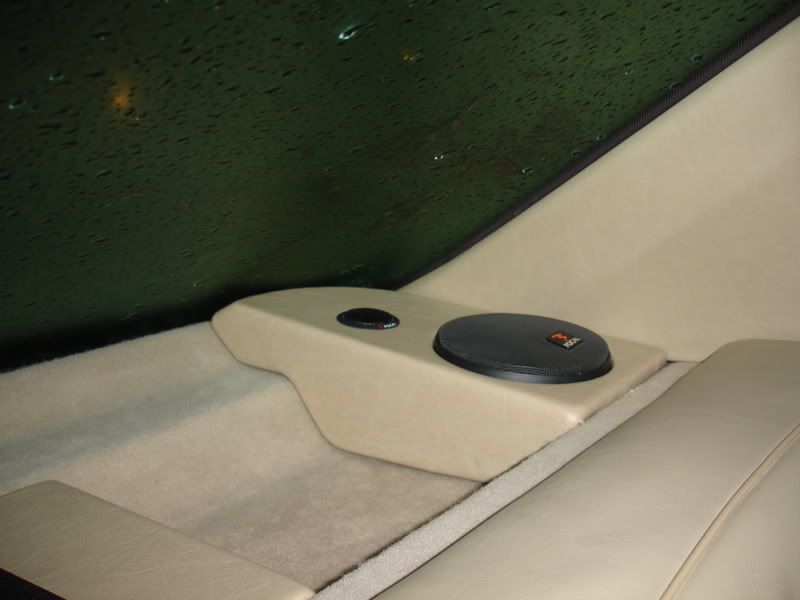
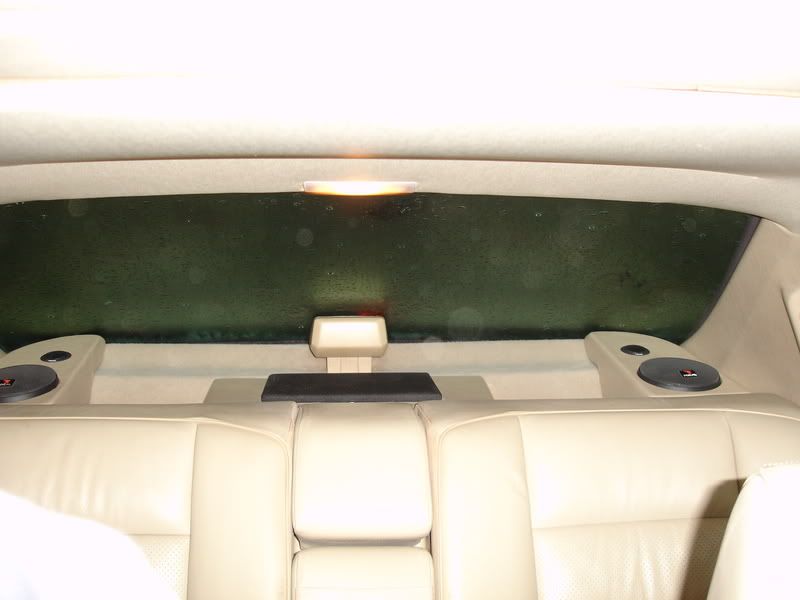
then upholstered and installed my rear speakers:
 0
0 -
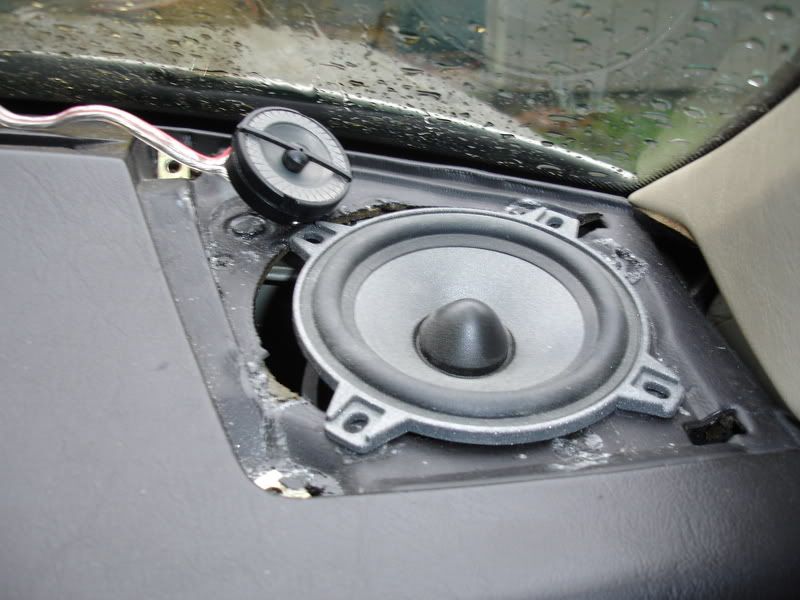
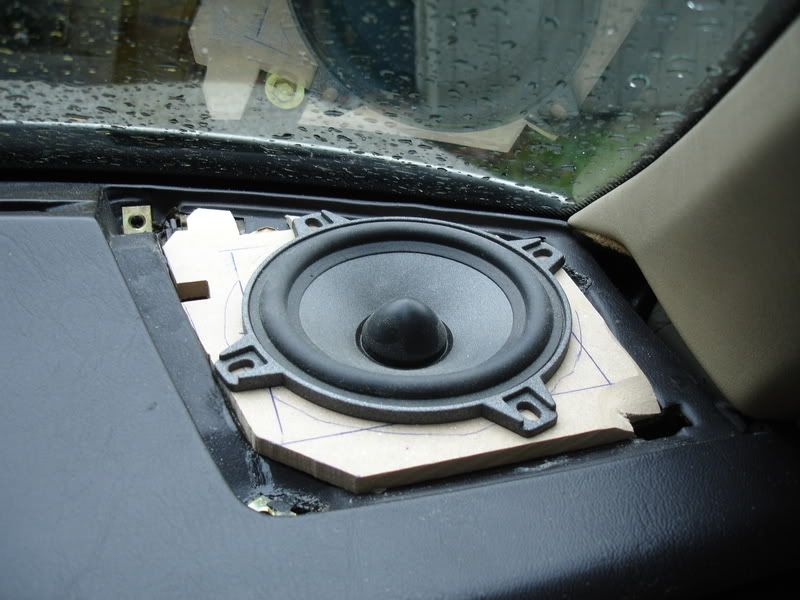
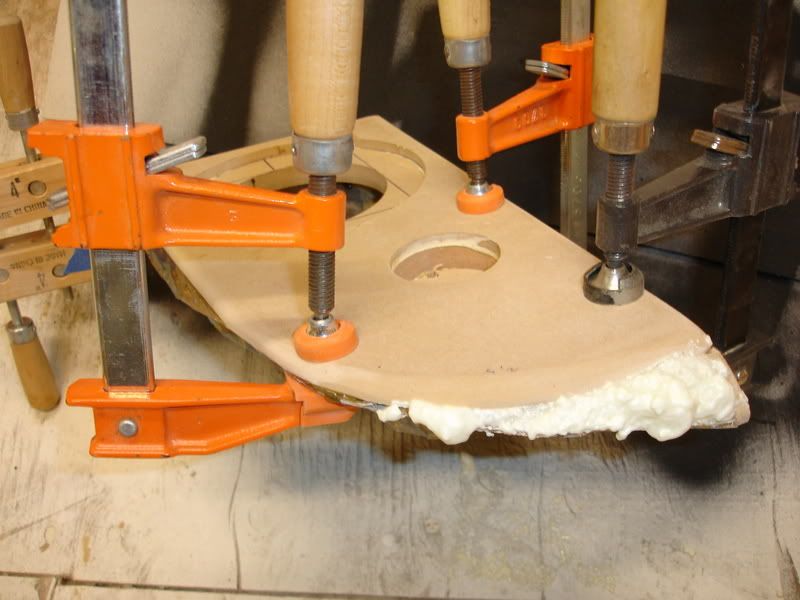
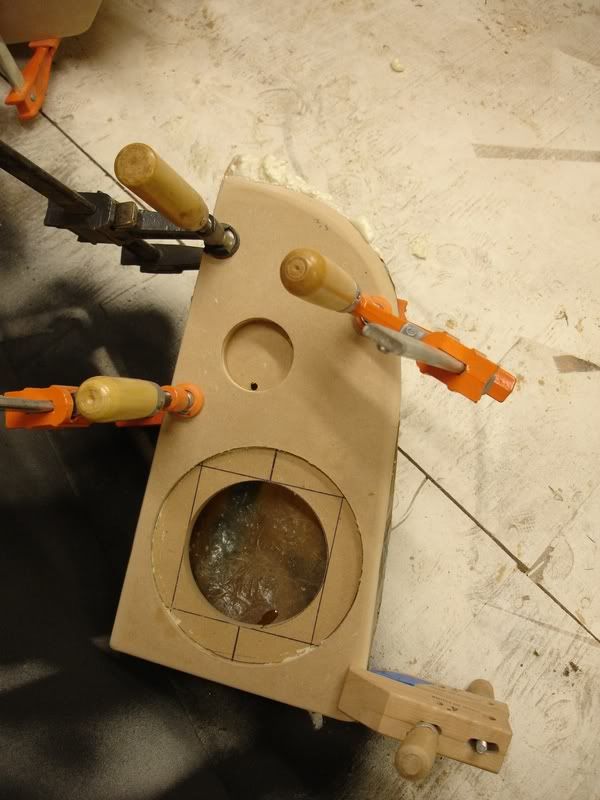
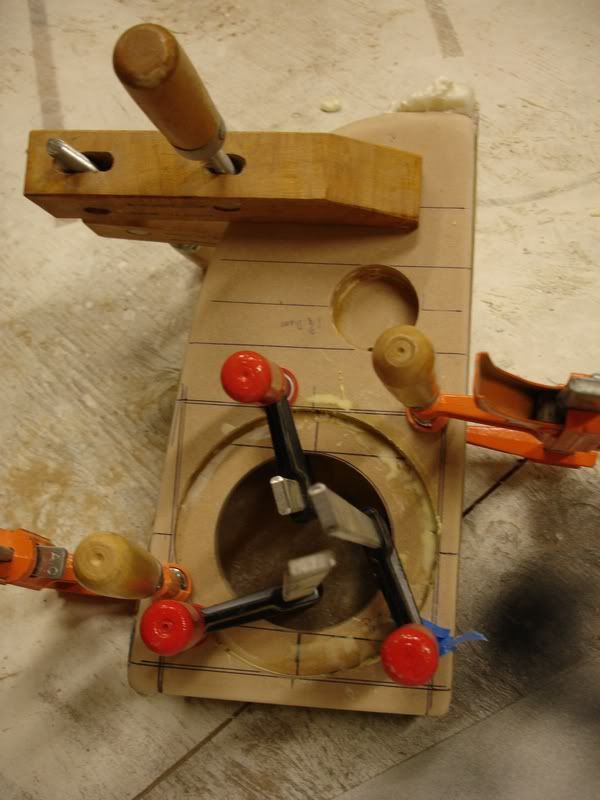
turned my attention to the stock dash speaker locations. Dang germans and their metric system! I had to make baffles for the speakers to fit, and that was a lot of guess-and-check:
 0
0 -
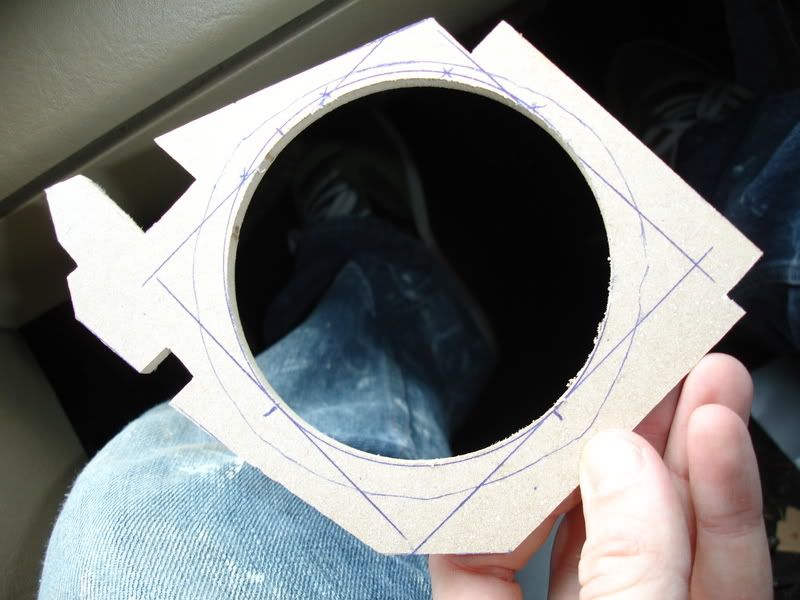
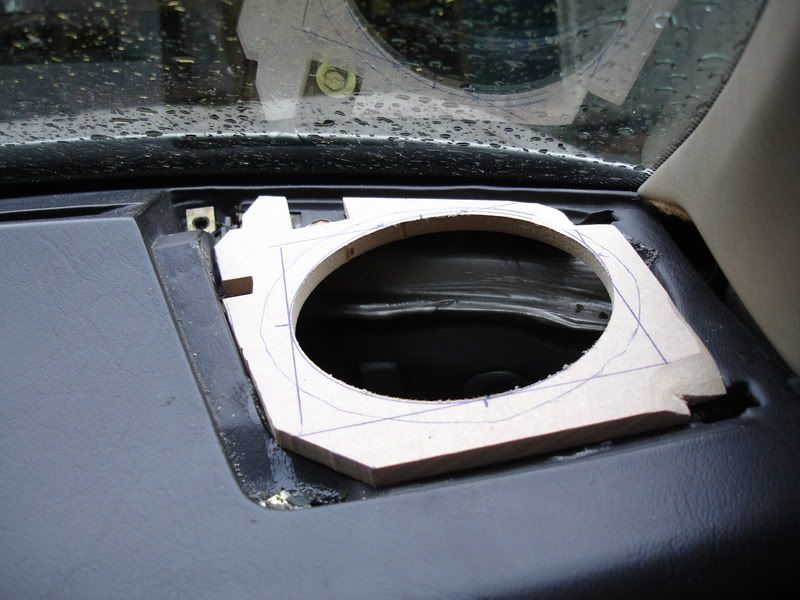
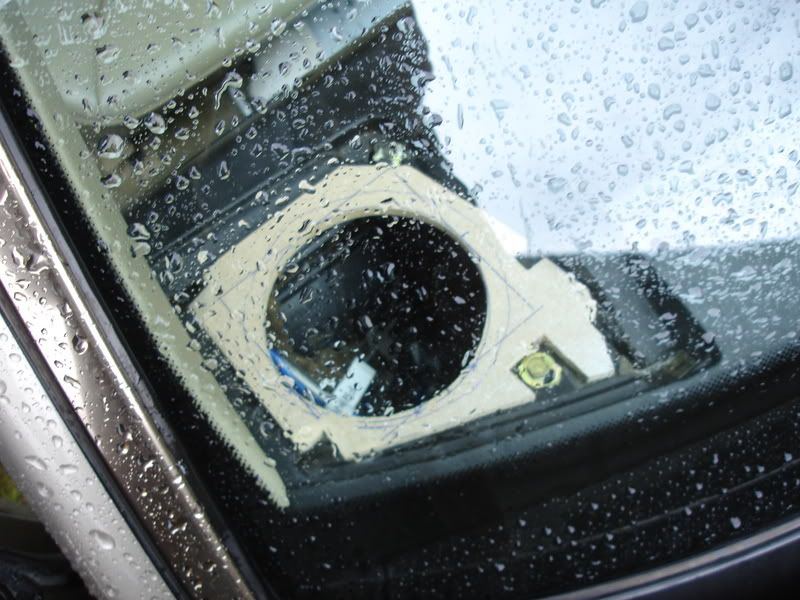
created the baffles out of MDF to give them a more factory look:
 0
0 -
aight, I dropped the pods off at the uphostery shop today. I'm not gonna tell you guys how much they're charging me! lol Worth it to me, but not cheap!!
I guess I should be working right now, but I'm gonna add the pictures back that used to be in this thread before the side crashed. I'll try to put them in order. You guys know more about car audio than I do, so you should be able to fill in the blanks.
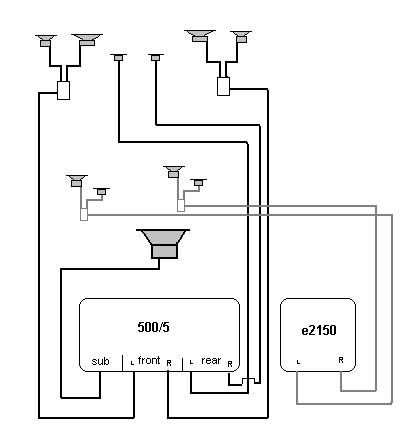
My fancy schematic drawn up in MS paint:
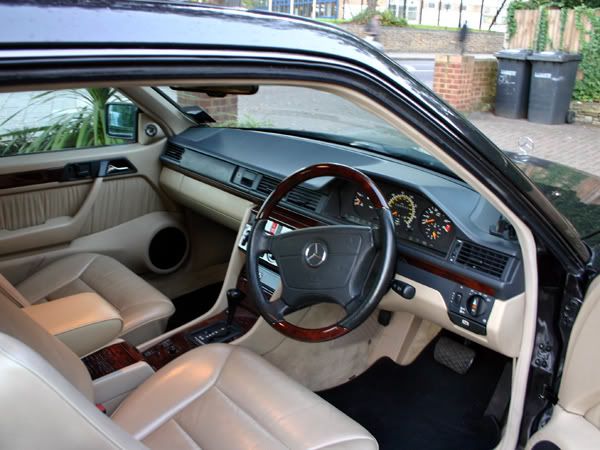
Front speakers are Focal Polyglass 3-ways, bi-amped (tweets on their own channel). Rears are the matching Focal 4"/tweet combo. Amp is a 500/5, sub is an Infinity Kappa Perfect 10vq via infinite baffle. Amp for sub and front speakers is the JL Audio 500/5, and the rear fill is lightly powered by JL Audio e2150. Head unit is a Nakamichi CD-400, which looks at home in my 1990 Mercedes 300ce. I think that covers the basics.
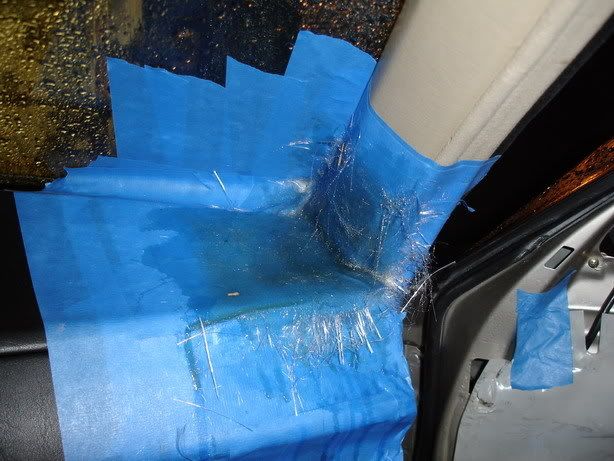
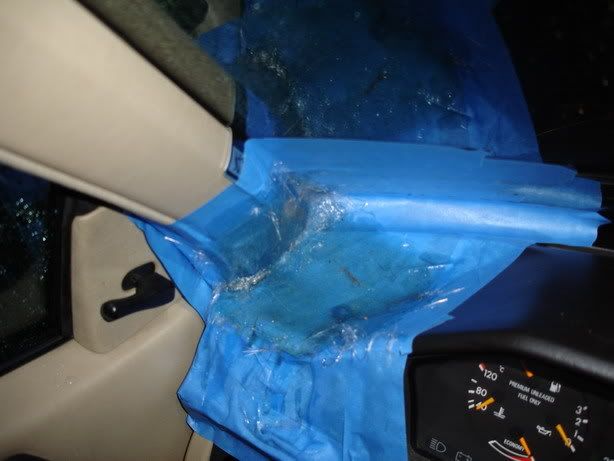
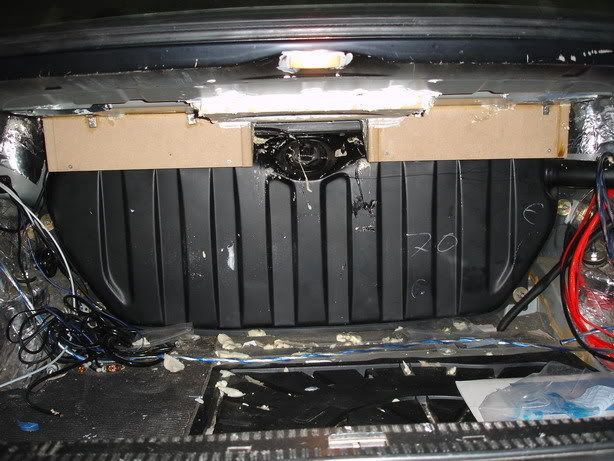
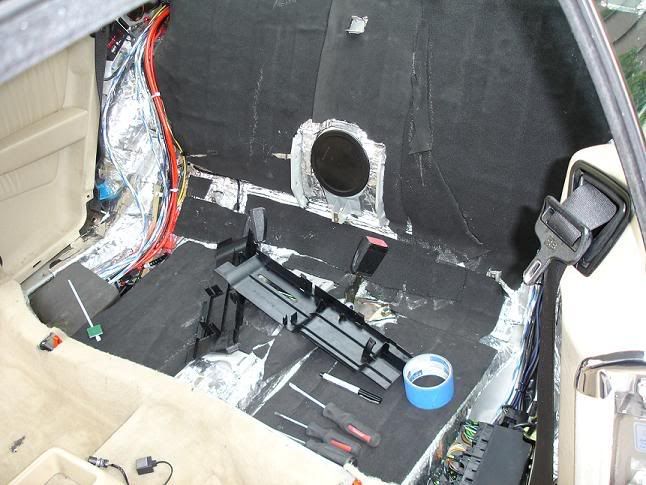
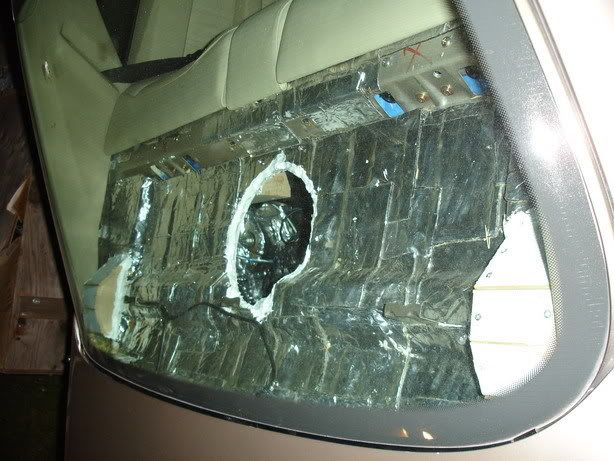
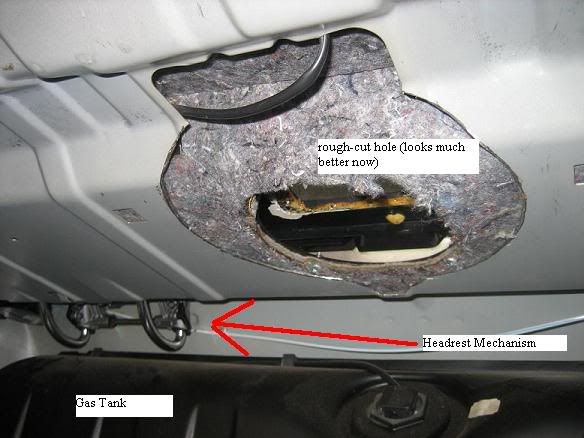
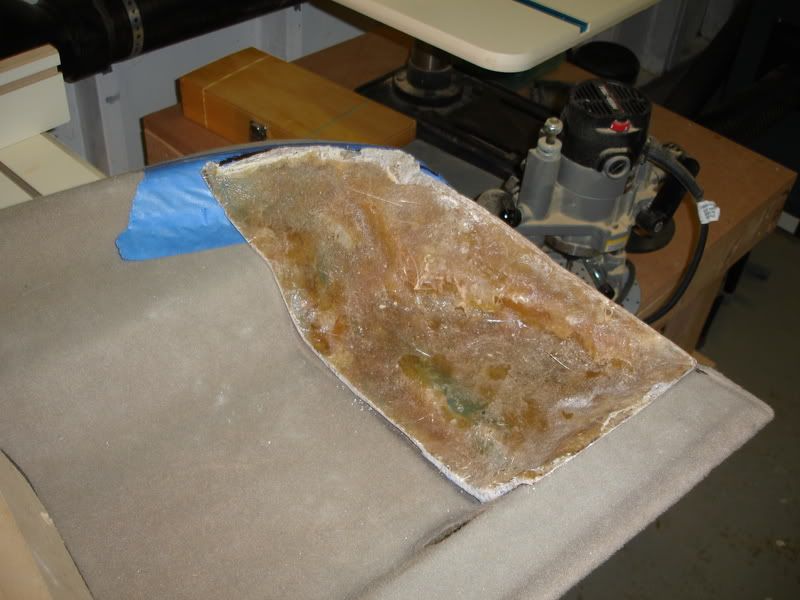
The hole I cut in the rear deck. eek! Sealing the rear deck was a bish cuz I have headrests that run on actuators so that they flop down. I gave up on that and just disconnected the vacuum system to make them stay in the up position. Sorry, I have no trunk pics. It's not done yet anyway.
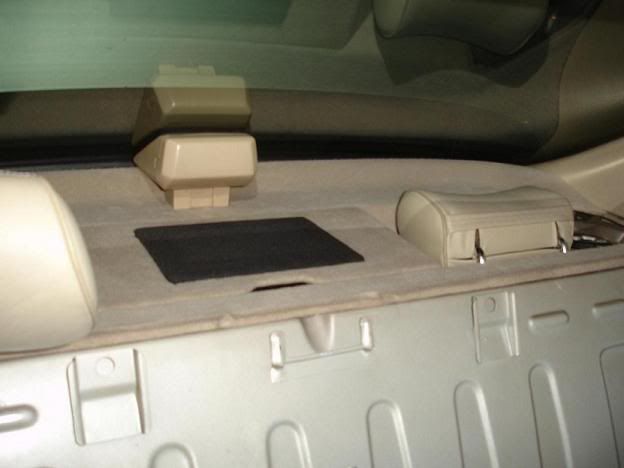
Previous rear-deck setup:
Rebuilding the med kit cover so that it doesn't rattle, working on rear speaker enclosures since I had to seal up the holes:
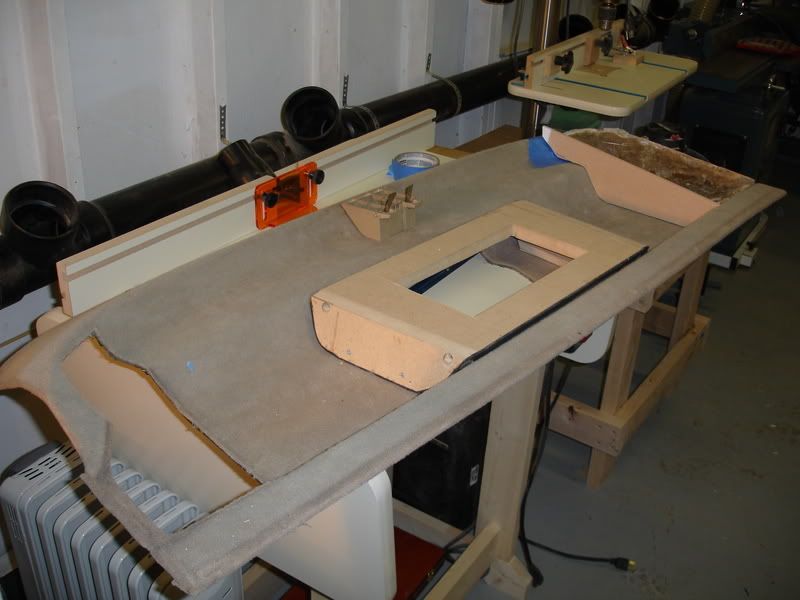
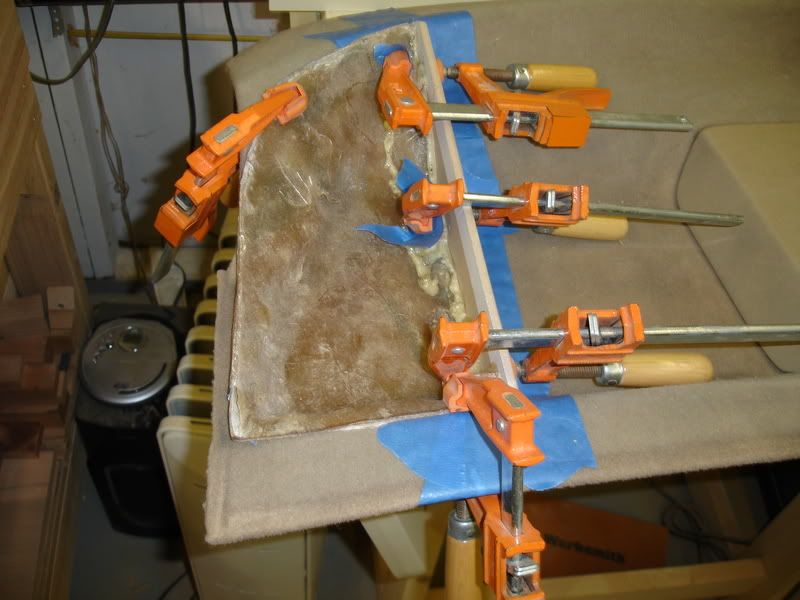
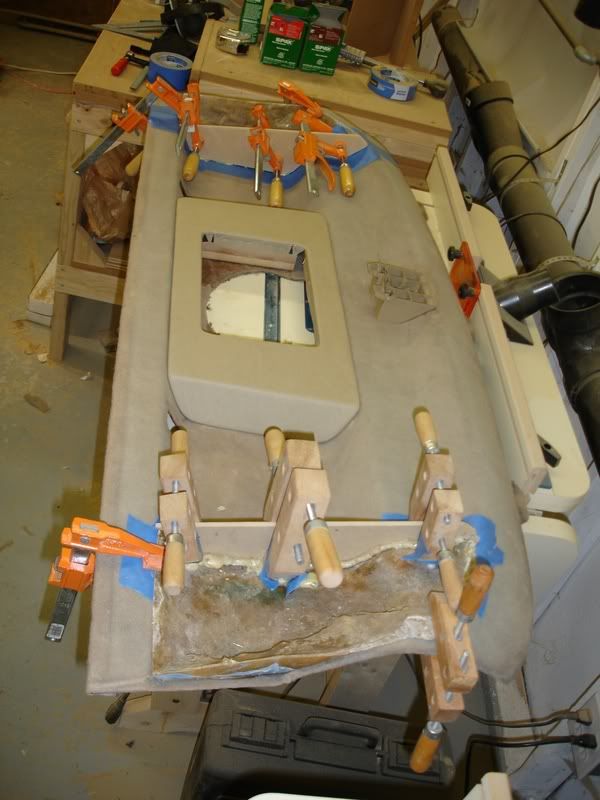
Notice the covers I made to seal the trunk hinges (upper left of pic):
 0
0
Pete's install log
in Build Logs
Posted
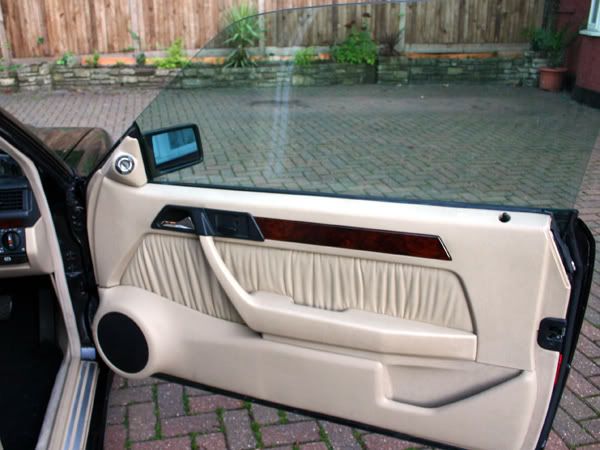
Got the door panels back on. Also finished up my sound deadening by doing the drivers' door.
Dude, getting the door panels back on had to have been one of the most frustrating experiences of my life. Then, getting those damn speaker grilles on was so difficult. I was about to buy a plane ticket to France to find the engineer who designed those speaker grilles and kick is arse. So I ended up scratching the hell out of the driver's side grille. Oh well. And yes, the aren't straight. I'll have to take them off again and redo it later.
But enough complaining, I'm very happy with how they turned out. My only regret is that I didn't find a way to make them more shallow. My left leg pretty much rests against it. But at best I probably could've only made them 1" more shallow. I still have access to the e-brake pedal and my seat can still move up really far. I just can't wait to hear them!
Comments encouraged!