
sexterra
-
Content Count
83 -
Joined
-
Last visited
-
Days Won
2
Posts posted by sexterra
-
-
Got the whole story:
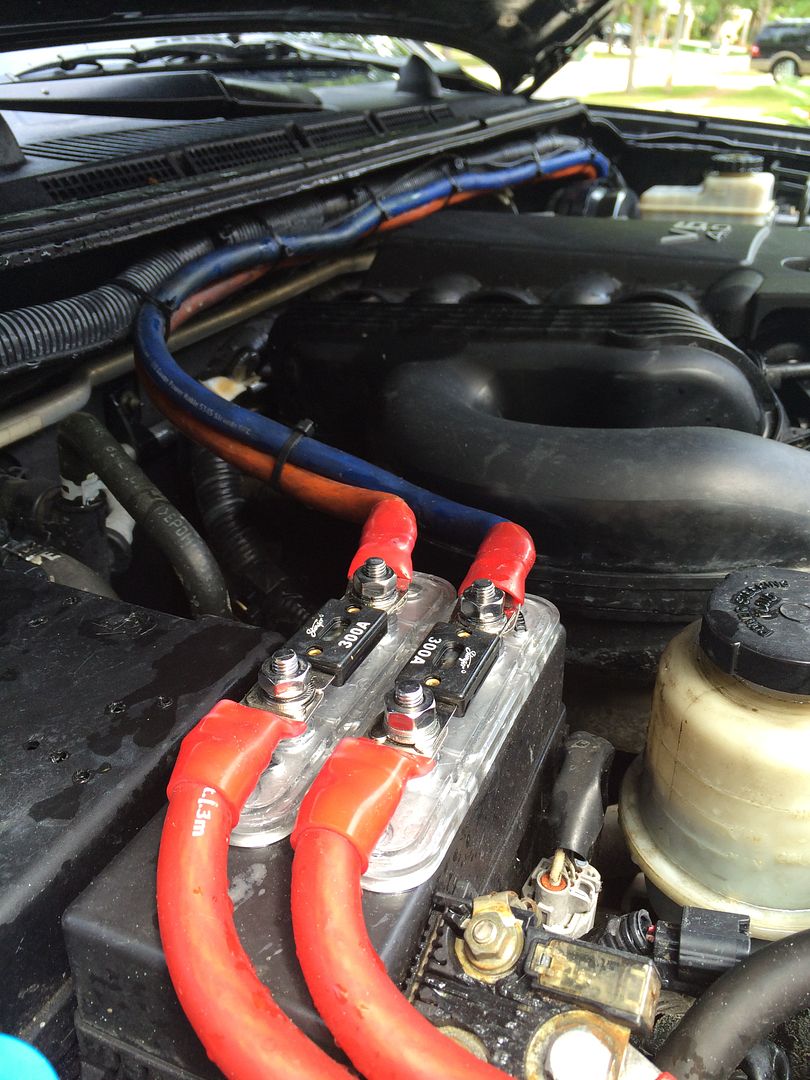
Plastic fuse block/holder rubbed on the aluminun brake lines because the entire booster/master cylinder shakes so violently from the bass (not an exaggeration). Plastic cracked, touched the + bolt on the brake line. After grounding itself multiple times, the aluminum line melted, causing brake fluid to flow out and fuel the fire. Entire electrical system shut down while going down the highway. Had to use the E-brake to stop.. He was very lucky it didnt become more serious than it did.
wow, glad everyone is okay. thats no joke taking out the brakes on the highway. Glad he had the wherewithal to use the e-brake.
Looks like its time for a nice toolmaker fuse block and a relocation out of harms way.
0 -
looks like spiderman had a premature evacuation...lol
Nice work!
 0
0 -
Holy shit! How does a power wire short out on a brake line? Something else had to happen here first.
Glad the vehicle survived though. Crazy.
0 -
So I should probably be more focused on finals, but priorities...More progress, did 3 more layers outside, 4-6 (6 in the center where it has the largest span) layers in some places over the weekend.So it ranges from 6-9 total layers.Then cut out the holes (sorta, didnt go all the way to the flush ring yet.)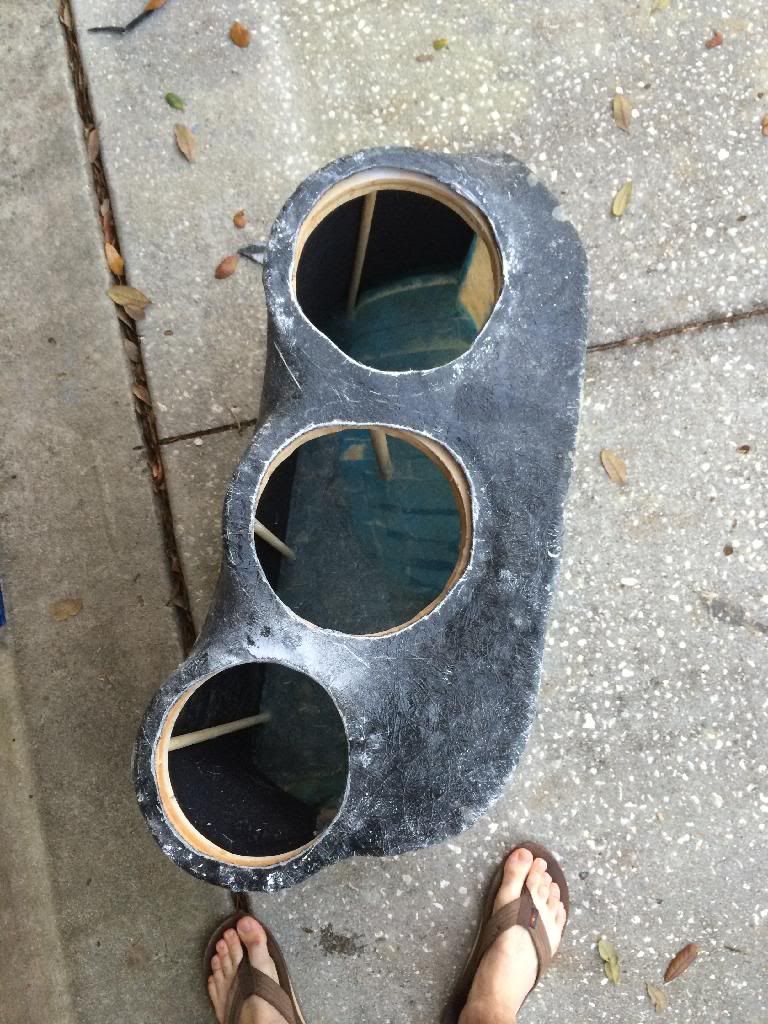 Got some resin and glass on the inside...
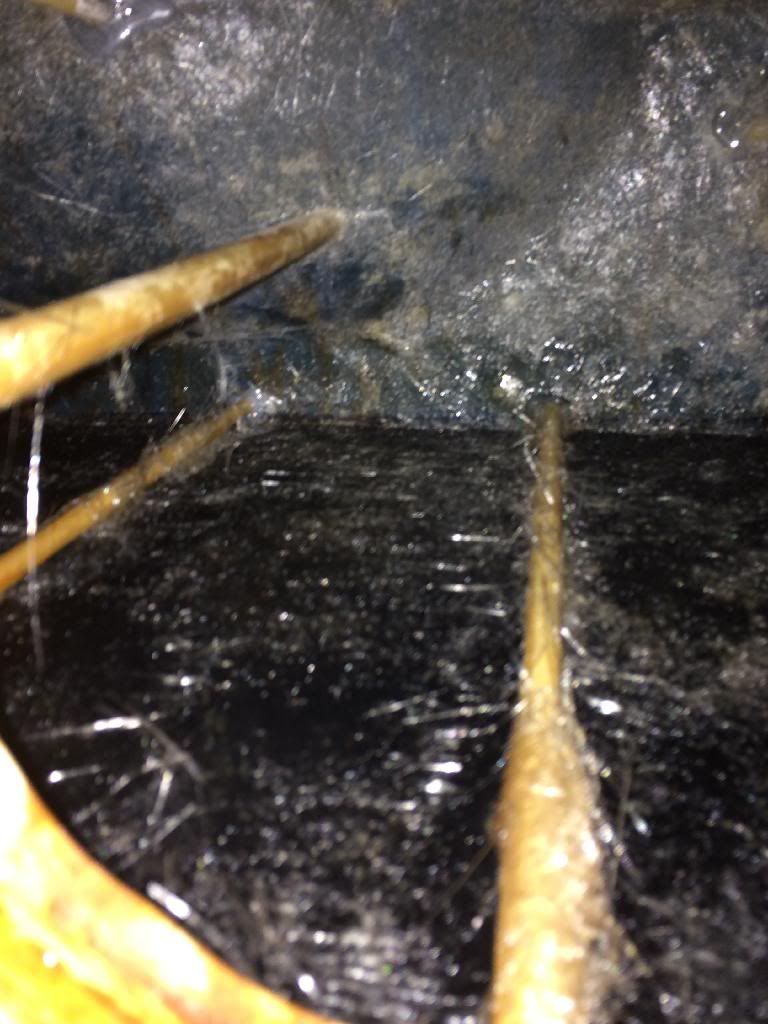
 Trying to stick your hand in this thing with a paintbrush sucks.0
 -
that's a niffty little system you got going on there! nice job!
Thank you sir.
0 -
Nice truck man! Love the tire and wheel combo and the stance looks great.
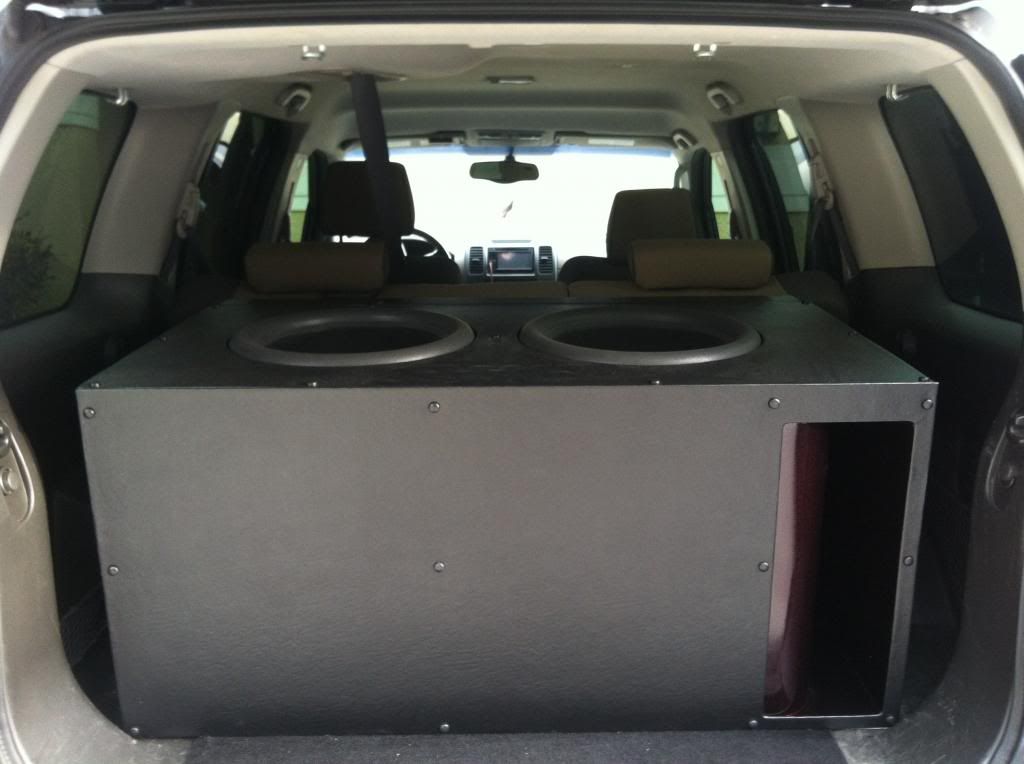
That truck has gotta be massive to fit that box in there and still seat 2 in the back. Box looks Super clean also.
Are you running the ia6.4? Didn't see any mention of it other than that it was what you planned on using. I'm running one on a bunch of crescendos and I love it.
0 -
Dear god 4 of those beasts on double current power is gonna tear that truck apart. The hatch is not going to be happy with that port loading directly into it!
But killer craftsmanship on the box man. The ssa logo is such a nice touch and it came out super clean.
0 -
Why not use water once it's all completely cured? Seems much quicker and cleaner.
Yeah it'd be easier but I used Mdf rings and don't want to risk trashing them even though I'll be hitting them with resin.
0 -
Yep, Packing peanuts, kitty litter, or rice works well.
Just find a cardboard box that's around 1ft^3 and keep dumping it in until you reach the max, and that's your total volume.
You can take an educated guess, since it is wedged shape.
Sounds like a plan. I think with my preliminary math it'll be around 2 cuft
0 -
Man I cant wait to see this thing finished! Love a good build in an X!
0 -
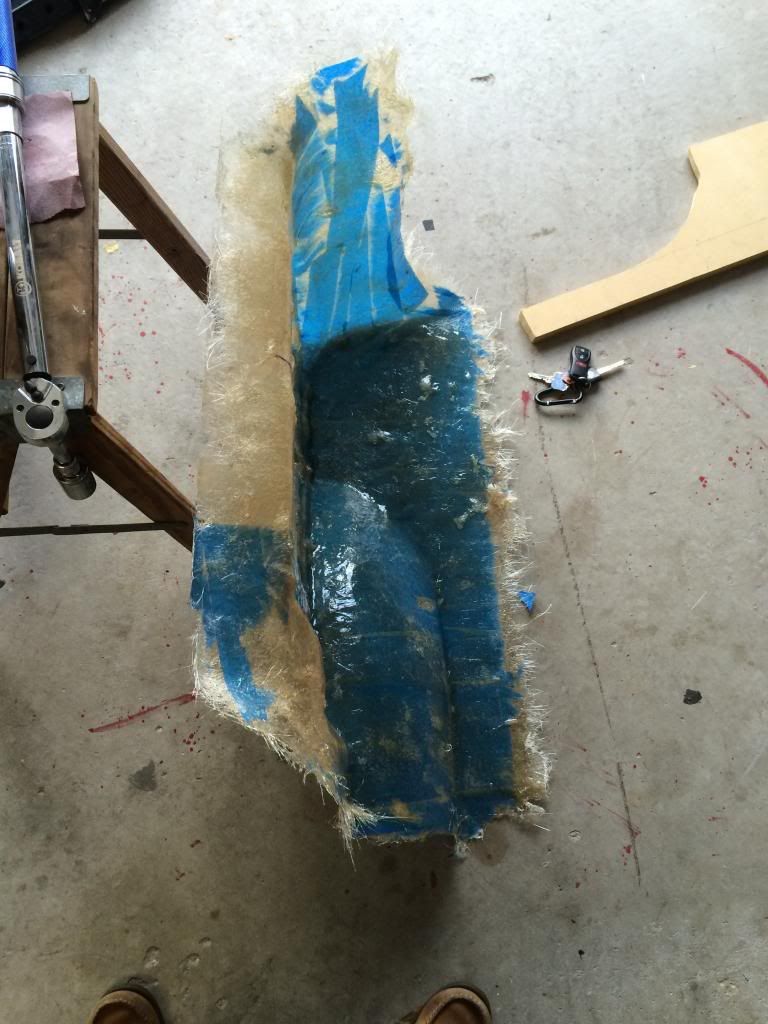
Got some glass layed on the outside yesterday, its 2 layers now and 3 in some spots.
Will probably do 2-3 more layers, then cut the holes and glass the inside a bit.
 0
0 -
looks great so far man.
Great build you have going here! Fiberglass box looks excellent

Would you mind giving us specs on the box once complete, including weight?
Thanks guys, the glassing has been interesting, have not worked with it before this, there is definitely a learning curve.
I dont think that will be a problem. Ill just need to get my hands on a bunch of packing peanuts so I can find the internal volume of it.
It will definitely be much lighter than a birch or mdf box, I'm pretty surprised at how rigid it is compared to the weight and thickness.
0 -
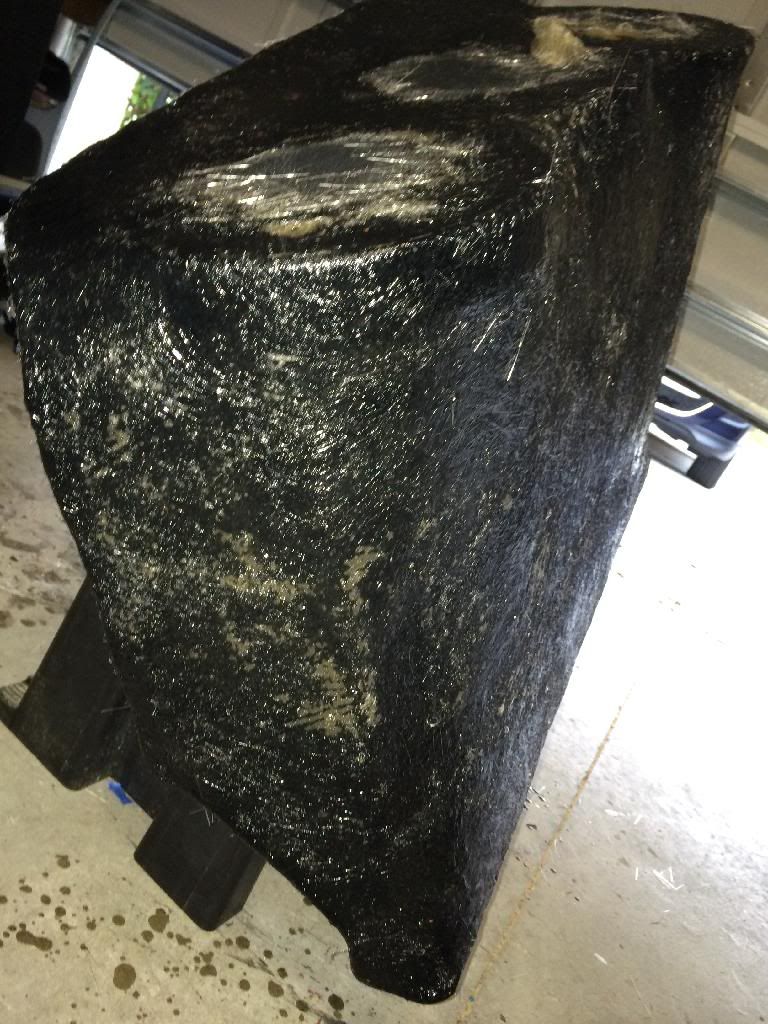
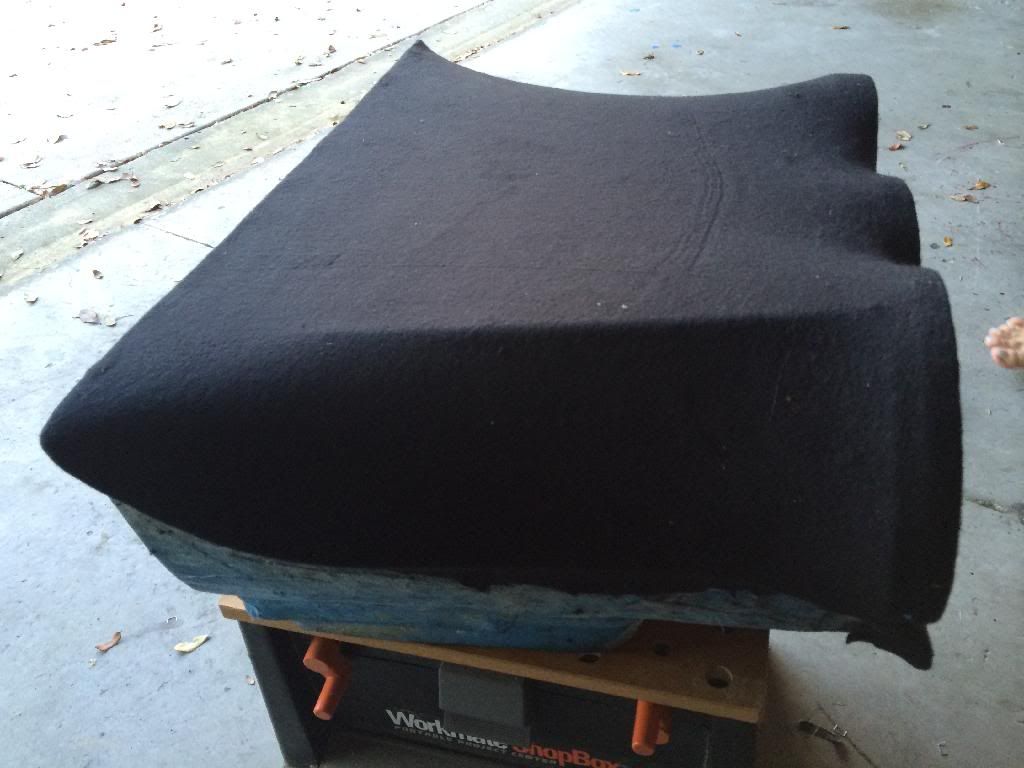
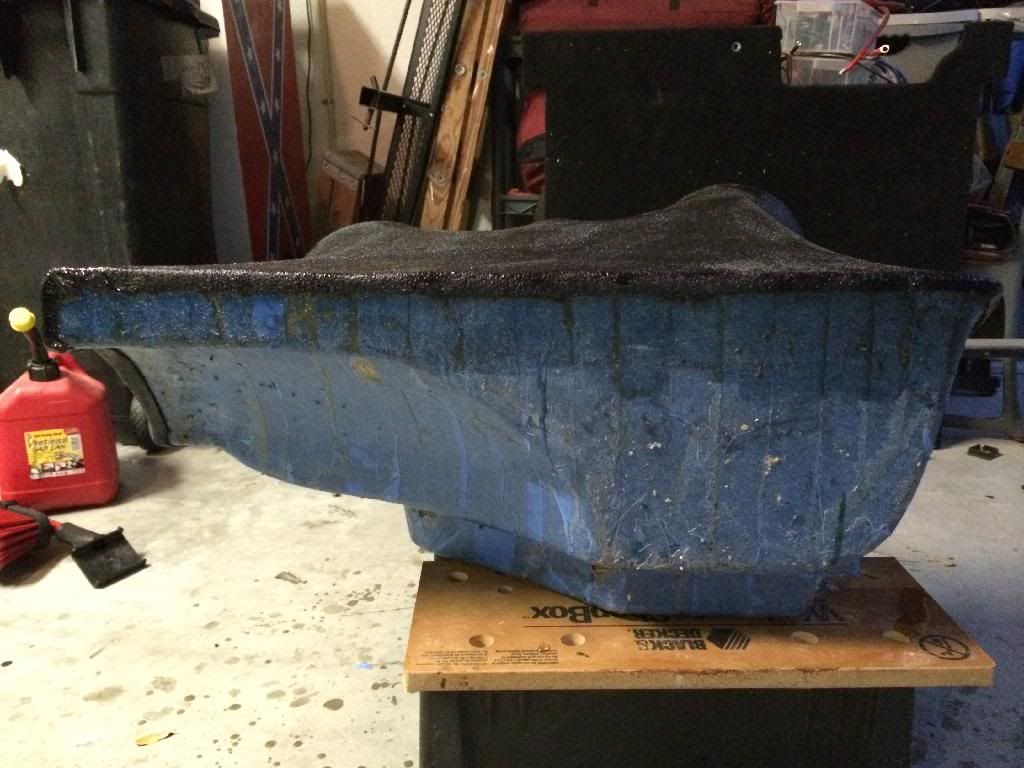
Since Im terrible at updating this one, heres what Ive been up to.Got 3 layers of glass on the mold and decided it was strong enough to come out.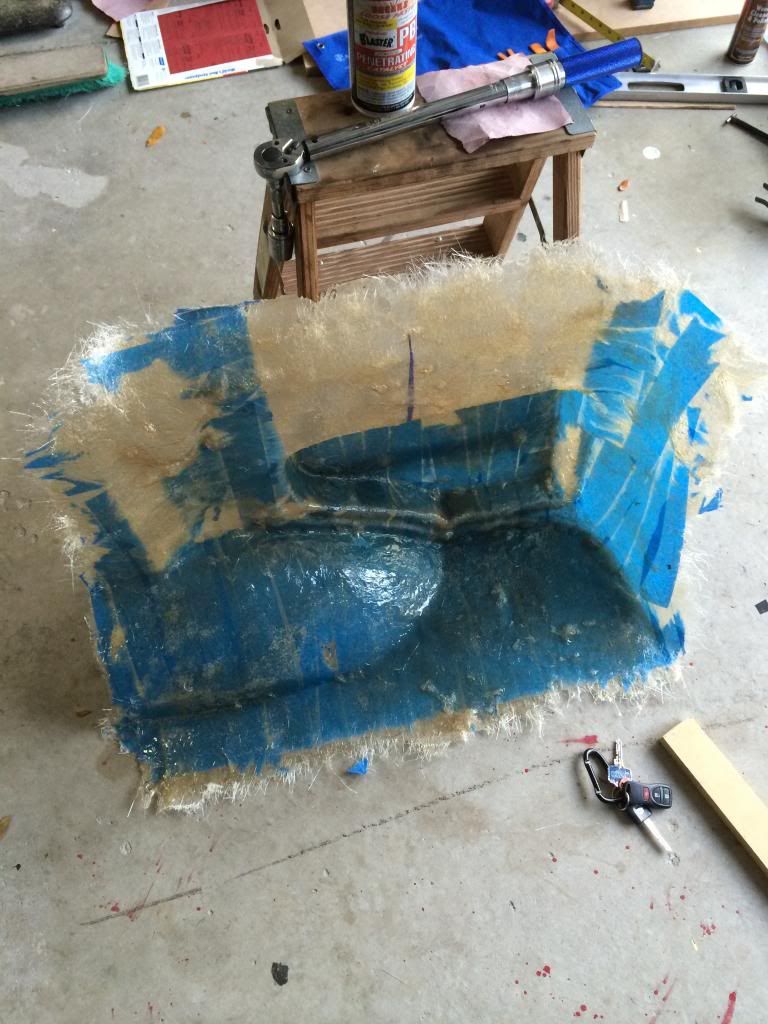
 Edges were pretty scary.Trimmed it up with the dremel...
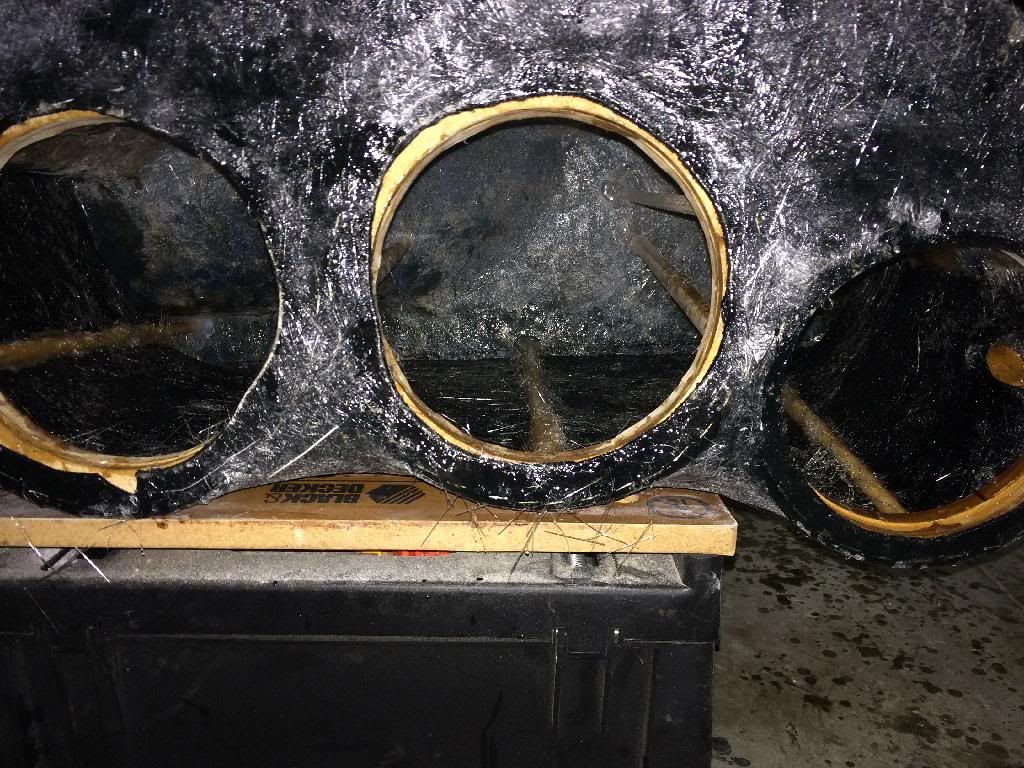
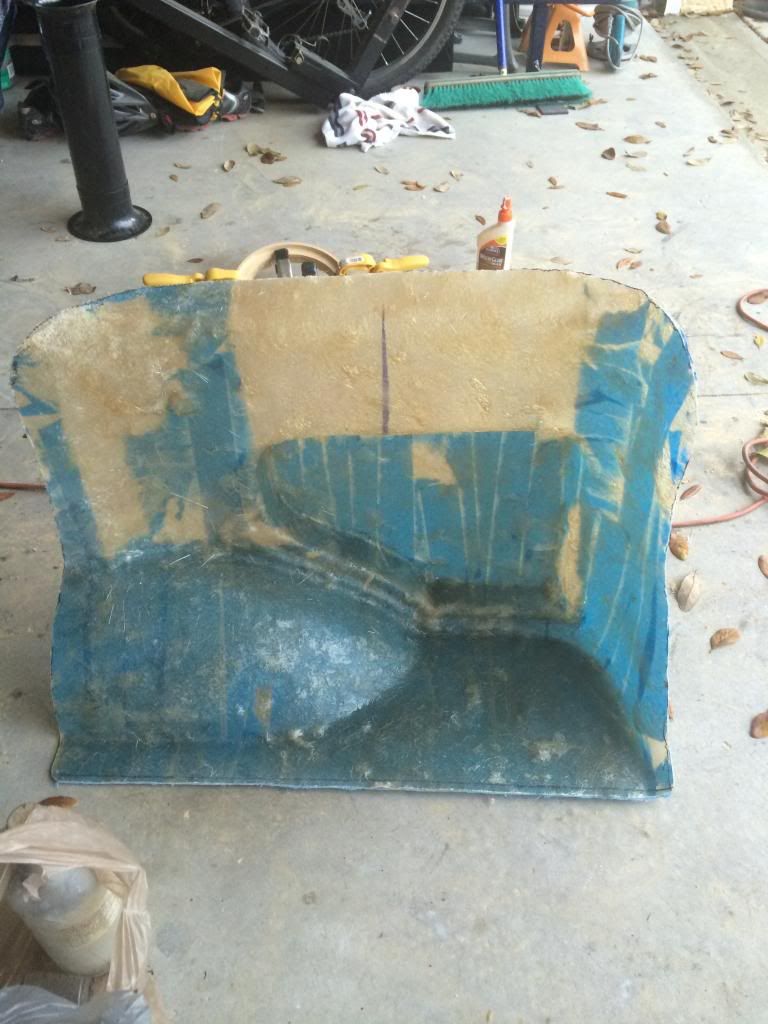 Much better.So measuring the mold, I've got 24" to work with. So the problem is that each subs OD is 8.5", Aeroport OD is 7.25" and add 1/4" to each side bc of the flush mount rings. So I have to fit 25.75" in a 24" space. Once again 10lbs of shit in a 5lb bag <_<It was a little tricky to make all 3 rings fit, I tried center port but the hump from the wheel well would make my port length too short unless I stuck that ring way above the subs which would've looked terrible. So the port is on the side closest to the hatch. I wanted everything to fire up since I will be using the cargo area to transport my bikes.
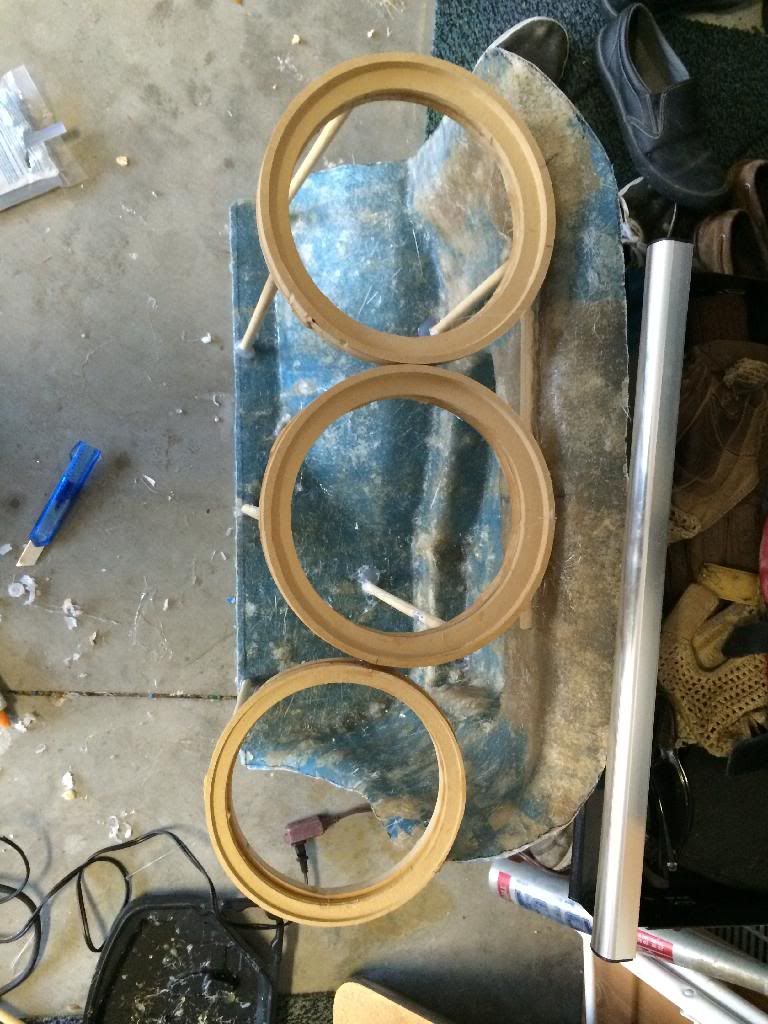
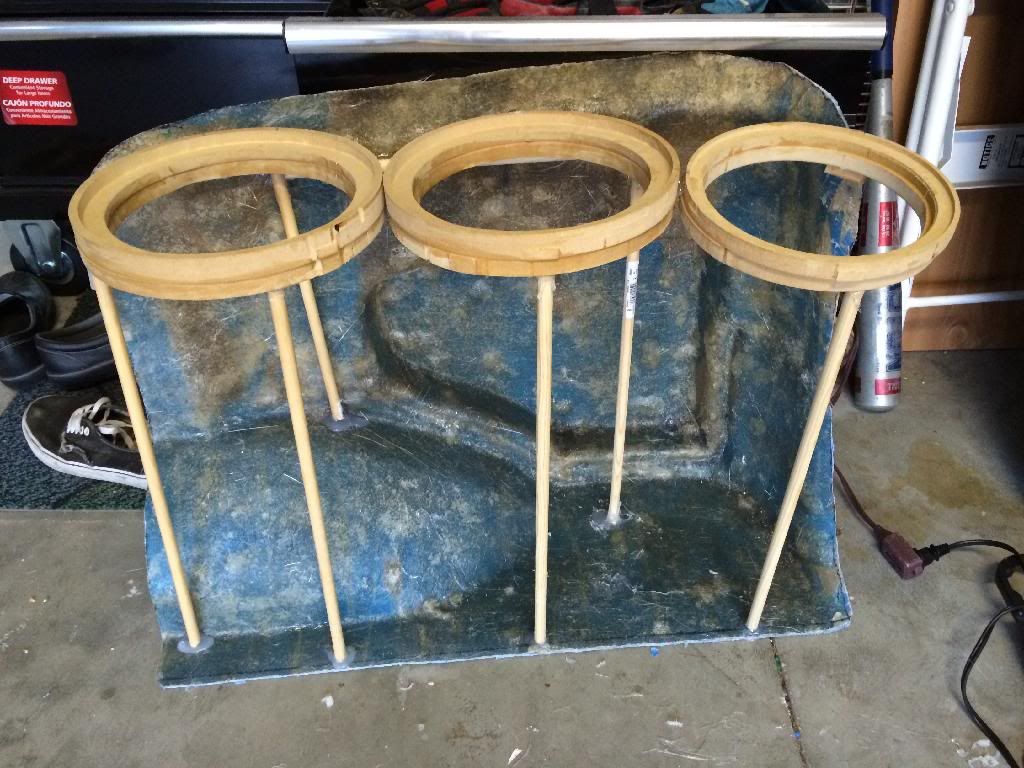
 So the port is going to be slightly angled. This should leave me with right around 14-15" of usable port length.Got the fleece stretched over it. Took a while but was able to get all the wrinkles stretched out.Used a staple gun to secure it to the rings and then used 3m super 90 to get it stuck down to the glass while stretching and then used superglue to secure it to the glass.
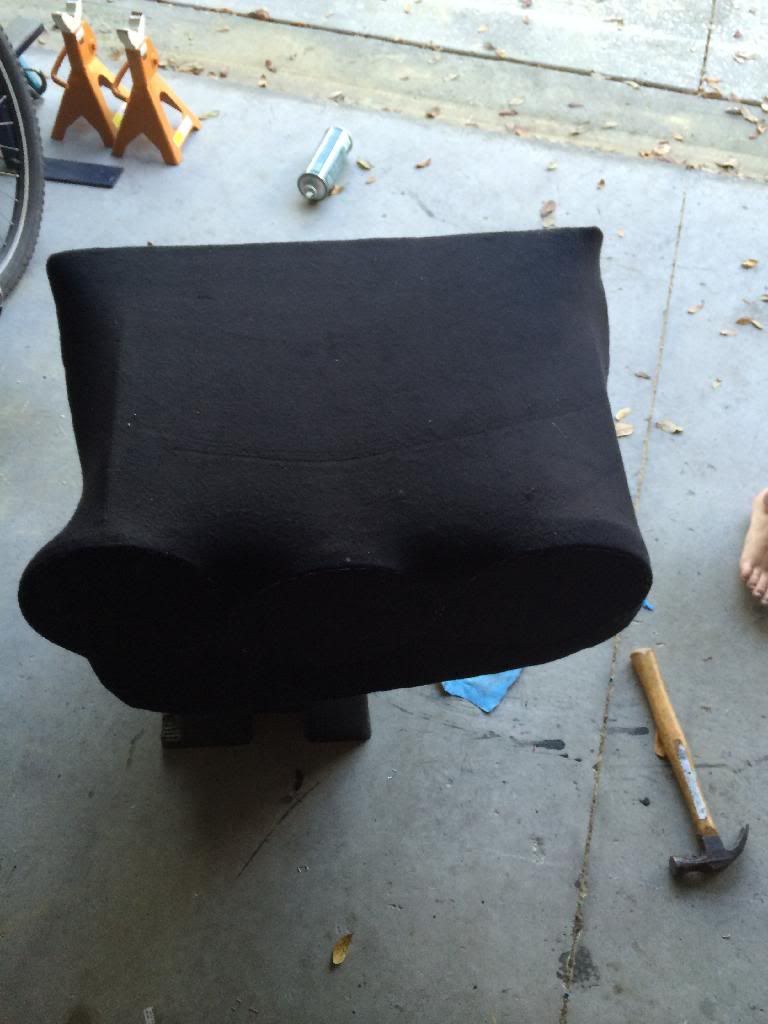
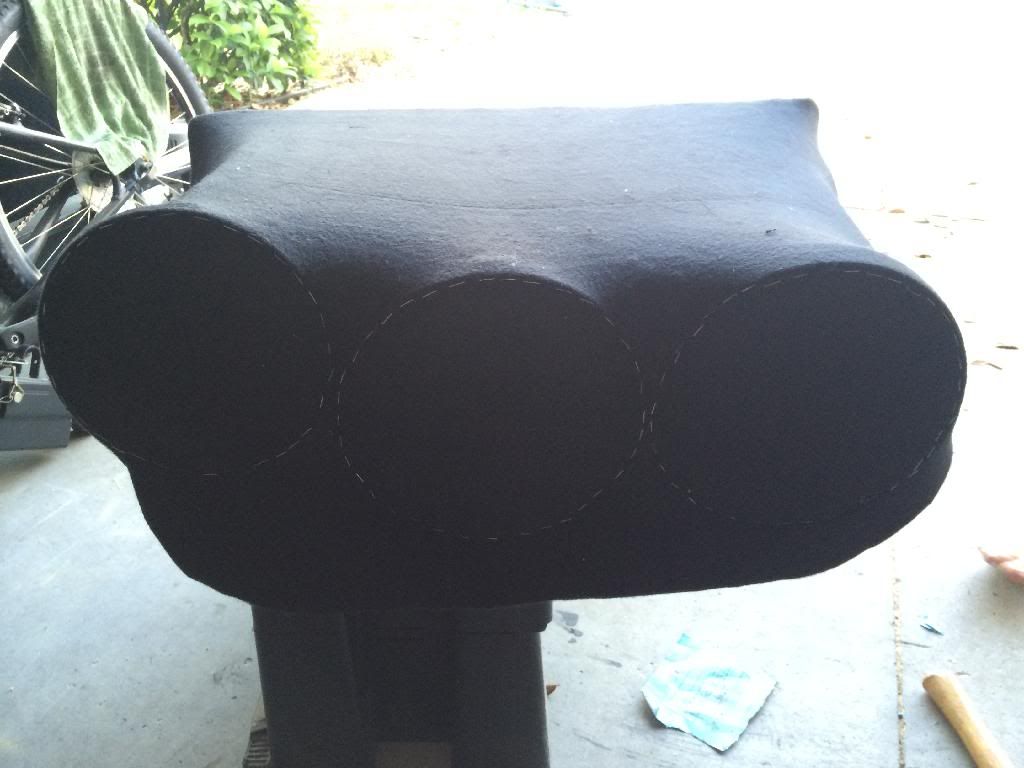
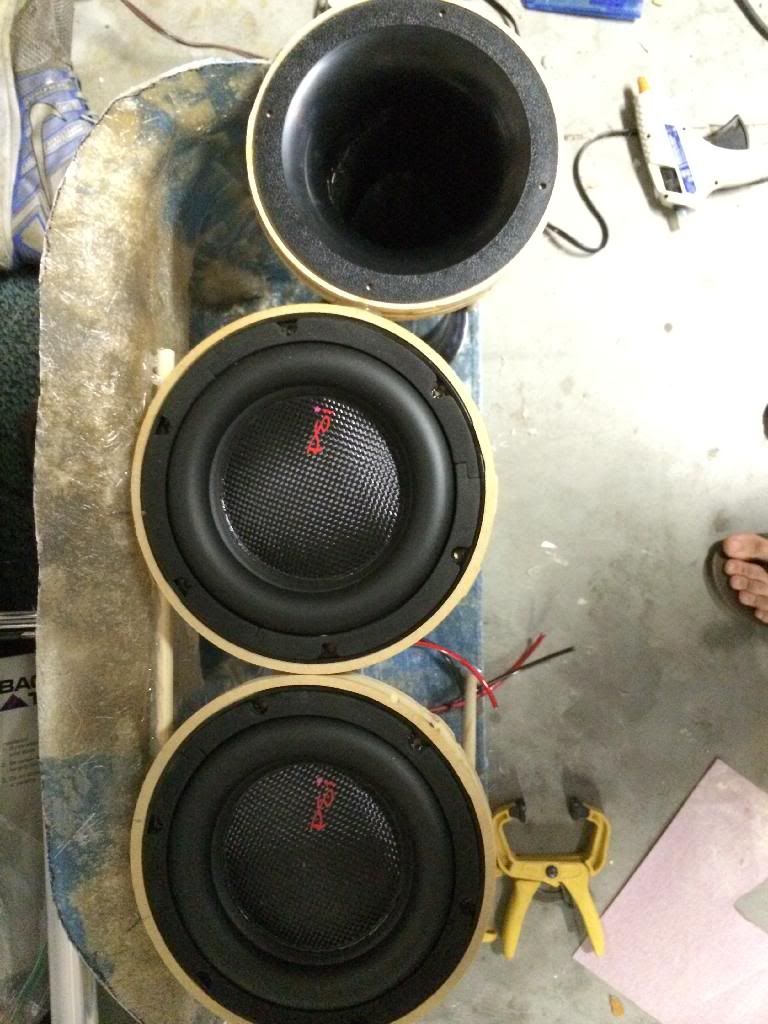
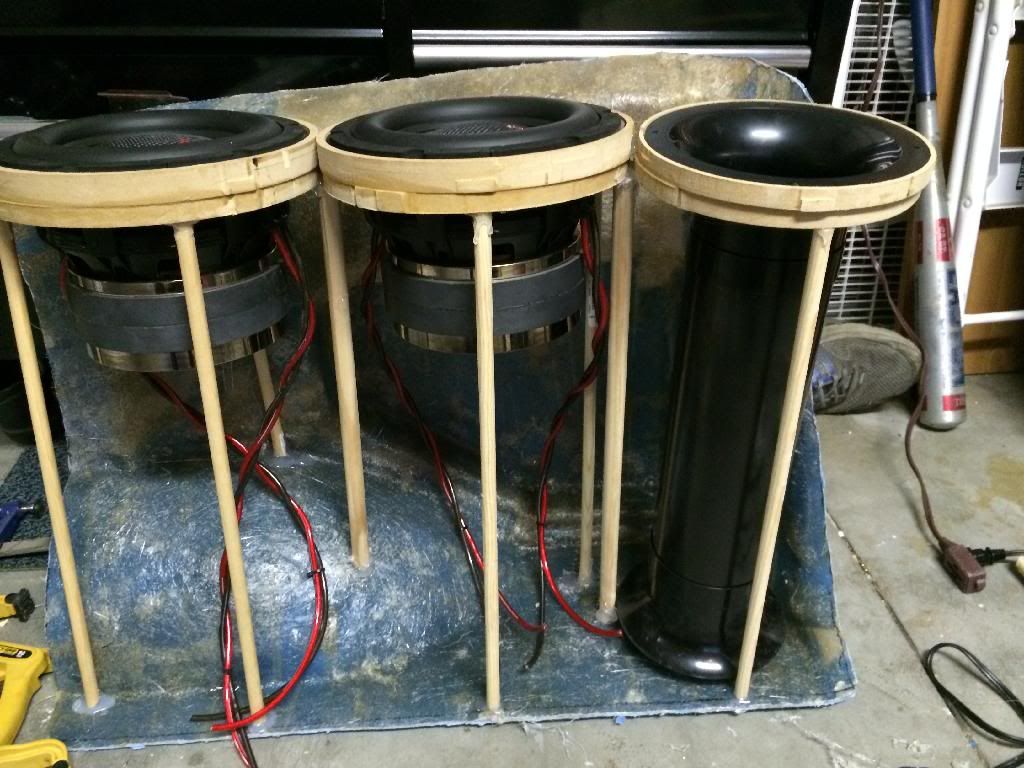
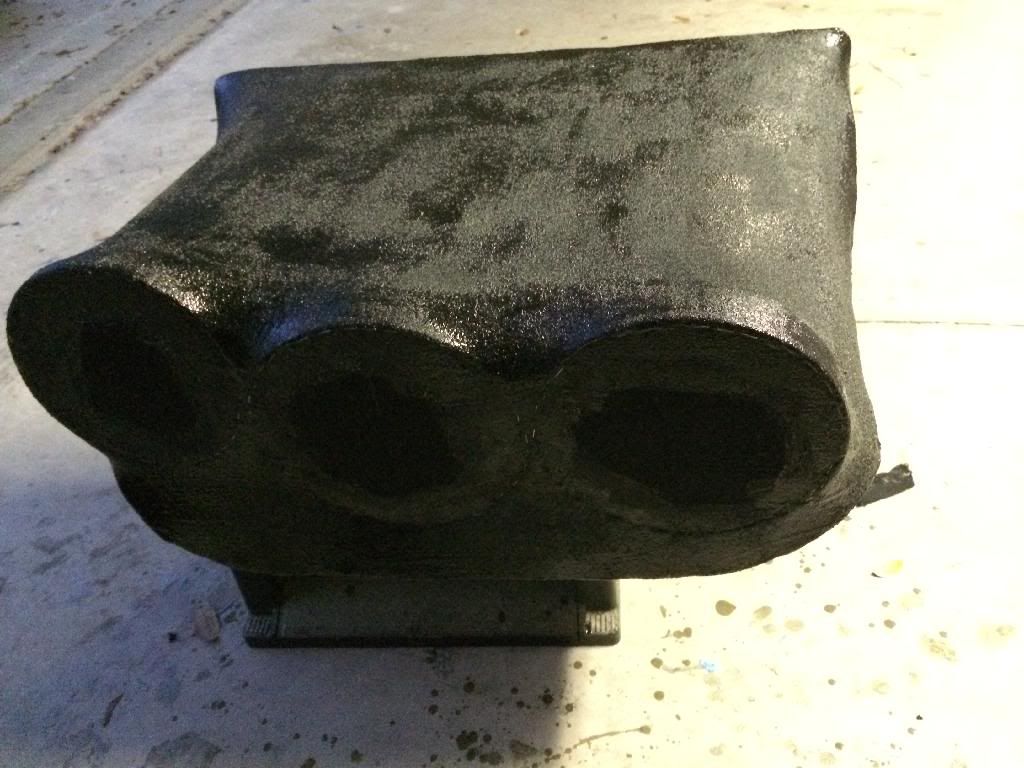
 Then got some resin on it. this stuff will absorb a ton it ate up a little over 1/3 of a gallon.First coat
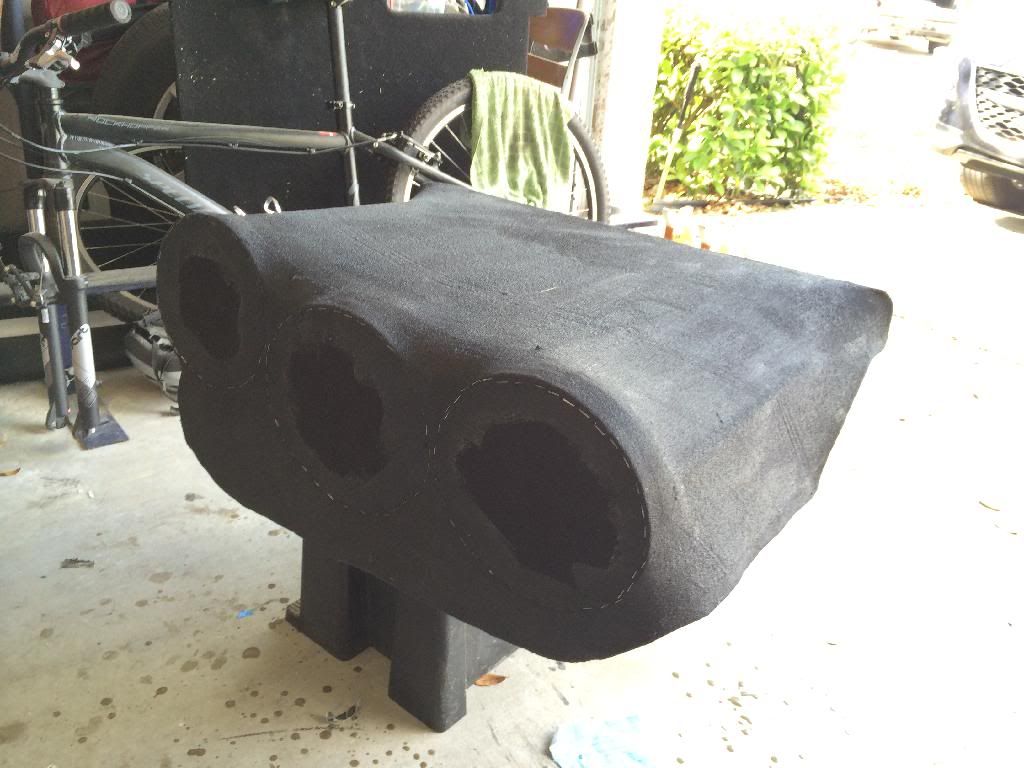 Used an xacto knife to trim back some of the fleece around the edges after round 1.Second coat
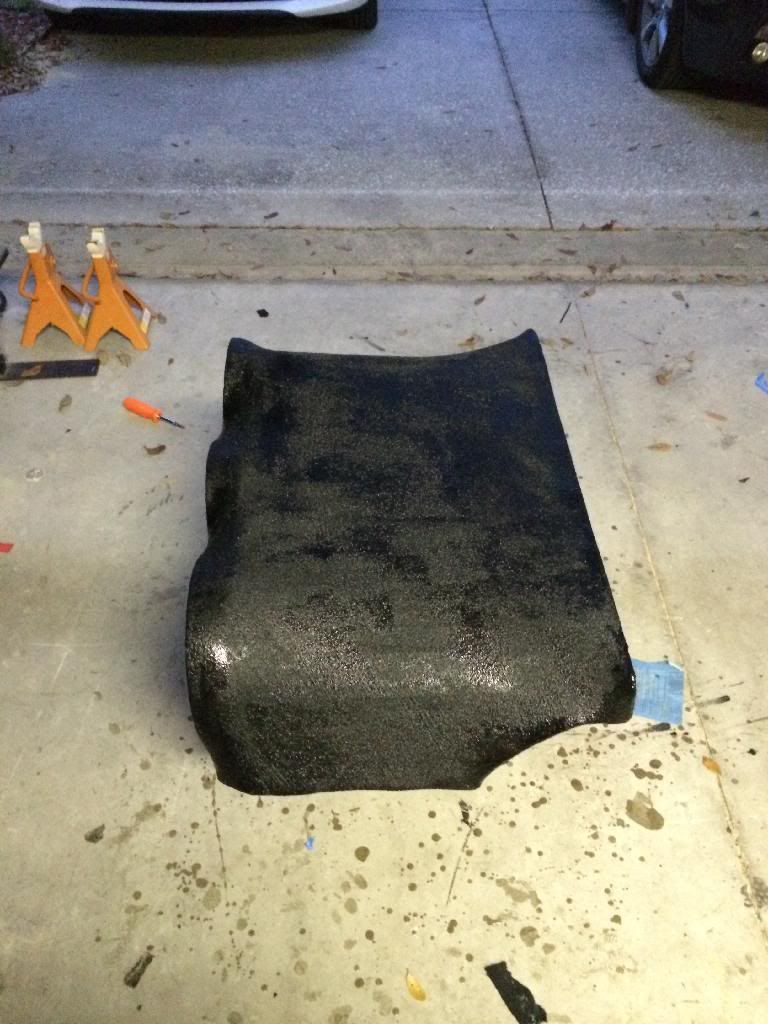
 1
1 -
Looks good, you can mix it slightly hotter and use a small space heater to speed up the process, but you have to be careful if you mix it too hot it can tend to warp.
Thanks for the tip, I did start mixing it hotter and it worked alot better as far as setting up time but still didn't like vertical surfaces much
Looking good!
Thanks cant wait to get it done and have bass again
0 -
So I got my area taped off and my first layer of glass down today. This is my first glassing project and this mat is pretty damn thick, definitely not easy to work with and didnt want to stay on the vertical faces. But all things considered, I think this layer will be fine.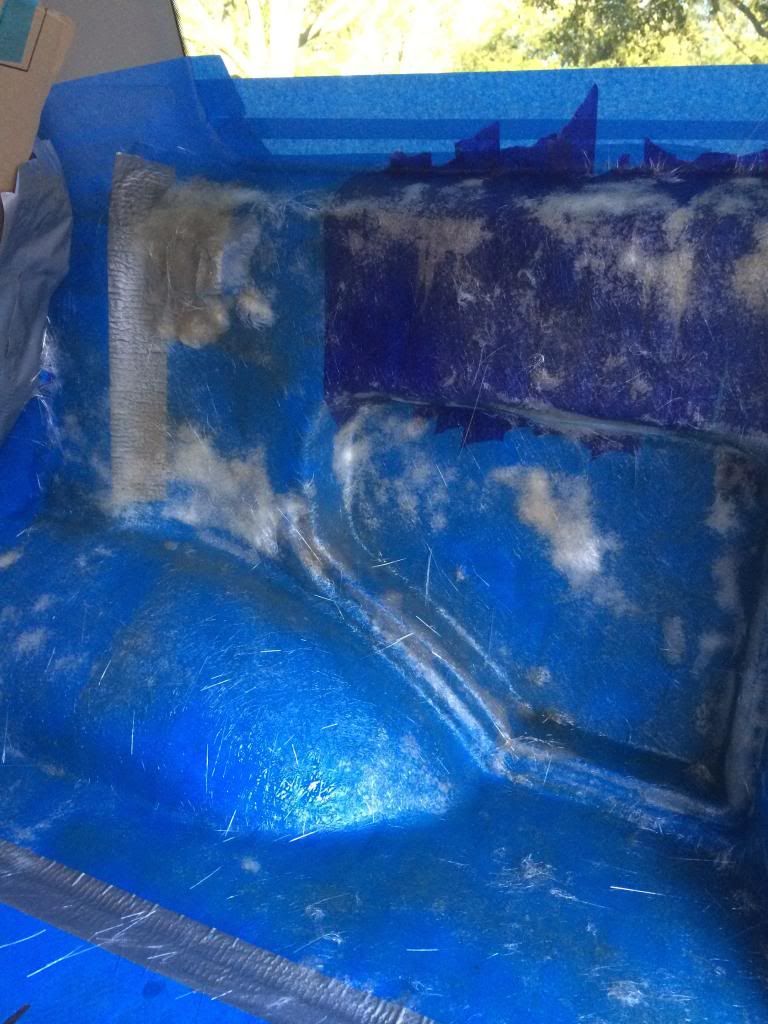 will try to do 2-3 more layers tomorrow.0
 -
Got my glass supplies yesterday...~2.5yards of 1.5oz mat. This stuff is pretty thick
2 gallons of resin
Hardener
2 yards of medium wt fleece
3/8" dowels
Shit ton of 2" paintbrushesJust to give you an idea, the box will be molded to the right side of the cargo area in this picture (where the little mesh netted pocket is) and will go over the wheel wheel but will leave the utilitrack usable, and allow me to use the storage hatch in the center of the cargo floor.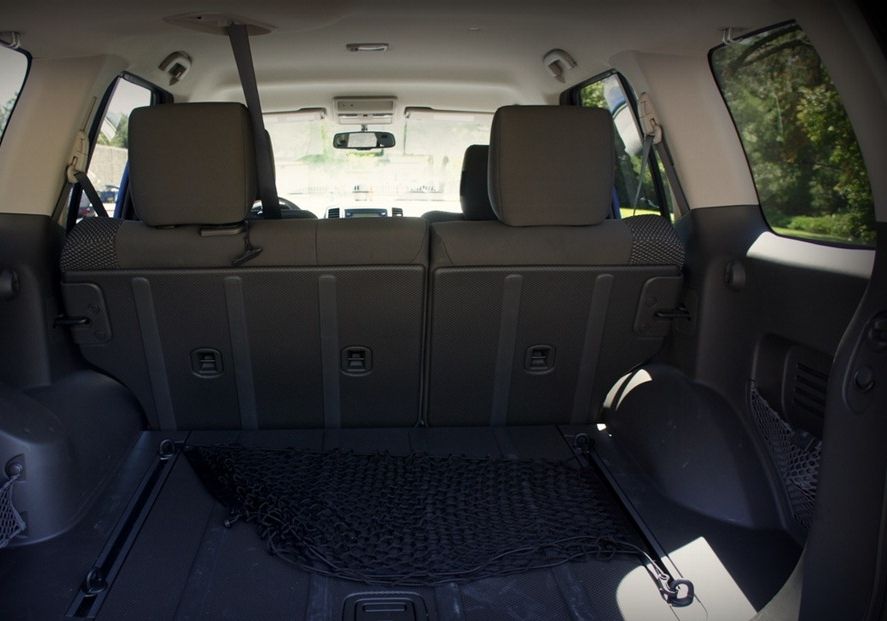 0
0 -
that first build reminds me of the setup that came in my envoy..... it didnt last long in there lol.
nice to see fellow xterra owners doing some audio builds.
i would say to address those apillars......try your hand at some glass.
Haha it was the first thing I ever built. I did it my senior year of highschool. Box was like 5 cubes sealed for 2 12s. It actually sounded damn good for $100 worth of subs (best buy BOGO ftw) ha
yessir, we are very few.
Its a possibility but wont be my first glass project. Sub box is coming first.
0 -
Little vid of the mids and highs playing a little bit of everything. Filmed with iphone 5s, obviously sq is not as good as it is in person. But its pretty damn loud and sounds great IMO.Song 1: Riff Raff- Dolce & GabbanaSong 2: Dillon Francis- Who the Fuck are YouSong 3: Justin Moore- Sunshine BabiesSong 4: Rebelution ft. Soja- Suffering
2 -
Little bit more...
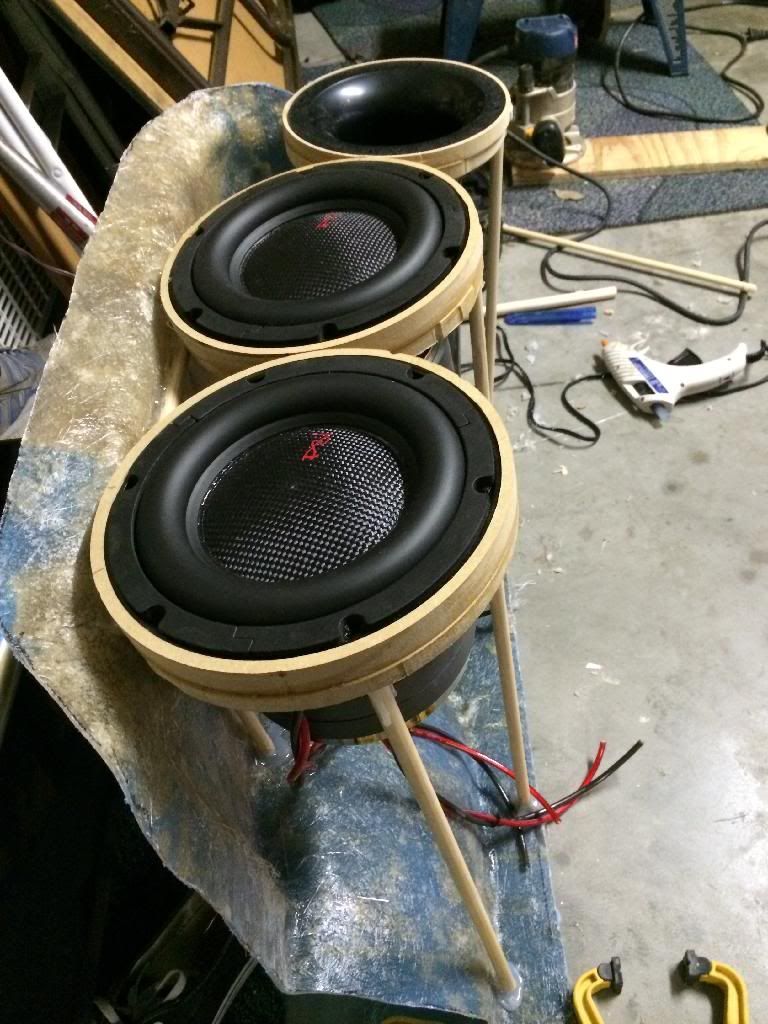
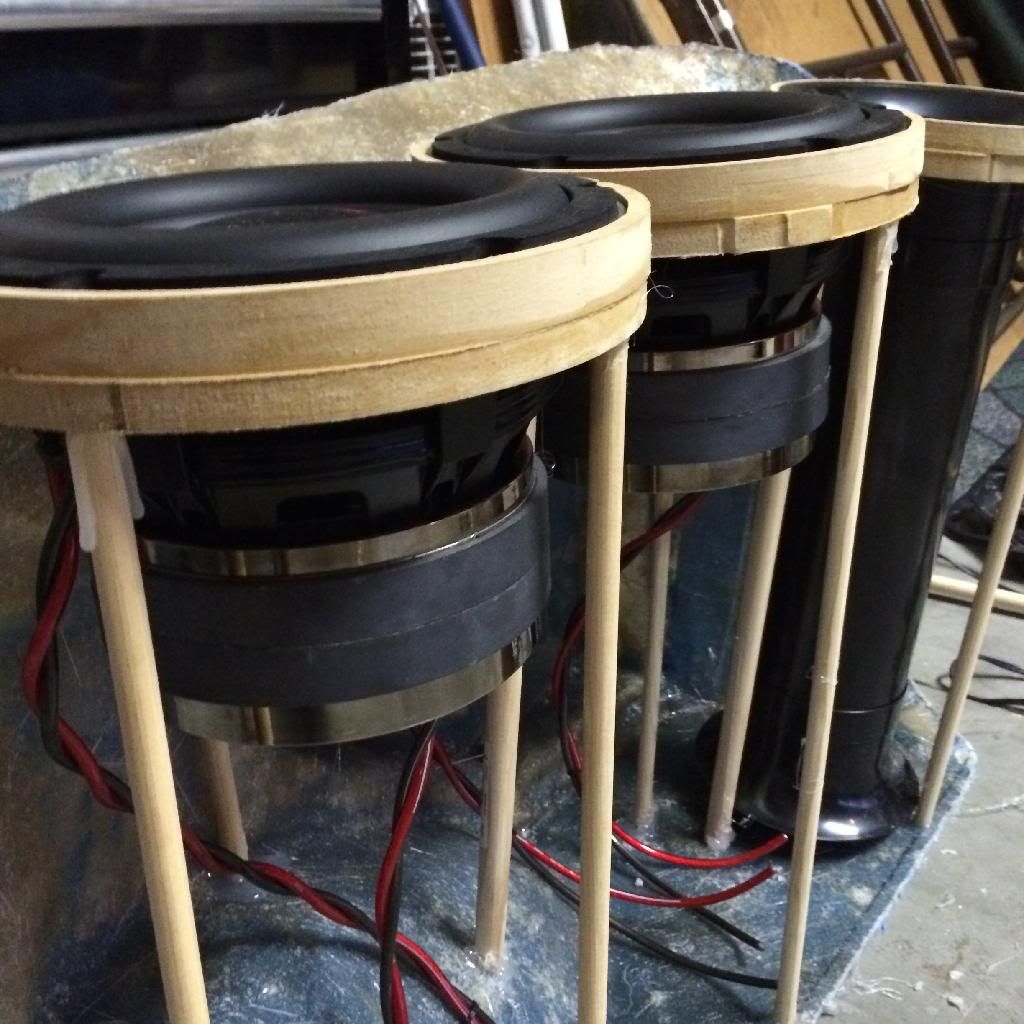
Made a ghetto jig, wish I would have done this when making the rings for my speakers, woulda been way easier.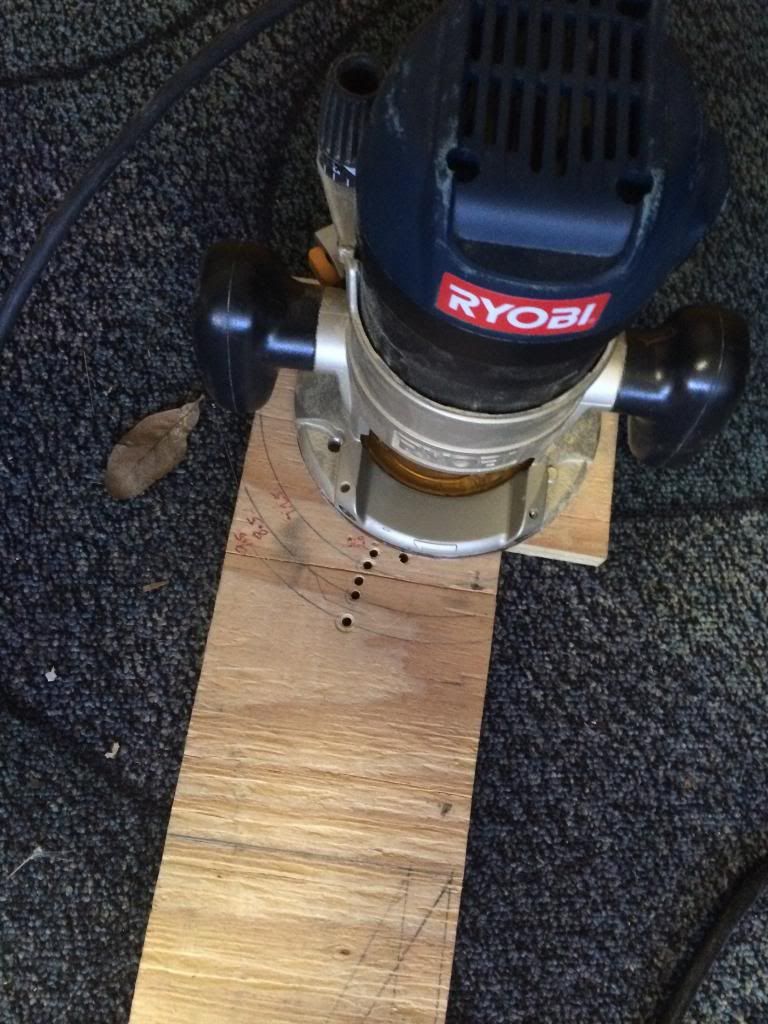 One down...
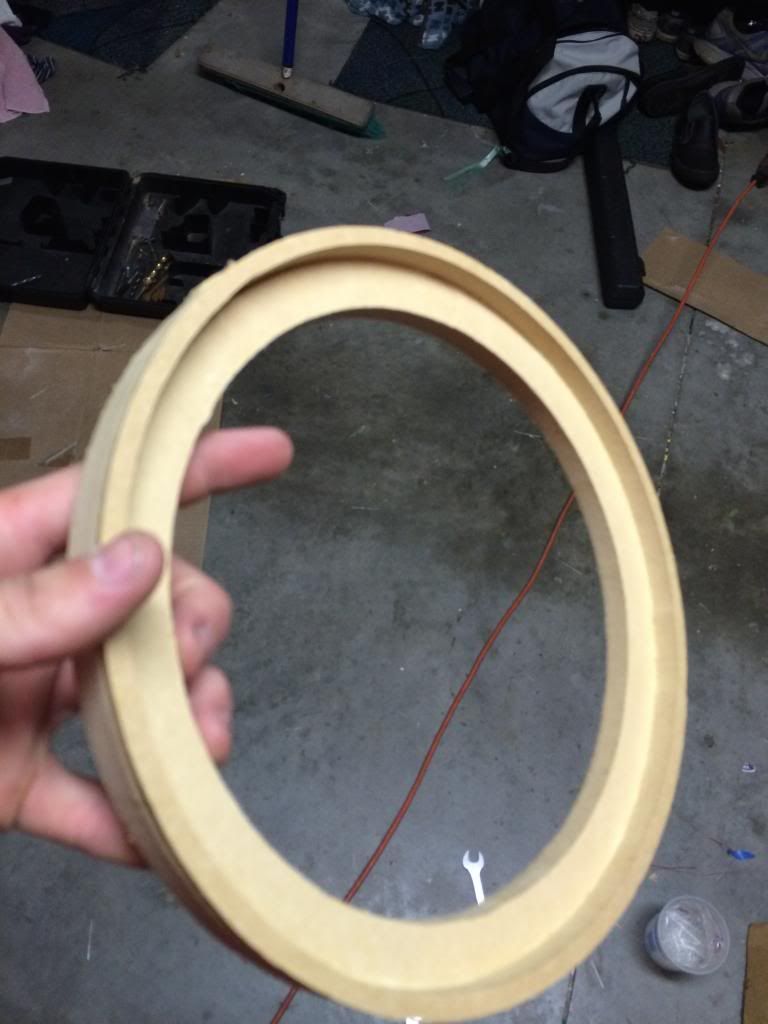 Test fitted...
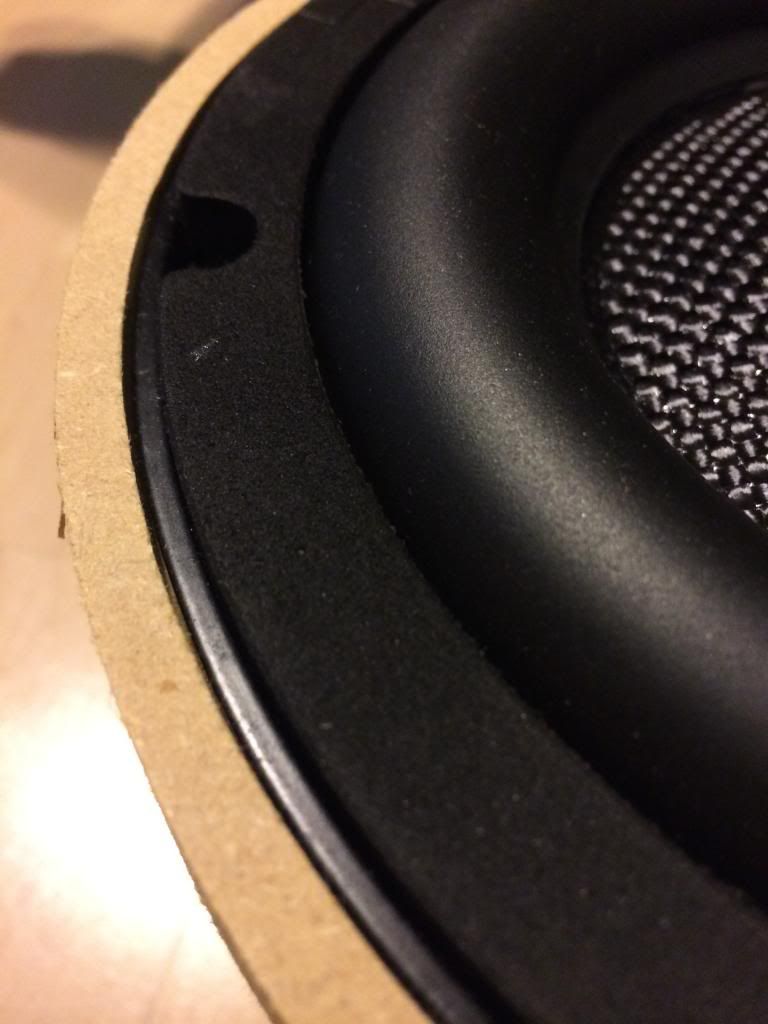 Decided they needed to be thicker, so more cutting...
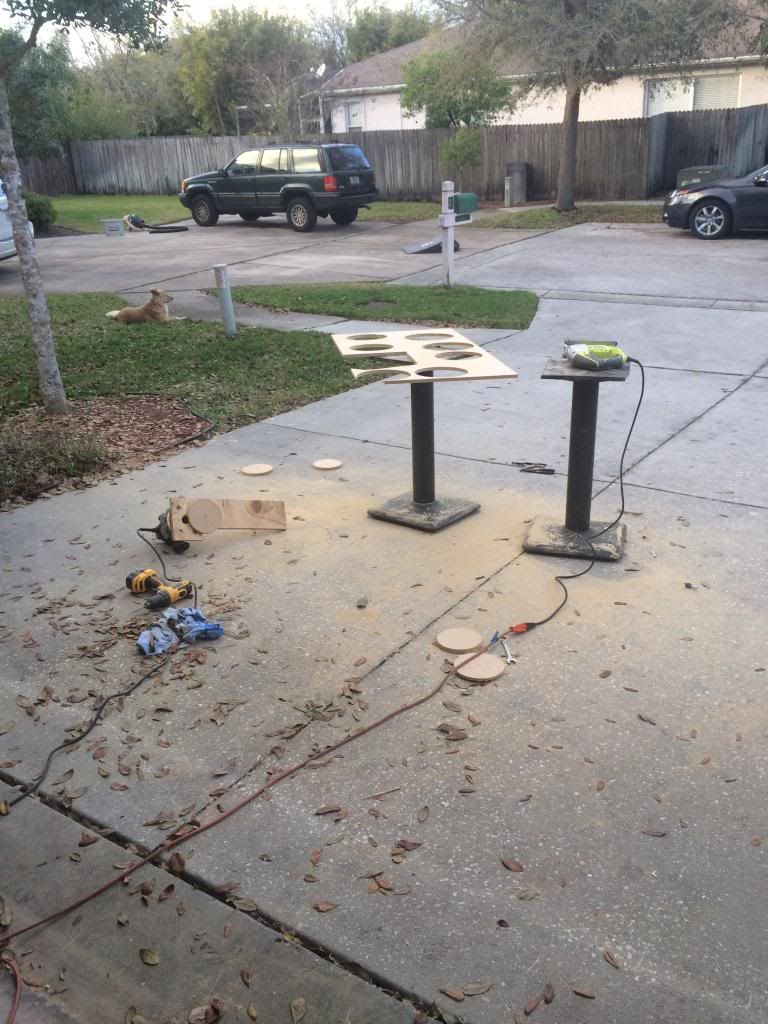 Gluing...
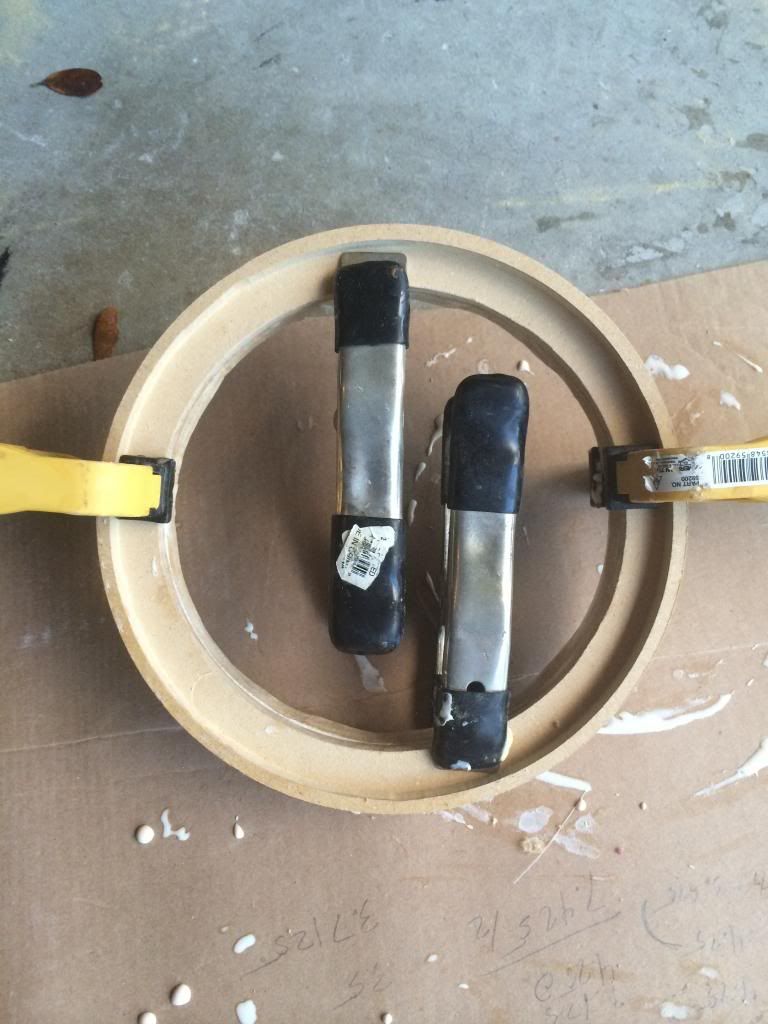 Done!
Done!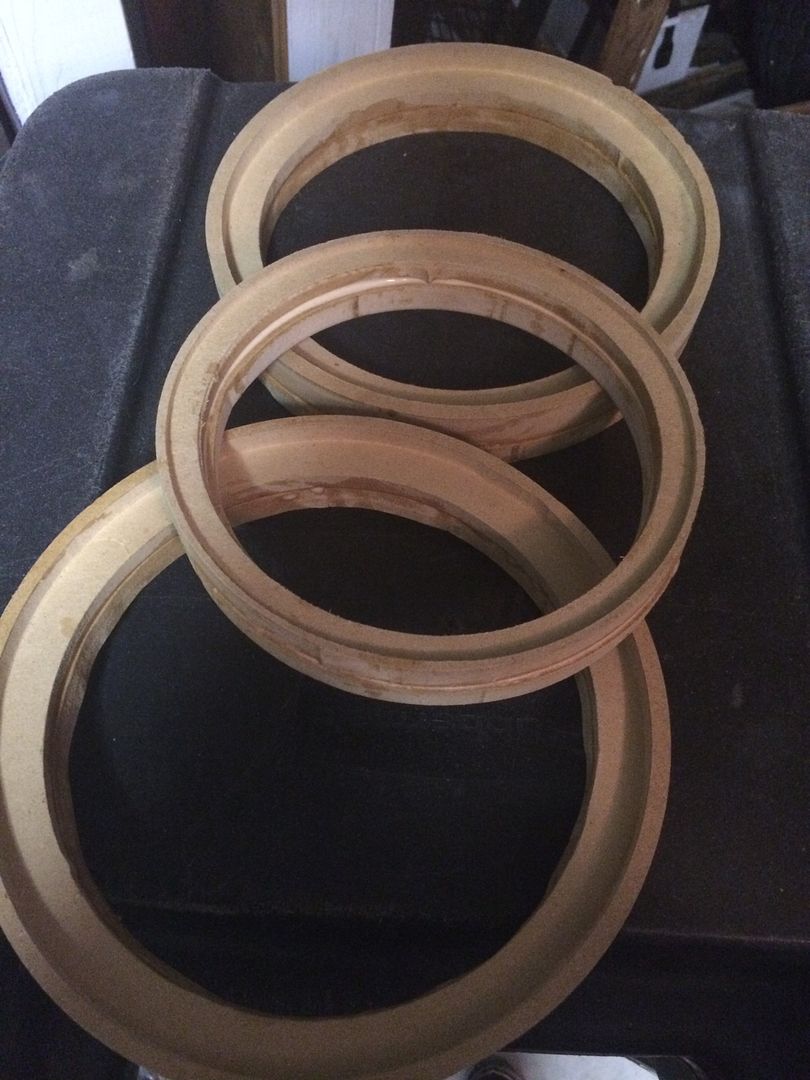 1
1 -
More catch up...
Got all my speaker wire ran, and got the IA 6.4 wired up...Then re ran my power wire...In the last build it was run under the truck in conduit and up into the cargo area, had to pull it out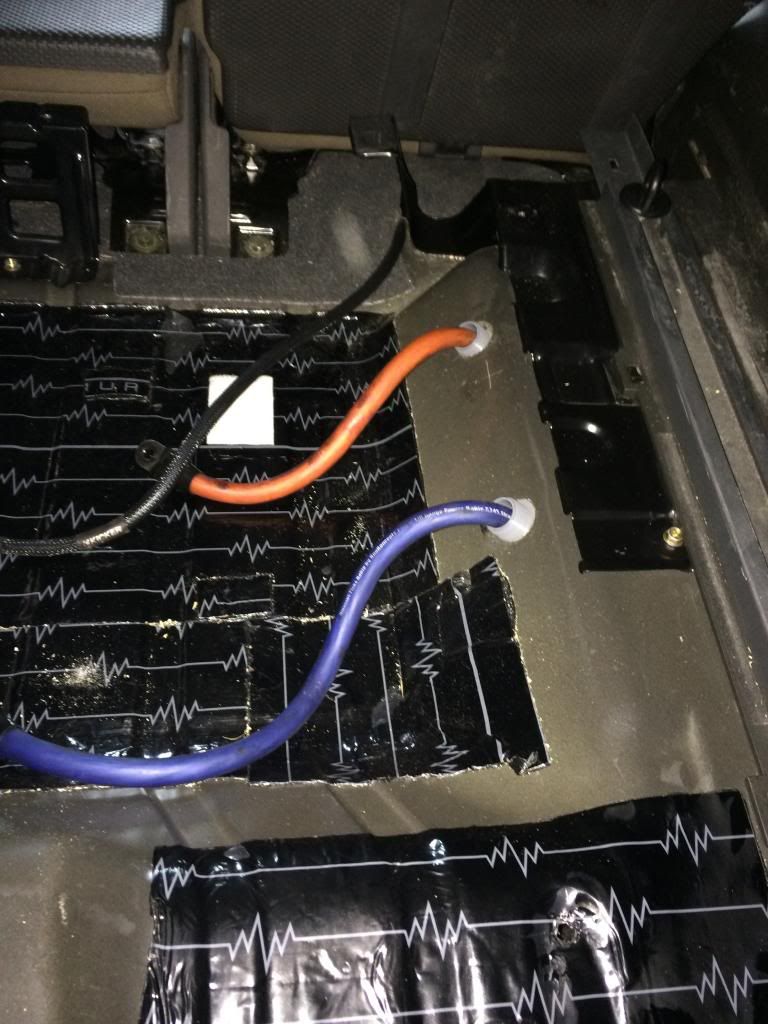
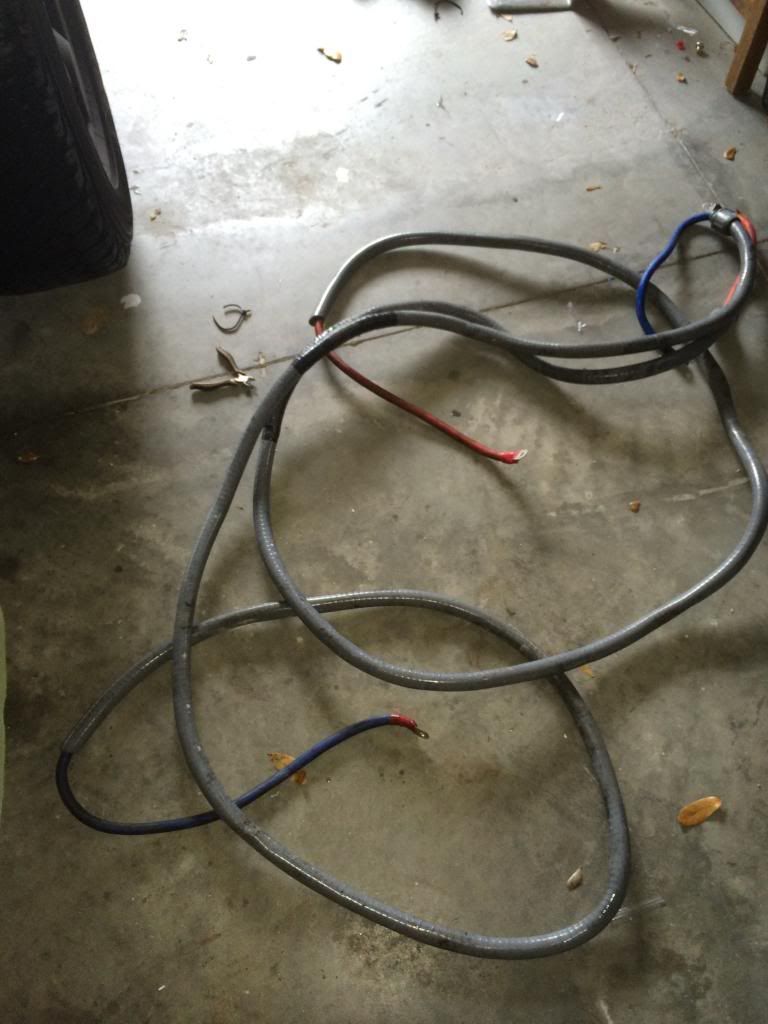 Decided to run it across the engine bay and into the driver side grommet (much easier to access and my RCAs run down the left side of the vehicle.
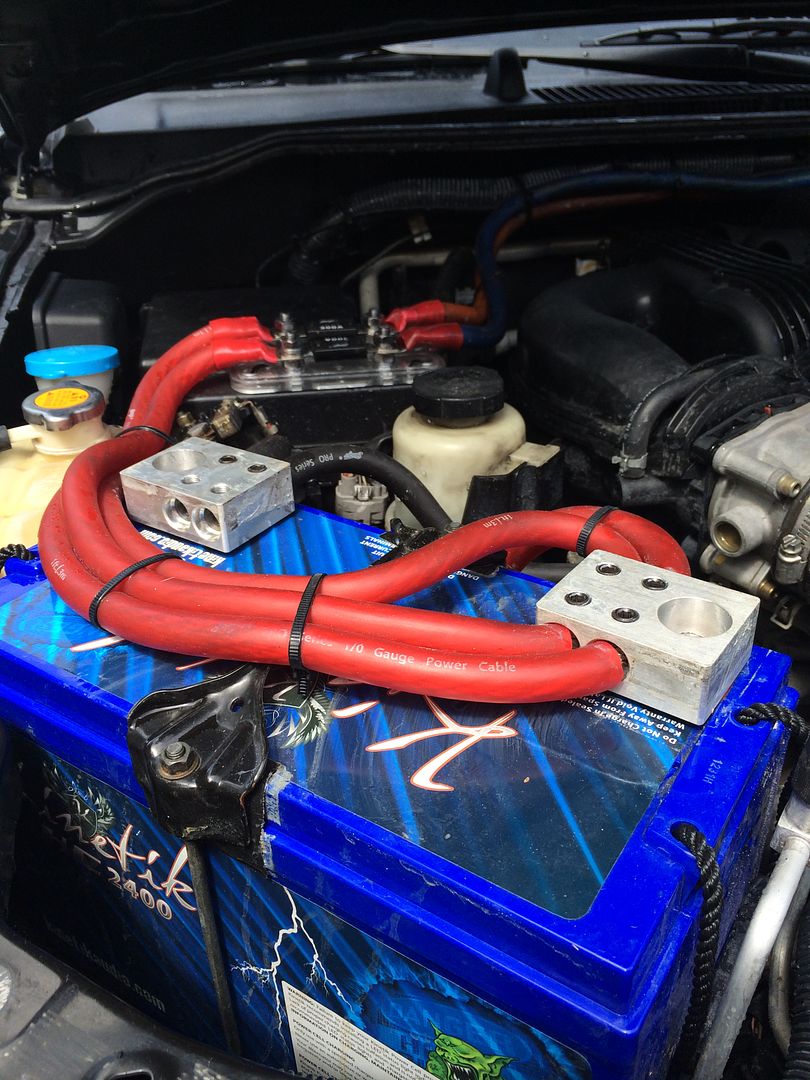
 Then got the carpet back in...
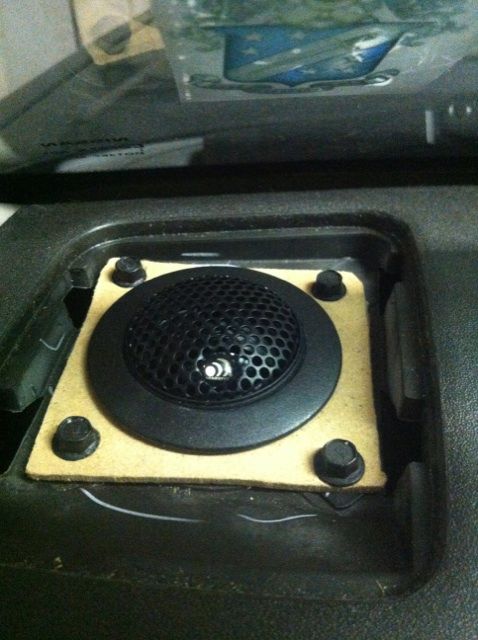
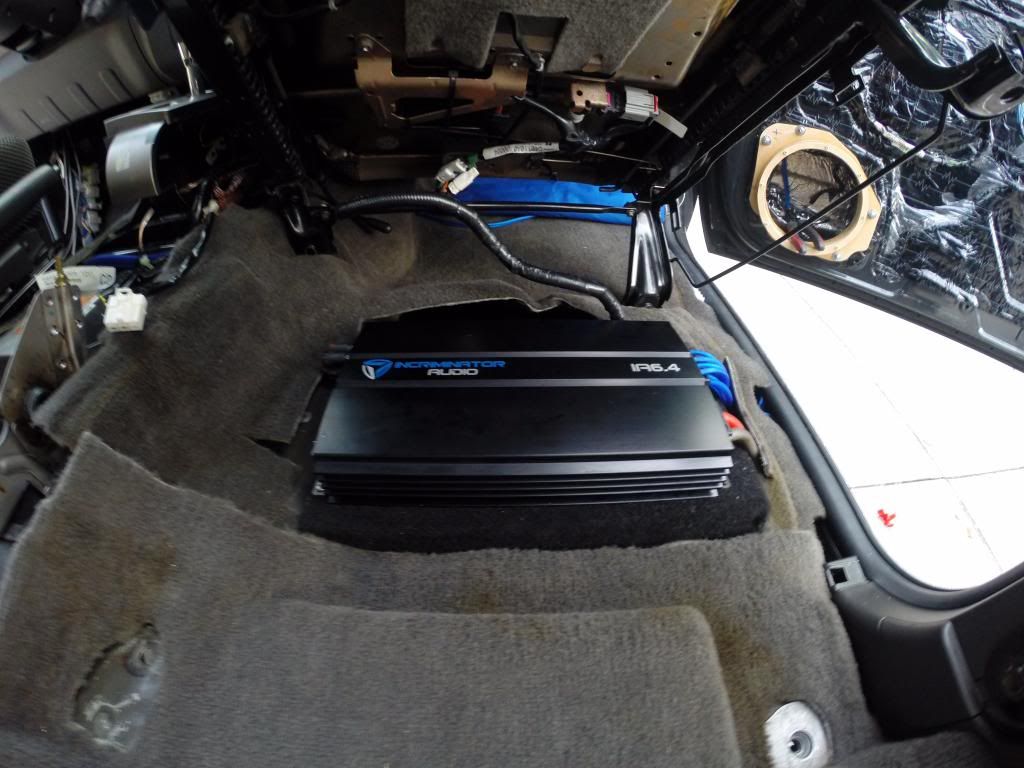 Got to work on the A pillars, no glass (yet?) just used a hole saw to punch out holes for the tweets (soldered up the leads and xovers last night) and did the back doors too...
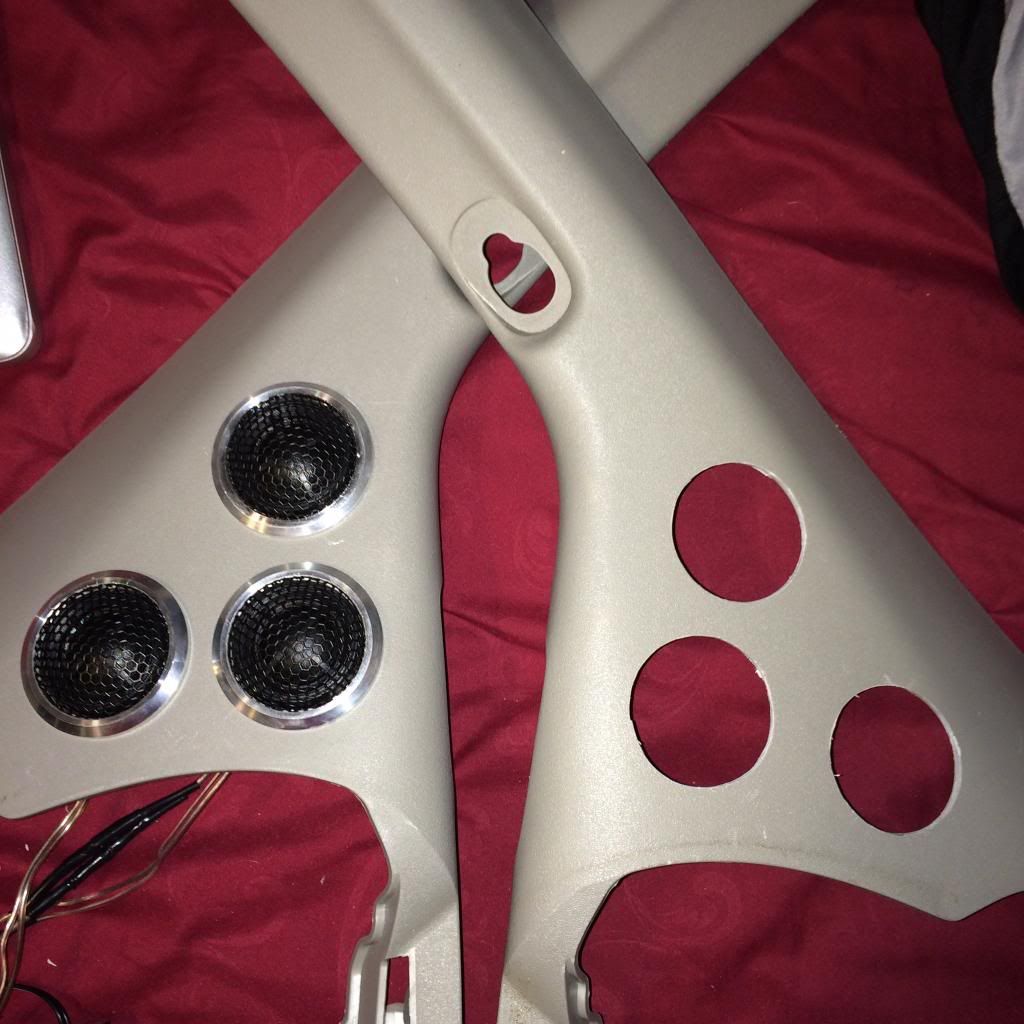 Threw the A pillars in the truck...
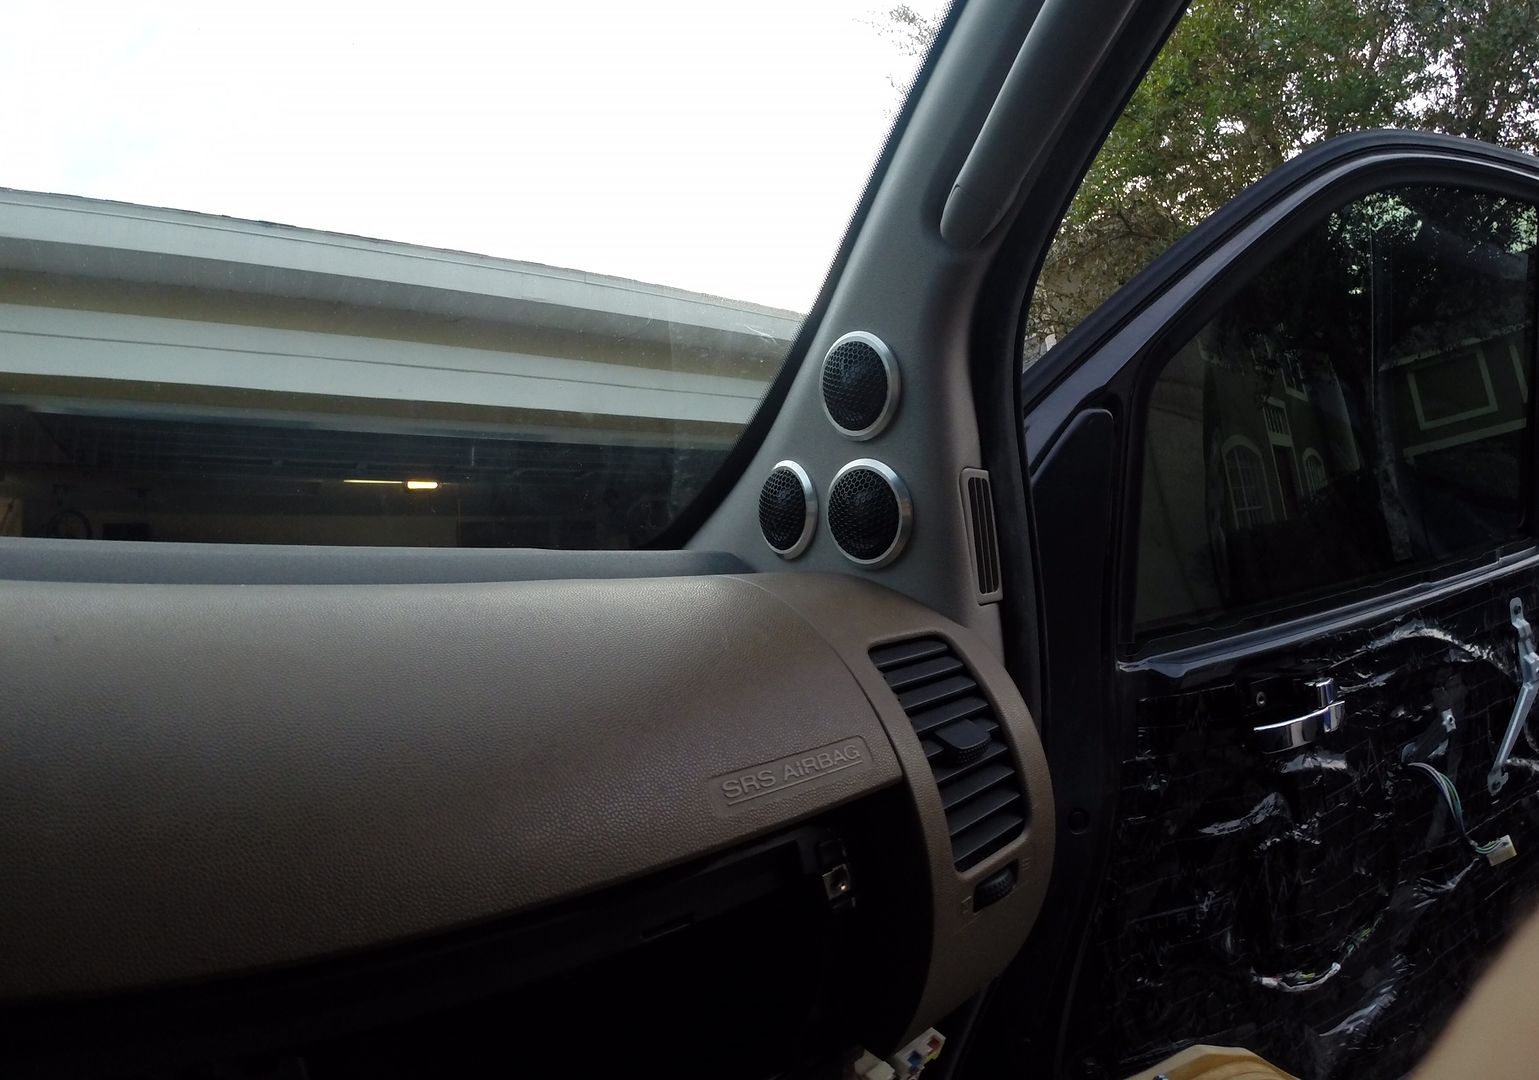 Loaded the doors...
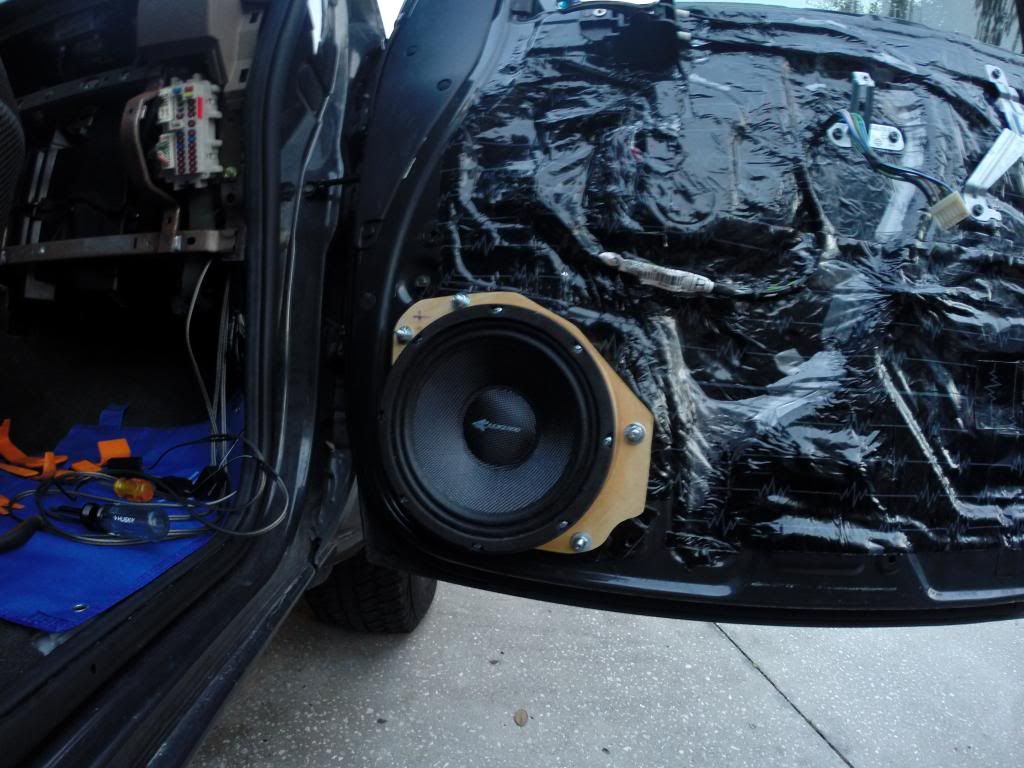 Finished running the power wire runs into the cubby where the jack goes (under rear seats, relocated jack to roof box) and got some power to the 6.4 ...
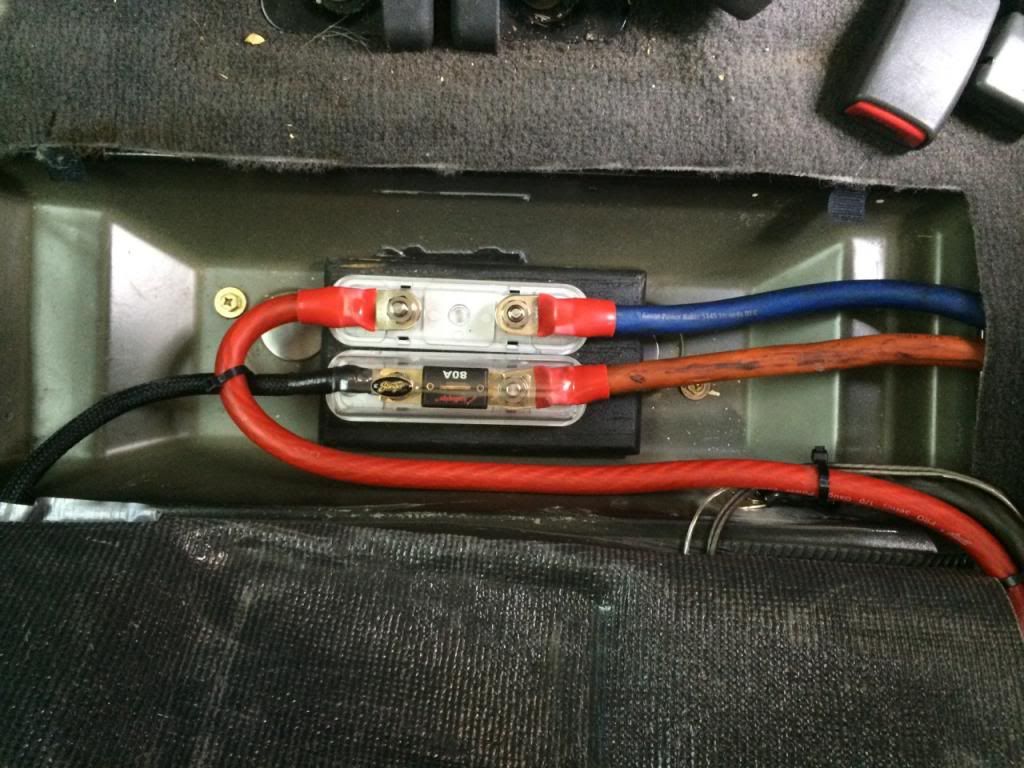 Used some double sided tape to secure the tweeter xovers behind the kick panels...
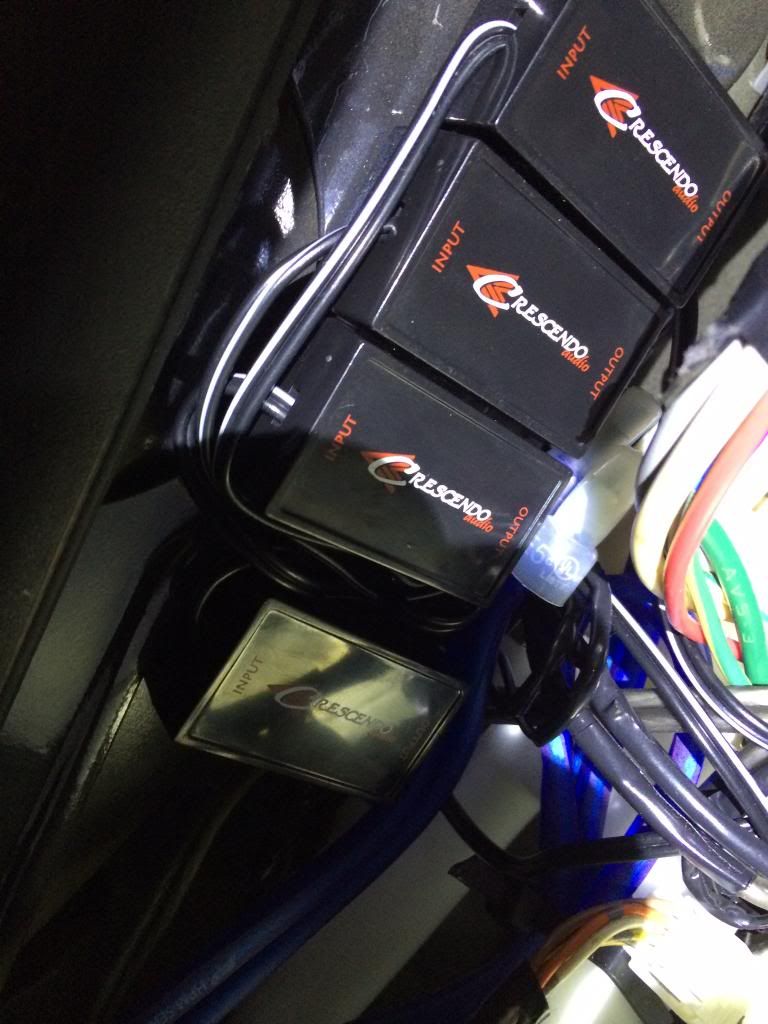 Got the rest of the interior put back together.Got the door panels on...Rear w/ tweeter
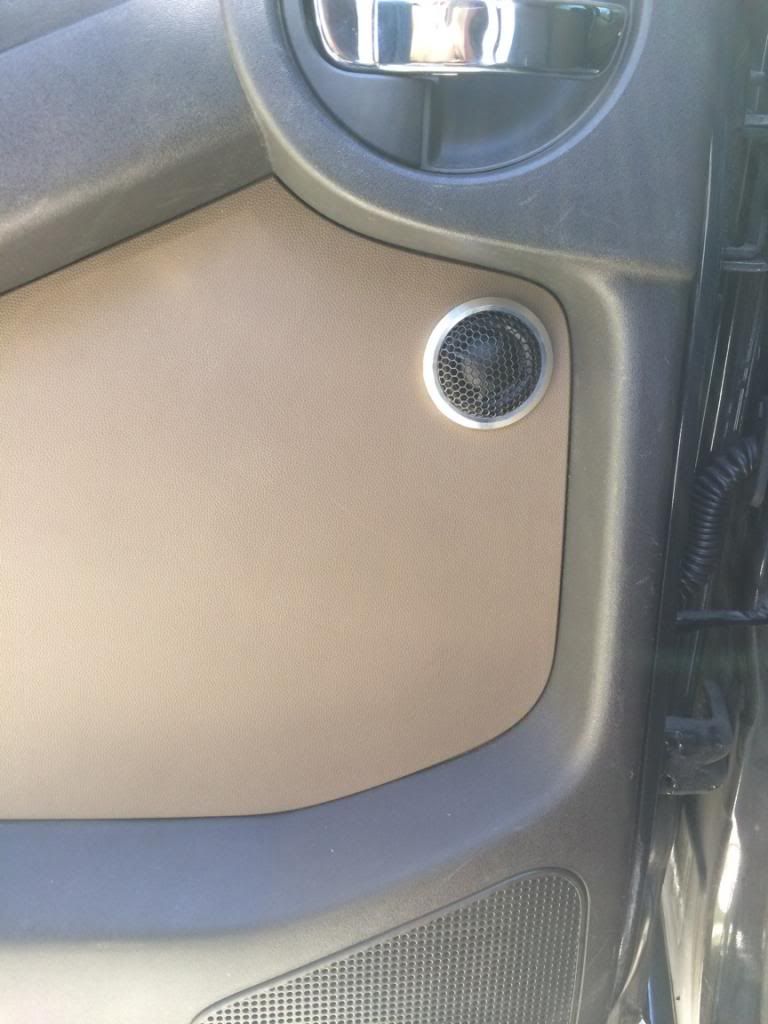 Fronts, hiding the 8s and still fit perfect!
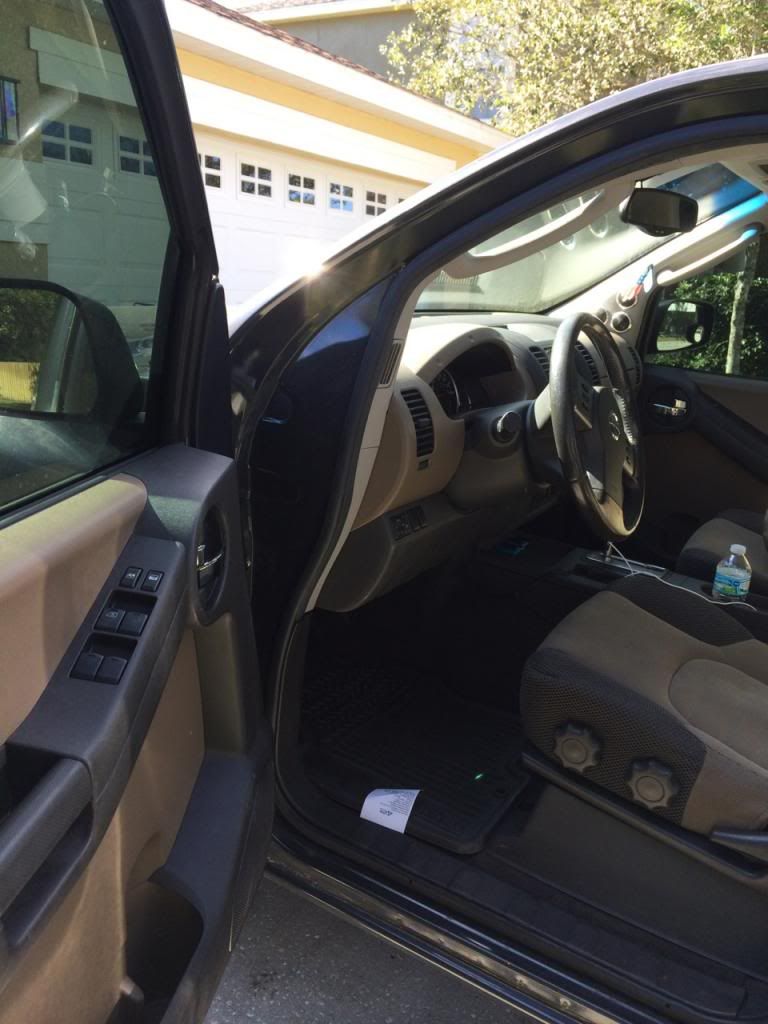 Still needs some tuning work, but it is so much louder than with the components!2
 -
Now to get caught up to where Im at....
So heres how the massives were loaded in the doors and the tweets in the dash...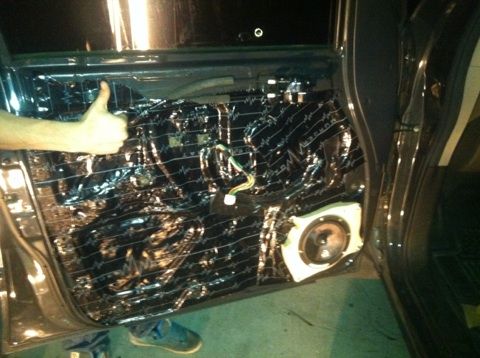
 Skar amp under passenger seat
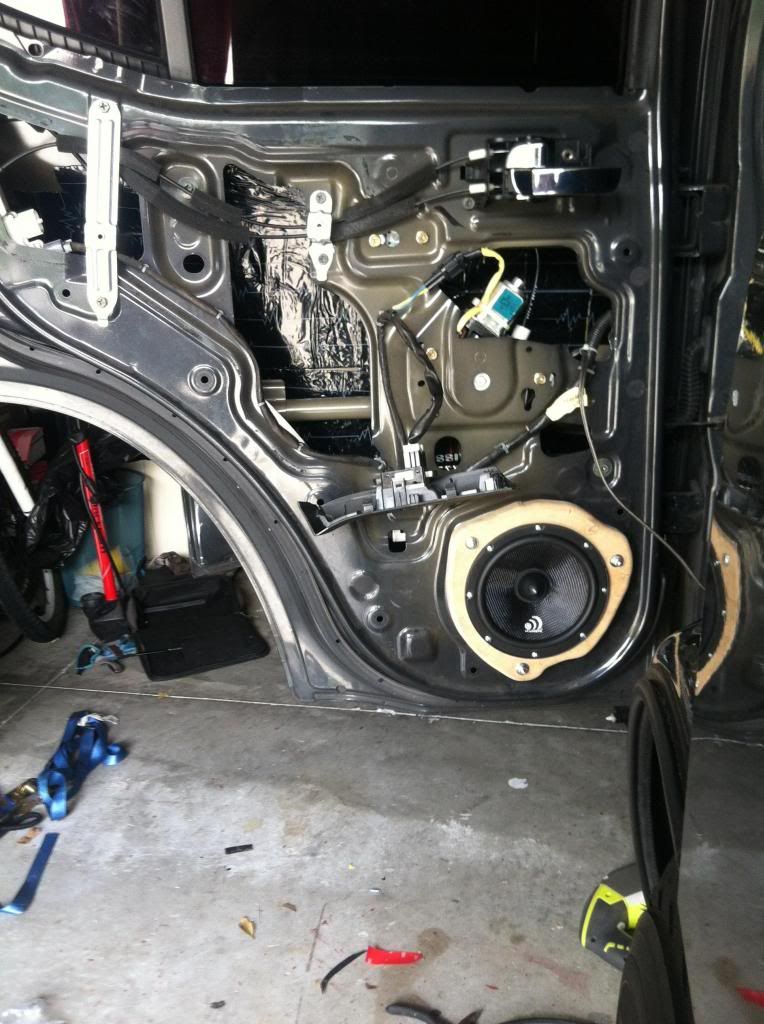
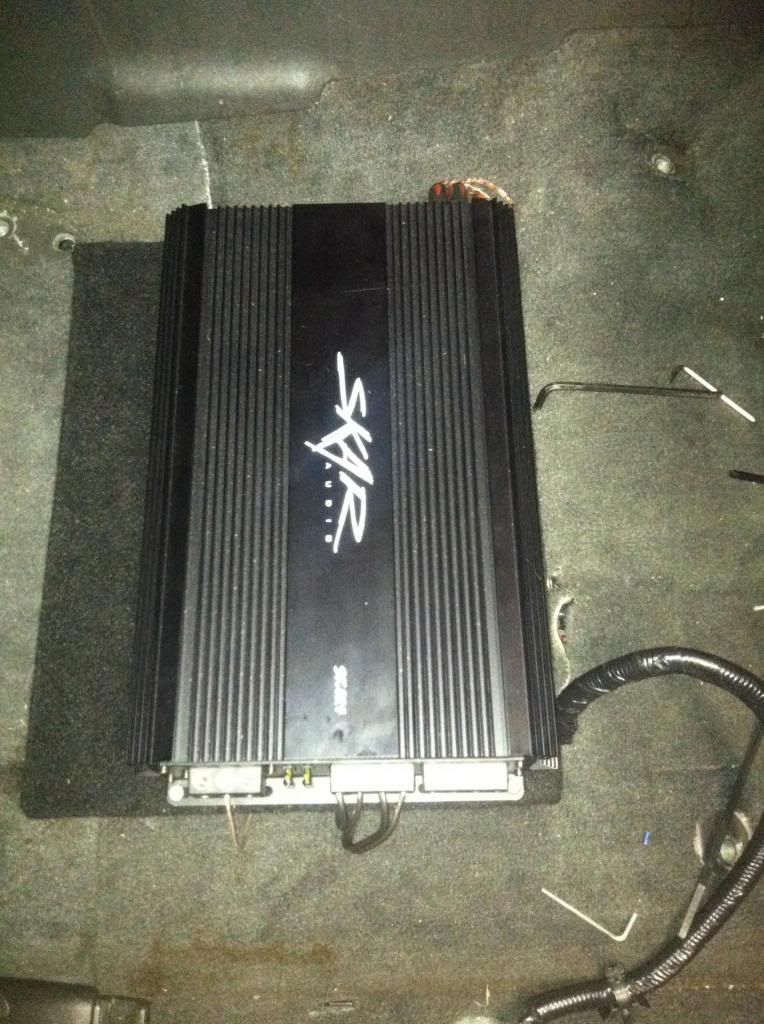 Got to work and Pulled most of the front interior out...
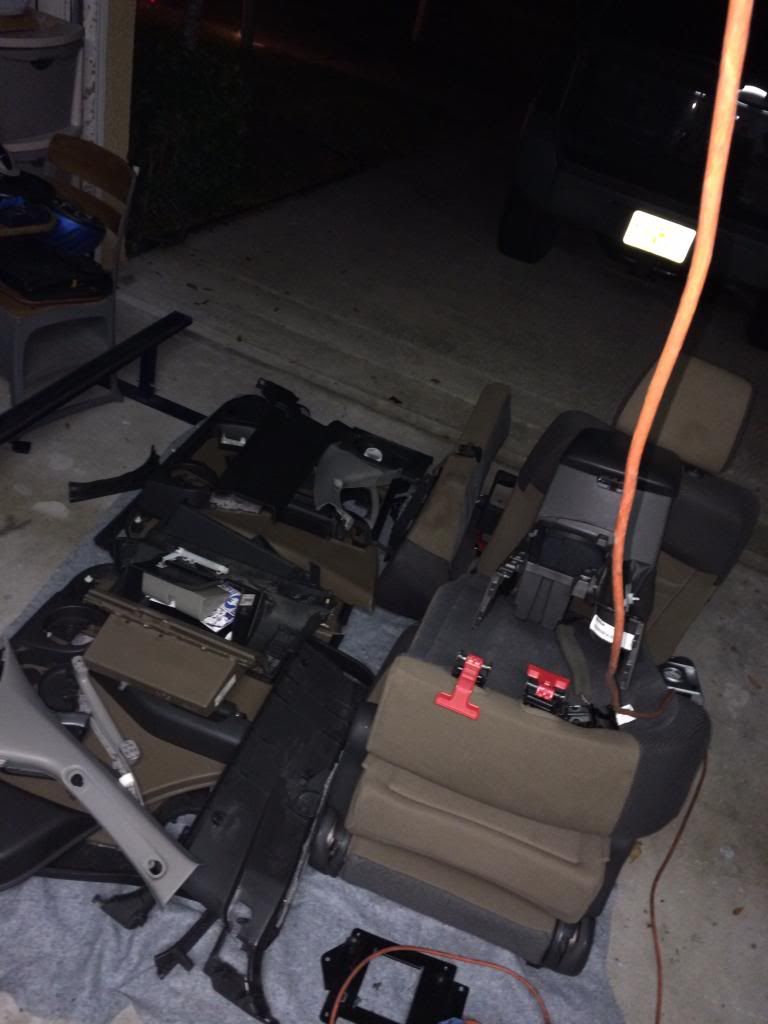 Then had to figure out how to fit the 8s behind the stock door panels. The depth and size made it pretty hard but I came up with a 3/4" bracket with a 3/4" ring and a 1/2" ring on it to just barely clear the motor with the window. Had to do a little surgery on the backside of the panel to make it work but you can't tell from the front side of the panel. Also had to break out the 4lb sledge to make a little room for the motors to fit into the openings in the sheet metal...Comparison of massive rk6 to pwx8(right)
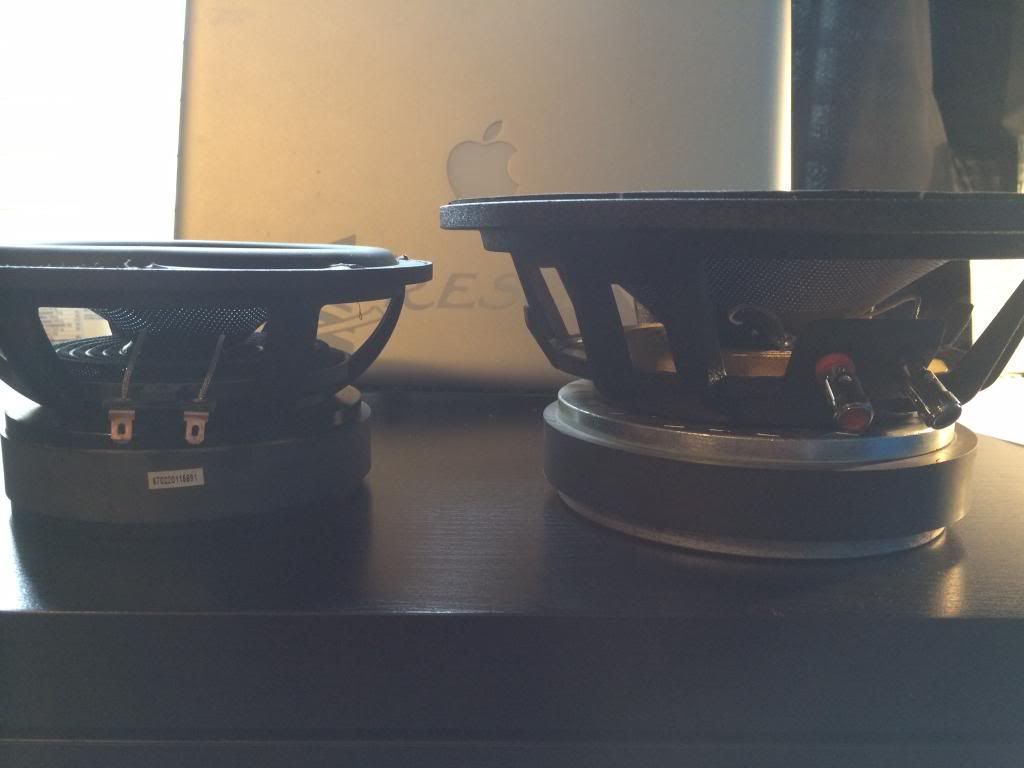 Making room for motors
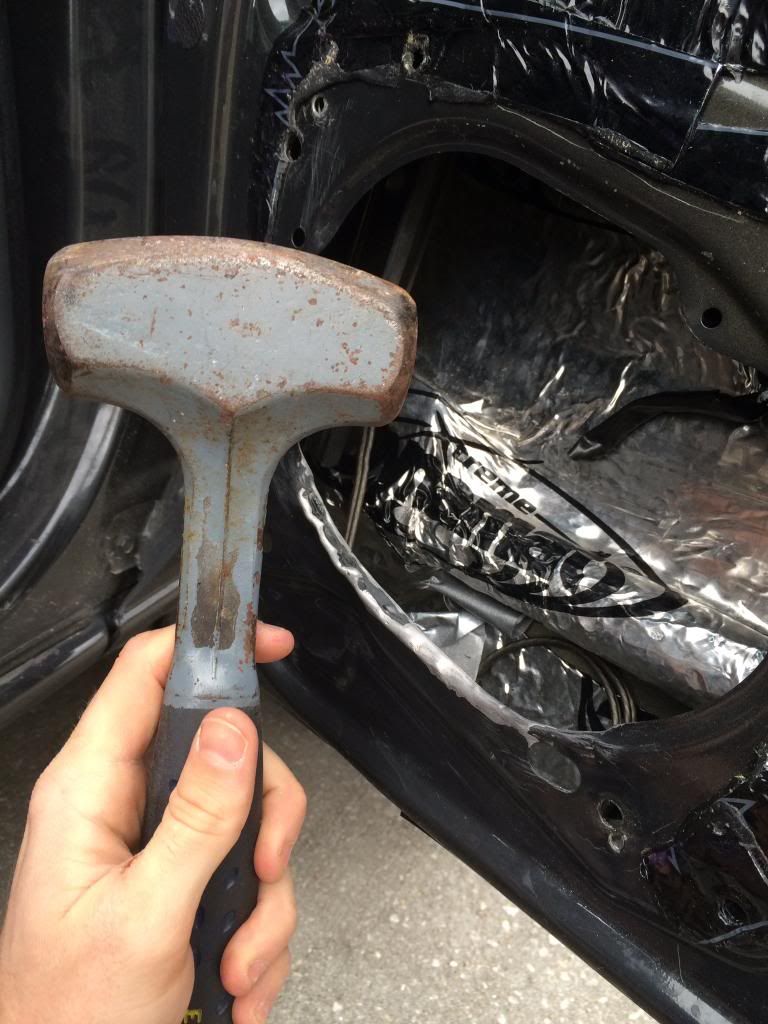 Bracket test fit
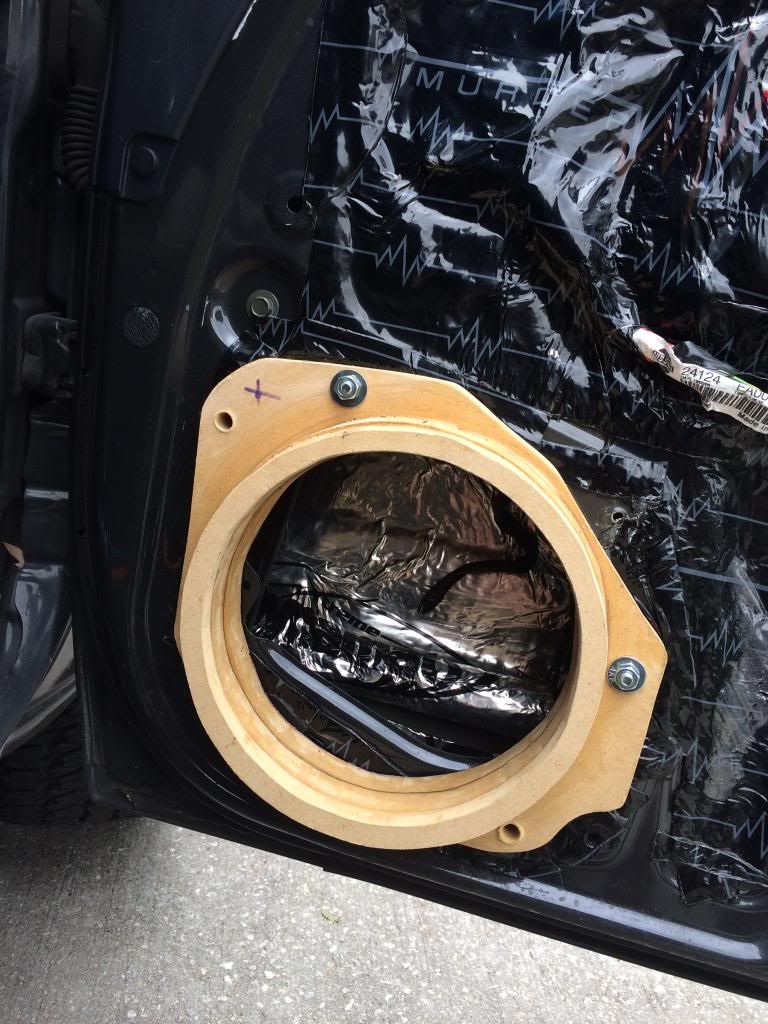 They work
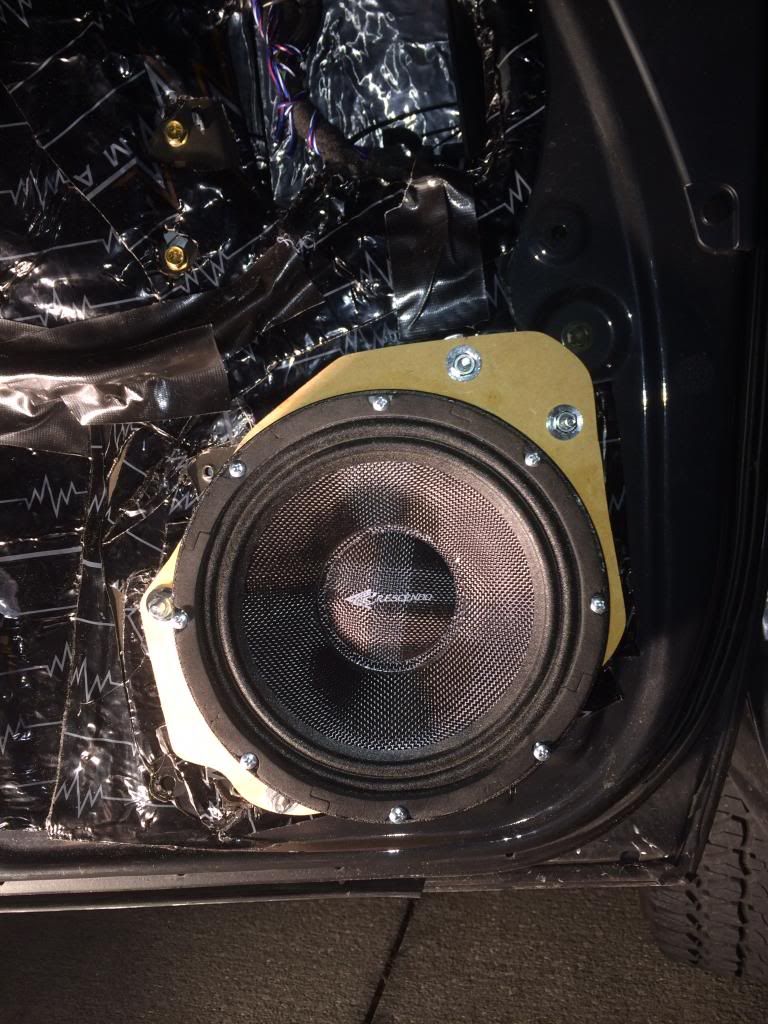 The pwx6s for the back doors still needed new rings but these were way easier, single 3/4" ring bolted to door
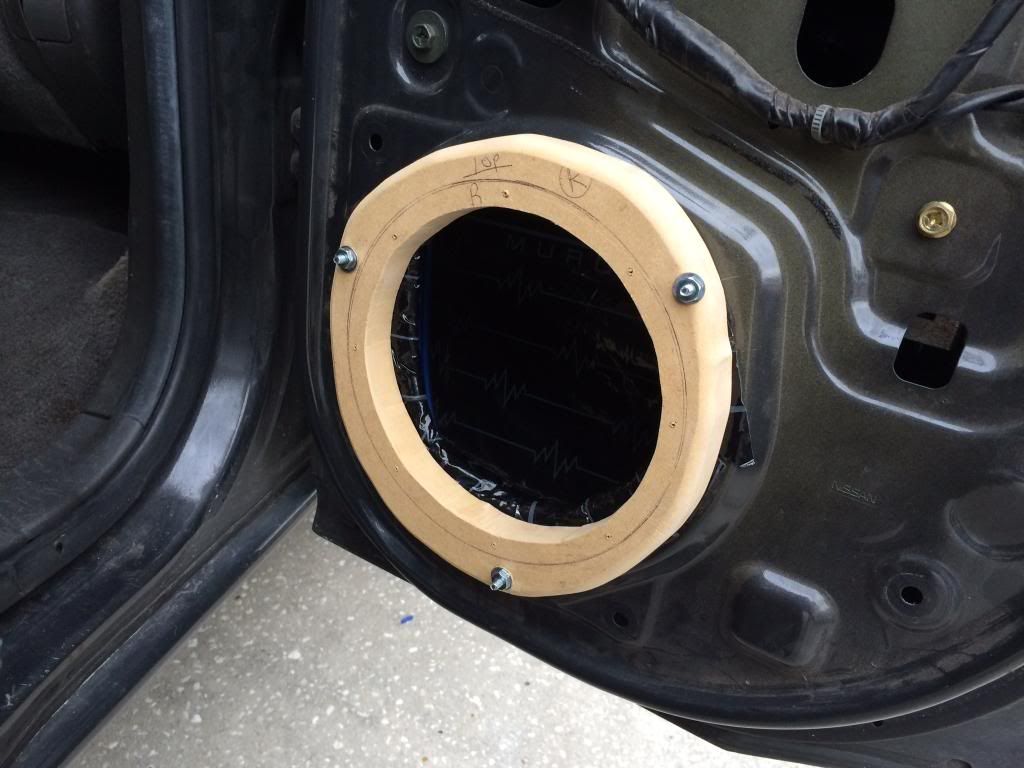 Mounted upside down to be sure the terminals dont touch sheet metal
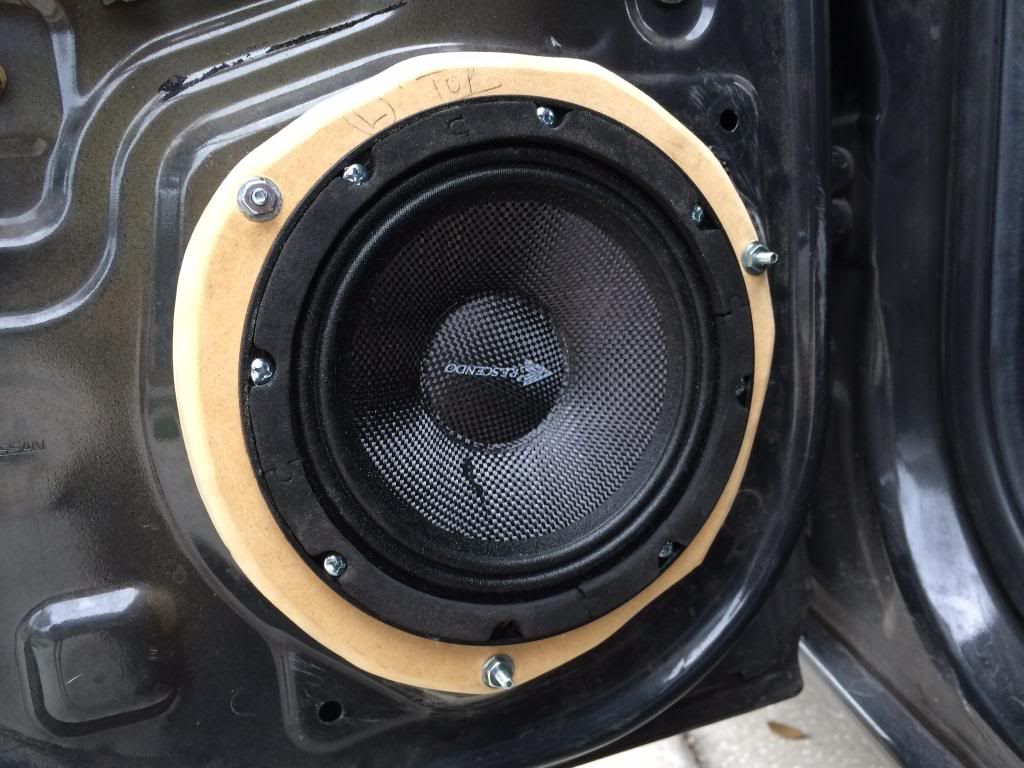 Now time to run some wires...
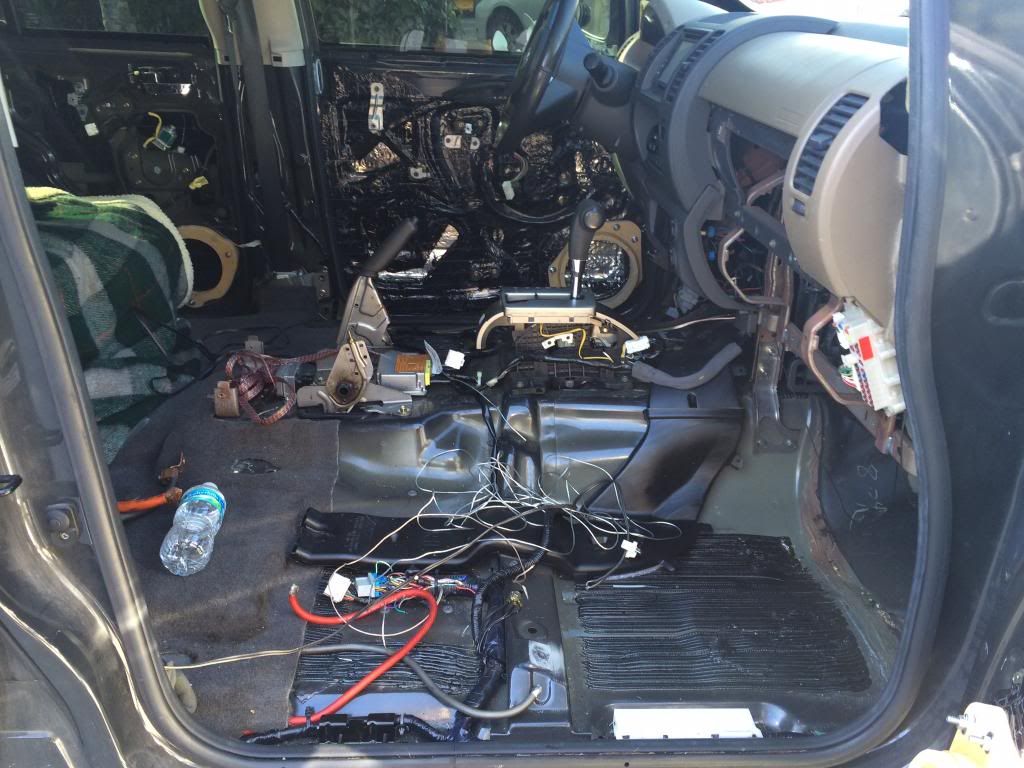 Wiring plans:There will be a run of 12g to each door for the PWX6s and pwx8s. Theyll run off channels 3/4 of the IA6.4 in parallel at 2ohm seperated by right and left for stereo seperation.There will be 3 rts-1 tweets in each A-pillar and one in each rear door. These will run off channels 1/2 series paralleled for a 4 ohm load, again seperated right and left. Each tweet will have a 16gauge lead coming off of it and will be soldered to the passive xover that comes with it all 4 passive xovers will be hidden behind the kick and soldered to a 12gauge lead from the amp.0
 -
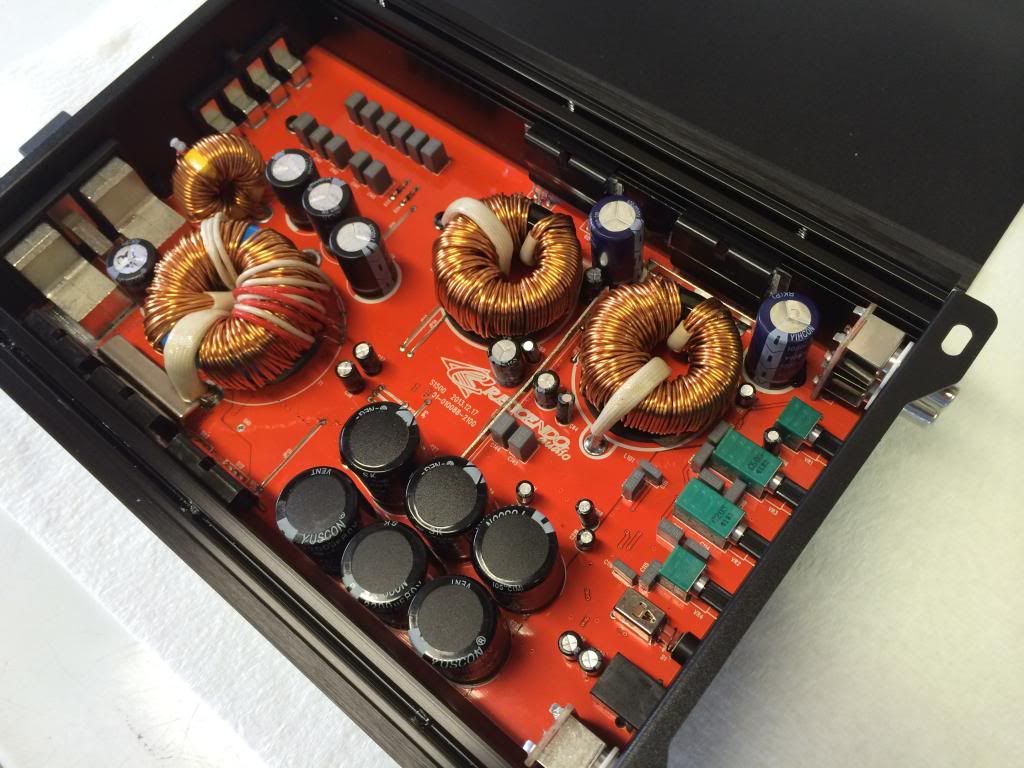
Obligatory new equipment pics...
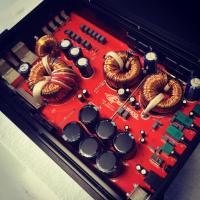
Psi 8s, beefy little guys...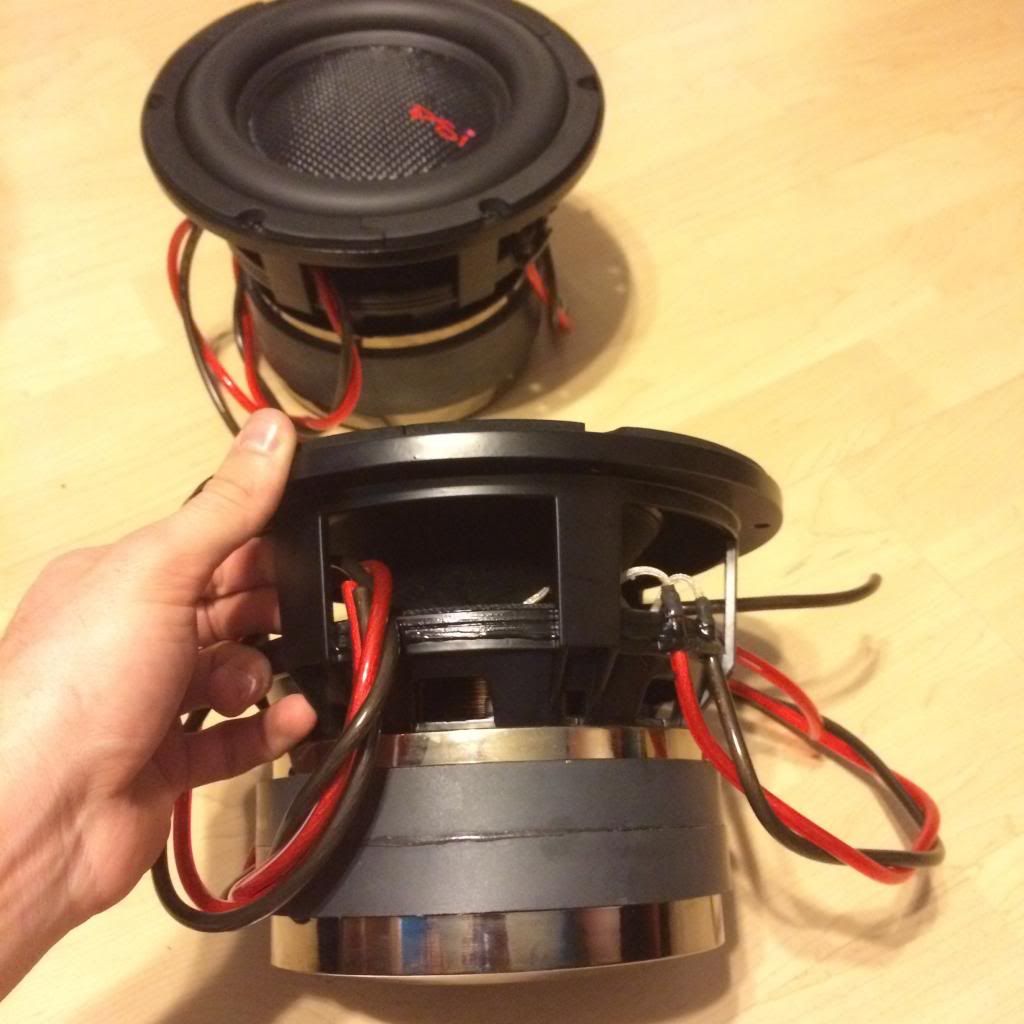 Crescendo s1500 is tiny, pretty crazy looking at the guts of this compared to my old BC5500...
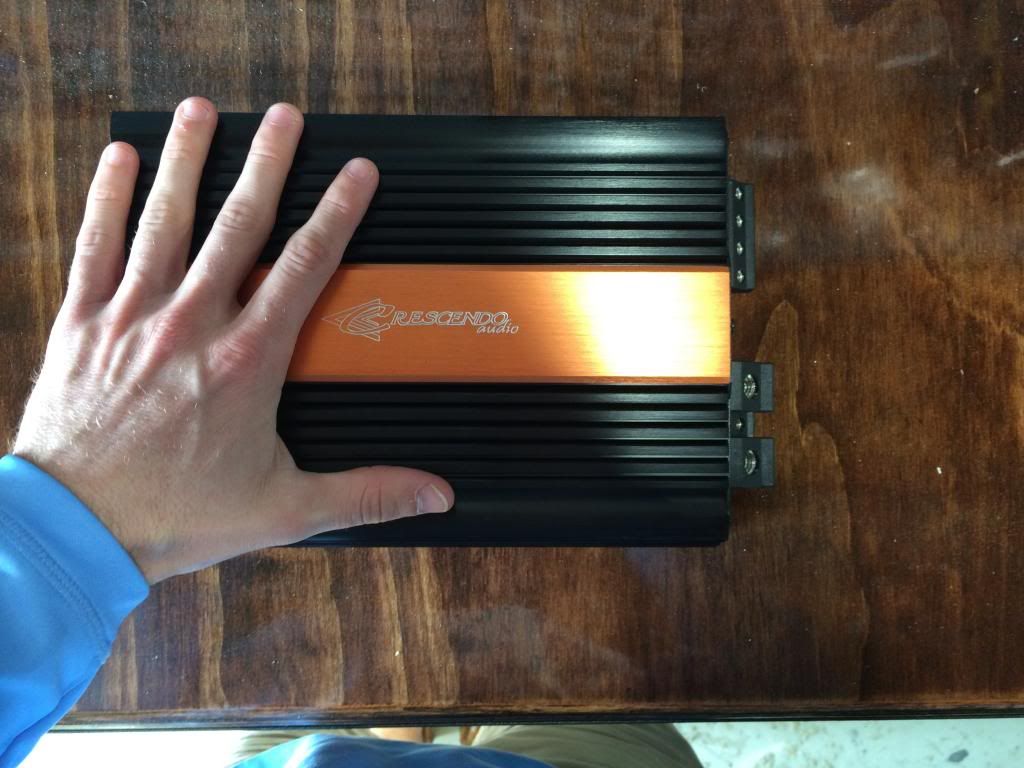
 Mids and Highs
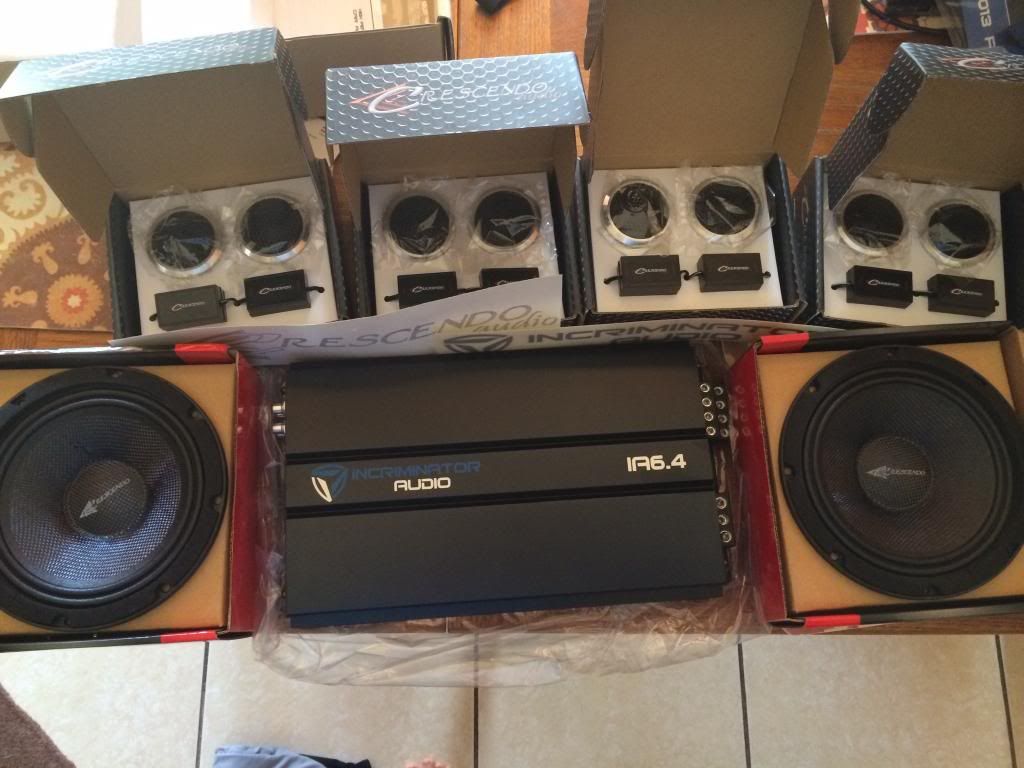 Toolmaker blocks
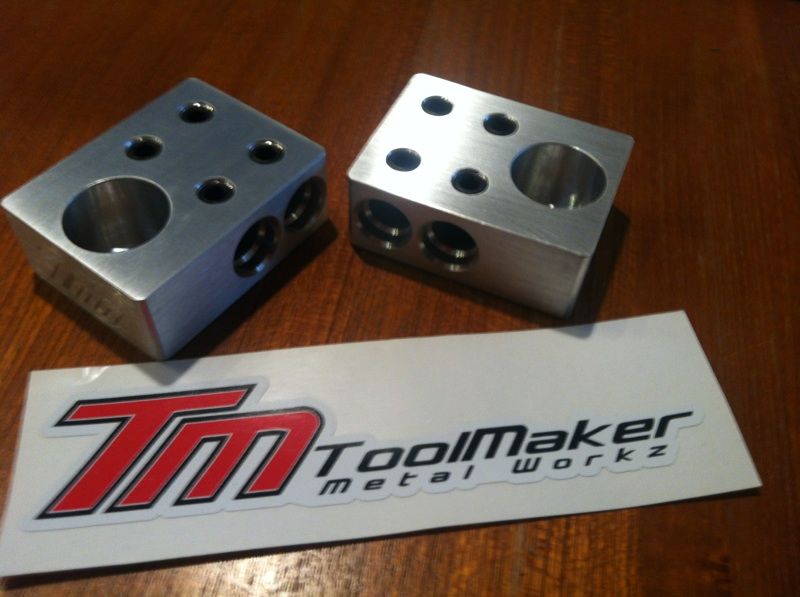 1
1 -
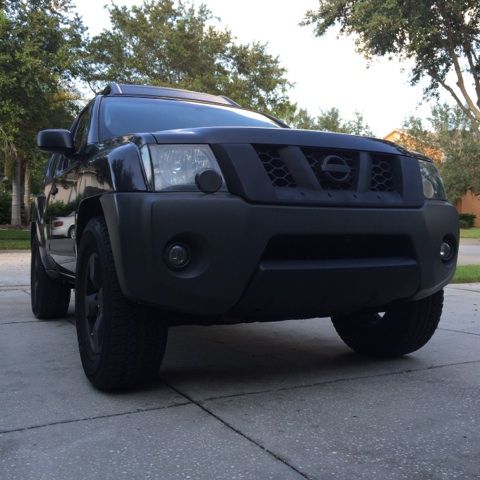
Currently working on my 4th build, guess Ill start off with some pics of the vehicle and the previous systems...2005 Xterra SE w/ 285/75/R17 Firestone Destination A/Ts, 2" PRG lift and DT long tube headers.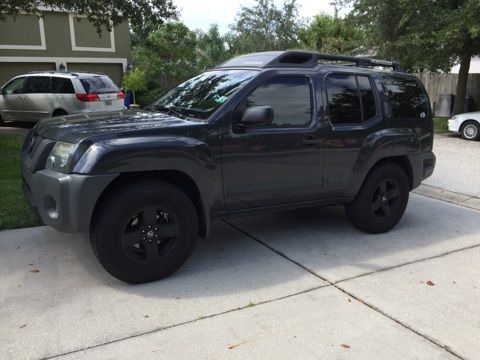
 First build:2x kicker comp 12s, sealed, Alpine type R coax all around on kicker zx700.5
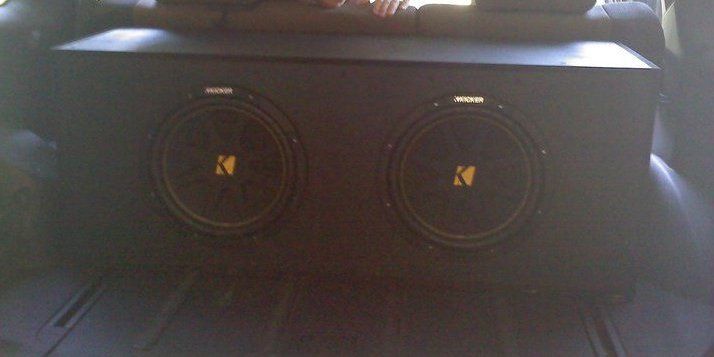 Second Build:RE XXX 15" on an aq2200d, massive audio RK6 components all around on the zx
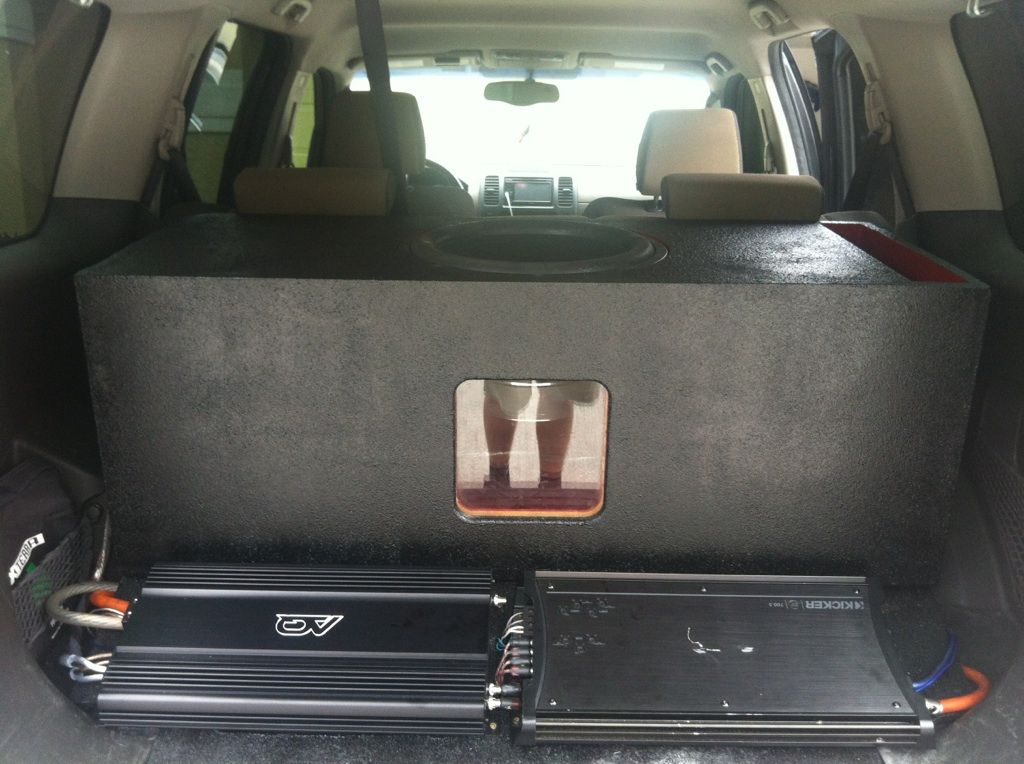 Third Build:2x Crossfire XSV2 15s in BHE box, Crescendo BC5500 @.5ohm, Massive Audio RK6 comps on a Skar SK85.4
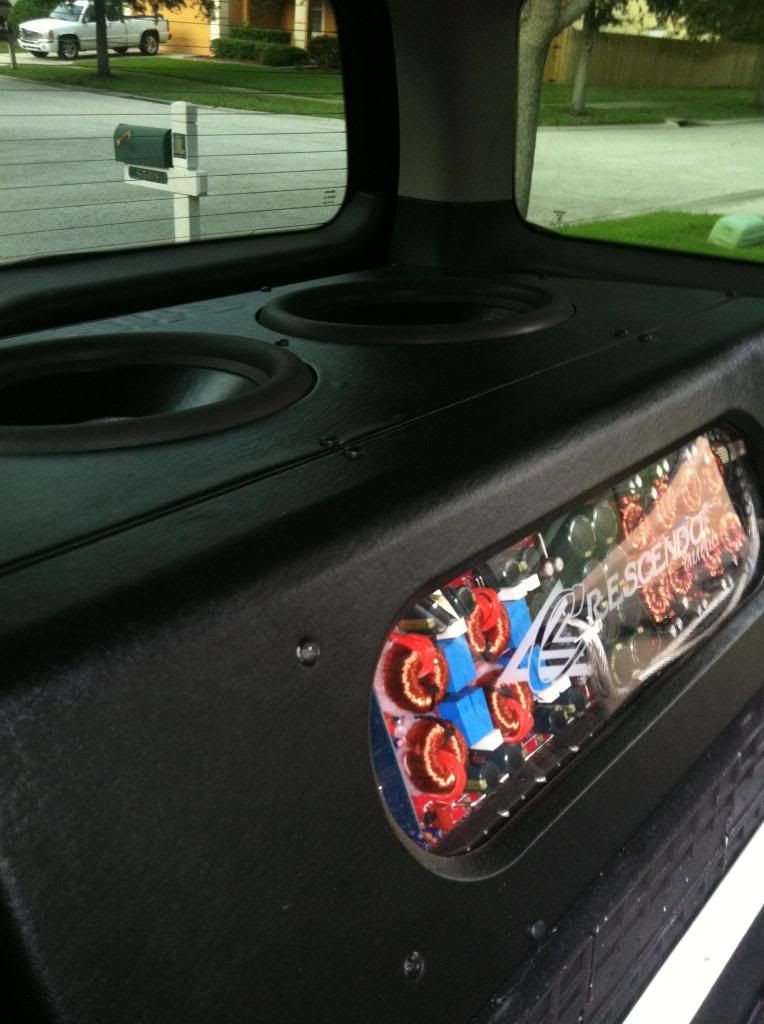
 Current Build Equipment ListH/U: Pioneer AVH3200BT (for now)Mids/Highs:Crescendo Pwx8s (Front doors)Crescendo Pwx 6s (Rear doors)Crescendo Rts1 tweets (4 pairs)Subs:2x Psi 8s (D4, High performance option)Amps:Crescendo Symphony 1500Incriminator Audio 6.4Wiring:Stinger HPM and Knukonceptz OFC 1/0Stinger HPM 4, 8, 12, 16 gaugeStinger 4000 series 6 channel RCAsStinger Fuse blocks and fusesElectrical:Kinetic HC2400 w/ Toolmake quad 1/0 BlocksBig 3 in 1/02 runs 1/0Stinger Voltage Meter0
 -
Nice man, I can't wait to hear this beast.
Me either, or atleast see it haha.
But I'm sure you know how getting progress pics from Robin goes.
Ill get some pics when i go get it sunday evening. Should be sexy; subs up port back, flush mount, black vinyl, kerf port gonna be a shifting dark grey to a dark red metallic flake in the light.
And hopefully amp will be in soon, so I can get it playing and get some vids.
0


Lee's Avalanche Build
in Build Logs
Posted
Im not a big wheel and low profile tire kinda guy, but those wheels look great on the truck. Interested to see how well they fit with that much drop.
Also really interested to see how this turns out with that insanely low tuning.