Jump to content
View in the app

A better way to browse. Learn more.

SSA® Car Audio Forum

A full-screen app on your home screen with push notifications, badges and more.

To install this app on iOS and iPadOS
  1. Tap the Share icon in Safari
  2. Scroll the menu and tap Add to Home Screen.
  3. Tap Add in the top-right corner.
To install this app on Android
  1. Tap the 3-dot menu (⋮) in the top-right corner of the browser.
  2. Tap Add to Home screen or Install app.
  3. Confirm by tapping Install.

Leaderboard

Popular Content

Showing content with the highest reputation on 05/08/2012 in Posts

  1. YOU CAN TELL IF YOU LOOK IN THE MAGIC MIRROR AND ASK FOR THE POLITE WAY TO ASK GUARANTEED IT WILL ANSWER AND WHAT YOU SEEK YOU WILL FIND EVEN IF YOU AREN'T PAYING ATTENTION BECAUSE IT IS THERE LOOKING BACK AT YOU ONLY WANTING TO ANSWER SOMETIMES IT'S CONFUSED WHEN WHAT IS ASKED IS OFF THE WALL INDIRECT SPELLED FUNNY AND YELLED AT THE FUCKING AUDIENCE BUT OBVIOUSLY IF YOU DON'T CARE TO ACTUALLY GET HELPED YOU CAN SURELY JUST IGNORE ALL DEVICE AND BE AN ASSHAT AND DO WHAT YOU WANT BUT THAT WOULD BE A SHITTY MANEUVER THAT WOULD MAKE THE MIRROR MAD
  2. No need for all caps, nor a huge run on sentence, and learn to use proper spelling and grammar. Make a decent post to get a decent answer.
  3. http://youtu.be/Mg_blZtK0mA
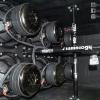
  4. Its been a LOOOOOONG time since I had my rear doors hooked up let alone multiple amps running the front and rear. As many of you know im rebuilding now so im excited!! Audison Voce 6.5's with Hertz ST25 supertweets in the center, Hertz high energy coax in the rear, nothing in the front doors. Lemme know what you think!!!
  5. remember the old monster garages... they would have like a 5000$ budget.. and some times they would get 45K in "freebies" assholes.
  6. nothing in this build has come free. I work very hard to build this car. I don't expect any freebees... All though it would be sweet Haha.
  7. No wonder the hatch got messed up... You guys can't handle your liquor!!! Hope it all gets fixed man!
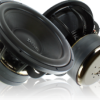
  8. come on $1200 dollars on some fine ass woofers and the stickers suck ass I understand what your saying.. but sending them back in would be outragous (the shipping that is) could just order a set of stickers.
  9. Send what back? I hope you wouldn't send the woofer in just because the sticker is coming off..
  10. ???? Drawing up a little writers block. Well, I was off the grid for a couple of days. I'm back now, trying to get things rolling. I last left off with the box done with the subs in place. Before the box can go in the amp power cables will need to be replaced. The new box is a few whiskers bigger than the old box hence why the power cables need replacing. How about some pics? I started off by laying out, highlighted in white, the size and location of the new cutout. Here the floor insulation has been cut to size to show how much of the floor needs to be cut. A little jig saw action to cut the sheet metal. Another fine opportunity. The floor sheetmetal is spot welded to a vertical panel on the underside of the Suburban. At this point the vertical panel is gonna need to come out as well. This is so the cables have enough clearance to loop around the bottom panel and come up and through the floor. This time around I did not have a fancy tool to cut out the vertical panel. I went old school with some tin snip a hacksaw blade and the ever impressive mini sledge and chisle. The carnage afterwards. With the sheet metal out of the way. I used some of my fancy cable holders to route the power cables. The cable holders will also keep the cables from rubbing on the sheet metal. This shot is looking down through the floor at the cables. This shot is looking from the ground up at the cables before the batteries are in place. Alot of cable snaking around going on here. With the cable opening all figured out the batteries can go back in. Here is a little action shot of the batteries going back in. The new cables in place waiting for the new floor cover. and here is the cable cover in place. The silicon job is a little messy on this one. Another shot of the finished cable job. Think, box going in place for the next update or the quickest way to get a hernia. Someone asked what paint I used for the box. Here it is. I used two coats about an hour apart. On the port and port brace bevels I put a thin coat of wood glue to keep the wood from absorbing too much paint and swealling up.
  11. They have the manuals that contain info about these amps that should help you distinguish version 1 from version 2. Go to zedaudiocorp.com and find there archive manuls/discontinued manuals.
  12. Hook that POS amp up so it can blow up already!
  13. That's because they don't actually try to help you, they just need to make it look like they're trying to help you. As long as it looks like they're trying, they look like the good guys.
  14. I'll drive there and kick you if this thing doesn't do a mid 50 lol. You'd have to do something seriously wrong considering my low tuned box with those n2s would do 50 on the glass.
  15. i ordered the blue chrome on my subs on tuesday will i have the same problem too ????????? can anyone from FI confirm this please??? Shut the fuck up, they can't confirm what may or may not happen. Just listen to the advice given in this thread. Spray adhesive on the back of the stickers if they're falling off.
  16. please dont (no homo) here....please plant city... sure i know where that is... i kinda grew up in lake wales/winter haven/aburndale areas
  17. Now, a little carpeting action. Firstly I'd like to thank a fellow forum member Jon, a.k.a CHEVY4X4BLAZER for braving the South Texas sun and humidity. He came over lending a helping hand and for a little comradership. Thanks for you help friend. First the goods. Parts Express finest speaker box carpet in a not so original charcoal color. Adhesive in a spray can by Loctite, some scissors and a box cutter. The wrapping process. Finally a box fully wrapped. The seams came out pretty good. The last time I carpeted a speaker box I used similar carpet with a backing and I couldn't get the seams to blend well with each other. This carpet didn't have any backing. The seams blended nicely together with no fussing just a little fuzzing. With the box wrapped and ready to go we got the plexi-glass pieces in place and wired the box up for the subs. Here is a shot of the plexi-glass in place. Thanks to Jon for helping with the gazillion screws and getting the plexi-glass mounted. I opted to do all the wiring internally to keep things looking clean. The subs are D1s. For the Warhorse the coils are wired in series to get the 2 ohm load required by the amp for full output. If the wiring pictured doesn't really make sense to you it's because the amp wires up to subs in a real odd ball way. Trust me when I tell you I know what I'm doing here. Here is the box at 95% complete. A close up of the box port. There is a little story about this port that I'd like to share with everyone. The original design of this box only had the outer most edge of the port beveled. The port brace and the inside edged of the port, next to the plexi-glass window, was originally to be left square. A co-worker of my likes addressing everyone by adding the word "Big" infront of their first initial. In my case, he addresses me by calling out, "Big H." In the spirit of that, I beveled both the port brace and the inside edge of the port to make a big "H". One last shot of the box. Up next, the subs go in the box. Thanks for your help Jon(CHEVY4X4BLAZER).
  18. With the box taking shape here are some pics of the inside being painted. First and foremost, a little test fit in the vehicle. He, he. Now some paint shots. A nice a sharp 45. Don't cut yourself. I spread a thin layer of wood glue on the beveled edges to keep them from soaking up too much paint and swelling up on me. With the inside fully painted I mounted the sub rings before adding on the bottom of the box. I pre-painted the bottom of the box before assembling it on. This keeps me from having to work in the small confines of the box. The final product. Up next a little carpeting action.
  19. Finally some box assembly action. Since I like painting the inside of my boxes I assemble them starting at the baffle down towards the base. Here the sides go up. The sub rings are in there, well, I don't know why. I'll take them out to paint. The center divider and the 45's going in place. Some essential tools to get the job done pictured as well. Glue, a hammer, and an industrial fly swatter. Here the port wall is coming together. Since the leading edge is cut with a bevel I used nails and a nail gun to keep everything together as the glue sets. Clamps, clamps and more clamps. The port is taking shape. Woot, woot! Hey now, this thing is starting to take shape. Sweet.
  20. Work is a stickler about me making stuff using their equipment for profit. At the same time they're not in the audio buisness so they're not interested in the profit offered. : I can offer you PDF and DXF drawings if the rings, in which you can take to a local shop with CNC cutting abilities. Let me know. Great community here. Always supportive regardless of equipment used by this knucklehead. Stop by more often. Thanks for the kind words.
  21. After a short hiatus I'm back. Up now, mounting the sub mounting rings. The recently modified sub is in position on the baffle to have the mounting locations transferred on to the baffle. With the mounting locations on the baffle it's time to drill out the mounting holes. Here is the sub mounted on the baffle. A close up of the mounted sub. I couldn't resist. Here is a preview of what the view will be like through the viewing slots.
  22. 1 point
    Their products are sold on the SSA store, here. Ask [email protected] : fast and reliable answers ! I'm in a foreign country too, and they take good care of me everytime I need something.
  23. Up next, work on the plexiglass. The plexiglass is half inch thick. Since it's a small window opening I figure it'll be good. As for cutting the plexiglass I used the trusty ol' table saw. Once the glass was cut I laid out the mounting hole locations. I started the holes with a brad tip drill. Since my free hand drill isn't worth a damn I decided to try a guide to keep the holes straight. Here is a pic of the silly contraption I used. Once the holes were drilled I installed the threaded inserts. I'll be using 10-32 machine screws along the narrow edge and 1/4-20 bolts on the far end. To get the holes in the plexiglass I'll be match drilling the holes through the box panel. I mocked up the box side and clamp down the plexiglass. I first drilled a pilot hole using the insert in the panel as a guide. I was extra careful not to booger up any of the threads in the insert. To drill the actual through hole in the plexiglass I used my little ol' drill press. A tip for drilling plexiglass, use the fastest speed as possible. If not the drill will grab when it breaks through and make a mess of things. Here is a shot of the plexiglass test fit.

Configure browser push notifications

Chrome (Android)
  1. Tap the lock icon next to the address bar.
  2. Tap Permissions → Notifications.
  3. Adjust your preference.
Chrome (Desktop)
  1. Click the padlock icon in the address bar.
  2. Select Site settings.
  3. Find Notifications and adjust your preference.