
Quentin Jarrell
SSA Regular
-
Joined
-
Last visited
Everything posted by Quentin Jarrell
-
 Gonna need a tad bit more info: Max dimensions Sub brand and model Sub and port orientation Port and carpet colors Number of terminals Zip code for shipping quote My typical enclosures like the black and gray dual 12 but for dual 15's run $305 plus shipping
 -
I don't use winlsd because it doesn't account for parallel wiring. I use leap. I don't see any flanged ends on your design. The only reason you would consider 2 flanges is if you were using a port such ad an aero that had flanges on each end. The reason you add half the radius of the port to the port length is because you have your port against the enclosure wall. Don't add any flanges to winlsd because you aren't using any in your box
-
I was two inches off by eye balling it. Officially I see the port as 29.89" long. Each top of the "T" still needs to be almost 4 inches longer. leaving it as is will tune it to about 33.75 hertz
-
Mwa speaker parts
-
I've got a tad bit of experience
-
I almost ready to start laying some glass but it's been a long time since I've done any fiberglass work so I gotta order some supplies. I have been ordering from US Composites for about nine years. They have great customer service and some of the best prices. The only thing I do not purchase from them is resin because on 5 gallon pails a hazmat charge is applied on shipping which makes it too expensive so I but that locally. Typical list follows: 1.5 fiberglass mat. never use woven cloth It is very had to get it to laminate correctly to itself on odd shapes unles it it is vaccumed. http://uscomposites.com/mat.html resin. Typical polyester layup resin. You can usually tell how good a resin is by the color. It should be dark blue to green in color. Don't use the Bondo brand at home depot it is junk. http://uscomposites.com/polyesters.html MEKP (hardener) typically you want to use 1.25- 1.5 percent by volume MEKP per resin http://uscomposites.com/solvents.html Pigment. I dye my resin black so I can see the air bubbles in the lay-up. It makes them much easier to see when working them out. http://uscomposites.com/pigments.html fiberglass roller to roll out air bubbles. I like a large 3/4 to one inch roller. http://uscomposites.com/fgrollers.html chip brushes to lay resin onto matt http://uscomposites.com/brushes.html Cab-o-Sil I mix this filler with resin and use it as a glue and a fairing compound. It also works well in tight crevases in molds. http://uscomposites.com/fillers.html Part All. I spray three coats on all my molds and taped areas. When using this the hardened mold will pot right out. http://uscomposites.com/moldrelease.html Duratec. I normally use this when I am painting or wrapping in vinyl. It makes life much easier when trying to get panels as smooth as possible. http://uscomposites.com/polyprod.html a little tape and waxed paper will be needed when doing the lay-up. Once I get all my supplies in I'll show the proper way to hand lay-up firberglass.
-
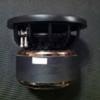
The Klippel results were a little off in the last prototype so I decided to use American coils and soft parts. The xmax was still there, we saw almost 30mm of one way movement and 25 mm of one way xmax. However the resonant frequency of the spider was a little off and changed the t/s parameters a little. The sub worked and sounded great but wasn't exactly what I wanted. On a side note it will only need about 400 watts to hit xmax. The coils are rated for much much more though. The sub has so much BL near the end if its strike that Physical damage will occur to the sub before the coil burns up that is why we will be WARRANTING BURNED VOICE COILS for one year.
-
Free squash with every enclosure purchase
-
Is your port 34 inches long. If I am reading the sketch up correctly it appears you only have about 24-27 inches of port length
-
We don't wanna mess with the squash. My old lady will have a shit fit if her squash comes up missing.
-
I also say ditch the treadmill and purchase the base P90X package. I don't care for it's meal plan bc the recipes aren't to my liking but the workouts are top notch and will burn calories much faster than a treadmill.
Now that I figured the area inside the cavity I figured out how much higher I needed to make the enclosure to get my net 1.8 cubic feet. So I layed out my port which will tune the enclosure to 27 hertz. This is the internal deminsions I will use to make a fiberglass port. I then finished my outline of the enclosure. The finished fiberglass port will be fitted into it later.
You will be in the neighborhood of 800 give or take 50 bucks. I will have to wait till Monday to get a better quote for shipping
Sorry I meant it would be louder than sealed
It will be a little smaller than recommended but will be louder than ported. I can do ported for 430. Going that large it will have to be sent via freight. That's not a problem but will cost a little more for shipping
Using your maximum diminsions you will have about 4.6 cubic feet net for each sub after sub and bracing. To keep the enclosure under 150 pounds so we can ground ship it the enclosure will need to be built from birch. If not it will cost twice as much to send it via freight Shipping and handling to Illinois will be $200. Actual shipping is around $170 The remaining amount will go toward proper packaging to make sure it is not damaged during shipping. The enclosure will cost $400 to build for a total of $600
Let me know your absolute maximum height and will work up a quote for both ported and sealed also your zip code for a shipping price
Let me know your absolute maximum height and will work up a quote for both ported and sealed also your zip code for a shipping price
I would like to persuade you to go ported if we can get a few more inches in height. If not I would be happy to do it sealed if you are set on it. Give me a few more details on how you want it to look. For example just a plain box Or do you want suede baffle inlays. Where you want the terminals located ect.
I vote for a WRX hatch
This one is on the back burner while I wait on prototypes
Gives up your maximum external deminsions
I would do the 15 ported being you have 3.5 cubes to work with
Added another layer of tape over everything to make sure everything is strong and sealed. Added a temporary back wall. This is just so I can calculate the volume of the cavity and will be removed. I take a normal square box then mark inches on the inside I filled the cavity with dog food because I have plenty of it. Anything will work kitty litter, sand, ect. Then poured the dogfood into the box. The dog food went to the 10 inch maker inside the box. So I take the 10" x 18" depth x 18'' width = 3240 cubic inches = 1.875 cubic feet. So now I have a base line of volume inside the cavity and I now I have to figure port and driver displacement to determine how much higher I need to make the enclosure.