November 2, 200718 yr Author the problem : thought about one fix : the ring is on the inside part. once the baffle is in place i'll lay some layers of fiberglass to connect the narrower parts to the enclosure.1 inch mdf for the baffle and 3/4 inch for the ring.
November 7, 200718 yr Author the lower edge will be supported by another mdf panel. only trouble i still have is on the upper part. that's where i plan on using fiberglass to reinforce. there are bolts in the t-nuts to stop the resin dripping. also ran out of resin so the left side onle has chopped mat. it's going to be fun removing the bolts the panel thas is going to support the lower side. there is a nut in that hole
November 21, 200718 yr Author almost done with the glassing part beware, it looks rather ugly from the excess wood gluethat's my attempt to reinforce the thin mdf lip. also fiberglassed a nut in there..for mounting purposes rear of the enclosurethinking of covering the visible parts in leather and painting the hidden parts black.the last pieces of resin are starting to cure.
November 21, 200718 yr Dude....................freakin sick.I end up in the Netherlands, if I gots a garge ur gonna come teach me to glass right?J
November 21, 200718 yr Looking good sir. little late for this tip now , but in the future if you need to glass around nuts and bolts. Coat the bolt in vaseline ( petroleum jelly ) first , then thread it into the nut . THe resin won't stick to the vaseline
November 21, 200718 yr Author He's in Romania... a bit out of the way from the Netherlands.24-26 hours with the car plus i never been there (only Germany and Belgium). if you're there this summer we'll arrange a meet sir Ramos, thakyou for the advice. i never thought about vaseline. it's something i'll do for sure next time i need to glass bolts.
November 21, 200718 yr I will let u know when the time comes man.We may have some stuff to do when I get there neways LOLJ
November 22, 200718 yr Author installed and running.still have some tweaking to do (fill, deaden the fiberglass and put a finish on it) but i'm rather pleased.
November 22, 200718 yr nice sir!!now, pictures of packages sent to you!!wheeeeeeeeeeeeeeeeeeeeeeeeeeeeeeeeeeeeeeeeeeeeeeeeee
November 22, 200718 yr nice build log... cutting up all those pieces of deadner mustve taken forever awesome work... cant wait to see the final product
November 22, 200718 yr Author nice sir!!now, pictures of packages sent to you!!wheeeeeeeeeeeeeeeeeeeeeeeeeeeeeeeeeeeeeeeeeeeeeeeeee thanks for the comments there will be some pics of the spl project along with the surf boards
December 20, 200718 yr Great build !!! any pics of the finished boxx ?what kind of cloth is that your using for the FG ?
December 20, 200718 yr Author Box is not finished yet. Not sure i'm going to finish it because i got another of those plastic panels for free so i'm going to build a new box this summer.No idea on the cloth
July 4, 200817 yr Author I'm baaaaaack Time to finish sound deadening the floor and build an enclosure for the Rl-i.The back panel of the enclosure is almost complete. Doesn't sit perfect on the plastic panel . The top sagged but it's already cut and ready for a repair. No pics of the enclosure...yet. At least it's better than my first box. Picked up the sound deadening today and as soon as I'm done with the fiberglass, I'm going to finish the floor.
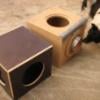
July 7, 200817 yr Author The floor is done The roof still needs to be deadened...Current progress of the enclosure :
July 7, 200817 yr Author Will post more pics tomorrow It bugs me a bit that it doesn't sit flush on the plastic (4th pic from my last post)
July 8, 200817 yr I just read through the whole build and it looks great. You definitely did an awesome job with the fiberglass, keep up the good work!
July 8, 200817 yr Looking good mr. adrian. Looks like you pulled the mold out before the glass had fully cured. It tends to warp Easy way to make it flush is to tape the area back up. except this time only tape up the plastic around the edge of your mold. THen set your mold back in on the tape. Now you can go crazy with some reinforced filler and fill in the gap between your mold and the tape. Let the filler cure fully and pull it out. Viola you just matched that shape perfectly with next to no effort at all
July 8, 200817 yr Author Thank you sir ! I appreciate the comments I forgot to mention I added too much hardener to the mixture and in a corner it got really hot and even smoked. Scared me and I had to pull it out Nothing done today except measuring the volume. Ended up at around 0.56cf. With some fill it should be good for the RL-i10
Join the conversation
You can post now and register later. If you have an account, sign in now to post with your account.