Leaderboard
-
altoncustomtech
SSA Regular2Points3,836Posts -
Aaron Clinton
Admin1Points53,822Posts -
mklett33
Members1Points250Posts -
The enD
SSA Regular1Points3,835Posts


Popular Content
Showing content with the highest reputation on 12/22/2011 in Posts
-
Okay, here goes it. Got you a plan all drawn up. Even though your max dims give's you 6.2cuft gross on that one calculator, that was without figuring driver, bracing and double baffle displacements and also most likely without using the minimum port area that's calculated for that sub which is 102sqin. Using the info you gave, the double baffle, bracing, woofer displacements and the minimum calculated port area of 102sqin yielded a box which was 34"x17"x25.25". Too tall for the max dimensions you gave. So I adjusted the port area down to 77.5sqin of port area which yielded exactly your max dimensions 34"x23"x17". So it's that size, tuned to ~34hz with ~4.5cuft NET internal volume, tuning without the bracing in the box comes to ~32.5hz. I gave those figures the ~ cuz there's still a little space to play with on bracing from what the model shows, which I simply showed as 1.5" dowel rod since it's easy to get, use, and you said you wanted simple. Without knowing exactly how that sub looks inside that enclosure it's hard to figure out exactly where the bracing needs placed, so I figured you can handle that. Now, onto the jollies. Here's a picture depicting the dimensions as a cut sheet. It doesn't show the internal baffle for the double baffle which the dimensions for that are 26.75"x15.5" which I think is easy enough to understand. BTW ignore the orientation (height, width, etc) you see on the cut sheets, that's just the default layout on that. Now, here's some shots of the enclosure sketched up with the dimensions on it with one side pulled back to reveal the internals for dims. And, finally, here's a few of the enclosure as it a finished product. So, there ya go. Hope this helps you on your venture. I do agree with shizzzon, if you don't get this thing properly braced up with single thickness walls that thing could possibly pop a seam or a panel, but I think you can handle this.2 points
-
1 pointKerfing 101- UNDER CONSTRUCTION What is Kerfing? “Kerf” by definition means “width of a saw cut”. This is the width of the actual saw tooth itself as opposed to the width of the blade as a saw tooth flares out and away from a blade. “Kerfing” is a term that many woodworkers have adopted to define the process of making several cuts within a piece of wood to achieve the removal of material. Often this removal of material will allow one to then bend the wood stock making a nice professional and appealing curve that can be incorporated into the project. Kerfing and Car Audio: What can Kerfing do for you in your quest of car audio domination? Well first of all it is important to note that in any ported subwoofer box hard corners are the devil. They do not allow efficient air flow which can result in less output and more port noise. Kerfing your port will allow you to maximize efficiency and create the most non-turbulent flow for the air moving in and out of the enclosure. Secondly Kerfing can be used to make an enclosure or other part of your build more appealing to the eye. You could use it for corners of an amp rack, or to make a custom arm rest more smooth. Kerfing is a process you need to learn to take your builds to the next level. What you need: This is outlined in the video but you will need the following (* means you don’t HAVE to have it but it is recommended): Circular Saw (Or table saw but the process will differ from the video) Disclaimer: My Saw blade is 1/8” wide. I recommend the same width! T-Square (Or table saw fence) MDF Wood Glue Safety Glasses Tape Measure Marker/Pencil Clamps Fiberglass Resin* Fiberglass Chop Mat* Body Filler* Sand Paper* The steps: Watch the video! Once the kerfed section is made load it up with wood glue and clamp it in place. Finish with fiberglass resin and chop mat and for that added professional touch apply body filler to the area and sand! The Math: I go through the math in the video but in case you are having a hard time understanding this should help. Please note this is used for slot porting applications so when I reference “diameter” I am NOT talking about a circular port, I am talking about the curve of the kerf if you were to look at it along its cross section. See the photo below: Step 1: Determine the diameter of your curve. Note I said “Diameter NOT radius” if you have your radius just multiply it by 2 and you now have your diameter). Step 2: Find the circumference of a circle using this diameter. The equation is: Step 3: You should now have a value for your circumference. Take this value and divide by 4 for a 90 degree turn or 2 for a 180 degree turn, this will give you the “length of kerf”. Step 4: Record your value for the length of the kerf. This is how much material along your mdf “linearly” must be used to make your curved kerfed section. This is the value you want to “mark off’ for your kerf on the mdf. (Note that this method can also be used to find the “length” of this part of your port so that you can build your port to the target tuning length. Instead of using the diameter of your kerf arc, use the diameter of the arc that is the centerline of the port). Step 5: Now that you have marked off where your kerf will be on the mdf you are going to take your “length of kerf value” and divide it by 12. This will give you your length between cuts. Now in the video I show a trick for making these divisions perfect. That way if your value is something like .6384 you don’t have to guess on a tape measure. My method is also much faster as it doesn’t require this steps math. Once you have marked out all the distances between cuts you can proceed with cutting and making your kerfs! Other notes: These are other notes that have been brought up on other forums and I feel are helpful. I made the mistake of wearing gloves in the video. Never wear gloves with rotary tools! It is not recommended to apply screws in the kerfed section of the mdf, it will likely split, instead use clamps (or heavy objects) and wood glue. If you are blade in not 1/8 you will need to do some math to determine how many cuts to make. I generally remove an inch and a half of material, so if your blade is smaller, more cuts, wider, less cuts. Note that fewer cuts will lead to a rougher curve and more a smoother curve but with less strength. Pictures: Design of an enclosure using a Kerfed Port: Box with Kerfed Port: (Picture to come) Box with kerfed port and kerfed exit of port: (Picture to come) Made this video to show how to Kerf, enjoy!1 point
-
1 point
-
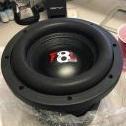
1 pointI wouldnt be surprised, neo motor and Ti basket. Like I said before, SSA products are very similiar to Fi. Yes Fi builds woofers for SSA. They do share similar parts. But this does not mean they are identical. Different companies, different subwoofers, different price points, and different goals.1 point
-
1 pointIf you can sell the 18" and get a 15" Q.. Do it ported and You will notice just as much if not better accuracy on notes and gain putput by alot if enclosure is designed and built right. I loved my Q1 point
-
1 pointWell I have been playing with the sub for the better part of the day, and the more I play it, the better it seems to be getting. I started off playing some Three Six Mafia "Late Night Tip" and Gorilla Zoe "Lil Shawty". I have numerous bass tracks,but these were the first ones I decided to use. It was thumping VERY loud,so loud that the neighbors that live way up the street came outside to see what was going on .I would say it was a good 200ft +/- from where my driveway is to there house. And of course I set off my closest neighbors car alarm again like I had done previously. Luckily my neighbors are cool and put up with all the noise. I then decided to put in some Metallica "One" and wasn't disappointed with the results. When Lars does the rapid part of the song,it was almost unbearable to listen to,I had to turn it down,as I did on the Mafia and Zoe songs. With the cold weather,my panels seem to want to rattle more than usual,so I'll have to put some sort of dampening in the rear qtr. panel to take care of that.But hey,that's a good thing. I don't hear any sort of distortion or anything that sounds like the sub is having a hard time keeping up with the output. I set the gain with a dmm and actually lowered it a little lower than what it says I could set it at. I don't see any reason to turn it up anymore after what I have been hearing today. I was thinking about putting some poly inside to see how the output and sound was,but really don't think it would make alot of difference since I had already removed the little that was in there and it just sounds better without it. I may or may not in the future,who knows. I expect the sub to just get better the more I play it. I have already had a few of my buddies come over to hear it and they were also impressed.While they weren't familiar with the Dcon (they tend to use main stream brands),I expect that to change after listening to my setup. I like to be different and not have what everyone else is using. For the price I paid for the sub, I can't think of another brand that would give the value/quality/sound of the Dcon. I am surely going to do my part and get the word out about the SSA line. I am one happy guy.1 point
-
1 point1 point1 point0 pointsf is for fuck yourself....... it was just a thought. just imagine a ssa sub with a neo magnet... BAD ASS0 points-1 points-1 pointsWhat are your box specs? Playing notes below tuning may make the sub bottom out pretty easily. Both of those songs get down to around low 30's which means alot of cone movement..-1 points-1 points-2 pointsSo, you wanna switch to woofer that are WAYYY shittier just so you "max them out"?-2 points