Leaderboard
-
Penguin4x4
SSA Regular3Points19,468Posts -
altoncustomtech
SSA Regular2Points3,836Posts -
porkchop
SSA Regular2Points4,091Posts -
stevemead08
SSA Regular2Points5,272Posts


Popular Content
Showing content with the highest reputation on 09/23/2012 in Posts
-
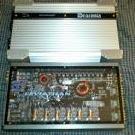
Gulf coast classic show today. I clamped 4900w out of my 5ks. I think I found the limit of the zcons.2 points
-
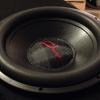
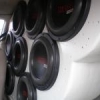
2 points2 points1 point1 pointJust read thru the whole thread. Nice work. Awesome first setup. Look forward to the future upgrades. Audiopipe is definitely FTMFW!1 point1 point1 point1 pointthis chick is SUPER sexy. thats a real womans body right there man. got damn that is hot1 point1 pointThis http://store.soundsolutionsaudio.com/products/incriminator-audio-6-4-4-channel-amplifier100wx4.html + http://www.soundsolutionsaudio.com/forum/topic/56798-store-coupon-codes/ = Just over budget, but not much. From what I hear a nice amp too.1 point1 point1 point1 point1 pointI'm sure the email you get with tracking information will let you know..1 point1 point1 point1 point1 point1 pointYou could ask me too. The issue comes from promoting another site by giving away a product that is sold on a the store that pays for this site to be on line.1 point1 pointOkay, the amp rack is done, installed and the 125.2 is running the Bravox components like the clean powerhouse I expected it to be. Those components have been well worth the modest price I paid for them while using them on the HU and with the amp running them that is even more evident. I have A LOT of tuning to do yet with the new found power, but so far the difference is exactly what I expected. Although I do have to say that the internal amp on the HU is definitely a powerful little chip and ran the Bravox's quite well considering the low power. As for the amp rack, I'm quite pleased with how it turned out except for a few little things, nothing big enough to really bother me, I just know I could have done better with it. On to the pictures. Here's the pics of the final assembly. Went together just like it was supposed to. Here's a couple of pictures of the ground for the battery and 125.2. I bolted the grounds to the floor with a cable running to the frame. I also covered that bracket on the frame and where the cable bolts to the bottom of the floor with the bedliner I used on the amp rack to keep the connections clean and prevent rust but didn't figure it was picture worthy. The pics jump right to the installation at this point. I just didn't see the need to include everything in between. Here you can see the amps mounted on the rack with the bedliner all done on it. This is one of my little fuck ups from getting in a hurry that I'm hating. I got my router with roundover bit laid out and ready to go before I applied the bedliner but got in such a hurry that I completely spaced picking it up and using it. So none of the edges or corners are rounded like they were supposed to be. I figure if something ever happens and I have to redo something I'll do it then and refinish the bedliner on it. Got the cables all pulled out straight and ready for it to go in. Here's the XP950 sitting ready to be connected and installed. Got the battery connected and set in place in the rack. Everything was measured so closely that I won't have to worry about it going ANYWHERE in there. Getting all the wires and cables pulled up through the board and laid in place. Here's the rack set in place over the carriage bolts. As you can see with the bolts and wing nuts holding it I shouldn't have to worry about the rack going anywhere and it makes it quite easy to remove again if needed. The last one is a bit of a reach, but again, everything was measured so well that my arm still easily fits in there to get to it. Got the wires pulled up and connected to the amps. The power wires connected to the front battery. And lastly the finished product. The things that annoy me with it finished is that the top board of the rack isn't as close to the side of the truck as I had planned, even though it was just right on the test fit it somehow came out with about a 3/8" gap. Not bad, but it shouldn't have been that far off. The other thing, if you notice the empty hole on the back of the rack there, is that the remote knob wire ended up being about 8" too short to reach the 1500. Easily remedied with a phone wire extension cable, but still annoying. So, besides the lack of rounded edges, the gap and the short wire it pretty well came out like I planned. Onto the enclosure build!!!1 point1 pointOkay, so I FINALLY got started on the amp rack this week while taking a little vacation time (when the wife isn't screwing it up that is). I'm down now to getting all the holes for the wires to pass through to the amps drilled, then I can do the final assembly and get the bedliner applied. After that it's as easy as installation, lol. Here I've got the bottom and side cut out and getting them assembled. Total length for the rack is just shy of 30" and it's 8.75" tall. Here's the picture of the mounting. I drilled 3 carriage bolts through from the bottom and put nuts and washers on them to compress the carpet. Then used a washer and a wing nut to secure the rack to the floor. Here I've cut out a template for the top of the amp rack to follow the side of the interior. Here's the amp rack sitting in place with the cut out for the XSPower XP950 battery for the rear. Finally here's the top and access door cut out and the amp rack mocked together to ensure everything fits snug together and looks like I had planned. Came out fairly close so far. Hopefully I'll get it done and installed before the end of the weekend so I can see what these Bravox components can do with some real power applied.1 point1 point1 point1 point1 pointSell it and buy home gear. It is always better. You aren't comparing apples to apples. Look at raw drivers for both and you'll see some crossover. A w7 could be used, but I'd rather have the cash to buy something else.1 point1 pointThanks! The color is kind of weird, Flouresant lights make it look dark, sunlight very sparkly, guess it's the metalic in it.1 point


Account
Search
Configure browser push notifications
Chrome (Android)
- Tap the lock icon next to the address bar.
- Tap Permissions → Notifications.
- Adjust your preference.
Chrome (Desktop)
- Click the padlock icon in the address bar.
- Select Site settings.
- Find Notifications and adjust your preference.
Safari (iOS 16.4+)
- Ensure the site is installed via Add to Home Screen.
- Open Settings App → Notifications.
- Find your app name and adjust your preference.
Safari (macOS)
- Go to Safari → Preferences.
- Click the Websites tab.
- Select Notifications in the sidebar.
- Find this website and adjust your preference.
Edge (Android)
- Tap the lock icon next to the address bar.
- Tap Permissions.
- Find Notifications and adjust your preference.
Edge (Desktop)
- Click the padlock icon in the address bar.
- Click Permissions for this site.
- Find Notifications and adjust your preference.
Firefox (Android)
- Go to Settings → Site permissions.
- Tap Notifications.
- Find this site in the list and adjust your preference.
Firefox (Desktop)
- Open Firefox Settings.
- Search for Notifications.
- Find this site in the list and adjust your preference.