Leaderboard
-
stevemead08
SSA Regular8Points5,272Posts -
///M5
SSA Tech Team2Points73,916Posts -
Penguin4x4
SSA Regular2Points19,468Posts -

Mark LaFountain
Admin1Points16,279Posts


Popular Content
Showing content with the highest reputation on 11/23/2010 in all areas
-
1 point
-
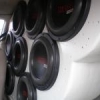
1 point1 point1 point1 point1 point1 pointWhy not just invest in some monster midbass and listen to it like it was recorded? It will sound WAY better.1 point1 pointI am teh confused. You like the Focal's but complain of the brightness of the Bostons? 3 way and passive is almost never good in a car, the exception being if you can mount all three drivers really close to each other. Q-logic panels are really just a starting point. They need a ton of reinforcement and venting into the fender, but can be the cosmetic portion of your install if necessary. It really sucks to have no capability to aim as well. On top of that it is easier usually to get midbass out of a door, in particular if you are prone to cutting corners. As for your budget and what you like, I'd spend some time listening to as many sets as you can with your music. If it is on a sound board don't expect to get an idea of midbass capability and don't listen to anything on axis unless of course it will be that way in your car. Currently I am confused as the Focal you like are way bright, but you seem to like them but not the Bostons (which I haven't heard the new ones, but it is unusual for them to be anywhere near as bright).1 point1 pointIt's nothing more than an equalizer. The only difference is it is center around a certain frequency or band and Q.1 point1 pointI personally love mine to be honest with you, I listen to a lot of old school music where it helps enhance the bass line. If you dont listen to old school music or music with limited basslines then I wouldnt get one. Most individuals who damage there sub using one dont use it correctly, just like the bass boost feature on an amplifier as well. In the wrong hands and on the wrong music than yes you can cause more harm than positive. It also has a voltage read out that is accurate but the mic isnt accurate like the tl meter but it does help with tuning and tweaking to see if you gained or loss dbs, may help or may not help you. I like mine and had fun with it, if your really interested and you dont want to pay full price for it then I wouldnt mind parting with mine. If not more fun for me, just trying to help out. Just my take and experience on it.1 point1 point1 pointAlright got a few steps closer to the finish line. I got my big3 rehooked up as well as the Deka9A31 hooked up under the hood to help out the factory. My truck has two battery trays FTW. I have an XS 1200 that i was gonna run behind the seat ...but it wont fit. Amps are all hooked up and all new Knukonceptz wiring and RCAs ran. Really the only thing left is an alternator. my factory alt is 180 amps but id like to be safer than sorry. and building the sub box. I have my cut sheet from Alton(thanks buddy) and the design was JBLcamrys in the begining but he never returned my emails after that Here are some pics. 2.4 cubes @ 33 htz. 41.6 sq/in of port SDS for kick panels to finish up the deadener installation. Don, I love you man. Truck sounds awsome and superb customer service. And of course one baby pic cus m a proud papa!1 pointI guess i forgot to take alot of pictures. like of the tiles on the back wall or floor. My truck had quite a bit of dampener on the floor already plus all places where two panels meet it had butyl rope that i added or foam from the factory. FTW! I added tiles to the roof and against Don financial judgement i added mlv and ccf to the roof also. Don explained to me it wouldnt be worth the money as most sound enter the vehical below the roofline, but since i had some extra and i really wanted it done. I did it. Dont tell Don. either i ordered too much mlv/ccf or Don sent too much either way i had extra.1 pointWell ive been slacking a bit on this rebuild and stacking more equipment. some of you know im a recent father so having a newborn takes alot of my time. work is steady and consuming alot of my time also. ( gotta pay the $600 month daycare bill somehow ) At any rate. i received the last order of my sound deadener showdown a couple days ago so i found some time today to get some work done. i removed about 75% of the fatmat and replaced with SDS CLD tiles. there is a few places where removing the old mat would be extreamly time consuming, so it stayed. FATMAT FAIL!!!!!!! CCF fut and shaped for the back wall MLV roll MLV glued to the CCF and ready for the back wall quick rubdown to clean the surface before the CLD tiles1 pointEven though I can see some ripples in them, they look good. I got tired of the ripples when I did mine a while back, I now sand, fill, sand, fill, sand, fill, and then sand some more. When I get it where I want/like, I use a textured paint from Home Depot to paint them. This textured paint also save a bit on the imperfections as well as blends in w/the rest of the dash. I had to do some repair work on my A-pillars from previous installs and when I put it back in, it cracked at the seams. I'll redo it when time allows. Keep up the work.1 pointI love me some CARBON FIBER!. Bravox carbon comps in front and carbon coaxils rear. driver rear door. butyl rope, cld tiles, ccf, and mlv installed Since this is really an entire truch build i figured i would show this also. This is the Driver Information Center or DIC. my truck didnt come with it new so i figured i would add it. its really simple and only costs about 100 bucks. the trucks all have the wiring and data, it just needs the buttons to control it. monitor tire pressure, eng hours, miles, different adjustable features like headlights, chimes, blah blah blah. before. After1 pointfront passenger door CCF. (kinda looks like Oregon) maybe thats a sign i need to go back home and visit. Mlv and CCF being glued together and ready to be hung on the door panel.1 pointButyl rope CLD tiles CCF and MLV sheets. The MLV is very heavy. almost reminds my of a refridgerator magnet material. the SDS line up.1 pointSorry Sir, wont happen again! Heres a glimpse of whats been going on. first thing i had to do is remove the old Fatmat deadener. I learned after two doors that using a heatgun is NOT the best way to go, despite what others have said. fatmat dose not stick that well even though i used a heatgun to install it. I found the best way was to use a set of Kleins or pliers and just pull slowly downward with steady even pressure. It almost just comes right off. then use mineral spirits and alcohol to clean up the residue. The passenger side went horrible wrong and the drivers side went very smooth without the heat gun. Anyhow here is some pics. I think my wife deleted the pics of the doors all cleaned up.1 pointA pillars are done. for my first time wrapping anything i think it turned out pretty good. I see one ripple in the passenger side but only in the picture. i I still need to figure out the "oh shit handle" its still tan. I thought about trying to dye it and make it work but that defeats the rebuild. i will just order a new one in black from the dealer.1 point


Account
Search
Configure browser push notifications
Chrome (Android)
- Tap the lock icon next to the address bar.
- Tap Permissions → Notifications.
- Adjust your preference.
Chrome (Desktop)
- Click the padlock icon in the address bar.
- Select Site settings.
- Find Notifications and adjust your preference.
Safari (iOS 16.4+)
- Ensure the site is installed via Add to Home Screen.
- Open Settings App → Notifications.
- Find your app name and adjust your preference.
Safari (macOS)
- Go to Safari → Preferences.
- Click the Websites tab.
- Select Notifications in the sidebar.
- Find this website and adjust your preference.
Edge (Android)
- Tap the lock icon next to the address bar.
- Tap Permissions.
- Find Notifications and adjust your preference.
Edge (Desktop)
- Click the padlock icon in the address bar.
- Click Permissions for this site.
- Find Notifications and adjust your preference.
Firefox (Android)
- Go to Settings → Site permissions.
- Tap Notifications.
- Find this site in the list and adjust your preference.
Firefox (Desktop)
- Open Firefox Settings.
- Search for Notifications.
- Find this site in the list and adjust your preference.