Leaderboard


Popular Content
Showing content with the highest reputation on 05/15/2012 in all areas
-
3 pointsThe only reason I'd rewire into the door is if I were running two+ sets of wire into the door. Considering I am flat out pretty opposed to any comp set this means I always get to. If I was using something passive and had a good spot for the passive in the door then there is no way I'd bother. The stock wiring is really fine.3 points
-
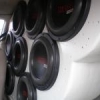
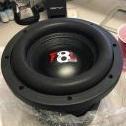
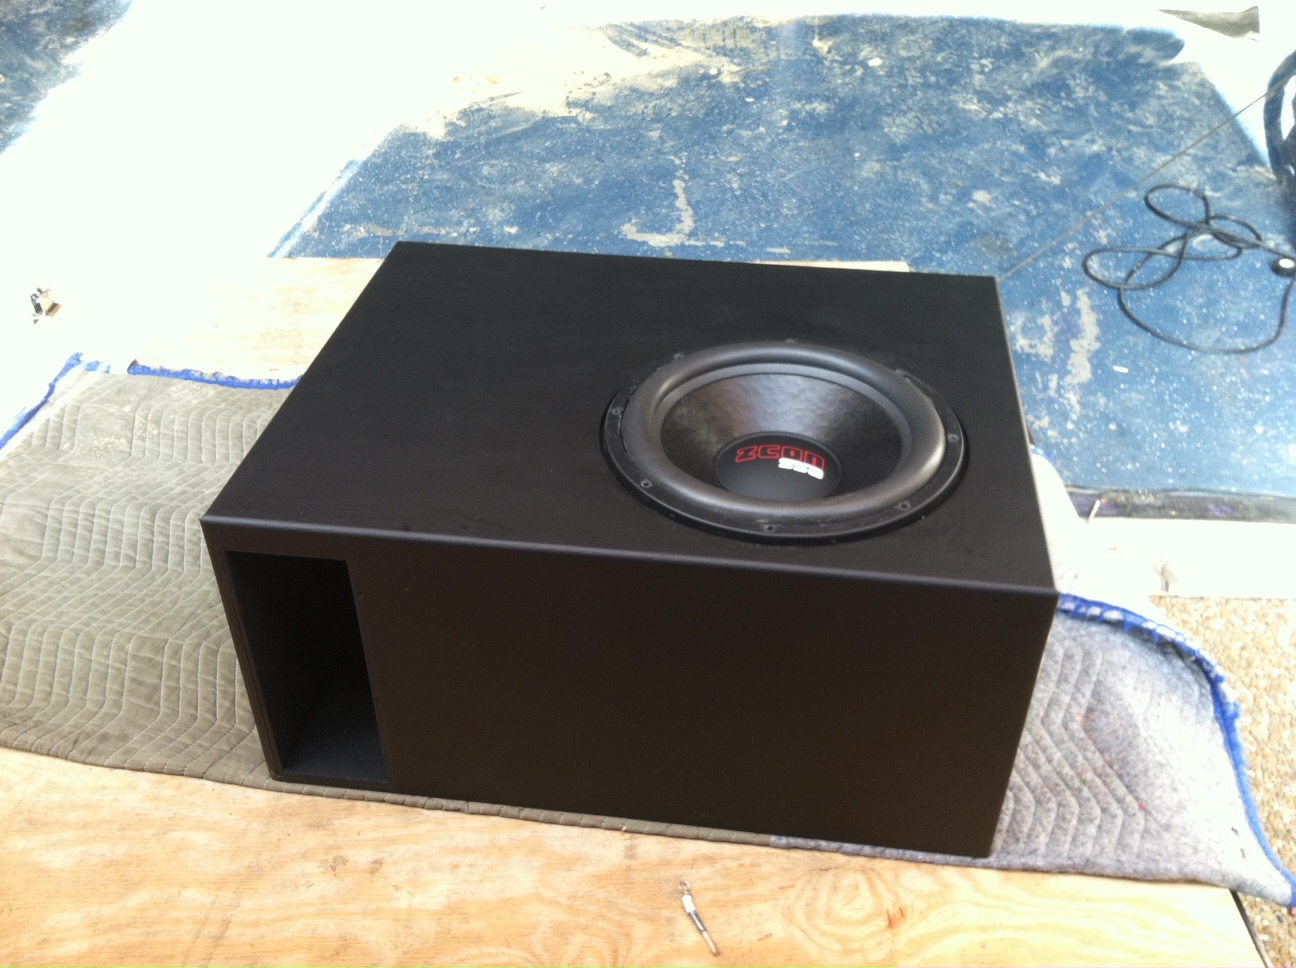
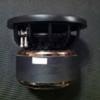
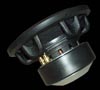
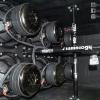
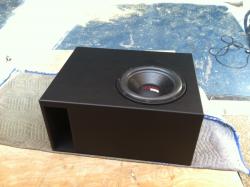
2 points2 points2 points2 points2 points2 points2 points2 points2 points2 points1 point1 point1 point1 point1 point1 point1 point1 point1 point1 point1 point1 pointYay for updates! This was a fun day. First a big thanks to my buddy Rick for coming over early in the morning just to help me load this monster up. No amp on the box, just too much weight. O_o Amp installed. A little bit of the wiring. A couple of install picks. Barely enough room to shut the barn doors. Looking over the drivers shoulder. Finally, some subs in view. Up next some the smoke test. O_o1 point1 point1 point1 point1 point1 pointHey TOPGUN... Torque/angle wrench Here you can see the screen, buttons, and if you look on the top and bottom of the LCD screen you can see the rows of lights that go from green to yellow to red.1 point1 point1 point1 pointI would worry less about the subwoofer selection and more about how you plan to power a 1600w amplifier on a stock electrical with a 70A alternator.1 point1 point1 point@dbsupra, thanks for the interest! But have been dealing with some issues as of late. I think I've FINALLY found the source, and its my pioneer, I think. Well anyways its in the shop. I have a few pics I can upload though. hope you enjoy! Ordered new RCA's Just a random shot of the ZED installed, it is not currently in this configuration. random shot of the box installed, again, not in this configuration atm Painted L brackets And today is a sad day... now I haz NO boom. But I hope for it to fix some of the issues I am having.1 point1 pointIt is regular flat back paint brushed on. It was still wet when he took pics. I will let him give his opinion but it slams hella hard. Threw the box in my truck to test before his and seriously pounds. Very clean, tight, deep and hard hitting. Making me rethink my build and I may just snatch up some Zcon 18's
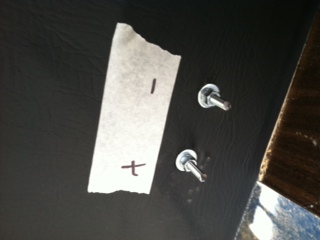
 1 point1 point1 point1 point1 point1 pointhere are the Dcons installed into a local buddy's ride Early box design by Swift And amp rack, I'm digging the first one Really great guy. Maybe I will finally have some proper music going, this thing was already banging before, can't wait till new enclosure!1 point1 pointSo this was a little different experience for me, haha, opening a product I've never seen opened before. I haven't seen any ZED equipment unpackaged, as far as newer model amps are concerned. Usually, when its time to open a present, you shake the box, listen for noise, look at the physical size of the package and w/e other technique we did as children, to nail it down to a few things of what might be inside. Well, I knew what was inside, I've just never seen one in person, where as christmas presents, we usually see our gifts at w/e store. So instead of ripping up the package, lol, I carefully untaped it There was no pretty pictures on the box, which is fine by me uhhhhhh, and then hold your breath There she is! Like I said, I didn't know what to expect, I actually just let it sit there in the box for a few minutes as I was sort of nervous lol I was really like this, After four weeks, I haz a Zed Leviathan 3 Its rather large, but not so heavy, which is good. maybe less than 10 lbs, I suppose you could put it in the "small thing big package" category:D As you can see from the picture, It has a decent size foot print, but the picture still does no justice. The big circle thing with all the copper coils wrapped around it is like, one big mofo lol. 3" in diameter to be exact. The caps are huge as well. There was quite a big of scracthes on the plexi, which kind of scared me at first, because some of the scratches are pretty deep. But once you remove the laminate cover, its squeeky clean. Ummm, overall, I really love this thing. Not sure when I will be installing it, most likely not for a while. I would like to get those 4 drivers and 4 tweets installed first. But like I said, 10/10 as far as first impression goes1 point1 point1 point1 pointThanx, can't wait to get things done! Thank you sir, I'm glad to finally be posting a fairly steady set of updates on this thing. Speaking of updates, here's the pictures from this weekends drive to get things done. I got the PCMforless performance tuned PCM installed this weekend along with the K&N cold air intake and the new Singer 250A alternator along with the Intimidator battery and BIG 3. Things went pretty smooth throughout the installation and the only hiccup I had was that I forgot about a slightly longer belt for the engine with the new alt installed. Quick trip to O'Reilly's yesterday nabbed me a 1 inch longer belt that fits perfectly to finish it and the BIG 3 up today. Onto the pictures. Here's the stuff, Knu Kolossus 1/0 cable, battery terminals and ring terminals, Singer alt and The Intimidator. Love Knu's stuff. The alt is nifty as hell. As you can see in these pics, how the charging stud is done is a little odd to me but it should work just fine. Besides, I'll only be running an SAZ-1500, nothing real crazy. This is how I saw it out of the box. Not drilled and tapped in the center. Working on getting the new battery in I found a little issue as you can see below. I had to make a quick modification to the battery tray. Luckily removing it was a snap and a quick run at the 10" wheeled bench grinder and it fits great. More pics of the alternator and BIG 3 installation. Well, hopefully in the next day or two I'll have the passenger side door baffle and the second half of the Bravox CS60K components installed and the pics of that up. Also, with the week off on vacation I plan on working on the amp rack and sub enclosure in between playing with the kids while they're on spring break. I bought the kids a pair of little four wheelers of their own yesterday so we'll be pretty busy playin' it up this week!!! Thanx for looking at the build.1 point1 pointUpdate, with box in!!! Still haven't listened to it yet due to many 's lol Internal cable management Yes, I run 4awg welding cable for speaker wire Finished product! T-Nuts to hold Zcon in place Looking through port In the eX Yes, I know, its upside down More ducktape!!! Got port? I hope to make a little bit of noise with this experiment setup And thats it for now, wow that was a lot of Learned a lot through the process. But the build log won't stop here Stay Tuned!!1 point1 pointOk, so last update for the night, its now 4:18, so I've been at this for atleast 5 hours after an 8 hour shift at work This box build is finally almost complete, thank god, this was a lot of work!! I have gained much respect for box builders. Well on to the pics... Glueing three panels together Decided to try bolt through terminals this time. Inside view of the terminals Inside view of finished bracing view with top baffle on Laying glue down on baffle And this is where we stand tonight, pic of the enclosure all clamped up. This enclosure is very ugly, uneven, and slppy, but at the end of the day, I'm happy with it, I feel accomplished Thanks for looking! Time to get some damn sleep after a nice shower.1 point1 pointA few pics to show what I'll be working on for the next few hours.1 point1 pointThanks @16k Small update During assembly of the box, I was wondering HTH am I going to cut the circles, so after a lot of stressful thinking and trying to get my roomates router to work, I decided to bite the bullet and just by some sort of damn tool myself. So before heading into work today, I stoped by lowes and bought the cheapest jigsaw I could find. Its pretty neat though and took little effort to make the circles. So now that I have just finished the cuts while at work, once I get home, I will glue the last 3 pieces together after test fitment and adjustments. Here are a few more pics. So just waiting for these next few hours to past, go home, and try to start "wanging" tomorrow sometime hopefully.1 point1 pointOk, small update, I didn't finsish the enclosure today Simply because we don't have anything at the house to cut perfect circles, but I believe my roomate is going to be kind enough to buy some adapter for the router, so I'm hopeing I can finish up tomorrow But I was able to put 4 walls up and 4 bracing in. Check out the pics Icon - Zcon Icon - Zcon Icon - Zcon Painted daily port Box from angle 1 Box from angle 2 I've also notice, replying since board update doesn't place nice with the latest version of FF But thats where I'm at right, just gonna let all that dry, then tomorrow, Place the double baffle and flush.1 point1 pointok, last update for the night, I've been at this for 15hours today, and I'm beat, will conitnue tommorrow. Not really much of a progress since going to get food, I cut my daily port to length, will pain the outside tommorrow, but I layed gorilla ducktape in the inside walls, to help with the flow of the air. Maybe it will increase .002 dbs?1 point1 pointSmall update, I have finished my bracing dowels finally! Omg, that took forever, I got to go and get more screws now tho, and food, I'm starvin like marvin right now! Curse fast matabalizm Bracing Plates pre-cuts Don't mind the mess ups above^^ My excellent carpentre at its best Here they are stacked up, I smooved the edges, will it make it louder? I doubt it, but it looks nice lol And heres the final product And thats where I stand ATM, once I get back, I suppose I'm going to try and place some panels together, *nervous* Wish me luck!!1 point1 pointI am feeling very good about this box build so far! The Zcon showed up in great condition, thank you very much Edoub. I am taking a small break right now as I've been working at this since I woke up (12ish). I'm making great progess, and I usually don't stop till I'm finish. Also, with the help of a friend, we have taken out the third row seating, and the stock subwoofer. After this update, I'm going to go back and finish up So for now, enjoy some pics! Gutted out third row Stock woofer location Stock Woofer My friend Dj installing the legs to keep the false floor level. Draw out of 4x4 displacement plate Another Third Row Zcon Shipping Zcon 8 Cut Outs, Double Baffle, Flush Clamps, Dowels, 10" Concrete Foam Tube New Tube vs Old 10" vs 8" And after 10hrs of updating with the board update Thats all I have atm, will now go back to work!! Also, for the dowels, I'm doing 2 Vertical, 2 Horizontal, and 2 Depth. I hope this works! Can't say enough thanks to Stefan, great guy1 point1 pointOk, here are the few pics that was taken by Project Mayhem Car Club/Models I tried to get her to get a close up of the ICON, but since it was back there a little, I guess its hard to see1 point1 pointSo yesterday was my first event, and I believe I did ok? I competed in S1 and scored a 140 flat with my Icon and AQ1200 and was beat by 1.4 dbs from a IA LI on a memphis 600watter in a late 90s Nissan Sentra <img src='http://www.soundsolutionsaudio.com/forum//public/style_emoticons/default/sad.png' class='bbc_emoticon' alt=''/> even though I swear his sounded like a POS and not nearly as loud as mine which makes me very angry!!! lol, but it was fun, and I gained a lot more knowledge which was the goal. I wanted to get my feet wet before I walked in there with an updgraded system, just to get my feet wet kind of thing. Saw some great system and got some demos as well. And boy does 155 make my panties wet <img src='http://www.soundsolutionsaudio.com/forum//public/style_emoticons/default/peepwall.gif' class='bbc_emoticon' alt=''/> Well on with the pics. I also got some professional pics taken as well that I should have available this week and of course will share them. I can't wait for the next one!1 point$225 shipped inside U.S. 26.5" deep x 24.25" wide x 12.5" tall 2.5 cft tuned to 32 hertz wrapped in black carpet, your choice of blue, red, yellow, or grey suede1 point1 pointSo the past few days, I've recieved a few packages in the mail. http://www.madisoundspeakerstore.com/seas-soft-dome-tweeters/seas-prestige-27tdfc-h1189-textile-dome-tweeter/ and http://www.madisoundspeakerstore.com/seas-woofers-6-7/seas-prestige-u18rnx/p-h1571-7-curv-cone-woofer/ Also http://www.arcaudio.com/product-pages/processors//equalizers/xeq.asp I will be running two drivers and two tweets per door. I'm no glasser and I want it to look as professional as possible, so I've decided to take the doors to a local shop around here. And he will begin on my doors starting next thursday if all goes to plan. I've decided to place the eq inside the center console department. Reason buying it was to give me some control over certain freqs as well as being able to control the volume of the subwoofer amplifier on the fly and hopes to cut out some engine noise at the same time. I haven't finished completely yet, ran out of day light yesterday, so I hope to finish it up today before heading into work. Now let me start off by saying these drivers are the best thing I have ever layed my hands on in regards to speakers. I've never seen this kind of craftmenship and design within a speaker before, only in upper model subwoofers. I was blown away by looking at them. They are huge as well. About 5" in depth and 7" wide. I cannot wait to get these in. Also, I'm hoping my new amplifier for these will be in before the doors are finished. The guy said about a week from start to finish. And I ordered the amp a few days ago. On with the pics!! I tell you what, my camera does these drivers no justice. I thought my IAs were big, these literally dwarf over those lol. I wish I had a better camera. Now, I don't have small doors, but just to give you guys an idea of driver placement. The next pics will show you my progress on installing the XEQ. I will need to order some Elbow shaped M - F rcas because these damn Monoprice RCAs are just too big Rerouting the RCAs that go to the amplifiers. And thats where I stand right now. I hope to get everything finished and cleaned up today as I've only been listening to ONE speakers for the past 2-3 weeks! Idk what happen but some channels went out, I'm hoping to fix that as well here. Good thing these IAs get loud lol1 point1 pointI suppose I should bring over my door speaker install if the IA's Coaxials. Right now I have the IA's Components in their place, and have moved them to the rear. Here is link for that thread, and I will simply carry over the photos. 07 Explorer door panel removal Comments?1 point1 pointThe viper The temp grounds since I don't know how to secure them to the frame yet Tried twice and failed The grounds coming into the vehicle.1 point1 pointAlright, heres the last update for this small build log, from this point forward, I will only be updating once equipment arrives, whenever that may be. This picture is what showed up a few days ago I made several attempts with DC Creations to get a box built for when I had the 10", but had no luck. Very few response that included information such as, Sorry I forgot, or been busy and will get back in the morning, or the most recent reasoning being out for lunch. I am very disappointed with their CS and wouldn't recommend if your not willing to basicaly beg them for an enclosure. This box was built by Audible Enclosures I believe and is huge and is amazing. Made out of birch wood, and specs are 4.0 cuft tuned to 34hz. I absolutely love this thing. Next picture is of the DMM I chose to tune my system I really like it, feels well built. And this picture is where I decided to install the voltmeter, I like it, and oddly its not too bright for me, maybe since its so low I don't see it while driving? It was already calibrated correctly which was nice. I checked with a DMM. My voltage seems rather low tho In the morning on a cold start, its anywhere between 14.0 and 14.3 but during normal driving, its anywhere from 13.8-14.0, I have the big three done, 130 factory amp alt, and a large walmart batt under the hood so IDK... The following two pics are of my finished terminal wiring, not the best but will do for now. And these last pictures are of the goodies And thats it for the camera show. All left to do now is to clean up the wires and vacume up a bit lol. I played around a bit with box placement and I am most satisfied with the port on the passenger side. Other thing on the to do list is to install some sort of amp rack, not sure how I am going to do this, any ideas would be great! I want to keep it clean but security is my number one priority. I have to find a wall to bolt down the box and the amp rack. I have a few bolts around the cargo area, some are holding down the third row seats, and some are holding down a few cargo hooks. The other thing is to install my Viper 5902 which I am NOT going to attempt lol. But shop quotes cost more than the freaking viper did Well thats it for now guys, would love to hear some feed back1 point1 pointupdate: So, the first batch of photos are my new Short Ram Cold Air Intake. I love this damn thing, a huge improvement for sure. One hour install time as well. Second bath of photos are of the big three complete. Been up for quite some time, so hopefully I can get some rest tomarrow and continue sometime this weekend.1 point1 pointOk so yesterday I got some more mail, and today. Yesterday I recieved my welding cable and jesus, this wire is unlike anything I have ever seen before. Even a 10 ft cut weighs a ton lol. Well here are some pics. Note* I also picked up some copper terminals, super duper heavy duty these phuckers are. The completed box... The wire is thicker than my fingers lol Ok, now for the story, opening the package for the terminals, I wondered, HTF am I gonna crimp these ? They are sooo thick, and just, seem unmoveable. So I found a solution, instead of ordering a 400$ crimper, I used some tool, (don't know the name), and a hammer. The pictures will help explain my method which turned out really great actually and I am very satisfied with the results. Heat Wrap, don't work so well with a normal hair dryer So I decided to double wrap And here I layed out the big 3 1 feet, 3 feet and 6 feet And a quick local stop to AutoZone I upgraded the terminals. Do have a problem though, the postive post of this daily battery is larger than the negative post. The problem this causes is that the new terminals won't snuggly fit on the negative post, so right now, its on there, but isn't tight at all (Yes thats what she said I know), so any opinion on how to fix this? In the morning, I will complete the big 3 withte positive run. Ran out of time today unfortunately Here is the ground I used, its the same one that Ford used. I just sanded down to the metal. And the package today was just my voltmeter that was already dead on with no need to calibrate Thats it for today1 point1 pointSeems I left out a few... Do NOT ever buy speaker adapter from Sonix Electronix, I would only recommend Car-Speaker-Adapter.com Ohhhh How I wish I could Put this on... (Aaron)1 point1 pointThe internal fusing is 160-amps per amp, so you can match that for 2 ohm strapped (1 ohm per amp).1 point
Account
Search
Configure browser push notifications
Chrome (Android)
- Tap the lock icon next to the address bar.
- Tap Permissions → Notifications.
- Adjust your preference.
Chrome (Desktop)
- Click the padlock icon in the address bar.
- Select Site settings.
- Find Notifications and adjust your preference.
Safari (iOS 16.4+)
- Ensure the site is installed via Add to Home Screen.
- Open Settings App → Notifications.
- Find your app name and adjust your preference.
Safari (macOS)
- Go to Safari → Preferences.
- Click the Websites tab.
- Select Notifications in the sidebar.
- Find this website and adjust your preference.
Edge (Android)
- Tap the lock icon next to the address bar.
- Tap Permissions.
- Find Notifications and adjust your preference.
Edge (Desktop)
- Click the padlock icon in the address bar.
- Click Permissions for this site.
- Find Notifications and adjust your preference.
Firefox (Android)
- Go to Settings → Site permissions.
- Tap Notifications.
- Find this site in the list and adjust your preference.
Firefox (Desktop)
- Open Firefox Settings.
- Search for Notifications.
- Find this site in the list and adjust your preference.