Leaderboard
-
rmzsuzuki89
Members28Points728Posts -
poundindak69
Members6Points726Posts -
GlassWolf
Members2Points50Posts -
Argent Audio
SSA Regular2Points926Posts


Popular Content
Showing content with the highest reputation on 05/28/2010 in all areas
-
2 pointsfor a speaker enclosure, you'd want a material that has high density, low resonant frequency, and is resistant to flexing. You want something as inert as possible, acoustically. Any flexation in the enclosure will color the output by altering the volume of the enclosure. Any resonance in the enclosure can cause harmonics and color the output. A good material (without being impractically havy) is birch plywood. If you want to see esoteric and expensive, take a look at the Krell Master Reference subwoofer. 1" thick aluminum billet enclosure, 2600 watts, and a pair of TC Sounds 15" subs.. for home audio.2 points
-
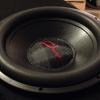
1 pointHere is a cool one for everyone who is amazed at the size of an MTX RFL. Here it is compared with a Shocker Sig. One of my favorite pics. And yes, the Shocker is a 12".1 point
-
1 point
-
i like new tab king and personas. dont really need much to please me1 point
-
Down load Malware Bytes. I had to load it to disk on another PC and install it that way. Start up your computer and hit F8 before you see the windows logo and enter safe mode. Run Malware bytes in safe mode then restart.1 point
-
1 point1 point1 pointlet me 'splain. No... let me sum up. Great question. Lots of tree hugger gym guys go by that method. It's natural and unprocessed etc. Milk also has some nice vitamins and minerals. I still feel it's weak sauce next to a dextrose/whey based solution. Milk sugar lactose is worthless for what you want. It could actually slow down what you're going for in the insulin response, It's too hard to standardize. All milk also has milk fat even skim, and that DOES take away from what you're going for. Whey gets into the body Whey faster( nutrition jokes). Casien is amazing don't get me wrong but you want mega fast amino acid and whey is king. It also has the best amino acid profile that's easy to get in your body. Eggs are the next best, but you don't want fat so no yolks, and cooking whites until they turn white is a bad idea too. You can buy liquid whites though and that would work. Globally in digestion terms your gut can only take in so many macro nutrients and use them within a given time. I would rather everything be flooded by super helpers than meh helpers. It's all about timing the insulin spike with the hormones in your blood and maximizing what you can get into your cells at that time. Finally and for some most importantly, almost no one can bike for a couple hours and then pound a half gallon+ of milk in the same 5-10 min you can a shake. That means you're not only limiting your digestion chemically because you can't break it down and absorb it, but mechanically all of it's not in your gut. When I started working out I used skim milk. I think it does a good job, but dextrose and processed whey does a great job. And it's eleventy bajillion times easier to bring to the gym or on a bike than a gallon of milk. If a guy had some personal feeling that we must use a "whole" ingredient, milk is a quality option. Personally I feel excluding processed nutrients is silly. Yogurt and cheese is a processed food as is sour creme. Whey is just a by product of the cheese making. No organic hemp wearing hippy would skip his no preservatives "all natural" cheese and organic plum tomato pizza made with non GMO wheat crust. I feel that that atitude is a bit, in the words of Gee Dubba, hiposyncratical.1 point1 point1 pointwell im looking for spl but im not looking to enter any comps...so basically the loudest it could possibly be while still being a daily driver Crossover setting basics link read this plaese. set your sub's LPF to 50Hz, 18dB slope. Set your HPF for components to 100Hz, 12dB slope. See how that sounds to you. Worth a try. From a brief read, that crossover link overlooks some important information that is necessary to consider when properly setting crossover points and misstates some information. In our environment, it's usually best to just set them by ear to what sounds best rather than using "rules" which don't really apply in most scenarios.1 point1 point1 point1 pointTaken from this thread: Daber audio """SQL""" subwoofer??? - SSA Car Audio Forum1 point1 point1 pointGot a good amount of glue and sawdust in my eyes and hair from this part. Mounting stuff upside down on my own ftl lol.1 point1 pointGot the second layer of 10x2's on the back. And got the top in and the and the first layer of 10x2's on top. More 2x10's cut. Notch for rear ac vent.1 point1 pointhey on the FI Q how low should i set the subsonic level?? and exacly what is subsonic level mean?? i got sealed box 2.3cf The sub-sonic filter removes bass frequencies that are too low to be heard by the human ear, hence the term sub-sonic, the main purpose of a SSF is to cut out low freq. to prevent damage to your sub when in a ported enclosure. If you enclosure is tuned to...say 32Hz...this means you are producing 32Hz at 0dB...as the scale drops below 0dB the sub has the potential of reaching an over excursion limit (cone will move more than it is made to) and in result you will damage you sub. The enclosure can not supply enough back pressure to support the suspension of the sub below its tuning freq. For sealed box, it is not so important, but for basreflex boxes it is, because speaker excursion goes rapidly up under vent tuning frequency. So you can blow your 1000W speaker with 200 Watts easily without smoke. The voice coil can hit the backplate of magnetic assembly or speaker cone can leave the basket and fly somewhere...; so if you want to have 30Hz in your music, you should tune your bassreflex box to 30-35Hz and cut it somewhere around 30Hz, because if 20Hz tone come, your speaker is going to crash when fully powered.1 point1 pointAnd some pics from when I got done and cleaned up a lil. Side are getting pretty thick.1 point1 pointGot the second layer on the sides in today. Holy puddle of glue. Starting other side. Making a lil sawdust and wood glue putty since there was a big puddle at the bottom going to waste.1 point1 pointStarting on the back. How it sits as of now. Gonna start on the second layer of 2x10's tomorrow if I'm able to get to Hone Depot to get some more.1 point1 pointOther side. Screws are a lil long for the job, but they do get the job done. Kinda looks cool too, even though all of this will be paneled off. I came back into the garage to this.1 point1 pointGonna be fun straightening all of this out haha. Where it is until tomorrow. I'm surprised that I got any work done today. I've been going since Friday evening haha. And there was a 3 story water slide at the place we stayed on the beach, and I somehow managed to land on my head, then my hip started to slip again haha...But I felt like getting at least a lil done. And a quick question. Does anyone know if the fiberglass that is used to make boat hulls would work for the inside of a box? I have access to about 1,000lbs of the mat, so all I would need would be resin. I figure since I can get it I may as well use it if it would work well.1 point1 pointGot back from the beach around 1 today and decided to do a lil work before everyone that was at the resort with us got back to the house. One side on the back part about to go in. Getting ready to start the shell that will be around the back part. It will be a combo of 2x10's, 2x4's, and 2x2's. So this will make the walls of the back part go as follows: one layer of 3/4" mdf, two layers of 2x10's/2x4's/2x2's, another layer of 3/4"mdf, and possibly some fiberglass.1 point1 point1 pointMore of my "clamps" haha. There's also 2x4 chunks wedged between the back wall and the battery rack. Little slot for my other grounds. Some fuel. Between the bungie cords and back porch table to hold the wood for the table saw, I was able to get a lot done by myself, and occasional help from my dad...I was gonna quarter in to the back from the floor, but the angle would have be so shallow that I wouldn't be able to drill. I'm going to the beach until Sunday with my parents. So I may or may not get more done today, but there will be more updates early next week at the latest.1 point1 pointUpdates! Got a lil more work done today. It's not much, but progress none the less. Our little setup for the table saw haha. Test fit of outer back wall. All glued. Who needs clamps and screws haha.1 point1 pointheres one i came up with, would be 6 cubes ported at 32hz with 4 pvc pipes. and with subs and ports in i have .9 of a cube to add as much bracing as i need.1 point1 pointHere are some pics of one of my first builds from the late 90's.... I was able to hit 148.6 off of 1000 rms from the Phoenix Gold M100's......1 point1 point1 pointdid some work today . then tore it apart. then did this!!! sealed on the dash then doors open then turned the gain up a little.1 point1 pointJust two bolts in for now. One has to come out because it's too short, but I figured I'd put it in for now. I'm gonna get to Ace in a couple hours to get a few more bolts. That's probably all I'll get done today because I think It's supposed to be pretty wet all day.1 point1 pointMy way of keeping glue from running onto my carpet haha. I look pissed for some reason haha.1 point1 pointGot the floor done yesterday, just need to get to Ace and get 3 more bolts to bolt it down.1 point1 pointdid some testing today and it seems i lost over 1db with the bracing i added. ehre are some pics the 137 is doors open the 136 is doors closed and the 150 is in the port. i think i need to rebuild already1 point1 pointAfter helping my friend dig a trench for a retaining wall, I got a little bit done. Be it a very little haha. Cut notches so that the floor will lay better.1 point1 pointno big updates...got my decal on and took a few crappy vids. would have more done but stuck at gettin the box sounding right and everything before i move on.1 point1 point1 pointPart of the lower floor. I'm hoping doing it like this will keep a lot of glue off of my carpet lol. Siliconing unused bolt hole shut, and siliconing around holes for the bolts to be sure that they seal. Bolting down.1 point1 pointFinally got a lil more work done. Starting on the floor. Gluing the step pieces together. Being proud of her work haha.1 point1 pointAll in. Buss bars on and all wired up. There is gonna be a lid that goes over the batteries, so all of the wire will be hidden. The fuse holders will be mounted to the top of the inside of the lid.1 point1 point1 point1 pointStarting work on the rack for the battery tray to bring the batteries up high enough to fit width wise. The gf doing a lil gluing. Ready to have the tray mounted to it, May do another layer of mdf for a lil more strength.1 point1 pointBattery tray all done and sitting in my car about where the front of the box will be. I wanted to get them all charging consistently and my dad wanted them outa the garage, so this was really my only option lol. Just means I gotta drag them all back out when I'm putting them in their final place. All temp wired up.1 point1 point1 pointFelt like organizing the snakes in the back of my car lol. Ghetto way of running power to my high amp until I get my batteries in lol.1 point1 point1 point1 point1 pointThis type of thing should never be covered by the manufacturer. You should have removed the plastic cover from the back of the motor, this may have really been a big part of your problem....... I would just plan on sending in the driver for a recone, and paying for it.-1 points