Leaderboard
-
Impious
SSA Tech Team6Points6,708Posts -
Aaron Clinton
Admin4Points53,822Posts -
BanginGMC
SSA Regular3Points2,307Posts -
Tirefryr
Super Moderators2Points30,516Posts


Popular Content
Showing content with the highest reputation on 09/14/2010 in all areas
-
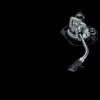
1 pointPlease do take a moment to read this topic and not just look at the pictures, as some of the photos will not make sense if you skip over what I try to say. I am few days behind on getting this pictures posted up, but life and all that goes with it has been in the way. Anyway, a MASSIVE thank you goes out to Don at http://www.Sounddeadenershowdown.com. I had initially hoped to use the SDS product line on the little Mazda with Don's guidance, but he went far and away above the call of duty and took 3, yes 3, very long work days out of his schedule to help me along the way. This was an excellent learning experience for me in terms of the physics of how the acoustics effect the car around me. Don was ever patient with my endless questions and wanted to go the extra mile and spend the extra time to make sure we got it right. Not to mention Don's supply of room temperature orange Gatorade that kept us from dehydrating in the process. I will not get into the demise of the sled (Mercedes Brabus 300ce) at this time. I have 10+ years of college behind me, and I have always learned faster when using practical applications of the concepts being discussed instead of just extensive reading. In this case, physically having Don there explaining and showing me, step by step, section by section of the car, how and why and where to apply the SDS system was priceless! As you will see in the many following pictures, this is much more of a system, and the full effects were staggering. I say system because the CLD, CCF, Butyl Rope and MLV all have a purpose and work together to vastly change the vibrations in the metal and interior parts, along with sound transmission both into and out of the car. Don has figured out a number of very nifty tricks for installing, one most importantly is the fact that every inch of CCF and MLV can be pulled right out of the car, which you will see below in the pictures. We started in the rear hatch floor area, then worked our way forward on the floor up through the firewall, lastly working on the doors and vertical surfaces. I have dampened a handful of cars in the past, heck, I nearly covered every inch of the wifey's old Civic with butyl tiles, many sections with multiple layers, but the performance was not like this. Once we were done, I was grinning like a fool, and opening and closing the door in disbelief as to the difference. The level of silence inside the vehicle is really something, almost cocoon like in nature as your ears take a moment to adjust to the change in noise level. In this rare case, I am not the man behind the curtain, I let Don (former large format pro-photographer) photograph the process, so all these photos are credit of the SDS camera. As for the audio in the car, disregard that at the moment as it is still a 7 year old fully stock Pioneer system as I have had the Mazda only a few weeks and I am spending much of my non-daddy time on the road or away from somewhere appropriate to install audio. The funny thing is, how much better the stock audio system preforms. We were both taken back for a moment once we had finished up, I joked that I might just leave it stock. (Though I did lay down power, speaker wire, and RCA's under the carpet for the impending install which is another topic). This was a great deal of work, more then I had anticipated, but so worth it. I keep telling Don on the phone the additional benefits I keep finding out, the latest being that my 4 year old son goes to sleep much easier now due to greatly reduced road noise levels. Again, and huge Thank You to Don for all the time, answers, assistance and effort that went into this install. Details of the install log: Vehicle: 2003 Mazda Protege5 5-speed Materials used: SDS Closed Cell Foam SDS Mass Loaded Vinyl SDS Constrained Layer Dampener HH-66 Vinyl Adhesive Velcro with dual pressure sensitive adhesive Tools: Silver Sharpie Painters Tape Large Shears Scissors At least a gallon of Mineral Spirits Denatured Alcohol Utility Knife Scalpel Razor Blades Panel Poppers Heat Gun Scraper Stop watch Photos: 1,2: Hatch Floor before start of install: 3,4: Begin of tear down: 5,6,7: Removal of some asphalt on hatch floor:1 point
-
The Kinetik KCIB12-35 is a sturdily built "intelligent" 12V battery charger with 2/10/20/35 Amp charge rates, alternator voltage check and battery recondition/desulfation functions. It features an easy to read 3-character display, four clearly marked push buttons for on/off and accessing the functions, and 4 LED indicators. It also features a heatsink that covers the majority of the front section, a built in cooling fan and the rear of the unit also functions as a storage compartment for the wires. Recondition According to the literature, as lead acid batteries discharge sulfate can build up on the plates, causing them to not fully accept a charge. Reconditioning (Desulfation) of the battery is accomplished by sending electrical impulses to the battery over a given period of time to break down this build up and allows the battery to better accept a charge and release energy more quickly. This seems to be a useful feature for not only under-hood batteries but also auxiliary batteries that may repeatedly be discharged. Very simple process. Just connect the charger to the battery and press the button! The large teeth and strong springs keep a tight clamp on the terminals. The downside is that this is a long procedure, however there's no way around this as it's simply a long process. The manual states it takes up to 24 hours. When using this mode on an HC1800 I had in the garage it seemed to take around 20 hours.....which while a long time, was shorter than anticipated. Charging The 2/10/20/35 amp charging allows you to select charging rate based on the size of the battery. The 2/10 are of course for smaller batteries, 20 for normal auto batteries, and the 35A rate is for large truck batteries or banks of batteries. It charges in three stages; Rapid Start Charge delivers maximum charging amperage (also allows for quick engine starting in as little as 2 minutes) Absorption Charge maintains the maximum possible charge at a constant voltage Top-off Charge voltage is automatically maintained and reduced to a predetermined level while current is adjusted to a safe battery charge level This process as well as the actual battery charge rate are monitored and adjusted automatically by the microprocessor. After desulfating the battery, I topped it off with a charge using the 20A setting. Again a very simple and surprisingly quick operation. Press the rate selector button until the desired rate of charge is displayed and let it do it's thing. The display will read "FUL" when the battery is fully charged. While I didn't watch it like a hawk, the process took less than a 4 hour interval. The charger appeared to stay nice and cool throughout the entire process. Alternator Check With the car running and charger connected, the manual asks you leave all accessories off and press the Alternator Check button, and then turn all accessories on a perform the same test. If the charger determines that the alternator is okay, the Alternator Good LED lights. Checked it on my car with the stock alt, and both times it indicated my alt was A-OK :thumbup: Overall, I would say this is a great charger. Useful features for the car audio crowd in the desulfator and higher 35A charge for battery banks, convenient storage and carrying handle, all built into a fairly compact case. It's extremely easy to use, stays cool while in use and quick charging times.1 point
-
1 pointredoing the paint job on my harley davidson buell befor: my paint booth: painting: my bike without the coverings: and help from my fiancee khrystyna aka. "pandoras box"1 point
-
I know, I'm still picking them out from yesterdays' little project I did.1 point
-
I leaned a new word today, "Ohmage" lol I am the creator, seems pretty legit though........and has a good meaning Ohmage1 point
-
If it helps, Bravox has a PAS Mag review hosted on their site: http://bravoxaudio.com/download/05.pdf1 point
-
http://www.parts-express.com/pe/showdetl.cfm?Partnumber=293-682 Exactly what you'll need for a single 12" with variable mass. And as far as size, that will be dependant on speaker and PR parameters. Get BassBox or some modeling software and play around with some enclosures. WinISD does passive radiators IIRC. Is this going to be for use in a vehicle?1 point
-
You can NOT use SPL scores to dictate how a woofer will perform in a musical application, so numbers mean nothing except for SPL competition.1 point
-
deka 9a31. contact darren of dbeez audio ( dealer for sundown audio) He's selling them for like 100 plus shipping.1 point
-
Watts/Voltage = Amperage Don't forget efficiency as well1 point
-
Nope, big fat myth right there. The only difference is cone size, so there is more output, they all play the SAME notes. The XCON is designed to sound good, yes. The BTL and Mayhem are made to be loud, the BTL will do better numbers on a meter vs. the Mayhem but the Mayhem plays a bit lower, better for daily.1 point
-
PUNCTUATION! That would require to much work for most. :-( It's easy to pick out the lazy and those who paid no attention in school. Or those who are just naturally stupid.1 point
-
You can series anything with voice coils. Pretend each of these speakers are tweeters.1 point
-
So your goal is to annoy people? Interesting. The Xcon was designed for SQ, and it just so happened to get loud. And who said 18"s are the best?1 point
-
CS60CF are out! We have CS50CF's left, and Kevlar series. Bravox Audio CS50CF Components Bravox Audio CS50K Components Plus many more!1 point
-
There made with different goals in mind you can't compare an XCON to an SMD just not in the league the smd may be musical and loud but so is the XCON but with different power handling. not comparable,1 point
-
I've personally heard the xcons before and I have to say it was the loudest AND best sq.1 point
-
When you jump up to 2000 watts your going to want more battery reserve on tap. Big 3 for sure and 0 gauge power ran is a must. Don't skimp on the wiring do it right the first time. I'm sure the SMD will be an incredible driver, but if your budget doesn't allow for the proper electrical buy the XCON and save the $400 and spend it on electrical upgrades. No alt needed at first if you add more battery reserve. Buy a voltage meter to monitor your voltage. The XCON is legendary and has a notorious reputation for getting loud. Package that with one of the new KhaotiK enclosures and you will be bumpin'!1 point
-
1 point
-
1 pointSounds like a loading issue. From what I can gather, a loading board behind the sub farthest from the port will help. Start with a board half the width of the cone and experiment with different widths and distances from the sub. The funky loading could also cause different impedance functions on each of the subs. Lower impedance = more current, so the extra heat could be an effect of the loading.1 point
-
1 pointThat's just a variable frequency bass booster. That won't cut all bass out if needed. I always recommend this. http://mobile.jlaudio.com/products_cleansweep.php?prod_id=446 It goes inline with the RCAs, and gets power ground and ACC power. It will also boost your output RCA voltage up to 7.5 VRMS http://mobile.jlaudio.com/products_cleansweep.php?prod_id=4461 point
-
1 pointYep, multiple layers are a waste. You've WAY exceeded the law of diminishing returns. Hit the center of the resonant panel...1 point
-
1 pointin order to get power from the alt. you need to wire them all up.. whether your running both a pos and neg line or just a positive line. I doubt a kinetik 2400 could fit in your stock battery location. If i were you i would just do the big three and monitor your voltage, then upgrade electricals IF needed.1 point
-
1 point38: Interior of rear doors: 39,40: Test fitting MLV panel to door skin: 41: Test fitting MLV panel to door: 42: Test fitting door skin over MLV: 43: Cut and trimmed MLV panel on door showing nearly complete coverage: 44,45: Finishing rear doors into the wee-hours of the night (showing CCF on inside of MLV): 46: Rear hatch panel turned over to show the cut and trimmed CCF with the Velcro and their respective windows: 47: Completed rear hatch inner skin with cut and trimmed CCF and MLV: Thank you for looking at the install log, I hope it is informative and eye opening to you as it was to me. I learned a great deal about my new little car, surprising as to all the engineering features and touches that you do not expect in a sporty little econo-box. As linked above, you can get these products from http://www.sounddeadenershowdown.com. Lastly, a thank you again to Don!1 point
-
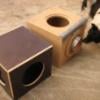
1 point22,23: Start of front floor area (as you can see, much less CLD then expected): 24: Test fitting spare tire in well: 25: Continuation of front floor area: 26: Bad-ass spare tire sub woofer enclosure: 27: More up front, showing some of the obstacles we were dealing with: 28: Front passenger door pre-tear down: 29: Torn down inner door:1 point
-
1 point8: Application of CLD tiles on hatch floor: 9,10,11: Forming, shaping, cutting, planning of MLV on hatch floor: 12: Formed and removable hatch floor MLV: 13: CCF underneath MLV layer: 14,15: Me cutting MLV moving forward on the floor: 16,17,18,19,20,21: Completed hatch floor (this was the single most time consuming part of the install:1 point
-
1 point
-
1 pointYo dawg I hurr you wuz lookin fo' some bang in yo' trunk. I'm only 19... by READING everything i could i LEARNED all of the things i KNOW about car audio. I've only been in the game for about a year or so. And no, Mommy and daddy didn't buy everything. ask ACTUAL questions with more details and we'll be able to teach you. None of this "If i have a Xplod on a Xplod 393939393 watt amp" bullshit, this is all install dependent. /thread1 point
-
Been working more with these and are rather happy with the results. We are extrapolating the design out further and will do more testing with things in the next couple of weeks. Looks like these will end up seeing production given the interest we have had. In order to keep costs lower, we have revised the amount of machine time the parts are seeing vs the original here. As always trying to keep the cost realistic and more than competitive for anything close to it. As you can imagine its tough to compete with all of the imported motors and pricing vs. doing all of the machining in house. We will keep you posted. Thanks, Scott1 point
-
Here's a picture of what's waiting for me... (speakers and batteries not included in picture) (more packages coming) Can't wait to start1 point
-
1 pointLine driver isn't going to do anything about "sloppy bass". Seems to me you already had yourself talked into a line driver, regardless of the waste of money they generally turn out to be. Adding a line driver also increases your risk of introducing ground loops and noise into the signal chain as you're adding another component to the chain. Also, I'm sure if you've actually pin-pointed the gain setting as the source of the "noise" or if you're just guessing, but unless you've been able to exclude all other variables and identify the gain setting as the cause then you're just throwing darts. Really no point in this thread as it appears you were going to purchase one regardless.1 point
-
1 pointNot really the type of "problem noise" I was really referring to that would necessitate a line driver or amplifier change. If it were cause audible problems during playback, that would be more of a cause for concern.1 point
-
1 pointA line driver is almost never necessary anymore. Considering most amplifiers on the market can make full power with as little as .2V, about the only time I'd consider a line driver a viable option is if the amplifier had an intolerable amount of audible noise with a high gain setting. Even then, changing amplifiers might be a cheaper and more suitable option.1 point
-
Okay guys, i came home last night and i walked in the door and my D3100 was there with open arms *Palm Pixi cell phone pictures FTL*1 point