Leaderboard
-
pmureika
SSA Regular16Points4,084Posts -
///M5
SSA Tech Team6Points73,916Posts -
Austin863
Members5Points667Posts -
sound=vibration
Members5Points775Posts


Popular Content
Showing content with the highest reputation on 04/16/2013 in all areas
-
3 pointsnope im on the autobahn......... Then you are driving uber slow3 points
-
2 pointsYou posted his private cell phone number, that is not for the world to know.2 points
-
2 points
-
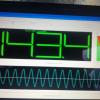
2 pointsPicture 1 (teaser) before i switched batteries and ran the wire. sizeing up to the car. ill have more pics of the carin the daylight tomorrow.2 points
-
2 pointsWe are rapidly catching up with new office staff. All delayed orders will be contacted in the next day or two. Thanks, Scott2 points
-
2 pointsI've learned you need patience with Fi. For some people that just doesn't work. For me I love there products and plan for the wait when I order. There good people just usually swamped which makes things a little difficult. Hope they get you taken care of bro. Edit: ssa is a good choice too, but you gotta realize your dealing with Fi in a way going that route also. Just get the added comfort of someone around to answer questions2 points
-
So some back story I bought the hatch back my senior year of highschool with the intentions of making a loud daily driver setup and ended up getting real involved with build car mainly Hondas. I always helped with other builds but was never able to do what I wanted to mine until now. I did end up getting my setup together as far as audio but the hatch was never what I really wanted it to be. Recently I have become a single man and around the same time I was promoted at work and now make enough to redo my hatch while still providing for my two daughters. Basically I am doing this now because I finally can!! I have been out of the scene entierly too long and I am back now. Hope some of you around here remeber me haha. Keep in mind I have done everything to this car with my own two hands. I has never seen a shop!!! So here we go I cant find my old build on here but I will start fresh here. I have gone through 4 engines and now have decided I want reliability so this is the tear down. While I had the motor out and at the machine shop I wanted to liven up my engine bay. I was set on painting it a light tan and found out someone close to me had been diagnoised with breast cancer and decided what the hell pink it is.! Kinda of a dedication kind of deal. I got to work here are some pics. This above was the tear down after I removed the engine. I dont have any picture of it but I completely tore down the ending I have spun a bearing in and it is currently at the machine shop. More on that later this week. After hours of sanding and prep work. At this point I had also done a full wire tuck re-routing all the headlight wiring, turn signals, ac, brake fluid level sensor, engine harness wiring as well as the whole engine harness, and wiper motor wiring has all been taken out of sight and yes everything is still completly functional. Preping and shooting her with primer. It is a pain trust me fingers were raw by the end of the night. Holy batman pink! My nieghboor is a painter and helped me shoot the actaul paint it self Lots of fun cant wait to do the exterior!!! here I put the bumper headlights and fenders on, I already have new replacements for them but I am keeping them off until I paint the exterior in a month or two. This is everything that will be under the hood minus engine and tranny everything else is relocated or hidden. Still need to remove the brake booster and paint it gloss black. It is in horrible shape at the moment. I am also going to re-route all the brake lines and position the prop valve in the interior of the car, the battery is relocated to the rear of the car now and the under the hood fuse box has been relocated under the dash. Ill get pics of that when I start messing with the interior some more. As of now I am waiting to pick up the Block which is a D16y8. I had it bored and shot peened the rods with arp studs pressed on and resized, it also has been jet cleaned, decked and honed. I already have my master rebuild kit in the garage as well as brand new pistons, water pump, oil pump, and every single gasket. The rotating assembly was also balances as this is going to be TURBO charged after break in.!!! I promise pics of the engine as soon as I get it from the maching shop and I will also take pictures as I assemble it. MARK I need a pink SSA sticker for the Firewall. I will also be getting breast cancer awareness banners air brushed onto the shock towers!!! Things I have done that I dont have pictures of Integra GSR rear disk break setup already installed with sway bar All new bushing in the suspension New ball joints New inner and outer Tie rods New pads rotors and calipers all the way around Steel braided brake lines Skunk2 adjustable coil overs Tockico blue stuts Front and Rear adjustable camber kits Front Sway bar kit Rear beaks tie bar Full dash swap All the interior has been changed to black interior minus the rear hatch plastics. I am still trying to find decent ones. I also have new carpet for it that I have not installed 00 si front seats Integra rear seats I promise picture of all this as I go through this build. Plan is to have the car back on the road in about 3 weeks as this is my daily driver. So when it comes to audio muahahhahahahahaha. I have everything except the tweeters I want. My setup consist of 2 Icon 12s 1 Audio pipe 3kd 1 Kicker 400.4 dx I belive is the modle number 4 AA Audio Carbon 7in mids Two fiberglassed kick pods and two kicker Tweets all of it has been pulled out of the car while I redo the interior This was when I made the kick pods about a year ago. Excuse the dash it is long gone now. . And here she is a few years ago I did a photoshoot with her in it. She needs some body work now lol!1 point
-
so you dont want to pull it and take a pic of it? ok. at the start informed you you that it was shorting out it would be very hot to t he touch, and would play you are explaining. but if you dont wish to investigate any further then stop posting here and email FI and contact them and only them until its resolved, and then come back and let us know what the issue was.1 point
-
1 point
-
1 pointI agree. Also people make fun of me when I use the term "hoot". Eff those people in the A, I ain't alone. It's a fun word to say. crotch rocket1 point
-
1 pointIf Scott's number was public, he would get NOTHING done, and I mean NOTHING. He has been forced to change his number many times because customers don't understand that he is ultra busy building drivers as fast as he can which he would not be able to do if his cell was ringing round the clock. If he was on the horn, trying to give up to the minute updates for everyone, they would never be able to catch up. As Scott said, they are adding staff to improve CS.1 point
-
1 pointIn reality they are not SQ quality no(no mono amp is). However, when compared to any other amp that is currently Korean built (Sundown, Crecendo, DC, and many others) they are all very very similar in output power and SQ. As for the clipping comment, that is 100% user error with improper settings. (or about anything else he listed that he was doing/trying lol) If you are purchasing a mono amp and worried about SQ then rethinking your purchase would be my main idea. If you are purchasing it to use daily for a sub stage then you are just fine. With all that said, I judged an SQ car over the weekend...it had AQ amps (I didn't know till after I judged it). I have to say, it was not just very impressive it was astonishing and scored amazingly well. They did take first in their class.1 point
-
1 point
-
1 point
-
t Bottom end is pretty much complete. Excuse the mess around it. Just another quick shot. Finally painted and rotated the booster 180 degrees. Also notice a leak in the master cylinder and did want to risk ruining the paint and ended up getting a new one. Just another angle. A storm came through so its a little dirty but brackets are glossy black as well. . Trying to get the head all finished up this week so I can get it back on the road. Work is demanding a lot of time at the moment so we will see how things go.1 point
-
1 pointI was contacted today by Nick, the new guy. Hes been with Fi before..but was away for about a year.. now hes back and has replaced Shawn. My order will ship nlt friday. #13251 point
-
1 point
-
1 point1 point1 point1 point1 point1 pointcheck out ssa subs. I would look into the SSA icon "10"(For 1000rms) it works great in smaller ported box's it has a higher thermal rating then the gcon then your intended use but it doesn't matter under powering insnt bad thing and doesn't effect output difference1 point1 pointspring season i would assume with the hold up. idk maybe something else is going on at fi that we are not aware of. "We are rapidly catching up with new office staff. All delayed orders will be contacted in the next day or two. Thanks, Scott"1 point1 point1 pointNope.....and hey, where are the pics? Correct you can't make an XCON a ZCON, but I have seen Zcon soft parts in an XCON body. Not sure what the out come would be, maybe Aaron or Mark would be able to provide you with that information.1 point1 pointoh and for those who dont know.. jegger and monster 24 oz at a time1 pointOk here is an update. I have just about competed the bottom end of the engine. Camera dies so I will pull some of the pics off my ipod unfortunately I wasn't able to take a lot of picture due to the camera being dead. Anyhow here ya go. Npr Rings! MMM. 1st 2nd and 3rds Checking piston ring gap. It takes forever, don't mind the surface rust on the water jackets it wipes right off. The pistons Bearings and Thrust washers Nicely balanced crank.! Crank Girdle before its cleaning Key to a good rebuild is to bag and organize all the parts and bolts that will get reused. Here are my Girdle bolts. Crank girdle is cleaned up and bolts. Another shot. All girdle bolts in place making sure all the threads are in good working order. Plasti-gauge time. Torque time.! Why I had an empty ice chest on the floor is beyond me. Girdle came back out.. After checking the plasti-gauge and cleaning it up I lubed all the journals and slapped the crank back in just to remove it another two times.! Crank. Here are the first two pistons being put in. Called it a night and got some corona since I am finally old enough to buy beer WOOOt. Old oil pump! Oil pump bolts. Prepping the gasket surface. Oil pump on. Ripped the front seal thank god I had an extra so pulled it and put another new from main seal. Also started cleaning the water pump area. New water pump. MMMM. Pump goodness. Both mated up to the block. Oil pickup. Extremely hard to clean due to all the old metal in it. Cleaned up and ready to go. Bolted in now. Took out the old rear main seal/ not sure where the finished pic is but it is on now Didn't bother deep cleaning the outside of the oil pan as I will be replacing it its all banged up. However I deep cleaned the inside. It is a lot further along now I will get some more pictures here soon. This is my little brothers Civic we are also working on. It is also our parts getter at the moment1 point1 point1 point1 point1 point1 point1 pointIf you strap 2 amps together they act as one. A master and a slave all the adjustments would be made by the master. This eliminates having to set up two amps.1 point1 pointOne of my daughter putting in the new NRG dress up washers and bolts. . And my other daughter doing some. Shes only 2 but is pretty handy with tools. MMMM NRG! More NRG Love! My little brother bought me some presents!!! Straight from the Factory! Oem Mudflaps! Rain Gaurds!!! Polished Beaks lower Tie bar! Notice the door panel. Wrapped one of my doors inserts. The picture of the actaul process are on my ipod. I will post them later. More to come. I will be doing the head liner, rear panel inserts, Shift boot, And arm rest. Picked it up from the machine shop! Yup Yup. The whole roatating assembly was balanced. This is the Crank. Arp Goodness! Machine shop hooked me up with a Free shot peening and resizing of my rods. They also wieght matched all 4. NRP rings and all new gaskets, oil pump, water pump, bearings, and timming componets. Some more balanced goodness. My Crank pulley and Presure plate and flywheel. Dont mind the old pistons in there. On the stand. Sprayed with high temp silver. Primmed ready for gloss black paint. Anodized oil cap I may use. Matched my NRG bolts. I am trying to start the assembly on the engine today. If I do check back for pics.1 point1 pointHeres a few pics of the Relocated fuse box. My car never had a passanger air bag so I set out to find a dash with a passanger air bag so I could remove it and use the space for my fuse box. So here it is. I still need to make the bracket to hold it in place but it is all wired up and ready to go! Looks blue due to the flash but it is black as you can see it dirty as hell from sitting for about a month now. Notice the top left where the air bag is! of and excuse the steering wheel it is gonna be switch out to a NRG wheel and a shorter hub. Another shot This is the top removed Here is the fuse box. I did have to modify it a small bit so it would fit but to get it to where it is now I cut no wires only depinned and untangled them from the stock harness one by one and reorganized them. I then re ran them with the dash removed and whalaaa. My removable steering wheel. Here are 3 of the 6 plugs I depinned and re ran to the center of the dash. From there the engine harness will come through the firewall and connect into these completly hidden from sight in the engine bay. Im tracking down the pictures of me doing the actual wire tuck it was like have a lap full of spagettii. Another pic of the bay. Installed the cruise control delete groumet as well as all the other black plugs and grouments and the windshield washer delete plug. I just need to order the two block off plates for the holes behind the shock towers. Other things going on this week will be the removale of the brake booster so I can paint it gloss black and rotate it 180 degrees so I can hide the vaccum line better. Got a set of these comming for the fender and front bumper!1 point1 point1 pointI would go with a single ssa gcon 12 d2 for a sub if you want better output. We need to know your budget for this build. I see you want to stay around 1500. I would get rid of the rear speaker and spend the money on some good comps for the front. Use a good three channel amp.1 point1 point1 point1 point1 pointFor a battery look into the sears diehard platinum 31m. A few people recommended it to me on here. It's suppose to be a very good batt.1 point1 pointWhy does my usb port thumb drive sound better then a cd burned off the same computer?1 point1 point1 pointWhat the fuck is this, high school? Seriously. You all need to get some lives. Trolls come over here and ruffle some feathers and then the "members" turn around and do the same damn thing. That just makes everything better doesn't it. Are there any intelligent young people left anymore? It doesn't matter where you are from, how big your score is, how big your muscles are or how many bitches you fucked. . . . Get over it. And the next dumb ass who wants to start drama, whether funny or not, will be shown the door. If you people want to act like children go play in the fucking playground.1 point0 points0 points-1 points-1 pointseven my kitties like sundown foo todays work. you know what it is!!!!! friday should bring some fiber glass.... this is my first time guys, i have never even tried to frame or fiber glass so this is kinda of a crash course i plan to see if i can find a fleece blanket to use for the fiber mat and then use some resin .. then use bondo filler, then sand it smooth then primer, then paint. let me know if im missing somthing-1 points


Account
Search
Configure browser push notifications
Chrome (Android)
- Tap the lock icon next to the address bar.
- Tap Permissions → Notifications.
- Adjust your preference.
Chrome (Desktop)
- Click the padlock icon in the address bar.
- Select Site settings.
- Find Notifications and adjust your preference.
Safari (iOS 16.4+)
- Ensure the site is installed via Add to Home Screen.
- Open Settings App → Notifications.
- Find your app name and adjust your preference.
Safari (macOS)
- Go to Safari → Preferences.
- Click the Websites tab.
- Select Notifications in the sidebar.
- Find this website and adjust your preference.
Edge (Android)
- Tap the lock icon next to the address bar.
- Tap Permissions.
- Find Notifications and adjust your preference.
Edge (Desktop)
- Click the padlock icon in the address bar.
- Click Permissions for this site.
- Find Notifications and adjust your preference.
Firefox (Android)
- Go to Settings → Site permissions.
- Tap Notifications.
- Find this site in the list and adjust your preference.
Firefox (Desktop)
- Open Firefox Settings.
- Search for Notifications.
- Find this site in the list and adjust your preference.