Leaderboard
-
dem beats
SSA Regular5Points31,351Posts -
Aaron Clinton
Admin5Points53,822Posts -
handman84
Members2Points288Posts -
jcarter1885
SSA Regular2Points12,022Posts


Popular Content
Showing content with the highest reputation on 10/28/2013 in all areas
-
2 pointsYou would be amazed the things people buy just because of the name on it. Even the people who bought one just say they like it and can't tell you why. What's even funnier, wwhen you tell them it sucks they rebuttal with hearsay. If you think SMD and his top notch engineers are so great please pass me what your smoking. Puff puff pass2 points
-
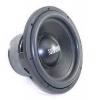
2 pointsI just got my 12" xcon running and it destroys the lows! it exceeds every single one of my expectations. I can't comment on any of the other drivers you mentioned but I have never heard of a disappointed xcon owner2 points
-
2 pointsNo..we're running 15 business days on new orders. We ran into a TON of supply side issues where we couldn't get our hands on parts. Our terminals are imported simply because they had to be and we just got them back in hand late last week (2 months late). Our cone vendor was really behind on filling our purchase order for the cones and we only got a partial shipment in until the rest of them arrived. Parts are in hand now and rolling out as fast as possible.2 points
-
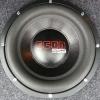
2 pointsI've loved every XCON that I've run, and I just realized I've used the 10's, 12's, a 15, and an 18 if that tells you how much I like them.2 points
-
1 pointPlease do take a moment to read this topic and not just look at the pictures, as some of the photos will not make sense if you skip over what I try to say. I am few days behind on getting this pictures posted up, but life and all that goes with it has been in the way. Anyway, a MASSIVE thank you goes out to Don at http://www.Sounddeadenershowdown.com. I had initially hoped to use the SDS product line on the little Mazda with Don's guidance, but he went far and away above the call of duty and took 3, yes 3, very long work days out of his schedule to help me along the way. This was an excellent learning experience for me in terms of the physics of how the acoustics effect the car around me. Don was ever patient with my endless questions and wanted to go the extra mile and spend the extra time to make sure we got it right. Not to mention Don's supply of room temperature orange Gatorade that kept us from dehydrating in the process. I will not get into the demise of the sled (Mercedes Brabus 300ce) at this time. I have 10+ years of college behind me, and I have always learned faster when using practical applications of the concepts being discussed instead of just extensive reading. In this case, physically having Don there explaining and showing me, step by step, section by section of the car, how and why and where to apply the SDS system was priceless! As you will see in the many following pictures, this is much more of a system, and the full effects were staggering. I say system because the CLD, CCF, Butyl Rope and MLV all have a purpose and work together to vastly change the vibrations in the metal and interior parts, along with sound transmission both into and out of the car. Don has figured out a number of very nifty tricks for installing, one most importantly is the fact that every inch of CCF and MLV can be pulled right out of the car, which you will see below in the pictures. We started in the rear hatch floor area, then worked our way forward on the floor up through the firewall, lastly working on the doors and vertical surfaces. I have dampened a handful of cars in the past, heck, I nearly covered every inch of the wifey's old Civic with butyl tiles, many sections with multiple layers, but the performance was not like this. Once we were done, I was grinning like a fool, and opening and closing the door in disbelief as to the difference. The level of silence inside the vehicle is really something, almost cocoon like in nature as your ears take a moment to adjust to the change in noise level. In this rare case, I am not the man behind the curtain, I let Don (former large format pro-photographer) photograph the process, so all these photos are credit of the SDS camera. As for the audio in the car, disregard that at the moment as it is still a 7 year old fully stock Pioneer system as I have had the Mazda only a few weeks and I am spending much of my non-daddy time on the road or away from somewhere appropriate to install audio. The funny thing is, how much better the stock audio system preforms. We were both taken back for a moment once we had finished up, I joked that I might just leave it stock. (Though I did lay down power, speaker wire, and RCA's under the carpet for the impending install which is another topic). This was a great deal of work, more then I had anticipated, but so worth it. I keep telling Don on the phone the additional benefits I keep finding out, the latest being that my 4 year old son goes to sleep much easier now due to greatly reduced road noise levels. Again, and huge Thank You to Don for all the time, answers, assistance and effort that went into this install. Details of the install log: Vehicle: 2003 Mazda Protege5 5-speed Materials used: SDS Closed Cell Foam SDS Mass Loaded Vinyl SDS Constrained Layer Dampener HH-66 Vinyl Adhesive Velcro with dual pressure sensitive adhesive Tools: Silver Sharpie Painters Tape Large Shears Scissors At least a gallon of Mineral Spirits Denatured Alcohol Utility Knife Scalpel Razor Blades Panel Poppers Heat Gun Scraper Stop watch Photos: 1,2: Hatch Floor before start of install: 3,4: Begin of tear down: 5,6,7: Removal of some asphalt on hatch floor:1 point
-
1 point
-
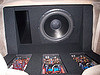
1 pointClose up of the wires and terminals in the box.. Some bracing.. 10" Port.. Final product.. I will take some pics of the box in my trunk soon.1 point
-
1 point1 point1 pointAwesome bro! Just read thru the whole log from front to back (thanks for putting the link in your sig btw!) and I have to say I am very impressed. Thanks for keeping it updated with each change. I love my X-12, couldn't imagine having 2. I have 1 in the back of a minivan and it is just insane. Nobody believes it's only a single 12 till I show them. Can't wait to see what yours does with the new box! The X's definitely do great in bigger boxes. Mine is 3 cubes net tuned at 31Hz with 50 insq of port and it kills the lows. Can play down to 20Hz with authority. Keep up the good work. Tuned in!!1 point1 point1 point1 pointFuck yea!! Sundown Xs. I have 2 12s and they are incredible subs. Nice choice!1 point1 pointDid some math for the last few days of the period and with a big delivery tomorrow, and some decent business today... It's bonus land. Manager is getting a big fat bonus, but I demolished his numbers. Even if you correct for his vacation. Hovering in the top 3 for personal metrics feels AWESOME!1 point1 pointThanks guys. It was in his sleep softly. I was there on Thursday and a priest from his church came by when I was there. His oldest child showed up too and so we got to do a final rights of the sick. He looks pretty happy to have had that done. He knew I think. He was a great man and as he said in the little movie about him he had a satisfied life.1 point1 pointi dont remember asking about subs for a 4th order so idk where you trying to go with this. i remember when i first signed up to this forum it was the best on the net, full of people thats willing help fellow car audio enthusiast and to share knowledge now its full of sarcastic replies, rude, and people that think every question is stupid. Know i see why this forum is so dead now1 point1 pointThat's don't make any since...Well how is anyone supposed to know about different subs and enclosures if they don't ask?1 point1 pointUsed it when I was a little more ignorant. The above statements are correct; you're only going to be able to measure for distortion at particular frequencies. In the DD-1's case, that's 50Hz and 1KHz. Also, to follow instructions to the letter of the DD-1's usage, it requires you to set max volume of your HU on a 0dB tone, then use a -5 and another -5 (or -10)dB tone for adjustment of your speakers and/or subs. I honestly don't know how this made sense to either D'amore or Steve Meade considering you're essentially running everything full throttle by using this method. One bad recording, one excessive voltage drop and things will go pop-pop-fizz-fizz. Tune by ear. Start with subs, then mids, then highs. Same exact method taught to me by Steve Mantz and if he's comfortable with using it, I sure as hell am as well.1 point1 pointwubwubwubwubwubwubwubwubwubwubwubwubwubwubwubwubwubwubwubwubwubwubwubwubwubwubwubwub1 point1 pointROFLMAO I'm at work and we have a guy who repairs McIntosh, and all the home audio stuff. He BARELY speaks English. I believe he's said 6 words to me since I've worked here. He just walked by and outta nowhere yells out OH YEA THAT'S THE GOOD!1 point1 pointxcon all day over the bl for daily!! Its just the lows of the xcon make your ear's orgasm.1 point1 point1 pointIf you havent had any issues with just setting by ear then dont worry about it. And even if you had any issues the product wouldnt help any. If you were set on using tones to adjust your amps i would say a dso nano for half the cost of the dd-11 point1 point1 pointJoining the family soon with a D1 10" ICON. Should do well in 1.3 cubes ported being fed by a Minotaur.1 point1 pointThe NES is pimpin. I have an Atari with about 20 games that I'm going to be installing in a demo vehicle. Install is gonna be ole school done up in tweed.1 point1 point38: Interior of rear doors: 39,40: Test fitting MLV panel to door skin: 41: Test fitting MLV panel to door: 42: Test fitting door skin over MLV: 43: Cut and trimmed MLV panel on door showing nearly complete coverage: 44,45: Finishing rear doors into the wee-hours of the night (showing CCF on inside of MLV): 46: Rear hatch panel turned over to show the cut and trimmed CCF with the Velcro and their respective windows: 47: Completed rear hatch inner skin with cut and trimmed CCF and MLV: Thank you for looking at the install log, I hope it is informative and eye opening to you as it was to me. I learned a great deal about my new little car, surprising as to all the engineering features and touches that you do not expect in a sporty little econo-box. As linked above, you can get these products from http://www.sounddeadenershowdown.com. Lastly, a thank you again to Don!1 point1 point30: Side impact beam before the Extruded Butyl Rope (EBR): 31: Side impact beam after little pieces of Extruded Butyl Rope pushed down between the beam and the outer door skin (this little amount made a very noticeable change in the door resonance, very smart application): 32: Small strips of plastic to cover the EBR as it stays sticky forever and will pick up dirt and grime: 33,34,35: Making templates of MLV for the door's: 36: Little blue Mazda inside the SDS Headquarters install bay: 37: Cut door skin MLV templates:1 point1 point22,23: Start of front floor area (as you can see, much less CLD then expected): 24: Test fitting spare tire in well: 25: Continuation of front floor area: 26: Bad-ass spare tire sub woofer enclosure: 27: More up front, showing some of the obstacles we were dealing with: 28: Front passenger door pre-tear down: 29: Torn down inner door:1 point1 point8: Application of CLD tiles on hatch floor: 9,10,11: Forming, shaping, cutting, planning of MLV on hatch floor: 12: Formed and removable hatch floor MLV: 13: CCF underneath MLV layer: 14,15: Me cutting MLV moving forward on the floor: 16,17,18,19,20,21: Completed hatch floor (this was the single most time consuming part of the install:1 point0 pointsLike it for what?Because you don't have to use your brain! And all the pretty lights.0 points0 pointsHere, this will help: http://bit.ly/18nBEVB And yes, serious piece of shit. SMD forum is full of jackhats that don't know anything. Never believe anything you read there. Serious BS. Only reason to visit there is to laugh at it.0 points-1 points-1 points-1 pointsWhat doesn't make any sense is your crappy, never thought out questions. Same question different day.-1 points-1 points-2 pointsBy far the best forum. If you don't like it leave. What Sean meant by if you have to ask don't do it, is if you don't understand what it is don't jump into it right away. Learn more about how 4th order band pass enclosures work and what it would do for you. So stating your goals and what you want from a system would probably be a good start with your post. Why do you want a 4th order band pass?? Most likely a standard ported enclosure will be better for your application.-2 points


Account
Search
Configure browser push notifications
Chrome (Android)
- Tap the lock icon next to the address bar.
- Tap Permissions → Notifications.
- Adjust your preference.
Chrome (Desktop)
- Click the padlock icon in the address bar.
- Select Site settings.
- Find Notifications and adjust your preference.
Safari (iOS 16.4+)
- Ensure the site is installed via Add to Home Screen.
- Open Settings App → Notifications.
- Find your app name and adjust your preference.
Safari (macOS)
- Go to Safari → Preferences.
- Click the Websites tab.
- Select Notifications in the sidebar.
- Find this website and adjust your preference.
Edge (Android)
- Tap the lock icon next to the address bar.
- Tap Permissions.
- Find Notifications and adjust your preference.
Edge (Desktop)
- Click the padlock icon in the address bar.
- Click Permissions for this site.
- Find Notifications and adjust your preference.
Firefox (Android)
- Go to Settings → Site permissions.
- Tap Notifications.
- Find this site in the list and adjust your preference.
Firefox (Desktop)
- Open Firefox Settings.
- Search for Notifications.
- Find this site in the list and adjust your preference.