Jump to content
Sign in to follow this  
altoncustomtech

1992 Olds 88 Royale LS - Build on the Cheap(er)

Recommended Posts

Okay, this little build will be going into my 1992 Oldsmobile 88.  I bought the car about 7 years ago right after I started working for the pipeline I'm working for now.  I got a hell of a deal on it and got it so that I had a car just for driving to work so my wife would still have the van to drive at home.  I only drove the car for a couple of years before I bought the Jimmy and right after that I gave the Olds to my mother and father in law to drive because their car broke down and my mother in law was having to run around to doctors and things for her cancer treatments and such.  Well fast forward from then and I find myself with the Jimmy out of commission and my father in law wasn't driving the Olds anymore because he had gotten his own car.  So he gave the car back to me so I could have something to drive to work again.  


Just before I gave the car to him to drive I had dropped an OLD Pioneer CD player I had bought used on Ebay for $20 to put in the car because the factory radio didn't work.  I also put a pair of Hifonics Zeus Components I had lying around from another project in the rear deck in place of the bad factory 6x9's.  It still sucked but it made music.  Now after driving the car awhile again I've gotten fed up with the damned thing.  Only one of the mids in the Zeus components are working anymore and the front factory tweeter/mid thing in the front doors are shot.  So I've picked up a little bit of stuff I got for cheap and I'm hopefully going to get it sounding better than it is right now.  I'm also going to use this little build as an experiment as well on some ideas I have floating around in my head.


The equipment going in:


Pioneer DEH-X7500HD - Used a discount I had on hand at SonicElectronix to get it for under $80


Aura 4x6 coax's - On clearance at PE.  I don't normally mess with oval speakers and such but for their clearance price I wanted to try them out.  Going in the front doors.


Dayton SD215A-88 - Used a promo code here and got them for $19 each.  Going to use the pair as dedicated midbasses in the rear deck.


JBL GTO1004 - Already have it on hand, will use it's internal crossovers to run the Aura's up out of harms way and utilize the Dayton's in the midbass range.


We'll see how it turns out.  It should be a fairly quick and easy build.  The goal is simply to get something that sounds reasonably good with better overall response than it has now and able to get more volume out of it than it can produce now, especially without the front speakers sounding like they're going to puke on every drum hit even at low listening levels.

Share this post


Link to post
Share on other sites

sweet

Share this post


Link to post
Share on other sites

sweet


Thanks.  It shouldn't be too shabby.


Going to treat the 4x6's like fullranges, or toss one of the full range sets I have lying around in.  We'll see which wins the toss up when I test them out.  Since it won't and can't be on axis the 4x6's will probably be the ones to get used.

Share this post


Link to post
Share on other sites

Okay, got all the last of the equipment and wiring today!!  I should be able to start tinkering with running the wires and working on installation of the gear tomorrow if I can get a few free moments at work.  I modeled the Dayton's in an IB environment vs. a .6cuft sealed enclosure and there's almost no difference in output so they should be pretty fair used that way.  


Anyway, here's a pic of the stuff.


DSCN0629_zps25f9539d.jpg

Share this post


Link to post
Share on other sites

I absolutely HATE my luck.  Moments after posting this we found a broken head stud on one of the units.....   There goes tomorrow......


Share this post


Link to post
Share on other sites

WOW, sucks man! :/


Love the equipment tho!

Share this post


Link to post
Share on other sites

WOW, sucks man! :/


Love the equipment tho!


It turned out not to be too horrible this time.  Usually it takes a day, sometimes two to get those hardened steel studs drilled and broke loose.  This one cooperated remarkably well.  I got pictures uploading to the bucket now.


Thanks on the compliment.  It's nothing special though, just enough to be a decent bit better than what's in there now.


Hi Alton!


HI CHOP!!!  Long time no word!!

Share this post


Link to post
Share on other sites

WORD Alton ;)

I'm looking foward toseeing this build log. You always do such great work :)

Share this post


Link to post
Share on other sites

Thanks man, though I don't think this build will be particularly noteworthy as it's going to be as simple as I can stand to make it.  A little sound deadener, some custom baffles, and an otherwise stealth install with about the cheapest stuff I could find to meet my goals is all that's going on with this one.


Eventually I may drop that 12" sub I tested awhile back in it just to get some use out of it but that will probably happen later on.  I am going ahead and buying Sean's PPI S850.1 for the purpose though.  :D

Share this post


Link to post
Share on other sites

Nice equpiment. I was hoping to see the car ...


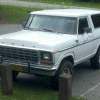
I was hoping to hide it for as long as possible, lol.  It really is just an old beater of a car that will probably be the first car the kids drive as they get to that age.  My daughter is 15, turns 16 right around Thanksgiving and will need something like this to start driving in but for now I'm driving to/from work until I get the trans replaced in the Jimmy.


Here's shot of the car since you asked nicely, lol.


E17A281B-4A51-462A-81F4-A2D074B7B7AC_zps


I got a chance to start on a few things yesterday.  I was only able to get a few feet of the RCA's zip-tied together and the inter coil connecting wires for the DVC's on the Dayton's soldered on but hey, progress is progress even if it is only little steps.  Here's a couple pics of the wiring on the Daytons.


1384CB84-F5A2-4FAF-A715-9EFD24219293_zps


19830DDB-CB14-423C-9038-6EF1DEAFC201_zps


Here's a shot of stock speaker location on the door panel.  I've got to tear into it further to see exactly what I'm up against but since this is a simple build I doubt much more will be done that just reinforcing the stock mounting and tossing the speakers in.  It would take more work than this level of build deserves to do anything much better for the speakers.  Maybe in the future if the car ends up staying with us for a long time but right now I just can't justify it.


2EC9C437-966E-4716-A267-5C37DE28D3BF_zps


I'll post more as it happens.

Share this post


Link to post
Share on other sites

Spent a little time this weekend tearing into the car to see what I was going to be up against.  The damned doors on this thing are more deceiving than I had originally anticipated.  They used what looks like a 5.25" mid at the bottom of the door and a tweeter up behind the 4x6 grill.  I don't think I'm going to let that deter my plans at this point and will still be building a baffle for the 4x6's to fit behind that spot in the door.  I am going to make an attempt at angling them and I'll probably cut out the opening on the factory grill so that it doesn't affect the response and will cover it with regular grill cloth for a nicer looking finish.  As for the 8" Daytons I'll be building a double thick 3/4" baffle to go on top of the rear deck with the baffle step cut so that the driver is recessed well below the surface of the 1.5" thickness of the baffle.  On the bottom of the rear deck will be another baffle board spanning the length of the deck to add more rigidity to the deck and mounting for the Dayton's along with giving a solid surface to mount the amp to.  Of course upside down isn't ideal for cooling but this amp shouldn't ever be getting ran hard enough for any real heat to become an issue.


Here's some pics of what I found on the doors and of the mounting I did for the cheap and horrible sounding Hifonics Zeus components I had mentioned at the start of the thread.


Here is a door without the panel on it.  Sneaky bastards, lol.


9911B98D-69FD-4938-8016-67714215D22B_zps


5C375820-94CF-42C9-8B4E-D6EF2FACD8B2_zps


Here's the top of the rear deck with the baffles I had built to fit the components over the 6x9 holes.  As much as I hate 6x9's a cheapo set of Pioneer 3 ways from Wal-Mart would have sounded better than these crappy components, but I used what I had on hand so I can't complain a whole lot.


64589BD8-1EF4-4AB8-914A-04194BBF07B8_zps


D8C544E2-FB36-447E-B62E-7475A7D44C4C_zps


Last but not least a shot of the bottom of the rear deck.  As mentioned before there will be a board going all the way across and the amp will be mounted to it.


B8FEF156-9DB8-4EF3-9598-65C0187933CF_zps


I'm hoping to dig into this and get some work done on it pretty soon.  Now that I think I have a good game plan, some measurements will follow and the work will begin.

Share this post


Link to post
Share on other sites

Another update.  Got some wire ran this morning.  I was able to get the speaker wires for the front doors and the RCA's ran from the front to the trunk and got the drivers side trim all put back in.  I got the fuse mounted and the power wire ran from the battery through the firewall and left it with silicone sealant on the grommet to set up while I eat lunch.


I find it hard to get pictures while I'm in the middle of doing work.  I just get too involved, but here's some pics I got when I could and after I got some of this done.


64065ACF-72D0-44E9-AF16-063C426F9441_zps


38ECD16B-F0AB-4088-AABF-14DD58CFE115_zps


53DABA1E-4775-405E-B24D-35A1191A1854_zps


D7456B71-B944-48FC-8B7E-E1CE75D855DC_zps


5396C7E3-8CBC-4531-B4FA-686D721FDE78_zps


7F4709BC-F46E-4535-BD86-0511D2987958_zps


65F79167-12A3-45F6-AB97-0B9D90FB27E9_zps


055870CA-CE07-4CE2-8DDA-43AB182A3DD0_zps


3F2B3E9A-BA27-4FC3-942D-8F7BBAC6F1CC_zps

Share this post


Link to post
Share on other sites

Looks like it should go together rather easy with your skills. Knock on wood nothing else gets in the way. :P

Share this post


Link to post
Share on other sites

Looks like it should go together rather easy with your skills. Knock on wood nothing else gets in the way. tongue.png


Thanks brother, it's not coming along too bad at all.  Something ALWAYS gets in the way, it just typically happens at the most inopportune moment.  trippy.gif

Share this post


Link to post
Share on other sites

More updates!


I was able to get the power wire ran and the passenger side put back together, the rear deck deadened, then covered in CCF, the top baffles made and installed, the amp rack/bottom baffle made and installed, the Dayton's installed and the back half of the car all put back together here before the end of the day.  It's not the prettiest job in the world but it should serve it's purpose quite well.


Onto the pictures.


Here's the rear deck as it was when I found it without the crappy Hifonics Zeus components in it anymore.


8445FDE4-36B4-472F-A009-FA0AAFB280B6_zps


Since the factory deadener was still well attached I went ahead with covering it at the mounting holes with some old RaamMat BXT I still have a roll of.  


21D9E582-D3C1-4E2F-AF81-DE9C5C632930_zps


I covered that with some IUO peal n stick CCF that's just as old as the roll of BXT that I had lying around as well.  It's not the greatest stuff in the world but for this project it's just fine.


6C701ED4-9269-4396-869E-352C2CA64C25_zps


I cut the baffles out from scrap left over from building the box for the XCON in the Jimmy.  In the interest of getting this job done quick I just shot the holes out with a jigsaw and I glued and nailed them together real quick but I think they turned out pretty darn good.


B58904E7-FDE4-47B4-A6A4-6B403FCE210D_zps


282009B0-8E25-4D3A-A4CF-D7C0FB3FC2C1_zps


DA2F8086-6305-43DB-999A-2AA0ADB17F90_zps


161FDAA6-A547-4232-AEFB-7A5554F280ED_zps


I test fit everything then screwed the top baffles to the rear deck from the bottom, then screwed the bottom baffle/amp rack onto the bottom of the deck.  Then I went ahead and mounted the Dayton's.  Just in case you're wondering about the CCF over the baffles, I did that to reduce the chance of having any rattles from the deck cover slapping the baffles.  I hope one layer is enough.


18A2883D-6FA3-4F10-9A56-169C820BC195_zps


0BA2E034-C4D5-49E4-86A0-814851FF1D18_zps


57EF4FC2-F26D-43C2-85C8-8E0B4C67B13A_zps


2EACC7DB-B93D-45AA-AE0B-5CC26EBD98DE_zps


F2161441-66F8-40FD-8440-D207BCFD389A_zps


E7FD949E-CAD4-451D-B3EC-FDE884AEE1A1_zps


Finally, here's what it looks like with the back of the car all put back together again.  Can't even tell all that crap is hiding under there.


E2A762E5-C5E4-4EC4-9C6C-C1D188CEEC28_zps


7A54D58E-D25A-45DF-943B-945B36B46958_zps


That's it until I get another chance to tear into it.  I'll be mounting the amp, installing the HU and fabricating some way to mount the 4x6's to the door panels.

Share this post


Link to post
Share on other sites

Thanks man.

Share this post


Link to post
Share on other sites

Wow, great updates!!! Can't wait to hear what it sounds like.

Share this post


Link to post
Share on other sites

Wow, great updates!!! Can't wait to hear what it sounds like.


Thanks, and neither can I!  It's not going to be anywhere near perfect.  Cheap speakers, cheap HU, no DTA, etc. but that was never the goal anyway.  It should be worlds better than it was and with any luck it will actually sound pretty decent.

Share this post


Link to post
Share on other sites

Alright, a few more updates.  Got to start working on my idea to mount the 4x6's to the door panel at an angle.  I'm not sure how well it's going to work, or fit for that matter, just yet but again I just made this stuff out of scrap so if it doesn't work out I'm not out anything but a little time.  I built a small box just large enough to rear mount the 4x6's from the back side and split it into two pieces at an angle to create the mounting angle for the Aura's.  As long as everything works and fits they should work out great.  I also began to remove some of the factory grill so that it doesn't affect the sound so badly.  Once those are done I'll be wrapping them in matching (or close enough to matching) gray speaker grille cloth for a nice finish.


Onto some pics.


E49BE975-C10A-4733-9F5F-E96C7D682CCB_zps


1E679418-C879-4042-8B2A-BE6F81CFA3E8_zps


F5DD7074-89B8-4A5B-8C05-FEC5F2B0F9E7_zps


DADA4761-A039-4C33-A2E8-D27293612F90_zps


C6A09E36-5855-4FC5-9742-28DD255192B9_zps


47A42CC7-FC6A-4467-AF0D-1F1EB9CDBE47_zps


8BDAD447-B7C3-432C-950A-653059237600_zps


EBDF1B04-9677-4520-8038-55631A780E9E_zps


Here's the factory grill.  It's a delicate operation drilling out each of those parts of the grill to leave the honeycomb looking reinforcement part of the grille to back the grill cloth.


B0F1214A-566B-4A90-A61B-6EC8F4A07CAA_zps


ED662B6A-B449-4472-8822-F7B5C1A4450E_zps


97E1CFAB-6D53-4D5D-9BFA-6EAAA72DC204_zps


More as it happens.

Share this post


Link to post
Share on other sites

Awesome idea on the door mounts!! Look forward to seeing more progress! :)

Share this post


Link to post
Share on other sites

Thanks brother!!


So am I...  Now if only work would cooperate, lol....

Share this post


Link to post
Share on other sites

Create an account or sign in to comment

You need to be a member in order to leave a comment

Create an account

Sign up for a new account in our community. It's easy!

Register a new account

Sign in

Already have an account? Sign in here.

Sign In Now
Sign in to follow this  

×