Leaderboard


Popular Content
Showing content with the highest reputation since 06/24/2009 in all areas
-
25 pointsClose to half the vibration damping/noise mitigation threads on other forums are debates about using asphalt based materials as a vibration damper. I’ve spent way too much time during the last 5 years typing and re-typing responses to these questions. Let’s keep it in one place to reduce litter and redundancy. This topic was my introduction to aftermarket “sound deadening”. I had a noisy car, wanted to quiet it down and started to do research. This was 2005. Several respected “authorities” were vocal advocates for asphalt. Part of this came from the belief that products like Dynamat Xtreme were part of a conspiracy to fleece consumers. Part of it was the often repeated “fact” that roofing materials and vibration dampers sold specifically for aftermarket automotive use were exactly the same thing. One cost pennies per ft² and the other dollars so it was worth investigating. Some of you may remember that Sound Deadener Showdown used to be a testing and review site. Since I wasn’t able to find any conclusive answers on the forums, I decided to buy small quantities of every product I could. Two things were immediately apparent: Nobody had ever had their hands on all of these products at the same time or they would have seen the obvious differences. The people claiming that Dynamat Xtreme and roofing materials were exactly the same thing didn’t know what they were talking about. I discovered a few other things very quickly. Many sellers were making outrageous claims. Some were wildly overstating obvious physical characteristics like thickness and mass/area. Others were either claiming outright that their asphalt products were butyl or were using intentionally deceptive descriptions like “rubberized compound” to describe their adhesive layer. Nobody seemed to be drawing the right conclusion from sellers’ attempts to hide the fact that they were selling asphalt. For several years the argument was about durability. Asphalt had an unhappy tendency to melt or fall off. At the time, there were no reports of butyl adhesive failure – that had to wait a few years until one seller decided to re-purpose some low quality butyl roofing material. I spent a lot of time trying to figure out why this was happening. All of these materials are asphalt with some sort of rubber added to increase heat tolerance. The generally accepted melting point for these compounds is 180°F. That seemed high enough for use in a vehicle, so what was going on? Our perception of the heat these products are subjected to was wrong. We thought in terms of air temperature inside the vehicle, maybe 140°F-150°F? It turns out things are very different at the sheet metal. Park a car in the sun during the summer, south of the Mason-Dixon line and you can easily get to 180°F+. That explains immediate failures in hot climates. An insidious part of this problem is that many failures were reported during the second or third summer, many in fairly mild regions. The explanation was pretty simple. The rubber added to asphalt deteriorates over time when exposed to temperatures much lower than those required to melt the fresh material. As the rubber deteriorates, the melting temperature drops. Suddenly it doesn’t take much heat anymore. The durability question has been answered to my satisfaction. Many high profile asphalt devotees, including some who went to almost insane extremes to install the material “properly” have had their installations fail over the years. A few of the brave ones have come forward and made their results public. The pennies vs. dollars argument still nags. What if you plan to junk your vehicle after a few years (worse, plan to trade it in and don’t care what problem you are passing on)? Is asphalt a reasonable choice when durability isn’t a factor? Nope. There are two main reasons people believe they can substitute asphalt roofing materials for CLDs: They look alike – shiny on one side, black and gooey on the other. They don’t understand how a constrained layer vibration damper works. See: Caddy Shack, swimming pool scene for all you need to know about point 1. Point 2 needs more consideration. I used to believe that vibration dampers work by adding mass to a panel and lowering its resonant frequency below the audible range. This is completely wrong. They work through a fairly complex sequence of events that occur in the adhesive layer and between the adhesive layer and the constraining layer and substrate. I won’t go into the details here, please see: Vibration Damping By Ahid D. Nashif, David I. G. Jones, John Phillips Henderson The important point is that everything depends on the material property viscoelasticity. Basically this describes something that can be deformed and will then return to its original shape more slowly than it was deformed. The strains created during these events account for the conversion of vibration to heat that we’ve all heard about. Butyl adhesives formulated for vibration damping are viscoelastic. Asphalt isn’t – it doesn’t need to be to seal a roof. Asphalt adds mass to a panel. It may stiffen the panel, but since stiffening raises resonant frequency, the two mechanisms are offsetting and reduce effectiveness even further. Those who claim to have used it and had good results aren’t giving you the full picture. These claims can be better stated as: I used asphalt. It was better than nothing. I haven’t used a proper purpose designed vibration damper so I have no basis for comparison. It hasn’t failed yet. Sometimes the endorsement is explicitly stated: I used asphalt and it hasn’t fallen off. Not falling off is a pathetically low standard of performance. Testing I’ve done has convinced me that it takes between 6 and 10 times as much asphalt to achieve something approaching the same result you will get with a real vibration damper. This puts the pennies/dollars question on its head. Add the durability concerns and the huge amount of extra work required and the answer is pretty obvious. I’m sure some will want to argue the points I’ve made here. If that’s you, please stay away from “I used it and it worked for me”. That’s how we got into trouble in the first place and doesn’t make any more sense than concluding that cigarettes are good for you because your grandfather smoked a pack a day and lived to be 90. If you want to go there, please show us some evidence.
-
22 pointsLets see how many likes we can get on this layout. We want to offer some more "in style" colors, we are thinking dark purple, sapphire blue and black. Here is the purple design. Also, if you are at SBN, hunt us down, you will get a free shirt while supplies last "Like" (right hand side of post) this post if you like the design!
-
11 pointsI havent recieved a warning or pm or anything? All I do is share my videos, I dont troll or anything That is just it, you only come over to spam your D4S logo all over your videos. We do not approve of this type of behavior. You are only here to promote you own site. We don't let anyone else get away with this, and you shouldn't be any exception. If you remove all of your logos etc in your video's we have no problem with you posting them here. I am sure you can understand this, it would be like us coming to your site simply to promote our store or subwoofer line with out paying your vendor fee's etc. Especially since you have now moved up to "competitor" status selling XS Power, I am sure you see where we are coming from. We protect the house we built here.
-
9 pointsBS Eric... You were told exactly what was going on time after time, and when I finally gave you an exact date it would be done, guess what? It was done.. You just pitched a fit the day before, demanded a refund and I GAVE someone else the alt I built for you. Shitty thing is man I bent over BACKWARDS to get that done for you too because of how things went down and how bad you needed it. Too bad for you though man, the XP's for the Hyundai's turned out pretty freaking SICK. You could have had your alt and would have absolutely loved it too... Get over it and move on bro... I don't care how good your alts may be, or how bad your suppliers have stiffed you with delays. You act like a complete douche to customers on the internet forums. This is not the first time I've seen you spout off with smart-ass comments towards a customer on here. It actually seems to be a pretty common reaction from you when a customer says something you don't like. I'm not arguing that you don't have a right to respectfully defend your company. But for fuck's sake, handle it with a little dignity. There's a right way and a wrong way to handle a situation, it seems more often than not you chose the latter. There's always two sides to a story.....but given the way you conduct yourself on here, I'm not surprised by all of the negative things said about the CS from your company given you can't even remotely conduct yourself in a professional manor when interacting with customers here on the forum. Proving a customer wrong isn't winning. DC isn't the first company in history to have supplier issues and unhappy customers.....however a shit load of those other companies are capable of handling the situation with far more dignity, professionalism and respect.
-
9 pointsStupid question: If his alts are done and have been forever, and you're just waiting to complete the brackets......why not ship the guy his alts (more than likely the most costly part of this transaction), and DC Power contract and pay for someone like tejcurrent, another manufacturer right here on this forum, to build the brackets? It seems like this would go a long way towards completing the transaction on a pretty timely basis. At the very least, this would put the biggest chunk of change back into the OP's hands by having a tangible product in his possession. Then the only thing left is the bracket, which if another manufacturer such as tejcurrent can't produce on a timely basis, it's less of a refund that would need to be made by DC. And the OP can be on his merry way finding someone who can build a bracket for him. With all of the machine shops in the US, and another manufacturer right here on this forum whose explicit business is building alt brackets, I can't believe this isn't something that could have been completed at least since the start of this thread.....much less nearly 2 years.
-
8 pointsFound this guide on another forum, and given the slew of recent threads on troubleshooting noise, thought I would post it here. One word of warning is that some HU's and/or processors nowadays have a zero bit mute, which essentially cuts off the output during low signal passages to reduce noise.....so be aware if this is a feature your unit has. Onward to the guide; How can you eliminate alternator whine in a car audio system? If you have alternator whine in a car audio system and want to get rid of it, there is only one sure-fire way to do it. David Navone and Richard Clark from Autosound 2000 in the USA developed the following step-by-step instructions. If you follow the instructions EXACTLY, you are guaranteed to trace and eliminate the noise in your car audio system. Don’t miss a step and don’t assume that something is OK without checking it. Each time you check for noise, you should do it with the engine running at 1500 to 2000 rpm and the headlights on full beam so that the alternator will be charging. The tests with the CD player connected should be done with a ‘zero bit’ track playing and the volume at maximum. Set your CD player to ‘repeat’ if it has that feature. Safety. Make sure when doing noise tests that the parking brake is on and working, and that the vehicle is in neutral or ‘park’. Perform these tests in an area with good ventilation or use an extension hose on the exhaust to route the fumes outside. Step 1. Check the Amplifiers 1a. Unplug the RCA cables from the amplifier/s and mute the signal at the input by using shorting plugs. This will isolate the amplifier from the rest of the car stereo installation. You can make shorting plugs by taking cheap male RCA plugs and soldering the centre and outer terminals together. This shorts out the input of the amplifier/s to ensure that it has zero signal. Has the noise gone? Yes. Go straight to Step 2. Reduce The System. No. Go to 1b. 1b. Disconnect the speakers from the amp and connect a pair of test speakers to it. Make sure the test speakers are not in contact with the car body. The purpose of this step is to ensure proper isolation of the speakers and the speaker leads from the car's chassis. Has the noise gone? Yes. Check speakers, speaker leads and passive crossovers for proper isolation from the car's chassis. Shift passive crossovers to a location away from power cables and the car’s body. No. Go to 1c. 1c. Isolate the amplifier from the chassis of the car. There must not be any electrical contact between the car's chassis and the amplifier, except for the grounding point. Has the noise gone? Yes. Reinstall the amplifier isolated from the chassis of the car. Make sure that the amplifier is grounded in just one point. No. Go to 1d. 1d. Supply the amplifier with an isolated power source, for example an external car battery or a 12-Volt DC power supply. Has the noise gone? Yes. Noise is entering the amplifier via the power supply, try changing the grounding point and add external power supply filtering. Consider changing the amplifier. No. The amplifier has some severe problems, is totally isolated and still noisy. Replace it or have it repaired. That is the end of Step 1. You have now either eliminated the amplifier and speakers as a problem or you have replaced a faulty amplifier. Now you can go on to Step 2. Step 2. Reduce the System. 2a. The amplifier is known to be OK. It is now time to disconnect any signal processors (equaliser, electronic crossover, etc.) and connect the signal from the output of the head unit directly into the input of the amplifier. Has the noise gone? Yes. The noise source must be either one or more of the processors or possibly the signal route. Go to Step 3. ‘Add Signal Processors’. If you didn’t have any signal processors and you are using the signal cable in its normal, installed route then the problem is solved. No. Go to 2b. 2b. Run new signal cables over a new route between the head unit and the amplifier. Has the noise gone? Yes. Permanently route the signal cables in the new route. Go to Step 3. ‘Add Signal Processors’. If you don’t have any signal processors then your problem is solved. No. Go to 2c. 2c. Isolate the case of the head unit from car's chassis. There must not be any electrical contact between the head unit and car chassis except for a single grounding point. Beware of antenna grounds and pullout cases! Has the noise gone? Yes. Reinstall the head unit isolated from the car's chassis and any other metal parts in the dash. Ground the head unit at one point. Go to Step 3. ‘Add Signal Processors’. If you don’t have any signal processors then your problem is solved. No. Go to 2d. 2d. Move the head unit ground to a quieter grounding point. Test a number of points and also try grounding the head unit to the same point as the amplifier. Has the noise gone? Yes. Reinstall the head unit using the quiet grounding point. Go to Step 3. ‘Add Signal Processors’. If you don’t have any signal processors then your problem is solved. No. Go to 2e. 2e. Move the head unit as near to the amplifier as possible. Then connect output of the head unit to the amplifier with the shortest possible RCA cables. Has the noise gone? Yes. Reinstall the head unit one step at a time. Check for noise after each step during the reinstallation. Once you have the head unit installed, noise free go to Step 3. ‘Add Signal Processors’. If you don’t have any signal processors then your problem is solved. No. Go to 2f. 2f. Supply the head unit with an isolated power source, for example an external car battery or a 12 VDC power supply. Make sure that car chassis is not in contact with the head unit. Has the noise gone? Yes. The head unit is sensitive to noise in the supply voltage. Add power supply filtering to the supply voltage for the head unit or use an isolated power supply. You may be better to change the head unit. Once you have a head unit installed noise free, go to Step 3. ‘Add Signal Processors’. If you don’t have any signal processors then your problem is solved. No. There is a serious problem with the head unit. Go to Step 4 'Check the Vehicle' and/or change the head unit. Step 3. Add Signal Processors. At this level the amplifier is known to be good. The car's electrical system is OK and the reinstalled head unit is working fine when connected directly to the amplifier. 3a. Connect one of the Processors back into the signal path. Has the noise gone? Yes. Go to 3a for the next processor. If there are no more processors, the problem is solved. No. Go to 3b. 3b. Run new signal cables over a new route between the Head-unit and processor and between the Processor and the amplifier. Has the noise gone? Yes. Permanently route the cables on the new quiet path. Go to 3a for the next processor. If there are no more processors, the problem is solved. No. Go to 3c. 3c. Isolate the processor from the car's chassis except for a single grounding point. Connect the processor ground to the same grounding point as the head unit. Has the noise gone? Yes. Provide isolation between the Processor and the car's chassis and permanently route the cables on the known quiet path. Go to 3a for the next processor. If there are no more processors, the problem is solved. No. Go to 3d. 3d. Since new cables and re-grounding does not help, it is time to relocate the processor very near the amplifier. Connect the output of the processor to the amplifier with the shortest possible RCA cables. Has the noise gone? Yes. Reinstall the Processor one step at a time. Check for noise after each step in the reinstallation. Be careful when routing the signal cables. Remember that the car's chassis is a conductor. Go to 3a for the next processor. If there are no more processors, the problem is solved. No. Go to 3e. 3e. Power the processor with an isolated power supply. Do not let the processor touch the chassis of the car. Has the noise gone? Yes. The processor’s power supply in not sufficiently isolated from its audio circuitry. Either replace it or consider the permanent installation of an isolated power supply (1:1 DC/DC converter). This type of device provides a permanent power source that is well isolated from the car's chassis. Go to 3a for the next processor. If there are no more processors, the problem is solved. No. Go to 3f. 3f. Physically separate the processor and the isolated power supply from the rest of the system by many metres. Use long signal cables. Has the noise gone? Yes. Something is seriously wrong with either the processor or your install/test procedures. Please repeat this level from the beginning. No. Change Processor -- this one has design problems. Go back to 3a for the new processor. Step 4. Check the Vehicle The suspect car's charging and electrical systems can be checked by using the previously installed sound system in a "known quiet" car. 4a. Connect jumper cables between the batteries of the two vehicles and start the engine of the suspect car. Turn on the headlights on the suspect car and listen to the stereo on the "known quiet" car. Is there now noise in the quiet car’s system? Yes. Have a qualified auto electrician check out the car’s charging system. No. The suspect car's alternator and charging system is now proven to be quiet. The problem must lie in the car stereo installation -- not in the vehicle.
-
8 pointsWell Travis is getting a new amp.....that way no mistake can be made, no middle problems if something were to happen in a re-boarding process. It will be an A stock brand new amp, that has been on our bench for a few weeks running every speaker setup under the rainbow, currently a single tower running bridged at 2 ohms both channels. Using all HPF combos, and bandpass too,,,,,we replaced the amp with travis' 1100.4 JUST the same way. After about 3 hours of play time, its gotten fairly warm, as it definitely should be running at 1 ohm a channel, and its working as it should. So we've tried to find the problem, multiple times, the only thing we've seen could be a possible cause was a good sized dent on the heatsink as if it was dropped before. Other then that, hopefully the new 1100.4 recieved works as should, otherwise must be an install problem Thanks for the understanding.
-
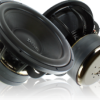
8 pointsActually he said outwardly the motors appeared to be similar. That says nothing about similarities within the motor, and frankly he doesn't even give any external measurements of the motor itself to confirm they are anything more than similar in appearance. Also, if you look at the actual measured T/S parameters you can see they are different drivers. The Xcon has a higher Q, lower Fs, lower Le and higher Mms. Plus the Xcon has slightly more linear excursion and I believe higher thermal power handling as well. It is still an Fi copy with a couple alterations. Quoted "Any differences from the Q are probably in the voice coil itself and the gap geometry and possibly the pole piece machining." Coil is different, suspension is different, magnet ID is different, dust cap is different, gap is different, pole piece is different, back plate is different, cooling is different. You can step off of your soap box now. -the guy thats built hundreds of them.
-
8 pointsi like to break mine in with a little, wine, perhaps a candle lite bubble bath, some kenny G in then back ground,... i like to relax them.. then poundem hard. no really. just pound them.
-
8 pointsThat leads to 3 questions: 1) What are these "actual higher results"? 2) What was the test methodology for determining these "actual higher results"? 3) Why is the amplifier not rated at the "actual higher results" if that is the level of their true performance and you're just going to add a disclaimer that the rated power is less than their actual power anyways?
-
8 pointsi would like to apologize to the fi and ssa forums for my outbursts at other users language and additude it is not my style.....i got a bit mad and lost my head....i do not like being called a liar for no reason... to doubt me is your right as an individual.....but to just bash me and slander my name is equally wrong but none the less i offer my apology to all that i offended...
-
7 pointsLOL....Exactly what I was thinking. Weren't they like $60 for a "6-pack" ? Aaron, I think you guys need to come out with an FPcon in honor of the Funky Pup. Would be a great addition to the SSA lineup I will put in a call to Krypton to see if they have any spider packs and surrounds left. There was rumors that before the Death Star was destroyed, that some special cones were jettisoned off into space for fear of the attack. Supposedly, Ray Liotta can get a hold of some nasty voice coils. That would leave only the unobtanium motor structure, last I saw, the Navi were pretty pissed when humans tried to take their rare metals. Just saying.
-
7 pointsConsdiering a 20 dollar hunk of neo previously is now 114 dollars..I wouldn't be bitching if I were you. It's still cheaper then anybody else on the market, you can go pay 1800 dollars for a Z series woofer if you would like...that's known as raping the consumer. The price is only adjusted to the cost of materials going up..which EVERYTHING has gone up. We ate it for quite some time while I was there and the reason was waiting until the SP4 and Team versions of the subs were available, or near available. If you don't like it..it's as simple as not buying it. Go pay 1800 dollars for the Z series woofer or 1000-1200 dollars for the DC neo woofer. (and no, i don't work there any longer)
-
7 points
-
7 points
-
7 pointsThere's much more to it than that. First, cone area and Xmax are multiplied to arrive at a parameter known as Vd, or volume displacement. This is the amount of linear air displacement the driver is capable of achieving. The higher the Vd, the higher linear output capabilities the driver has as a larger Vd means the driver is capable of displacing more air. Second, don't confuse Xmax with excursion. They are different. Excursion is how far the cone is physically moving. Xmax is the maximum amount of linear excursion the driver is capable of achieving. Excursion is the amount of movement, Xmax is the limit of how much of that movement is "linear". Generally a driver operating at Xmax will have ~10% THD. This is typically the highest amount of acceptable performance. As you exceed Xmax it's generally considered that the distortion performance would be at an unacceptable level (among other things). In sealed enclosures, Vd is one of the important factors along with alignment and the driver's parameters in determining output capabilities. All things equal, the driver with the higher Vd will have higher output. In reality, things are never equal. So you have to look at the response of the driver in a given alignment along with your environment and available power. Having a higher Vd isn't any good if you don't have the requisite power to reach Xmax or if the driver is in an alignment that begins to roll off at a high frequency. Having a higher Vd is only a capability of higher output; whether or not you will be able to realize that higher output is dependent upon several other factors. In terms of low frequency performance, you're required to increase displacement by a factor of 4 in order to maintain a given SPL level one octave lower in frequency. This means that you need to displace 4x the air at 25hz as you do at 50hz to maintain the same SPL level at both frequencies. You can see how having a higher Xmax could be beneficial as displacement requirements increase substantially in lower frequencies. In the low frequencies Vd can be very important as it can very much limit how much linear output your system will be able to achieve. Luckily in car audio we have substantial cabin gain in the low frequencies as well, so we can maintain SPL levels at lower frequencies without having to quadruple our displacement. A 12db gain at 25hz compared to 50hz, for example, is equivalent to quadrupling your displacement. So if you have a 12db gain at 25hz compared to 50hz in your vehicle, you've already accomplished the feat. Generally you want the most cone area you can reasonably place within your space, environment and enclosure requirements. Why? A driver with a larger cone area will displace a greater amount of air for a given excursion level. This means that it takes less excursion to reach a given SPL level with more cone area. This, in turn, means that the driver(s) would ideally be operating further within it's linear range at that SPL level which, ideally, reduces distortion. This ofcourse assumes the drivers are of similar distortion performance as distortion performance will vary based on driver designs. For example, one driver may still have less distortion at 15mm than another more poorly designed driver (from a distortion perspective) driver operating at 10mm. The reason Xmax "doesn't matter" for SPL is because 1) the subwoofers are generally "burped" near tuning where excursion is minimized and 2) Xmax is a linear parameter....people competing in SPL don't really care about having higher distortion due to possibly exceeding Xmax. But that doesn't mean Xmax is not important in ported enclosures. Xmax is not a limitation on how far the driver can physically move , only on how much of that movement is linear. Also, going back to what we said about power and alignment; Xmax does not tell you how much excursion you will have in your alignment with your power. And that is what ultimately determines how much output you will have from the enclosure, any enclosure. Vd is still "important" in ported enclosure as it still helps determine which driver has the capability for higher linear output, but you have to look at your power and alignment to determine which will ultimately have higher excursion, and hence output, in use. In a ported enclosure generally enclosure size and tuning are going to have a significant impact on low frequency response and excursion with regards to frequency; but that doesn't make Xmax irrelevant for daily listening. About a half octave above tuning, the enclosure will behave similarly to a sealed enclosure meaning excursion will increase to a point that is similar to that of a sealed enclosure. Xmax may become important in this region where it's possible to reach or exceed the Xmax of the driver. That post feels like it was one giant ramble.....hopefully it makes sense.
-
6 pointsKerfing 101- UNDER CONSTRUCTION What is Kerfing? “Kerf” by definition means “width of a saw cut”. This is the width of the actual saw tooth itself as opposed to the width of the blade as a saw tooth flares out and away from a blade. “Kerfing” is a term that many woodworkers have adopted to define the process of making several cuts within a piece of wood to achieve the removal of material. Often this removal of material will allow one to then bend the wood stock making a nice professional and appealing curve that can be incorporated into the project. Kerfing and Car Audio: What can Kerfing do for you in your quest of car audio domination? Well first of all it is important to note that in any ported subwoofer box hard corners are the devil. They do not allow efficient air flow which can result in less output and more port noise. Kerfing your port will allow you to maximize efficiency and create the most non-turbulent flow for the air moving in and out of the enclosure. Secondly Kerfing can be used to make an enclosure or other part of your build more appealing to the eye. You could use it for corners of an amp rack, or to make a custom arm rest more smooth. Kerfing is a process you need to learn to take your builds to the next level. What you need: This is outlined in the video but you will need the following (* means you don’t HAVE to have it but it is recommended): Circular Saw (Or table saw but the process will differ from the video) Disclaimer: My Saw blade is 1/8” wide. I recommend the same width! T-Square (Or table saw fence) MDF Wood Glue Safety Glasses Tape Measure Marker/Pencil Clamps Fiberglass Resin* Fiberglass Chop Mat* Body Filler* Sand Paper* The steps: Watch the video! Once the kerfed section is made load it up with wood glue and clamp it in place. Finish with fiberglass resin and chop mat and for that added professional touch apply body filler to the area and sand! The Math: I go through the math in the video but in case you are having a hard time understanding this should help. Please note this is used for slot porting applications so when I reference “diameter” I am NOT talking about a circular port, I am talking about the curve of the kerf if you were to look at it along its cross section. See the photo below: Step 1: Determine the diameter of your curve. Note I said “Diameter NOT radius” if you have your radius just multiply it by 2 and you now have your diameter). Step 2: Find the circumference of a circle using this diameter. The equation is: Step 3: You should now have a value for your circumference. Take this value and divide by 4 for a 90 degree turn or 2 for a 180 degree turn, this will give you the “length of kerf”. Step 4: Record your value for the length of the kerf. This is how much material along your mdf “linearly” must be used to make your curved kerfed section. This is the value you want to “mark off’ for your kerf on the mdf. (Note that this method can also be used to find the “length” of this part of your port so that you can build your port to the target tuning length. Instead of using the diameter of your kerf arc, use the diameter of the arc that is the centerline of the port). Step 5: Now that you have marked off where your kerf will be on the mdf you are going to take your “length of kerf value” and divide it by 12. This will give you your length between cuts. Now in the video I show a trick for making these divisions perfect. That way if your value is something like .6384 you don’t have to guess on a tape measure. My method is also much faster as it doesn’t require this steps math. Once you have marked out all the distances between cuts you can proceed with cutting and making your kerfs! Other notes: These are other notes that have been brought up on other forums and I feel are helpful. I made the mistake of wearing gloves in the video. Never wear gloves with rotary tools! It is not recommended to apply screws in the kerfed section of the mdf, it will likely split, instead use clamps (or heavy objects) and wood glue. If you are blade in not 1/8 you will need to do some math to determine how many cuts to make. I generally remove an inch and a half of material, so if your blade is smaller, more cuts, wider, less cuts. Note that fewer cuts will lead to a rougher curve and more a smoother curve but with less strength. Pictures: Design of an enclosure using a Kerfed Port: Box with Kerfed Port: (Picture to come) Box with kerfed port and kerfed exit of port: (Picture to come) Made this video to show how to Kerf, enjoy!
-
6 pointsIf you have to ask that question, you have no business messing with 5K. Hell, you shouldn't be playing at all.
-
6 pointsOf course. He's aware of this thread and is now in damage control mode.
-
6 pointsIt's actually worse (and funnier) than that. It started with the soda can tests which proclaimed SDS the winner! He actually left that video on Youtube for something like a year. I was still getting queries up until a few moths ago from people wh saw the video. While he was gathering samples for the soda can testing, he got hooked up wth AudioWrap someow and was spamming their product. Soon after that he decided to launch his own product and started spaming forums again. Somebody from one of these forums e-mailed me to ask if I knew who cthedinger was. He told me the forum members had backed him into a corner by asking him to explain how vibration dampers work. About two minutes later I get an e-mail that starts: "Hey Don. I was just thinking about things. Can you explain to me how vibration dampers work - strictly for my own education"? No joke.
-
6 points
-
6 pointsJust got my first pictures of the first completed prototype of the new SAZ-1500D v.3 model... so the cat is out of the bag on this one! As the model that got us started it is only appropriate that it is the first model to be shown in the 2012 trim! Newly tooled 2012 casing -- you can still tell it IS a Sundown amp but it is a refresher and also narrower. The FETs are mounted at a 45 degree angle to shrink the width AND avoid spring clips (which I've never liked). So we are getting the best of both worlds on that. * Fully custom tooled boards for all of our new 2012 models complete with fans. More photos to come as I get the other models done! Yes... you do see 16 power supply FETs in this amp along with four transformers. * We will use the fancier RCA plugs for production. So this has many things I've been asked for (smaller size and fan) and MANY improvements to design that were really just personal goals of mine. The entire line is stable to 19v as well. Power testing to come when it arrives... the SAX-125.4 model should be showing up within a week or so as well. Pictures of the completed prototype coming soon too!
-
6 pointsAlso, To the "You need to sell at OEM prices" argument. Absolutely not. OEM work does not involve anywhere near as much work as the Fi product line does. OEM clients buy hundreds of speakers at a time and they are all the same which makes it easy to build and do. Margins are VERY VERY VERY slim doing OEM work in the USA so you have to sell hundreds and hundreds of them in order to make a dollar.. I don't know about you, but I don't think you would like to bust your ass for 10 hours a day and walk home with 50 bucks in your pocket. That doesn't exactly pay the bills and earn you a living.
-
6 pointsI'm hoping this staff meeting took place at a titty bar, and the pics will be of the naked women.
-
6 pointsOkay, here goes it. Got you a plan all drawn up. Even though your max dims give's you 6.2cuft gross on that one calculator, that was without figuring driver, bracing and double baffle displacements and also most likely without using the minimum port area that's calculated for that sub which is 102sqin. Using the info you gave, the double baffle, bracing, woofer displacements and the minimum calculated port area of 102sqin yielded a box which was 34"x17"x25.25". Too tall for the max dimensions you gave. So I adjusted the port area down to 77.5sqin of port area which yielded exactly your max dimensions 34"x23"x17". So it's that size, tuned to ~34hz with ~4.5cuft NET internal volume, tuning without the bracing in the box comes to ~32.5hz. I gave those figures the ~ cuz there's still a little space to play with on bracing from what the model shows, which I simply showed as 1.5" dowel rod since it's easy to get, use, and you said you wanted simple. Without knowing exactly how that sub looks inside that enclosure it's hard to figure out exactly where the bracing needs placed, so I figured you can handle that. Now, onto the jollies. Here's a picture depicting the dimensions as a cut sheet. It doesn't show the internal baffle for the double baffle which the dimensions for that are 26.75"x15.5" which I think is easy enough to understand. BTW ignore the orientation (height, width, etc) you see on the cut sheets, that's just the default layout on that. Now, here's some shots of the enclosure sketched up with the dimensions on it with one side pulled back to reveal the internals for dims. And, finally, here's a few of the enclosure as it a finished product. So, there ya go. Hope this helps you on your venture. I do agree with shizzzon, if you don't get this thing properly braced up with single thickness walls that thing could possibly pop a seam or a panel, but I think you can handle this.