Jump to content
Quentin Jarrell

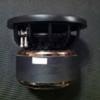
Single 12 daily driver stealth enclosure

Recommended Posts

I haven't had a system in my dd for a few years now. I drive nearly 1,000 miles a week so I am in need of something. I normally have a lot of junk I need for work so this install will save as much space as possible. Through out the build I will show step by step some of the techniques I learn over the years.

5667523444_93699a7aa2_m.jpg

Factoy interior, hopefully the end result will look like this as much as possible.

5666957071_bbc9e9e638_m.jpg

spare tire location under false floor

5667532374_95ba3fcbfe_m.jpg

false floor removed

farm6.static.flickr.com/5267/5666965605_2a85e9c267_m.jpg

tire cover removed. tire will remain remember this is a daily driver. jack and such will go in side pockets by the tire well

5667544688_0e74dfce24_m.jpg

the sub

5666969767_4425f0f159_m.jpg

the sub will go somewhere in this location

5666987853_0a891c471f_m.jpg

initial masking

5666992281_4e530a6268_m.jpg

tire reinstalled

Share this post


Link to post
Share on other sites

First claen all surfaces to be masked with alcahol to remove dirt and grease. I normally use a better tape because this cheap stuff will leave glue residue when it heats from the resin. However I am not concearned being it's my vehicle.

5670290301_3f8505ea9e_m.jpg

5670291805_49f35fa4ce_m.jpg

mask off all areas

5670294199_bd5c3d2af1_m.jpg

be sure to get in all the little nooks. This will make the enclosure more rigid

5670295953_4bf34d6ba7_m.jpg

I use heavy painter's masking paper instead of cardboard because it is easier to use.

5670865004_8c04cc75a9_m.jpg

5670866610_eb960441c1_m.jpg

5670868434_f278f69012_m.jpg

mask off all corners making sure they all have a nice smooth slope

Share this post


Link to post
Share on other sites

I'm tuned in for this. Need to continue to learn as much as possible about fiberglassing. Your explanations thus far go far to help understand the steps and processes.

Share this post


Link to post
Share on other sites

I'm tuned in for this. Need to continue to learn as much as possible about fiberglassing. Your explanations thus far go far to help understand the steps and processes.

X2 would would you recommend as high quality tape that wont leave residue?

Share this post


Link to post
Share on other sites

I'll be watching this too. Looks almost exactly like what I need to do.

Share this post


Link to post
Share on other sites

nice work so far...

Share this post


Link to post
Share on other sites

I'm all ears, oh wait I guess that will be eyes. Love seeing a stealth type install and overcoming the challenges of not taking up un-needed space. :popcorn:

Share this post


Link to post
Share on other sites

I normally ude 3m's green autobody tape. It is the best I have used. But I'm not spending $25 a roll when I ca just clean the goo off afterwards.

I will be going 1.8 cubes net and the cavity came to 1.875 cubic feet. I'll post how I got that a little later.

Share this post


Link to post
Share on other sites

Added another layer of tape over everything to make sure everything is strong and sealed.

5670594635_198b479b8b_m.jpg

5671166112_edfde5fe93_m.jpg

Added a temporary back wall. This is just so I can calculate the volume of the cavity and will be removed.

5671167836_0b1b48415b_m.jpg

I take a normal square box then mark inches on the inside

5671169290_3cc36a3a48_m.jpg

5670602469_a0e31c9a2a_m.jpg

I filled the cavity with dog food because I have plenty of it. Anything will work kitty litter, sand, ect.

5671173460_0827bdc99d_m.jpg

Then poured the dogfood into the box.

5671174892_da49c717b9_m.jpg

The dog food went to the 10 inch maker inside the box.

5671176934_f2e68057c5_m.jpg

So I take the 10" x 18" depth x 18'' width = 3240 cubic inches = 1.875 cubic feet. So now I have a base line of volume inside the cavity and I now I have to figure port and driver displacement to determine how much higher I need to make the enclosure.

Share this post


Link to post
Share on other sites

Great dog food man!

:P

love seeing your work, i know it's an eye opener for me

Share this post


Link to post
Share on other sites

Keep the how-to coming! :drink40:

Share this post


Link to post
Share on other sites

Dog food is easier to clean up then sand, good thinking.

Share this post


Link to post
Share on other sites

Now that I figured the area inside the cavity I figured out how much higher I needed to make the enclosure to get my net 1.8 cubic feet. So I layed out my port which will tune the enclosure to 27 hertz.

5699157325_1869ebac48_m.jpg

This is the internal deminsions I will use to make a fiberglass port.

5699155085_4d3be2f2c5_m.jpg

I then finished my outline of the enclosure. The finished fiberglass port will be fitted into it later.

5699725158_5db6f1170b_m.jpg

Share this post


Link to post
Share on other sites

I almost ready to start laying some glass but it's been a long time since I've done any fiberglass work so I gotta order some supplies. I have been ordering from US Composites for about nine years. They have great customer service and some of the best prices. The only thing I do not purchase from them is resin because on 5 gallon pails a hazmat charge is applied on shipping which makes it too expensive so I but that locally.

Typical list follows:

1.5 fiberglass mat. never use woven cloth It is very had to get it to laminate correctly to itself on odd shapes unles it it is vaccumed.

http://uscomposites.com/mat.html

resin. Typical polyester layup resin. You can usually tell how good a resin is by the color. It should be dark blue to green in color. Don't use the Bondo brand at home depot it is junk.

http://uscomposites.com/polyesters.html

MEKP (hardener) typically you want to use 1.25- 1.5 percent by volume MEKP per resin

http://uscomposites.com/solvents.html

Pigment. I dye my resin black so I can see the air bubbles in the lay-up. It makes them much easier to see when working them out.

http://uscomposites.com/pigments.html

fiberglass roller to roll out air bubbles. I like a large 3/4 to one inch roller.

http://uscomposites.com/fgrollers.html

chip brushes to lay resin onto matt

http://uscomposites.com/brushes.html

Cab-o-Sil I mix this filler with resin and use it as a glue and a fairing compound. It also works well in tight crevases in molds.

http://uscomposites.com/fillers.html

Part All. I spray three coats on all my molds and taped areas. When using this the hardened mold will pot right out.

http://uscomposites.com/moldrelease.html

Duratec. I normally use this when I am painting or wrapping in vinyl. It makes life much easier when trying to get panels as smooth as possible.

http://uscomposites.com/polyprod.html

a little tape and waxed paper will be needed when doing the lay-up. Once I get all my supplies in I'll show the proper way to hand lay-up firberglass.

Share this post


Link to post
Share on other sites

Nice list, that will be helpful for sure!

Share this post


Link to post
Share on other sites

Nice tips on the shopping list and an explanation on your usage of the products recommended!

Share this post


Link to post
Share on other sites

Sweet write up, I am always looking for new ideas when doing fiberlassing.

Bigger pictures would be better if you can.

Share this post


Link to post
Share on other sites

As usual plans change and I got a box and 15,000 watts going in on one of my divine 15's

Share this post


Link to post
Share on other sites

Only 15k? :lol2:

Share this post


Link to post
Share on other sites

Create an account or sign in to comment

You need to be a member in order to leave a comment

Create an account

Sign up for a new account in our community. It's easy!

Register a new account

Sign in

Already have an account? Sign in here.

Sign In Now

×